 Having built the blade guides and
table the saw was basically functional, but without enclosure or blade guard,
not very safe.
Having built the blade guides and
table the saw was basically functional, but without enclosure or blade guard,
not very safe.
Having built the blade guides and
table the saw was basically functional, but without enclosure or blade guard,
not very safe.
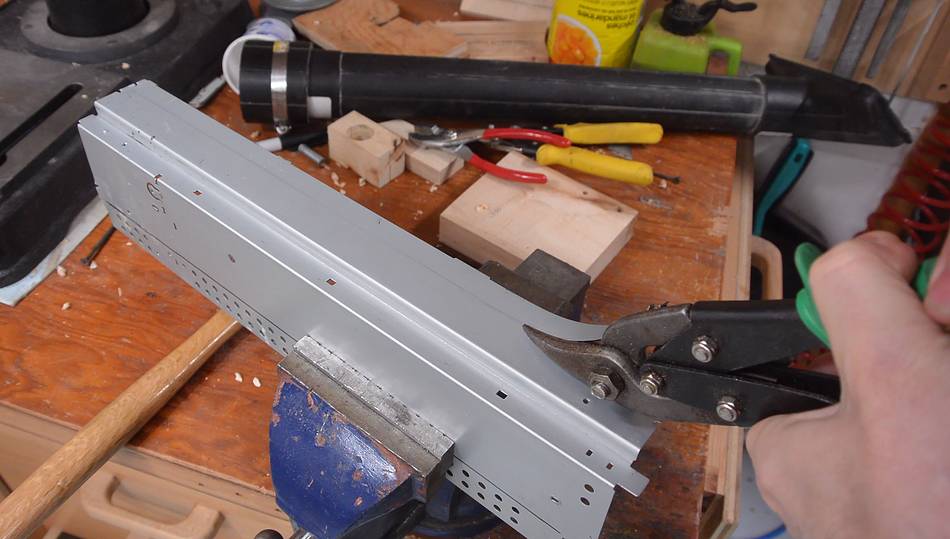
 Going through my junk, I found a piece of sheet metal from an old printer
that I tore down. This already had some angle bends to it. In a
previous build
I used the corner of a PC case, but I didn't have an old PC case to cut up.
Going through my junk, I found a piece of sheet metal from an old printer
that I tore down. This already had some angle bends to it. In a
previous build
I used the corner of a PC case, but I didn't have an old PC case to cut up.
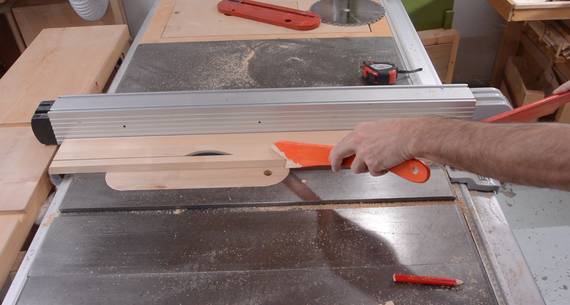
I cut a strip off it to get it to the right width.
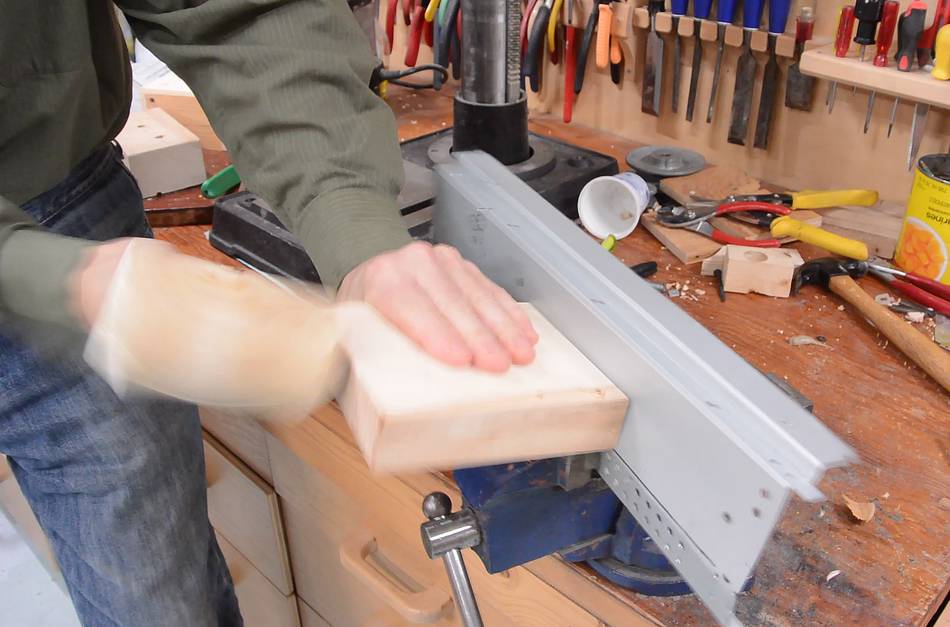
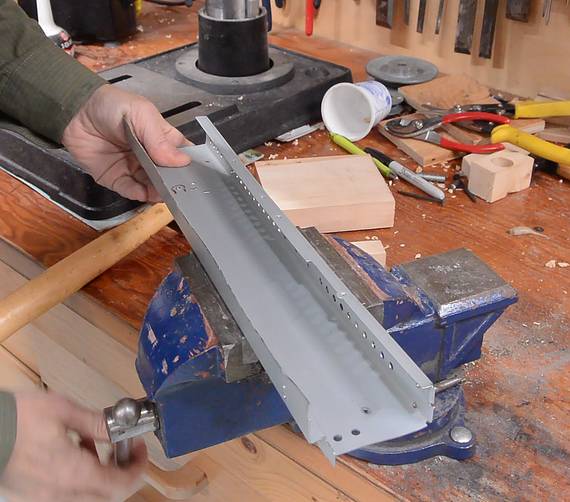 I needed to add one extra fold to it. I did this by clamping it in the
vise and using a block of wood and a rubber mallet to add a slight bend
against the vise jaws, then moving
the piece to the side and continuing the bend, going back and forth until
I had a 90° bend along the whole length.
I needed to add one extra fold to it. I did this by clamping it in the
vise and using a block of wood and a rubber mallet to add a slight bend
against the vise jaws, then moving
the piece to the side and continuing the bend, going back and forth until
I had a 90° bend along the whole length.
A sheet metal brake would be the right tool for this, but I don't have one.
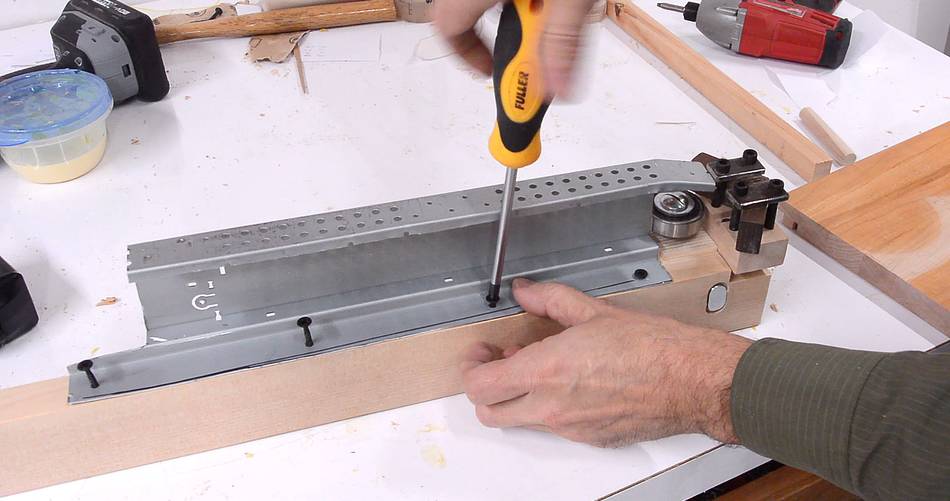
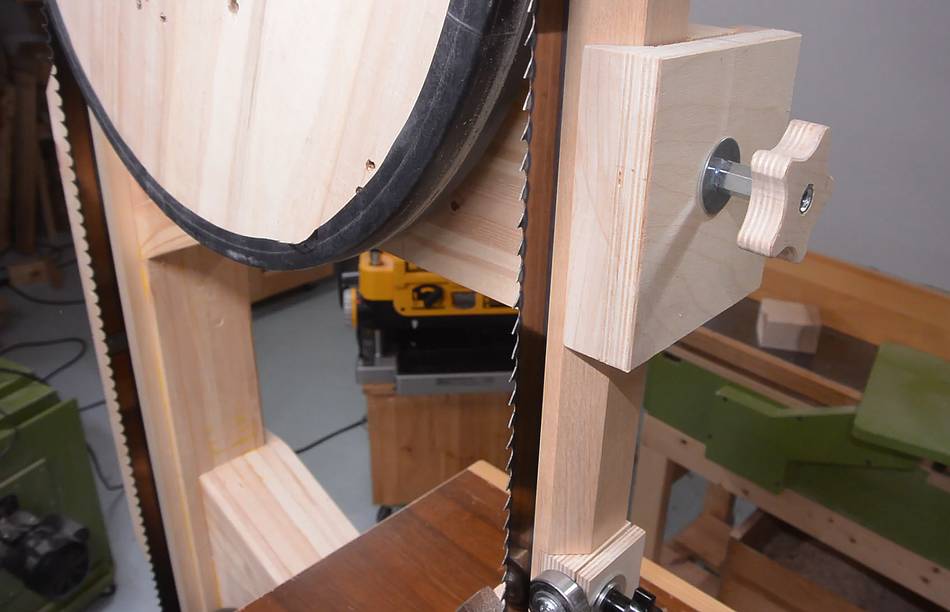
 Screwing it to the post. The pre-existing triple bend in the corner
works out really well here. Otherwise, I would have had to put a spacer
behind it to clear the clamp that holds the post.
Screwing it to the post. The pre-existing triple bend in the corner
works out really well here. Otherwise, I would have had to put a spacer
behind it to clear the clamp that holds the post.
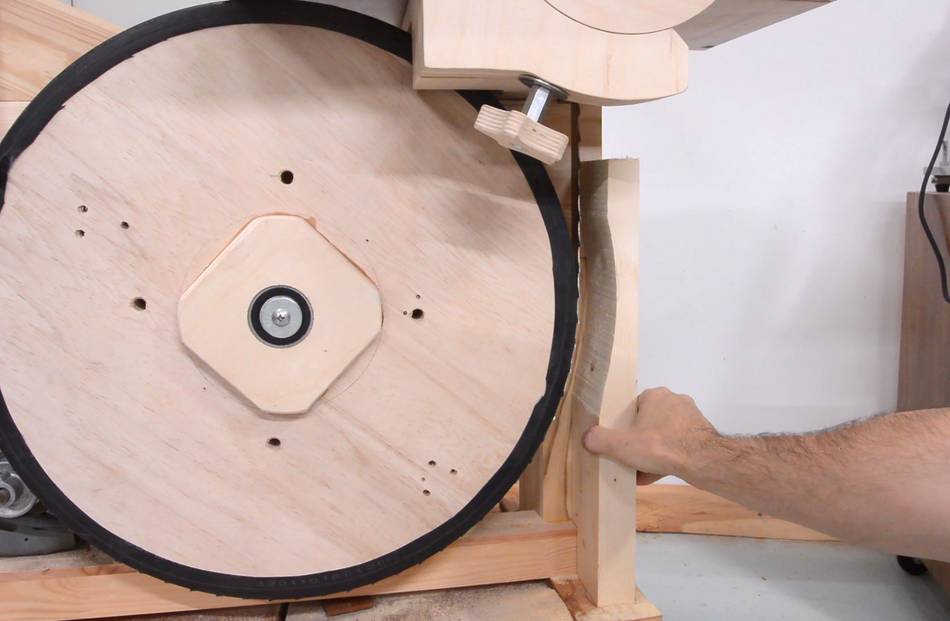
 The guard needs to fit around the top wheel, but it shouldn't have too much
clearance, because it also needs to fit inside the top enclosure.
The guard needs to fit around the top wheel, but it shouldn't have too much
clearance, because it also needs to fit inside the top enclosure.

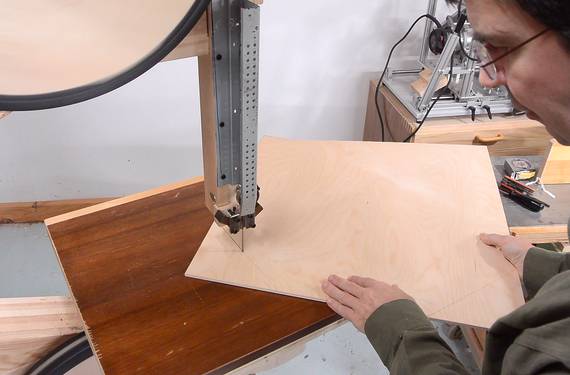 Cutting up the plywood for the top of the enclosure. I bought some 1/4" (6 mm)
Baltic birch plywood for the front of the enclosure. This part will be very
visible, so it was worth spending money on good materials.
Cutting up the plywood for the top of the enclosure. I bought some 1/4" (6 mm)
Baltic birch plywood for the front of the enclosure. This part will be very
visible, so it was worth spending money on good materials.
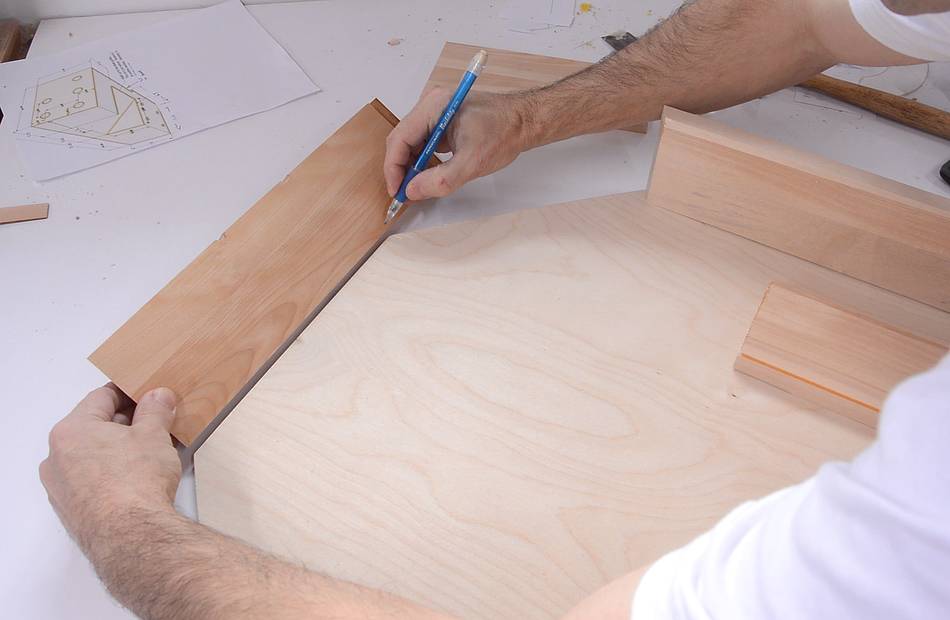
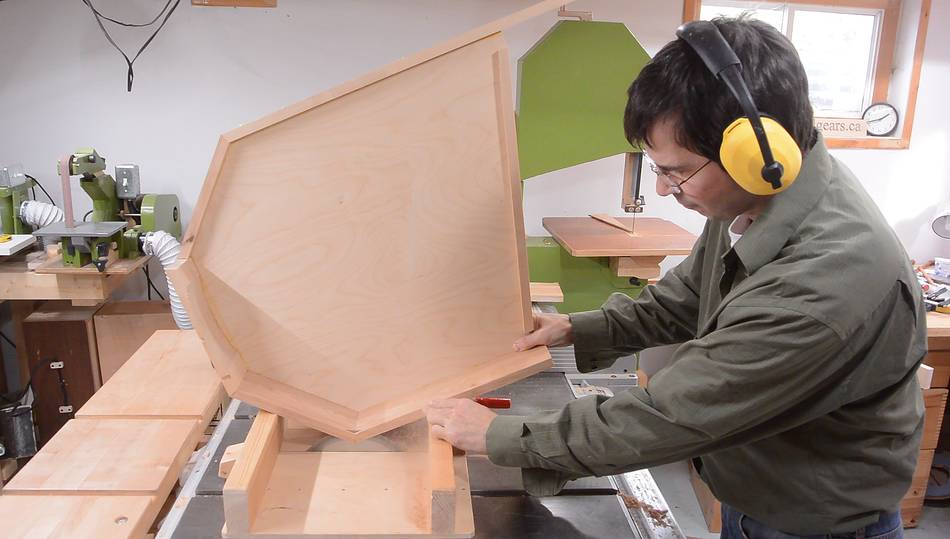
 I cut a 22.5 degree bevel on all the pieces to form the 45° corners
for the top of the enclosure. I just marked the lengths off the plywood
instead of using the measurements from the CAD drawings.
I cut a 22.5 degree bevel on all the pieces to form the 45° corners
for the top of the enclosure. I just marked the lengths off the plywood
instead of using the measurements from the CAD drawings.
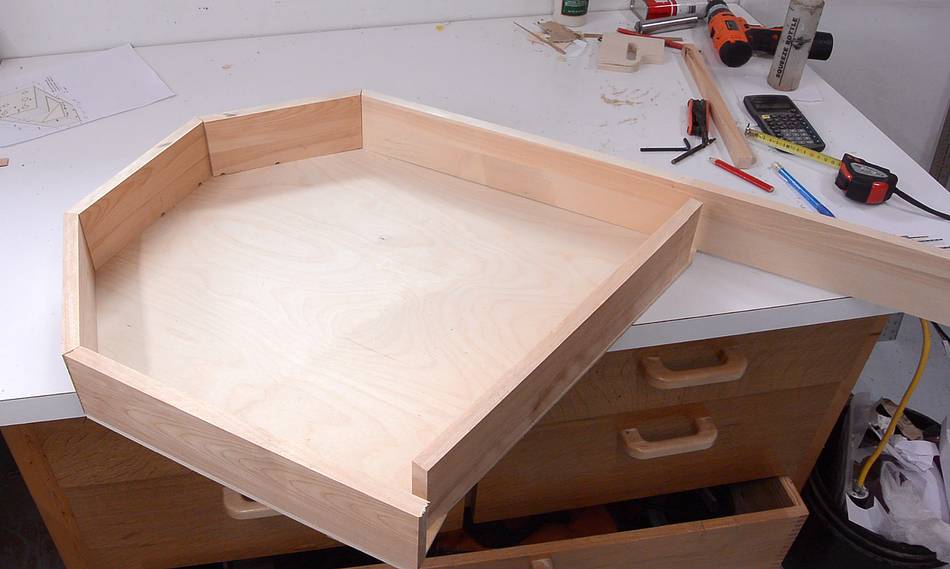
 Enclosure pieces laid out.
Some of the pieces need to be ripped lengthwise because parts of the wood attach to the front and parts to the back.
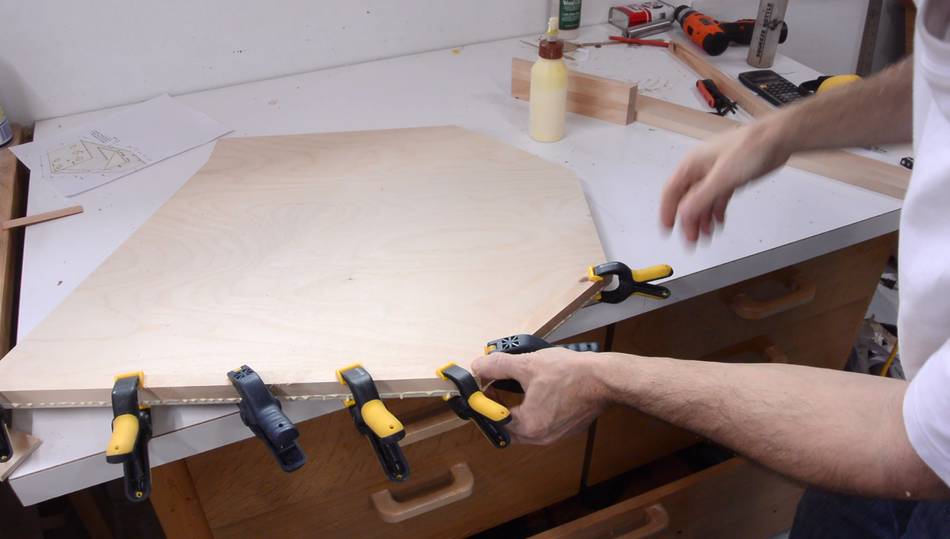 Gluing on the narrower strips on the front cover.

 Putting a clamp between the handles of the clamps
helps to fully close the mitered joint. A handy trick.
Putting a clamp between the handles of the clamps
helps to fully close the mitered joint. A handy trick.
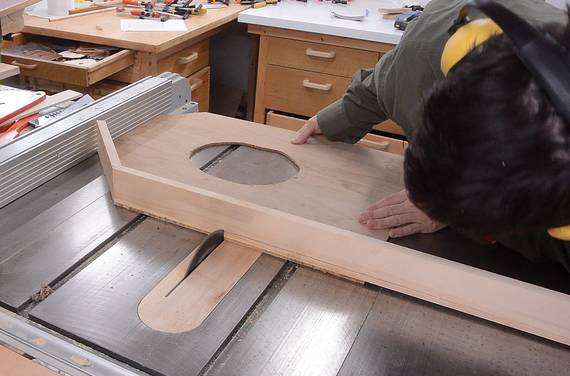
I also cut out an arc shape out of the top of the enclosure to give the top wheel a bit more room. That way, the enclosure doesn't need to come up as high.
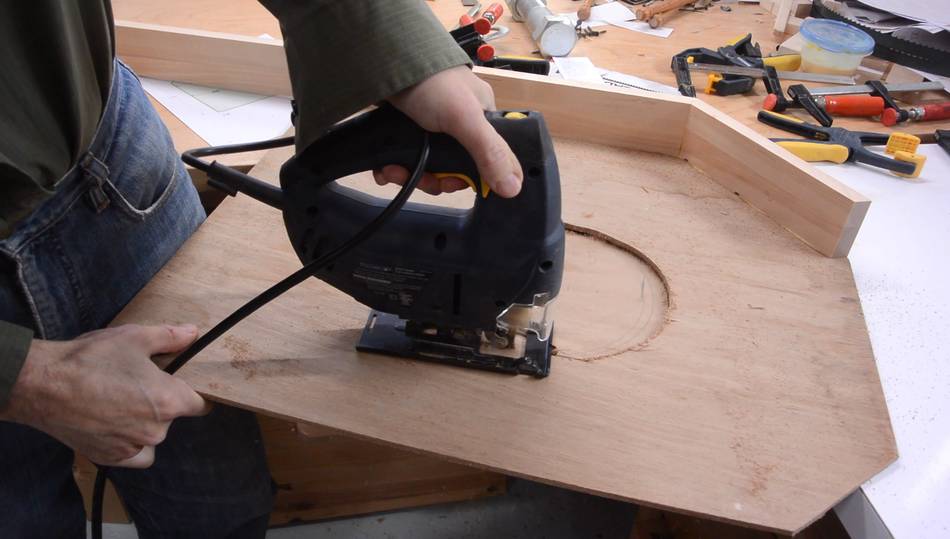 I cut a hole in the back of the enclosure with a jigsaw. This hole needs
to be large enough to clear the whole wheel flange (not just the axle)
on the top wheel.
I cut a hole in the back of the enclosure with a jigsaw. This hole needs
to be large enough to clear the whole wheel flange (not just the axle)
on the top wheel.
 Checking the fit...
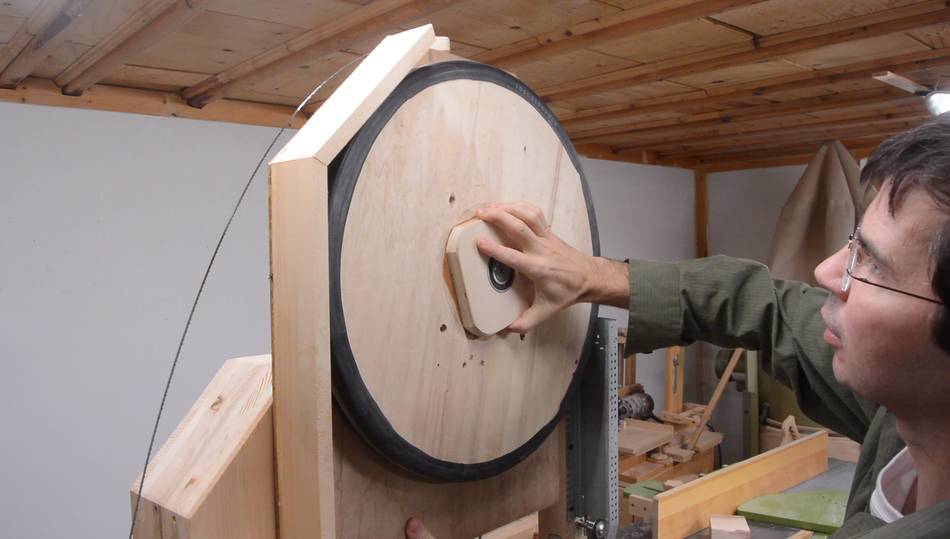 And more checking with the top wheel in place. I worked out how far up
the enclosure needs to go, then marked that on the enclosure.
And more checking with the top wheel in place. I worked out how far up
the enclosure needs to go, then marked that on the enclosure.
 Part of the enclosure needs to be cut away to clear the thicker part of
the bandsaw frame's post on the left.
Part of the enclosure needs to be cut away to clear the thicker part of
the bandsaw frame's post on the left.
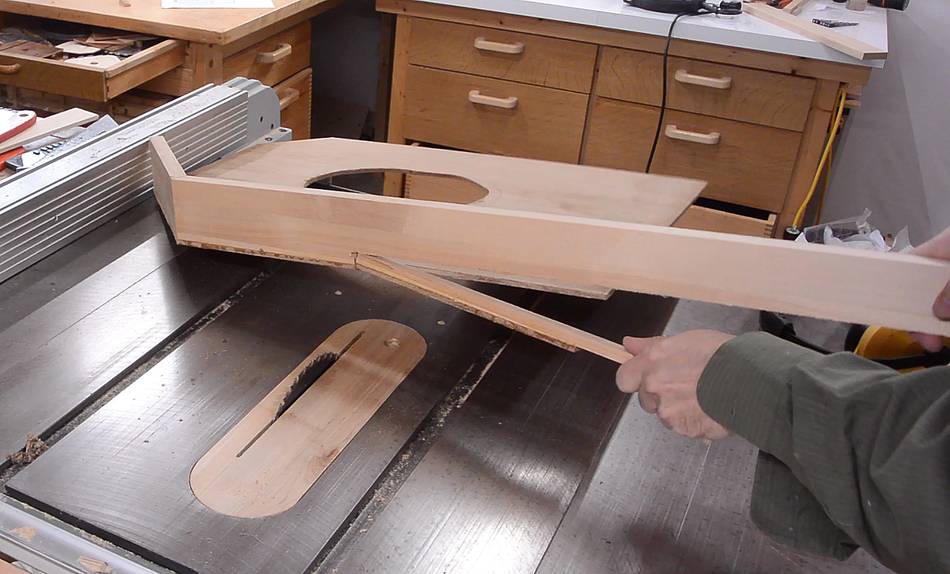 This is the part that comes off.
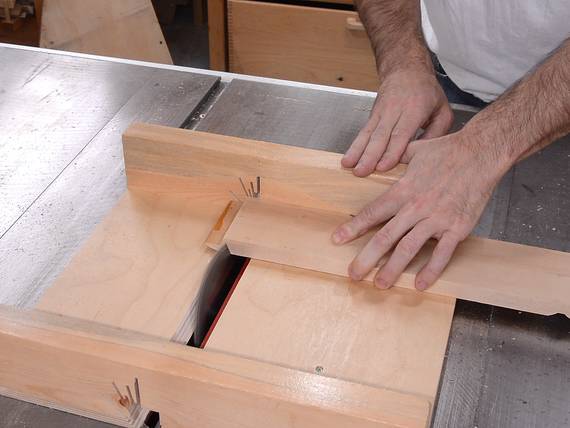
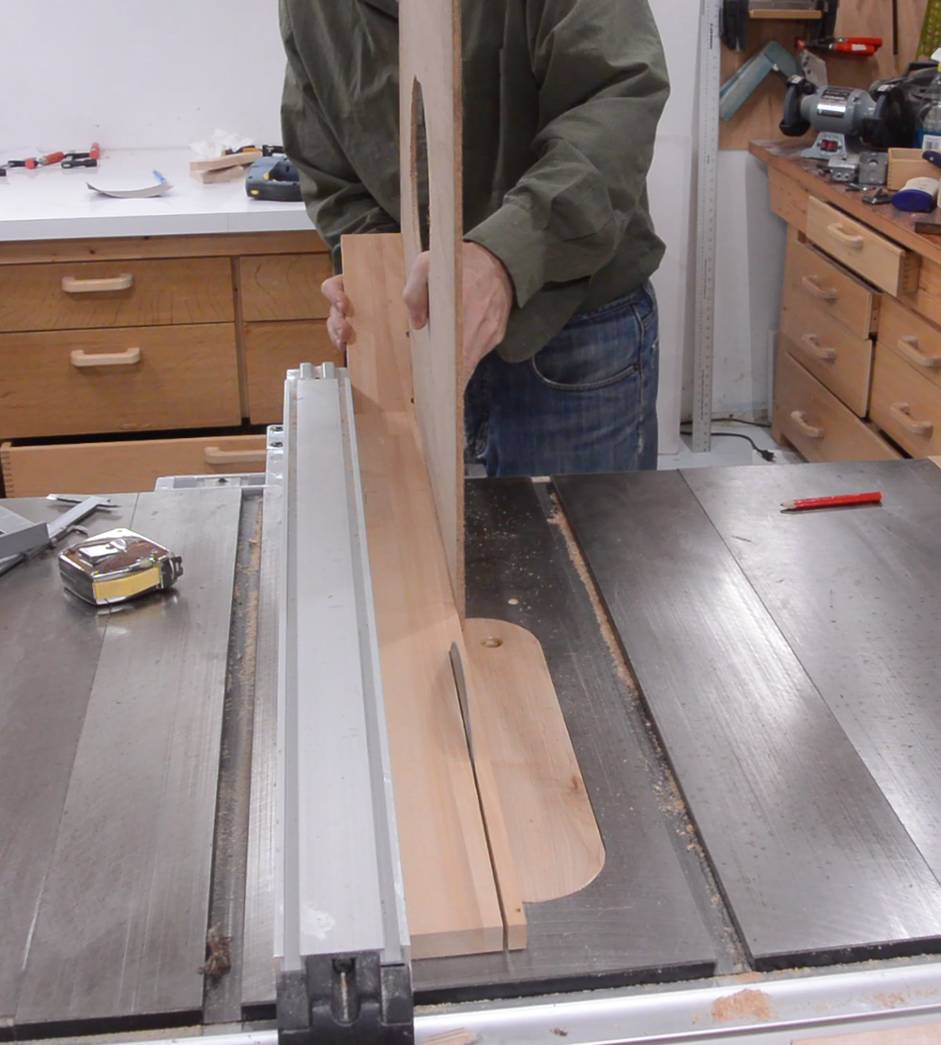
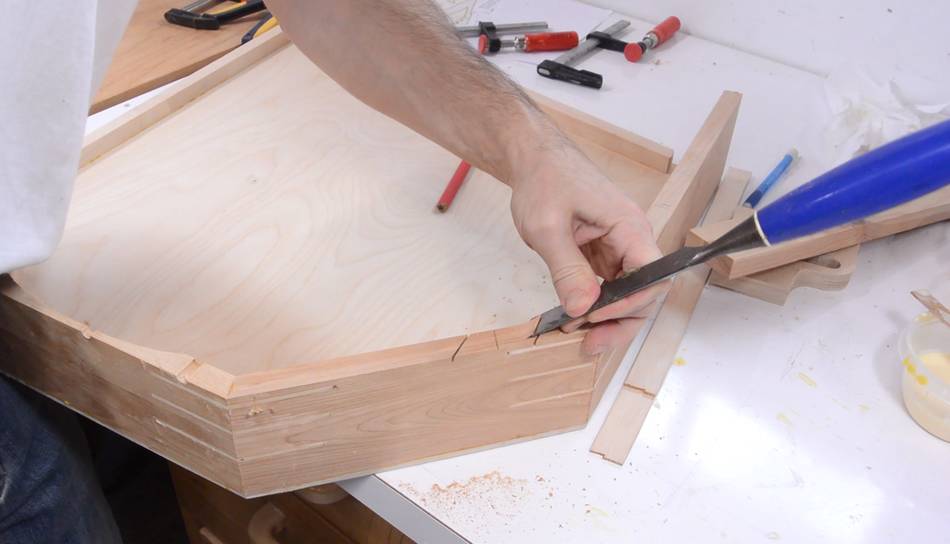
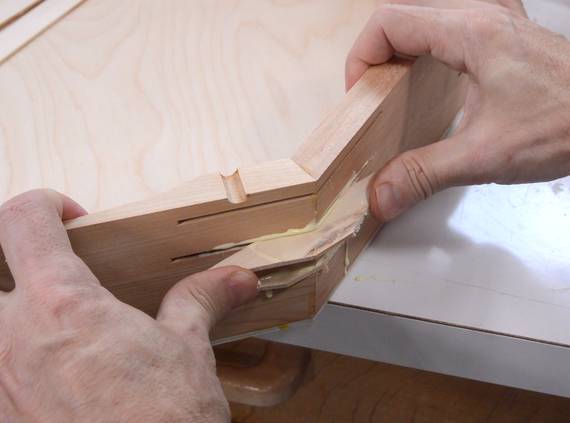 Then cutting splines into the corners and filling them with some
strips that I cut to the same thickness as the saw blade's kerf.
Then cutting splines into the corners and filling them with some
strips that I cut to the same thickness as the saw blade's kerf.
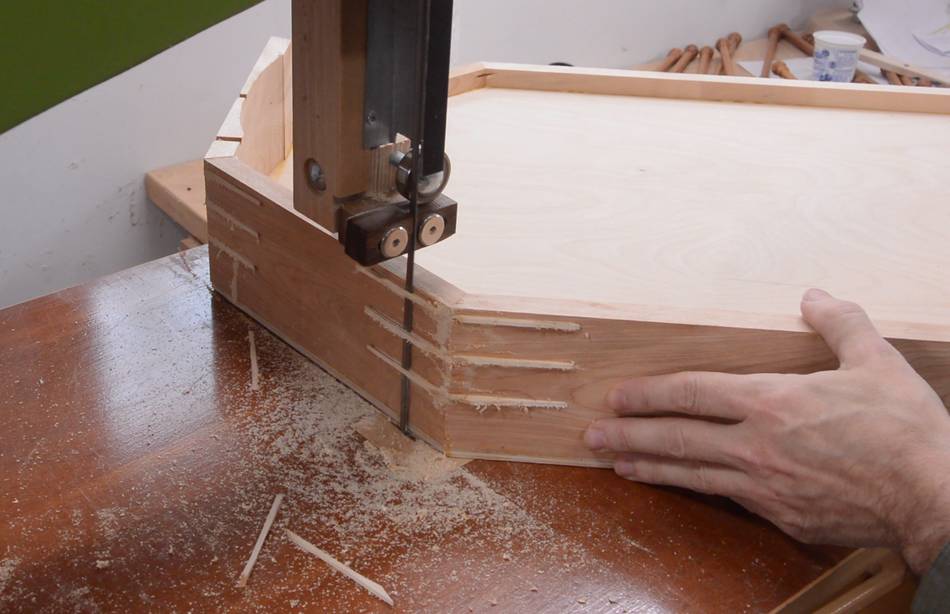
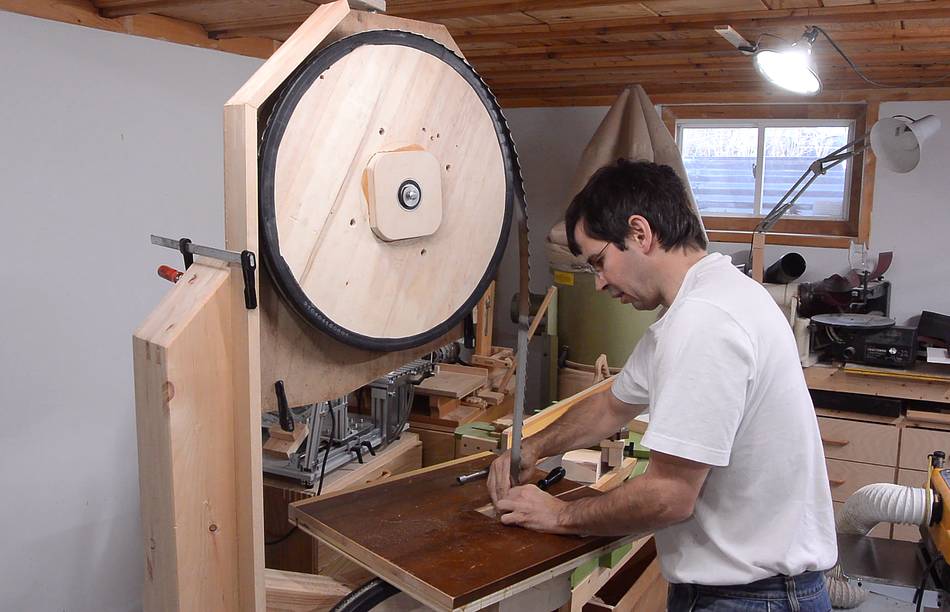
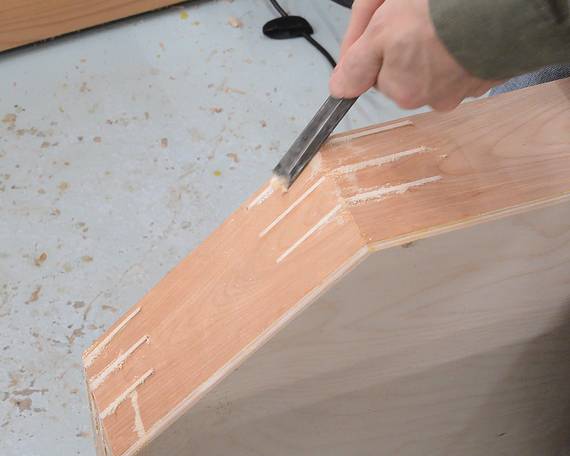 I trimmed these on the bandsaw, then flush trimmed them with a chisel, cutting
away from the corner so the chisel is always cutting out of the spline's grain.
I trimmed these on the bandsaw, then flush trimmed them with a chisel, cutting
away from the corner so the chisel is always cutting out of the spline's grain.
 Checking how the top cover will swing open before adding the hinge.
 Part of the front cover ended up hitting the blade guide post, so I used
a hand saw and a chisel to carve a notch about 5 mm deep to clear it.
Part of the front cover ended up hitting the blade guide post, so I used
a hand saw and a chisel to carve a notch about 5 mm deep to clear it.
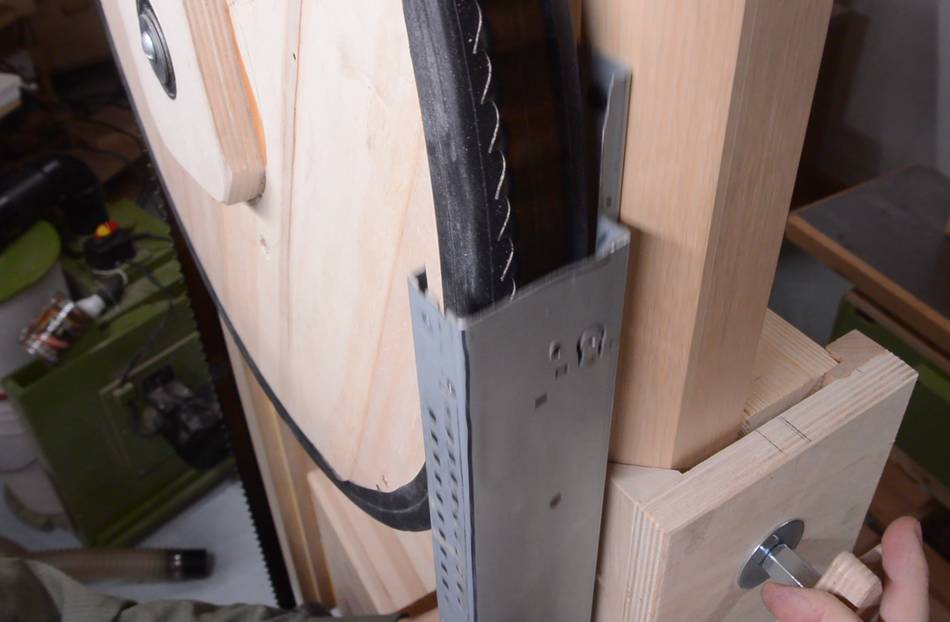
 Checking how the blade fits in the enclosure, using a 1 1/4" (30 mm)
wide bandsaw blade that is actually meant for bandsaw sawmills.
I got this blade on line from sawblade.com
(one
of these).
Checking how the blade fits in the enclosure, using a 1 1/4" (30 mm)
wide bandsaw blade that is actually meant for bandsaw sawmills.
I got this blade on line from sawblade.com
(one
of these).
The cover gets in the way to some extent, but also helps to hold the blade in place while I put it on the wheels.

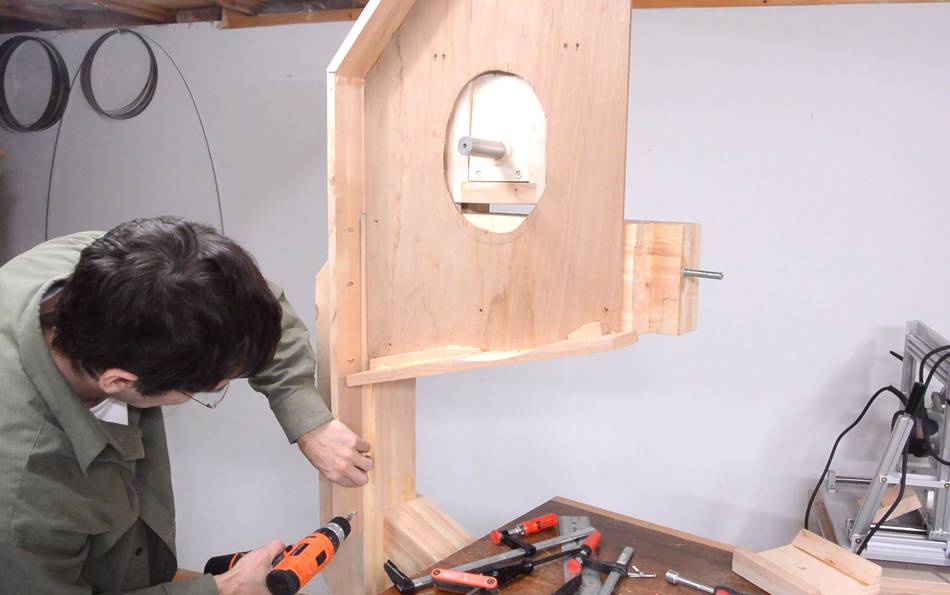
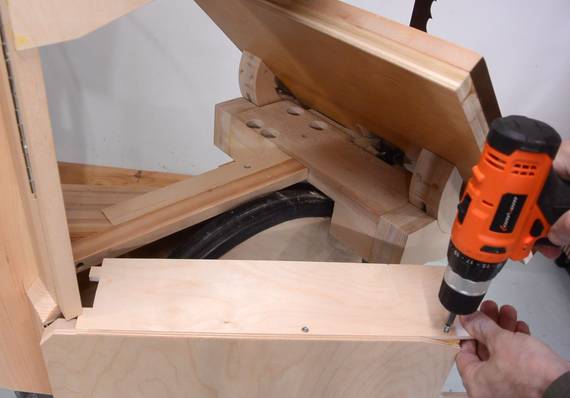
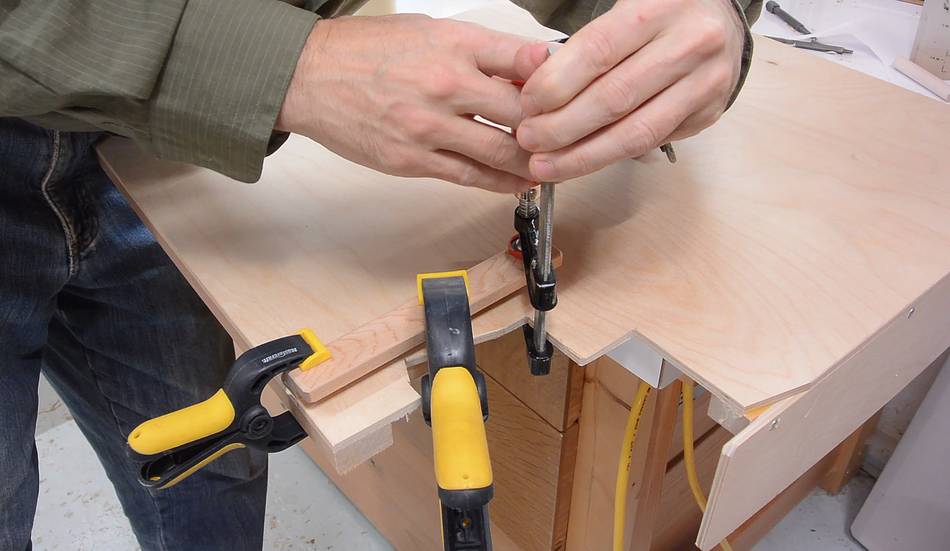
 I needed to screw the top cover onto the post, but I didn't want to screw
it straight on from the front because then the screws holes would get
covered by the piano hinge. So I drilled in at an angle, using a sacrificial
piece clamped to the side to help start the hole. So basically, part of
the top cover is held on with pocket holes.
I needed to screw the top cover onto the post, but I didn't want to screw
it straight on from the front because then the screws holes would get
covered by the piano hinge. So I drilled in at an angle, using a sacrificial
piece clamped to the side to help start the hole. So basically, part of
the top cover is held on with pocket holes.
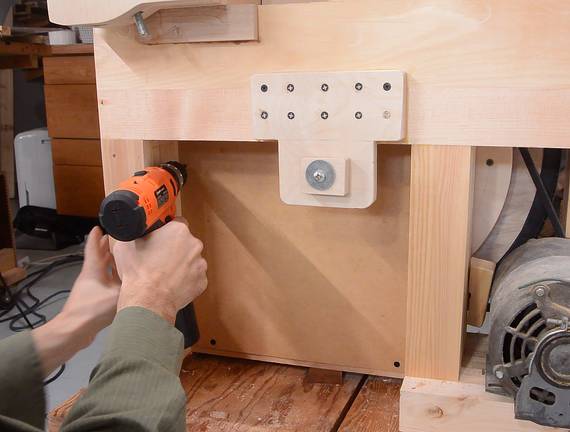
 The pocket holes screw into the frame.
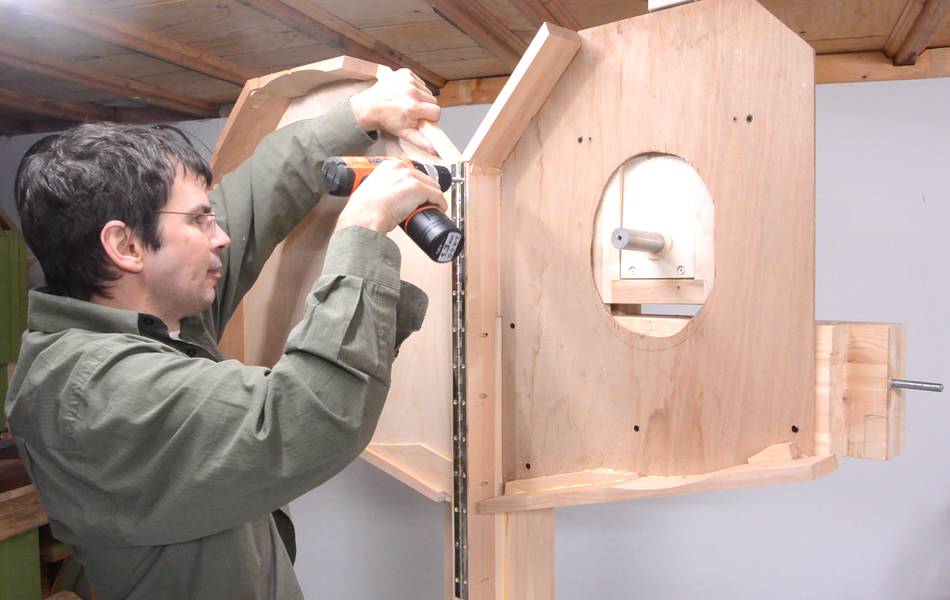 Then attaching the front of the cover with a piano hinge.
On my 16" bandsaw the top cover comes off by sliding it up, but with the low basement ceiling height, there really isn't much room above the saw in my shop.

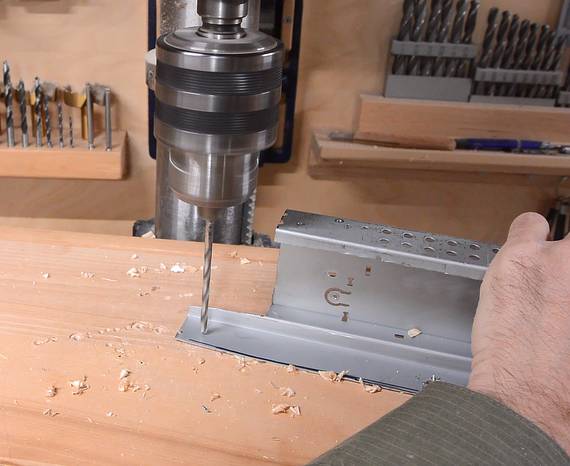
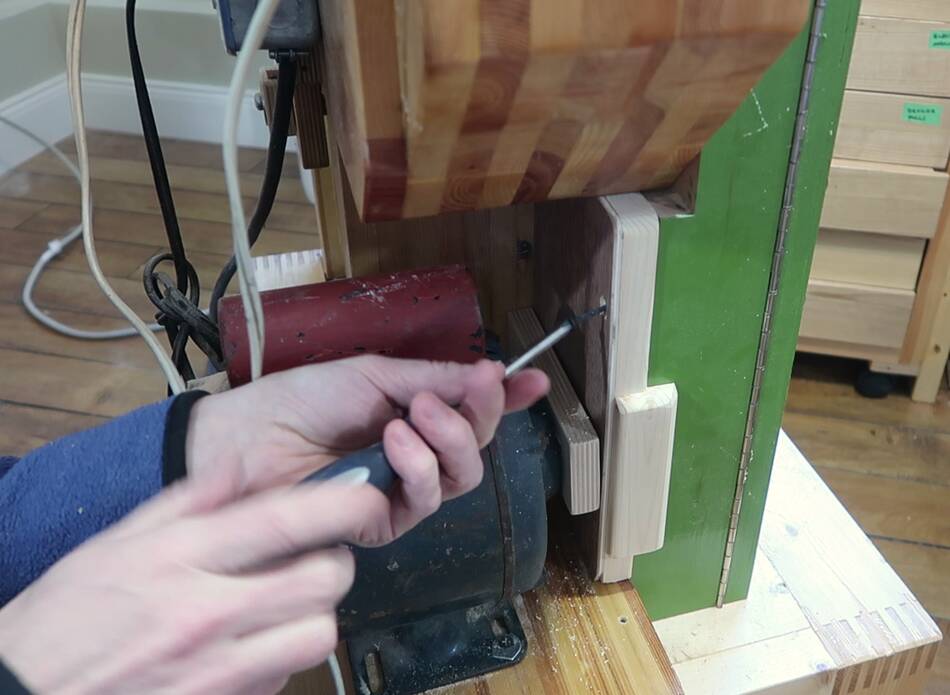
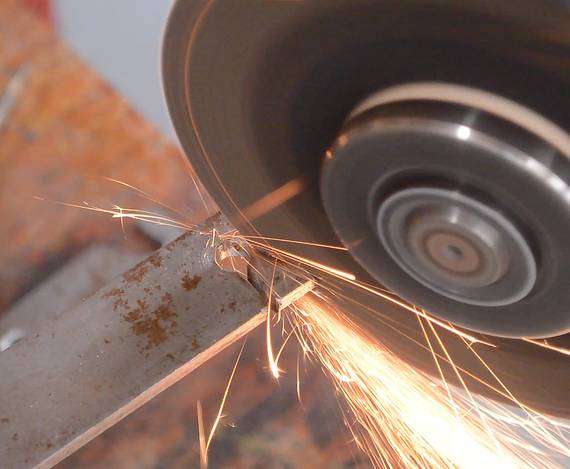 I made a metal hook to hold the top enclosure closed. I started by drilling two
holes in a piece of flat bar stock, then cutting the rest of the shape with
a thin cut-off disk in an angle grinder.
I made a metal hook to hold the top enclosure closed. I started by drilling two
holes in a piece of flat bar stock, then cutting the rest of the shape with
a thin cut-off disk in an angle grinder.
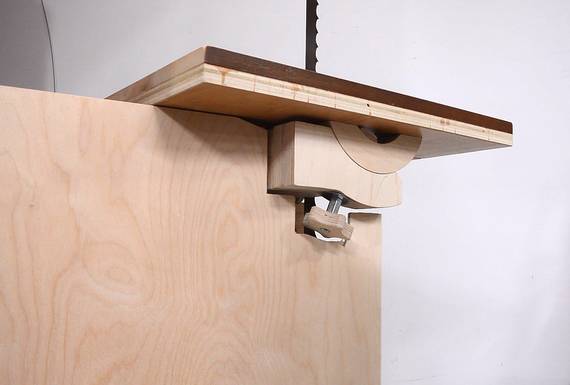
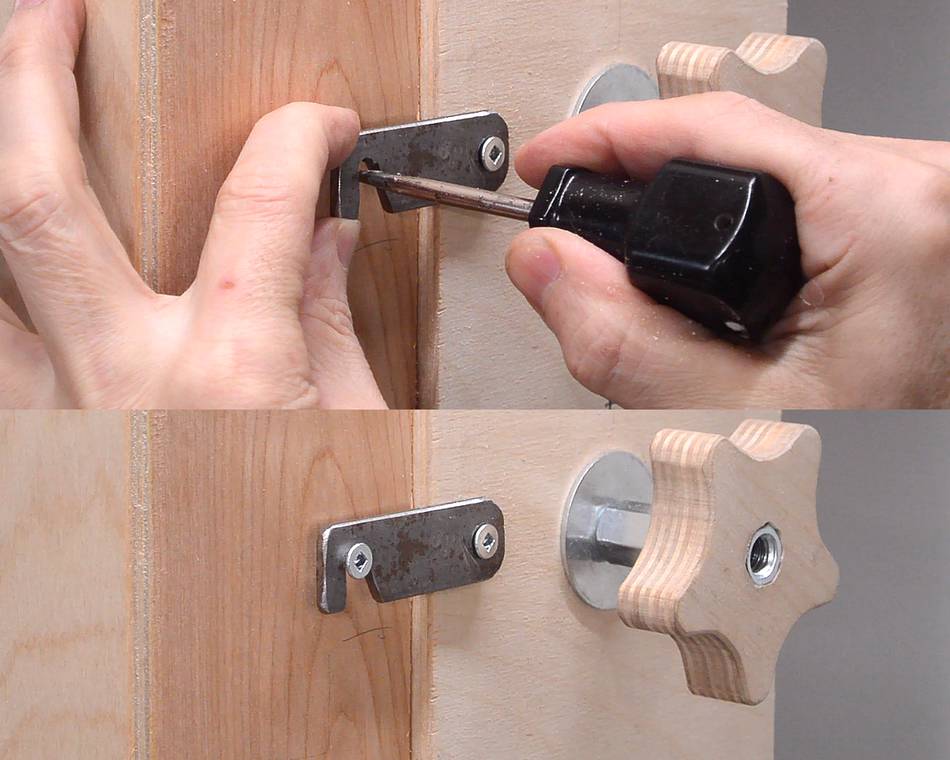 The hook attaches to the clamp that holds the upper blade guide column.
After screwing it onto the clamp, I pressed the top cover closed and used an awl to mark where the screw in the cover needed to go.
 Then I started to work on the bottom cover. I cut a piece out of the part
that goes on the right side to provide more clearance around the wheel.
I glued this part to the frame.
Then I started to work on the bottom cover. I cut a piece out of the part
that goes on the right side to provide more clearance around the wheel.
I glued this part to the frame.

 The bottom cover is another piece of 1/4" Baltic birch plywood, with strips
of wood glued around the edges for reinforcing.
The bottom cover is another piece of 1/4" Baltic birch plywood, with strips
of wood glued around the edges for reinforcing.
It has an odd-shaped notch cut out of the top right corner to clear the trunnions as it's opened and closed.
 This piece fits behind the wheel to close off that area.

 And a piece of plywood, screwed to the bottom cover to close it off at the top.
 Two pieces of plywood joined at a 90 degree angle close off the area around
the lower blade guides. The pieces are joined using two "L" shaped pieces
of plywood on the inside corner (not shown).
Two pieces of plywood joined at a 90 degree angle close off the area around
the lower blade guides. The pieces are joined using two "L" shaped pieces
of plywood on the inside corner (not shown).
I held it in place to measure how far down it comes on the front cover.
 I then glued a hook shaped ledge on the front cover to help hold this piece in
place.
I then glued a hook shaped ledge on the front cover to help hold this piece in
place.
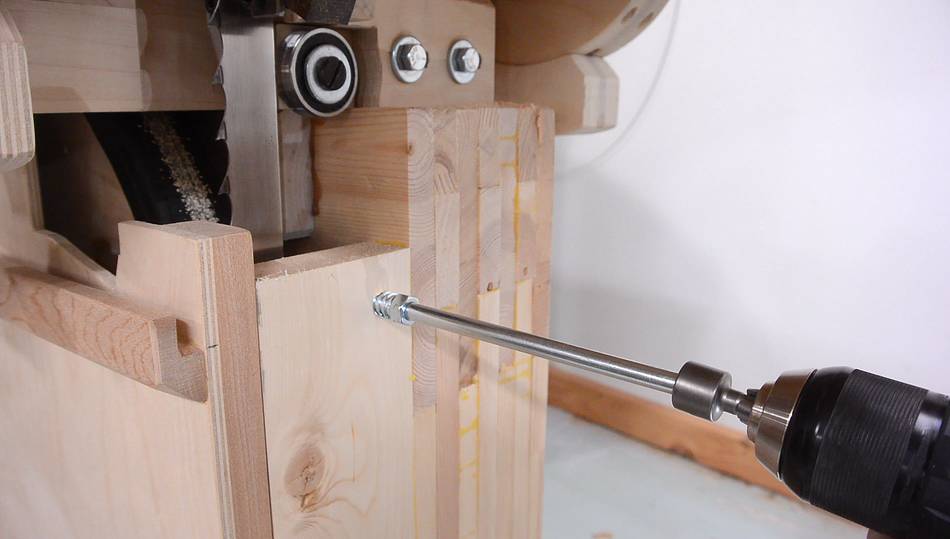
 While waiting for the glue to dry, I added a cover for behind the lower wheel.
I glued a strip of wood to the leg under the trunnions to have a space to
screw it on. I may change the design of the frame in the plans a little so
this part might screw on from the front in the plans.
While waiting for the glue to dry, I added a cover for behind the lower wheel.
I glued a strip of wood to the leg under the trunnions to have a space to
screw it on. I may change the design of the frame in the plans a little so
this part might screw on from the front in the plans.
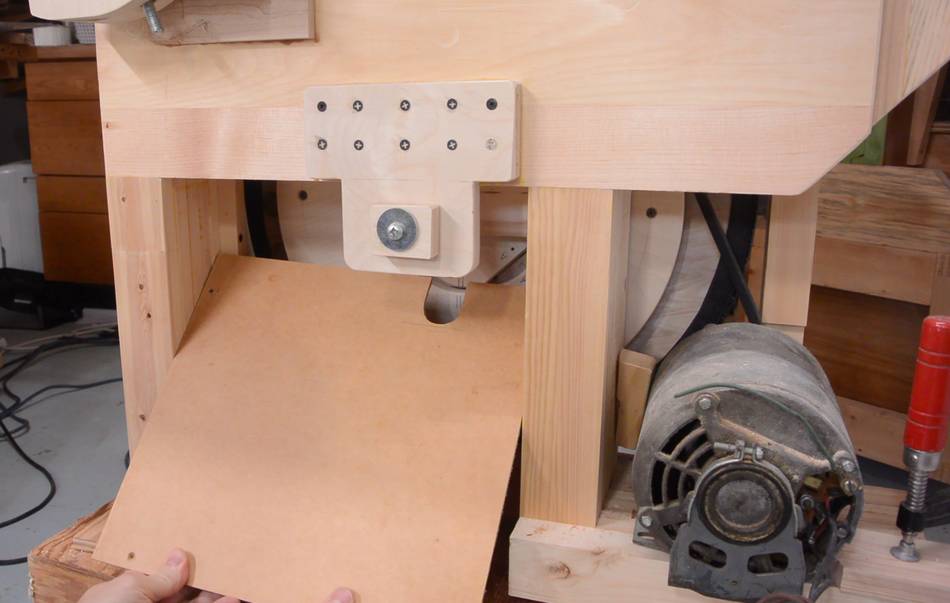
 Now back to the bottom cover. I installed a threaded insert for holding
the small section of cover near the blade guides.
Now back to the bottom cover. I installed a threaded insert for holding
the small section of cover near the blade guides.

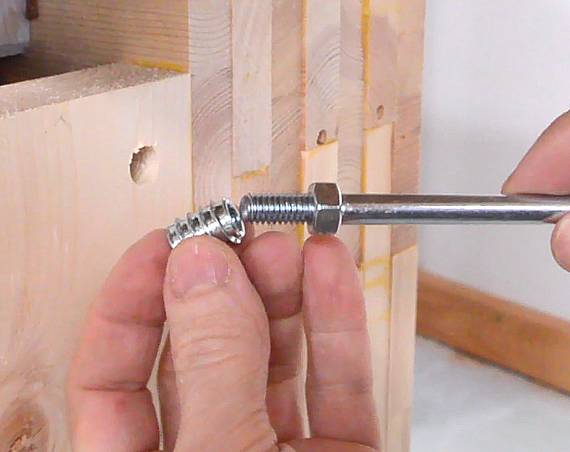
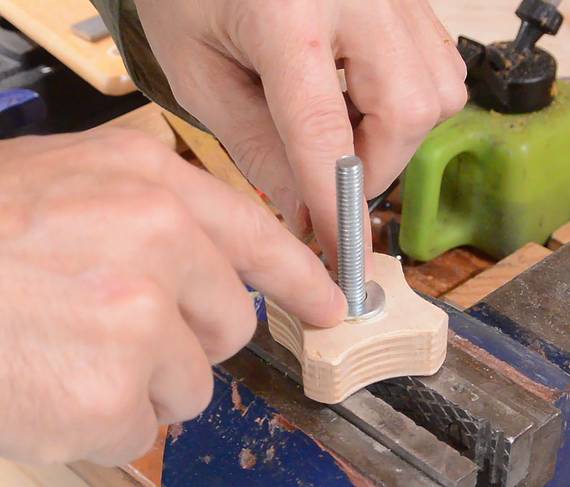 I made a small knob to hold that cover by gluing a 5/18" (M8) bolt
into a knob that I cut out of some 18 mm Baltic birch plywood.
I made a small knob to hold that cover by gluing a 5/18" (M8) bolt
into a knob that I cut out of some 18 mm Baltic birch plywood.
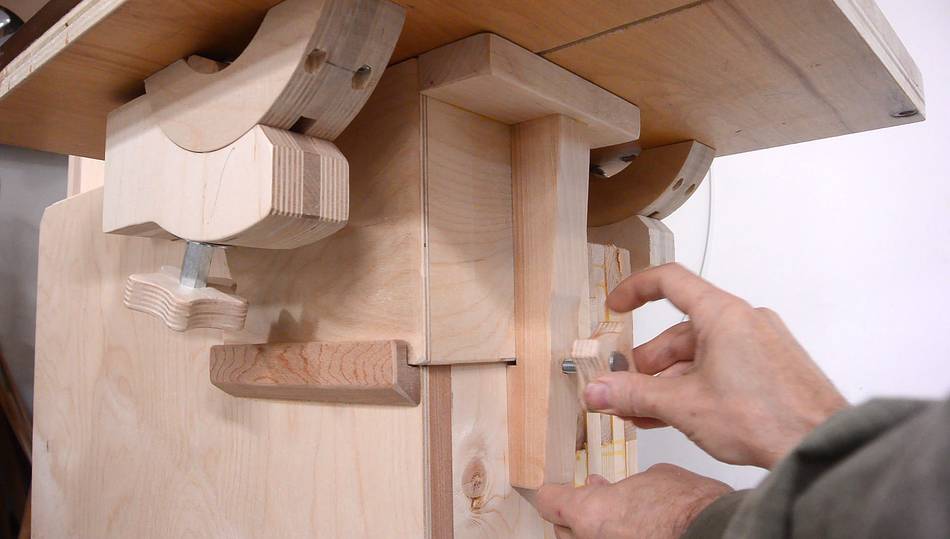 This knob holds the cover under the table in place.
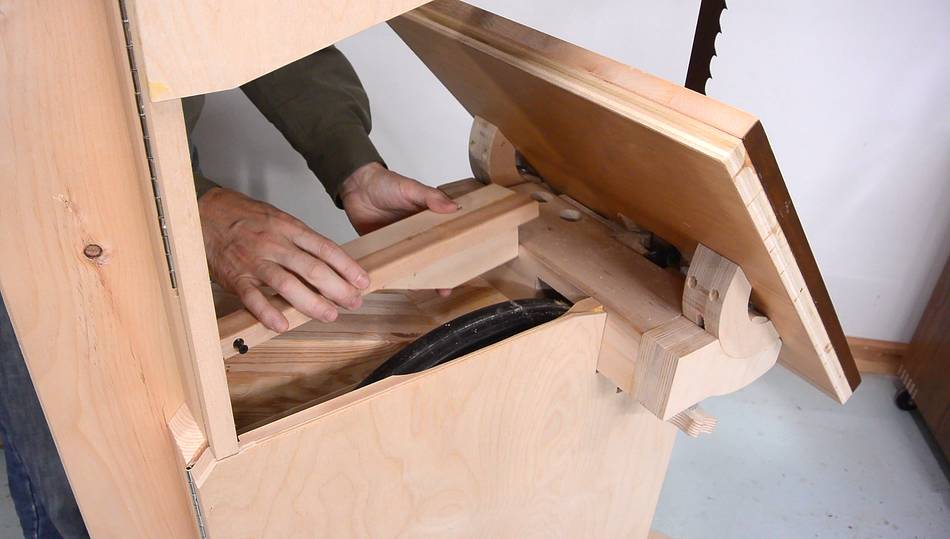
I added a brace for the table to this cover. The cover only fits on while the table is level, so I figure I might as well add support to help hold the table level against heavy loads.
The cover and brace needs to come off when tilting the table, but it's fairly rare that I do bevelled cuts. And with the brace normally in place, the table won't tilt unexpectedly even if I don't sufficiently tighten the trunnion screws.
 I glued another piece just under this brace to give it support. It was a bit
awkward clamping this on (removing the lower wheel would have made room for
the clamp, but that would have been more work).
I glued another piece just under this brace to give it support. It was a bit
awkward clamping this on (removing the lower wheel would have made room for
the clamp, but that would have been more work).
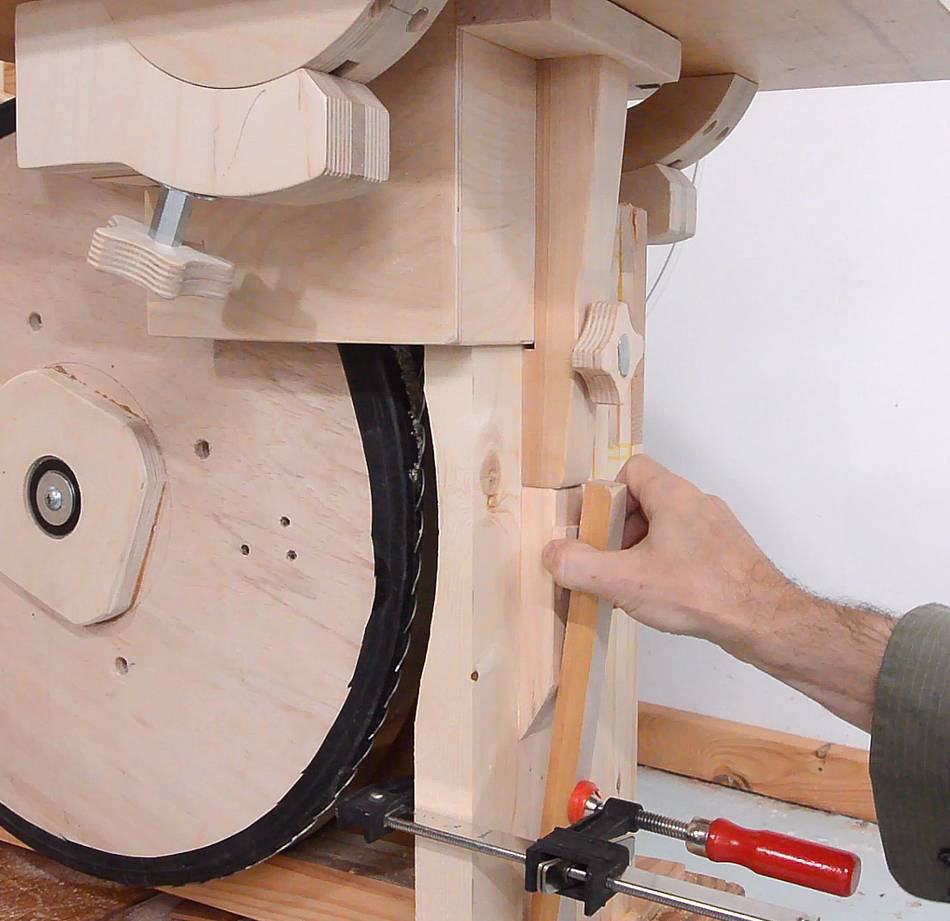
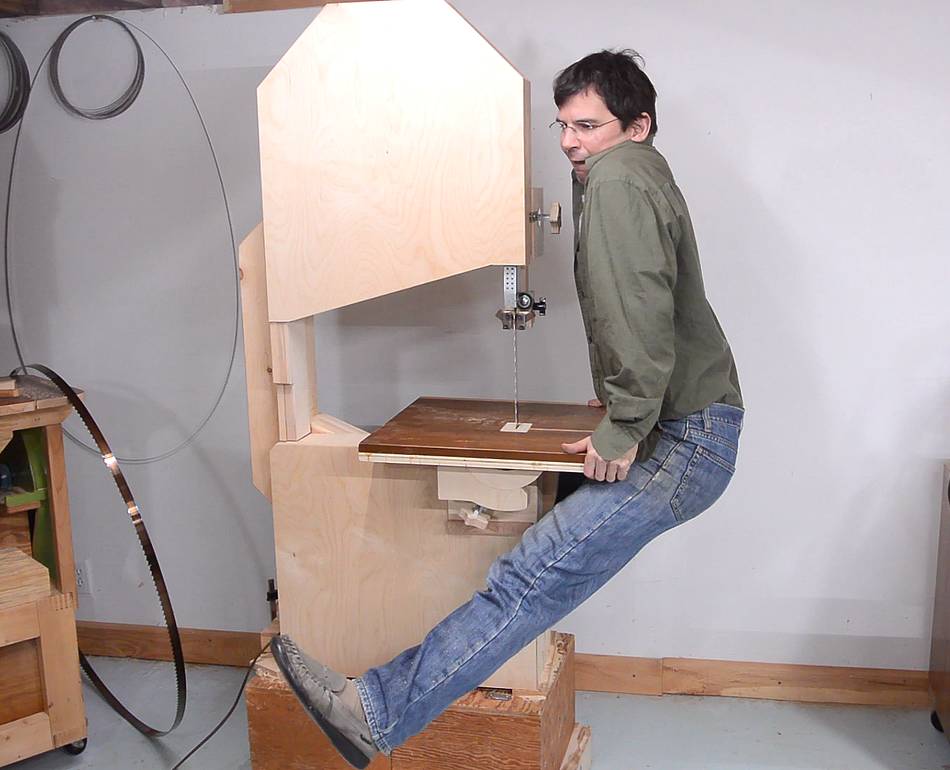 Checking the rigidity of the table with the brace installed.
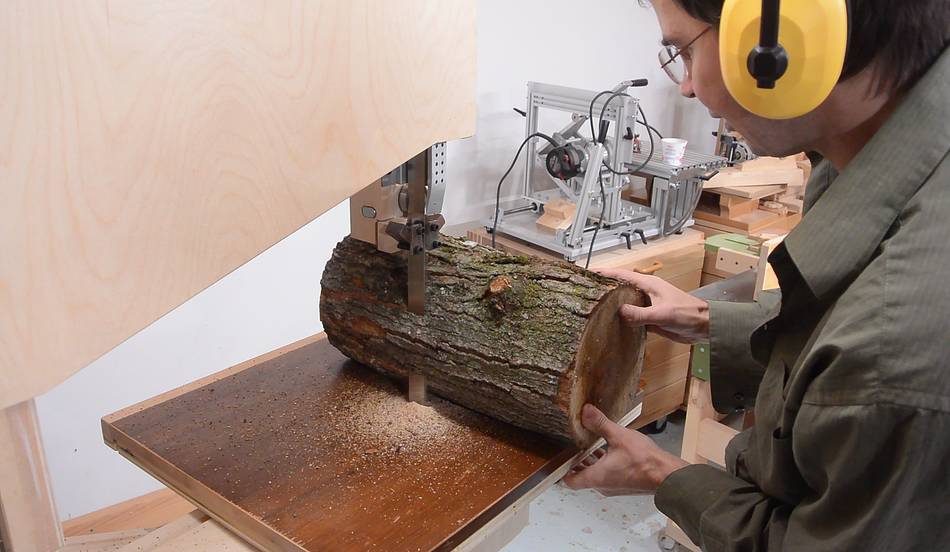
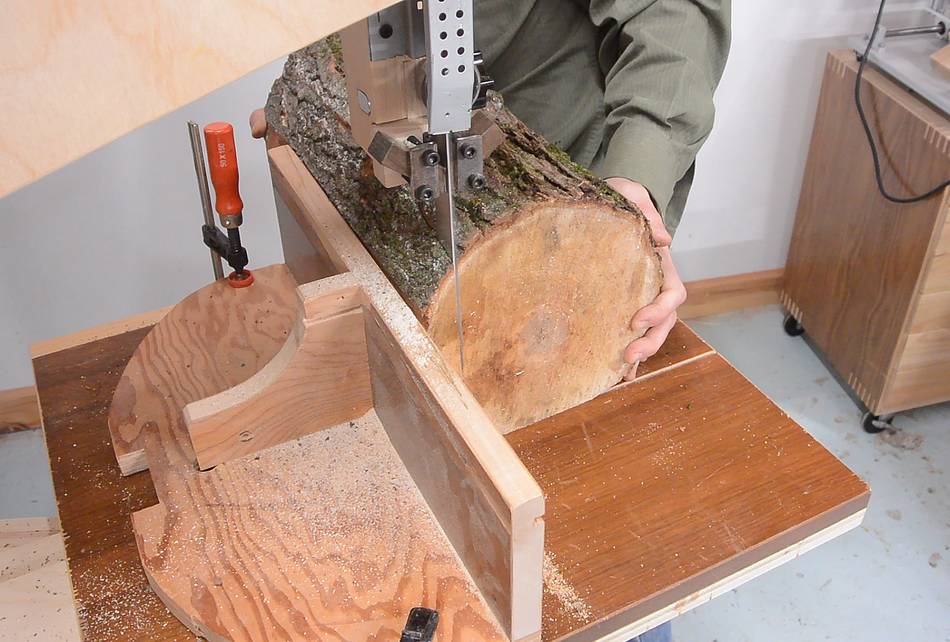
 And speaking of heavy loads, time to do some cutting. Here's a 8" (20 cm) diameter
piece of log that I got from John Heisz
from this tree.
And speaking of heavy loads, time to do some cutting. Here's a 8" (20 cm) diameter
piece of log that I got from John Heisz
from this tree.
After making a flat spot on the bottom with the jointer, I flattened one side just freehand.
The fence I'm using here is just clamped to the table. I have used this fence on every one of my other bandsaws at various times (it's the only resaw fence I ever use, here, here and here). So there are advantages to not building a dedicated resaw fence.
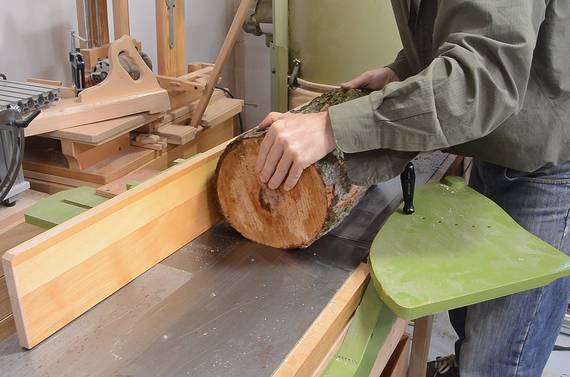
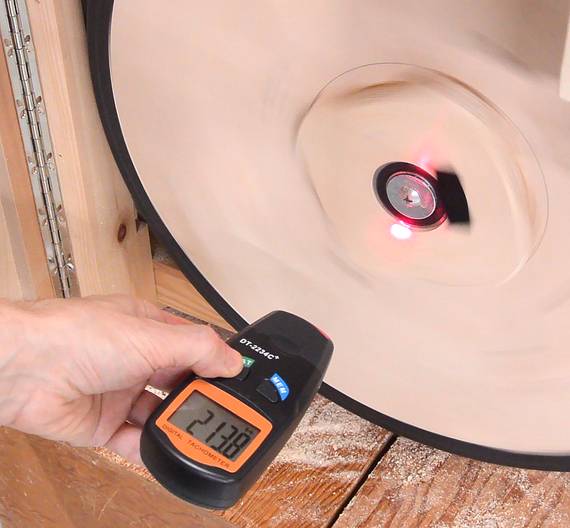 I was running into a fair bit of chatter. This is probably because I'm running
the bandsaw far slower than one normally would run with a sawmill blade.
The wheels are running at 213 RPM idling. With 20" (50 cm) diameter,
wheels, that works out to about 1100 feet per minute or about 330 meters
per minute. Sawmills normally run at least three times as fast.
But it was still faster and more accurate than using a chainsaw.
I was running into a fair bit of chatter. This is probably because I'm running
the bandsaw far slower than one normally would run with a sawmill blade.
The wheels are running at 213 RPM idling. With 20" (50 cm) diameter,
wheels, that works out to about 1100 feet per minute or about 330 meters
per minute. Sawmills normally run at least three times as fast.
But it was still faster and more accurate than using a chainsaw.
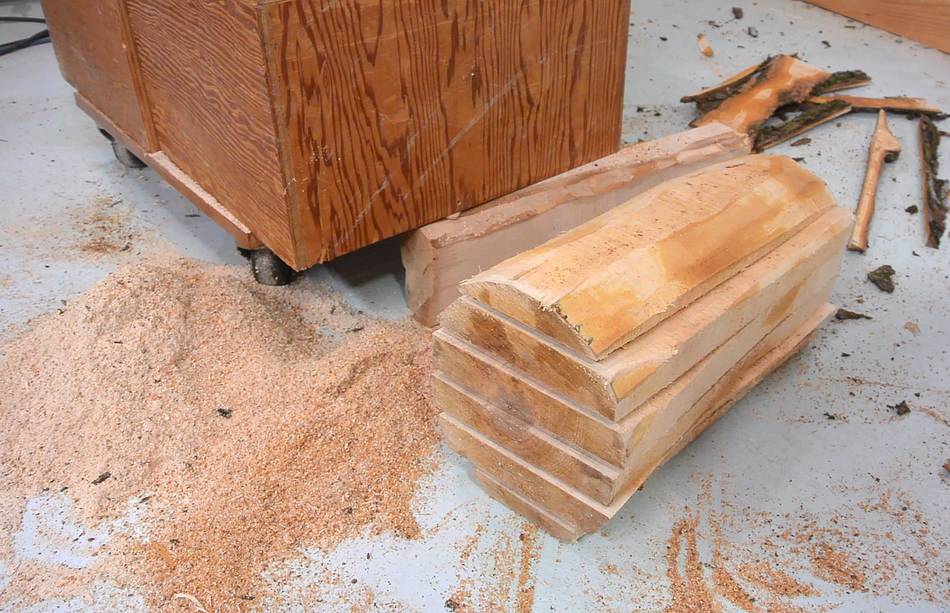 Here's my log all sliced up.
 I have to say, right now, the saw is definitely underpowered. I'm still using
it with the same 1/3 hp motor that I initially tested it with.
I have to say, right now, the saw is definitely underpowered. I'm still using
it with the same 1/3 hp motor that I initially tested it with.
When cutting out shapes with a 1/4" wide blade, the low power and slow speed are perfectly adequate, but for resawing and sawmilling, it's definitely marginal. But if I can do what I can do with 1/3 hp, then with a sharp blade, 1 hp should be quite enough for most operations.
 Update 2020:
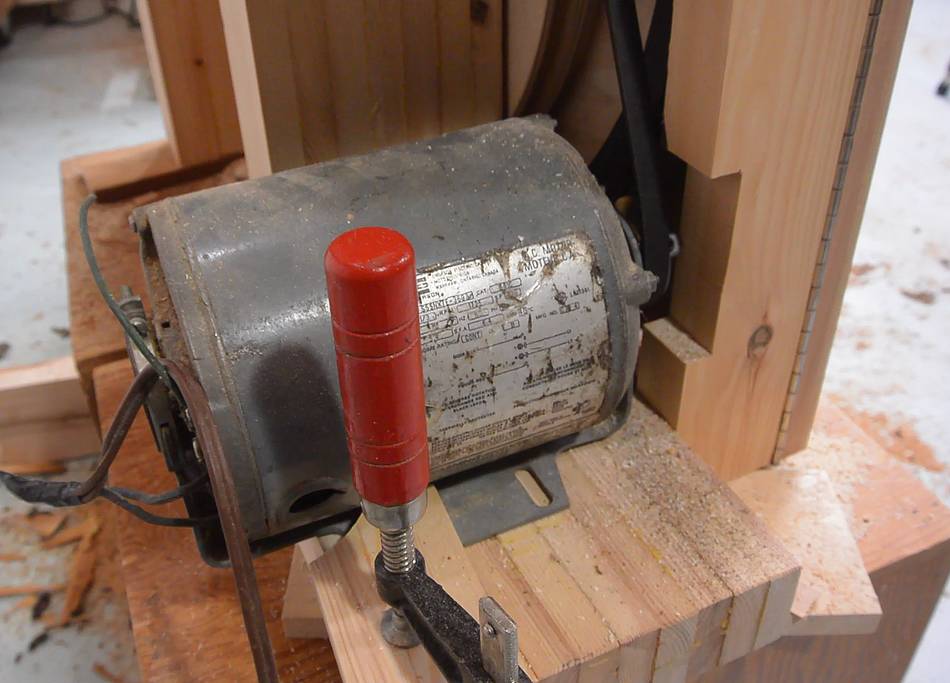
Three years after I built the bandsaw I finally made the guard
part of the enclosure to close that area up. I hadn't built that
earlier because I wasn't sure about
which motor to dedicate to this bandsaw, but I have had the same 3/4 hp motor
(seen at left) on it for over three years now, so I guess I'm keeping that motor.
Next: Electrical, resaw height, metal table
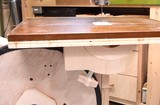 Table and trunnions
 Blade guides
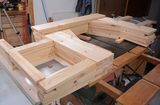 Bandsaw frame
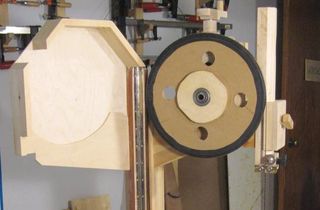 Enclosure for
 Plans for the bandsaw