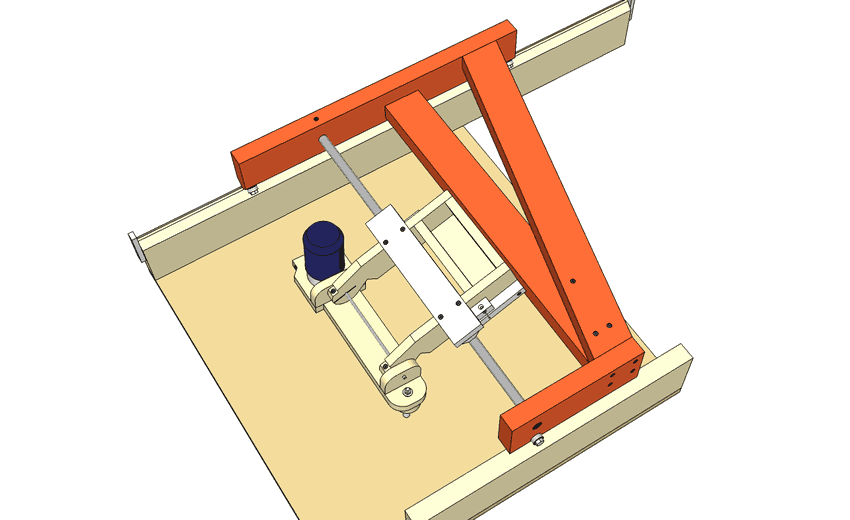
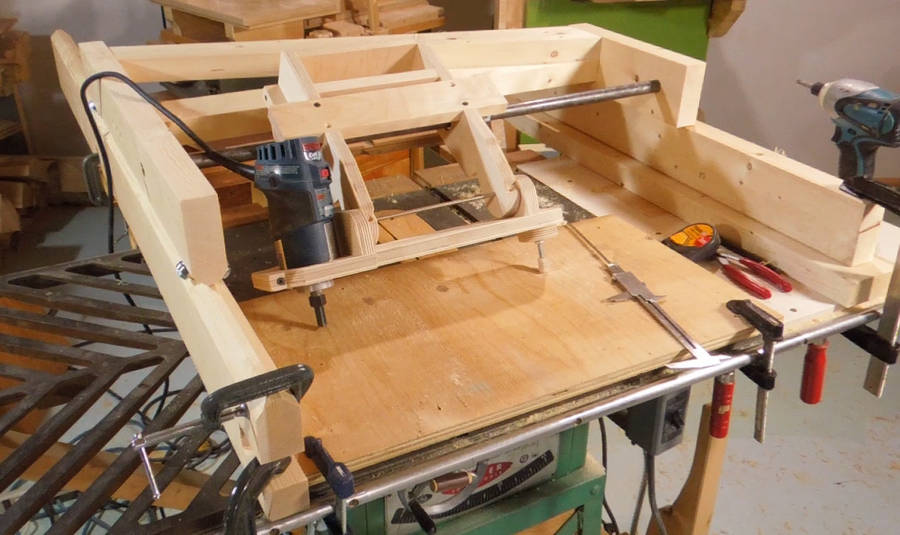
 Next it's time to make the larger frame that allows the pipe to slide
back and forth. I'm making this out of construction lumber - 2x4 and 2x6 scraps.
Next it's time to make the larger frame that allows the pipe to slide
back and forth. I'm making this out of construction lumber - 2x4 and 2x6 scraps.
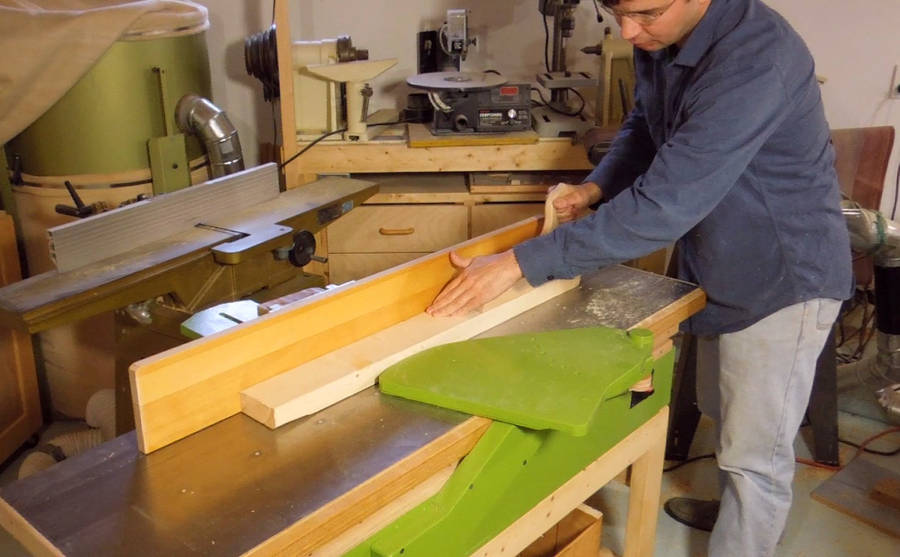 2x4's are often a little twisted or imprecise, so first I square and flatten them
on the jointer. The dimensions I used in the design assume 1 mm has been planed off
each side, but if the wood is slightly thinner, that's ok too.
2x4's are often a little twisted or imprecise, so first I square and flatten them
on the jointer. The dimensions I used in the design assume 1 mm has been planed off
each side, but if the wood is slightly thinner, that's ok too.
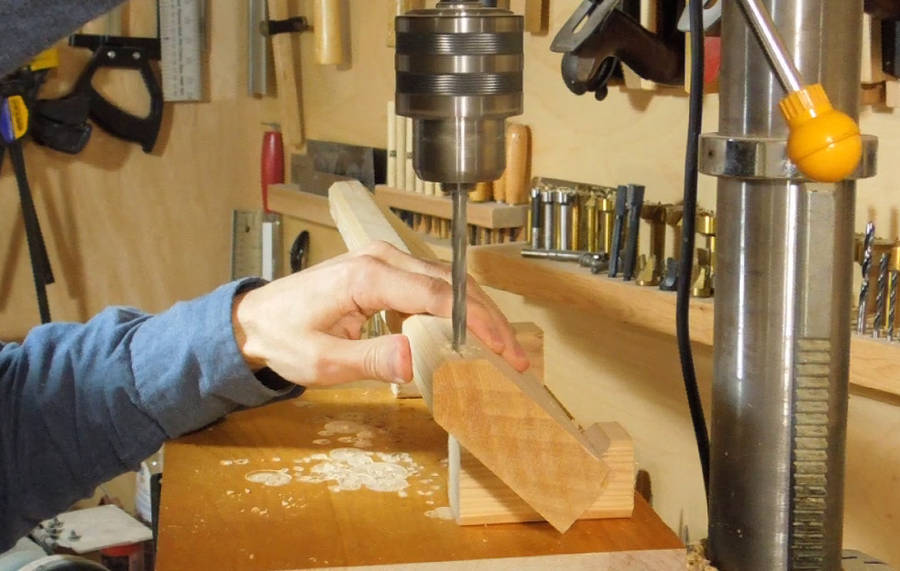 Drilling the holes for mounting the bearings. I reused the same V-blocks I made
for drilling the bearing mounts for the carriage. They are a bit small for this
work piece - larger ones would have been better.
Drilling the holes for mounting the bearings. I reused the same V-blocks I made
for drilling the bearing mounts for the carriage. They are a bit small for this
work piece - larger ones would have been better.
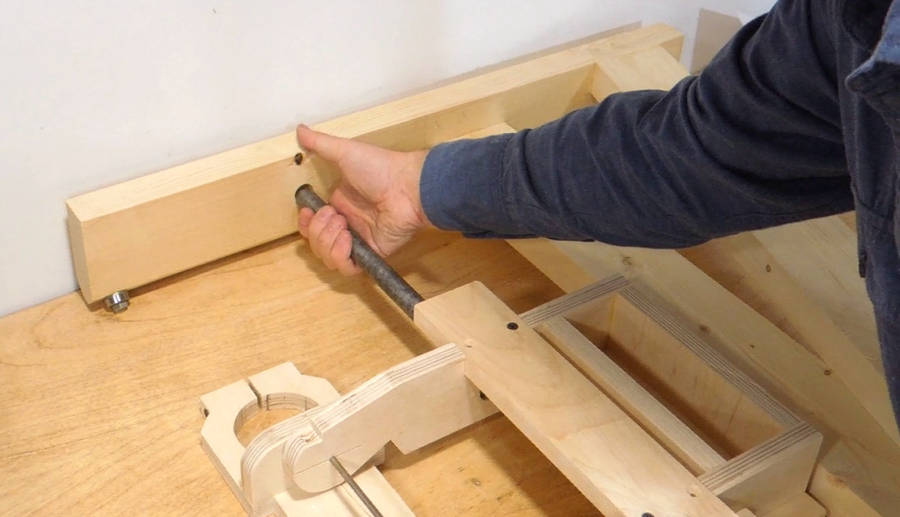
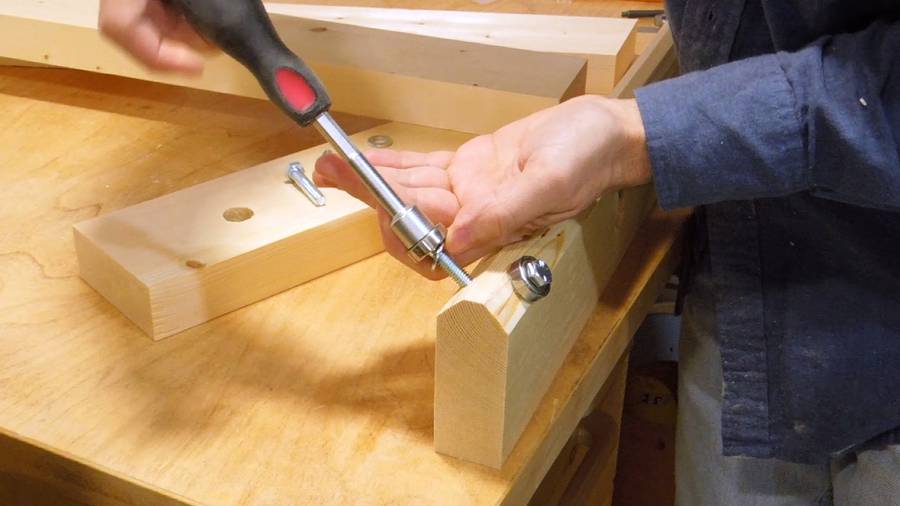 Screwing on the bearings. I'm using a nut driver. If you don't have a nut driver,
many socket sets come with a nut driver handle - these work just as well.
It's too easy to get the bolt in crooked when screwing it in with a wrench.
If your socket set doesn't have a nut driver handle, use the socket extension to help
give you a better sense of direction.
Screwing on the bearings. I'm using a nut driver. If you don't have a nut driver,
many socket sets come with a nut driver handle - these work just as well.
It's too easy to get the bolt in crooked when screwing it in with a wrench.
If your socket set doesn't have a nut driver handle, use the socket extension to help
give you a better sense of direction.
The second bolt is slightly offset from the first one so that the screws don't hit each other.
 The frame is attached together with drywall screws (2 1/2" long). Doweling and
gluing would be better, but I figure this way I can take it apart again when I'm not
using it. If storage space is not a concern, I'd recommend doweling it.
The frame is attached together with drywall screws (2 1/2" long). Doweling and
gluing would be better, but I figure this way I can take it apart again when I'm not
using it. If storage space is not a concern, I'd recommend doweling it.
I'm using some 2 1/2" screws, just screwed straight into the end grain. Not ideal, although in earlier tests, I found that screws in end grain hold much better than I thought.
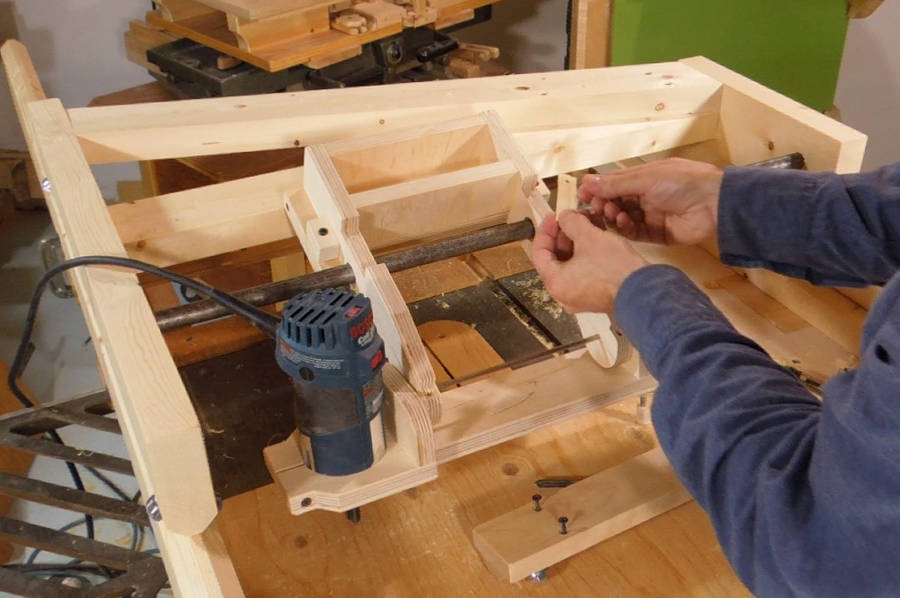
 Inserting the pipe through the holes in the frame and through the router mount.
This is where I realized I had made a measuring error! The pipe was 1 cm too close to the frame, so the back of the router mount ended up hitting the frame. I was able to reposition the screws on the longer rail, but I had to re-make the short piece that holds the pipe end.
 Lining up the pipe with the hole in the longer piece.
On this one, the pipe fits fairly tightly in the holes so there's no need for any screw to fix the pipe in place.
In the plans, I drew in a screw going through the pipe to lock it in place, sort of like a set screw. You may or may not need that.
 First test assembly on the floor. It's quite large.
I drew it with a plywood base in the plans, but I think I'll just clamp the two rails to my work surface when I'm using it.
 I need to mount a "follower" in the same relative position as the router.
I decided to mount these using a 1/4" (6 mm") piece of threaded rod (actually,
a carriage bolt with the head cut off). This will mount through the wood, with
a nut and washer on either side. That way, I can adjust how far from the plywood
the follower will be.
I need to mount a "follower" in the same relative position as the router.
I decided to mount these using a 1/4" (6 mm") piece of threaded rod (actually,
a carriage bolt with the head cut off). This will mount through the wood, with
a nut and washer on either side. That way, I can adjust how far from the plywood
the follower will be.
Here's checking the follower mount.
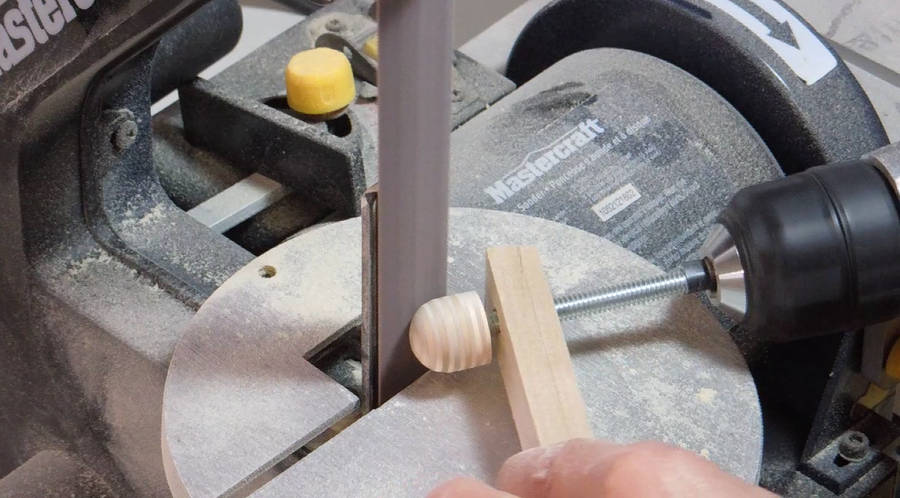 I attached a piece of wood to the end of the bolt by screwing it into a slightly undersized
hole in the wood.
I attached a piece of wood to the end of the bolt by screwing it into a slightly undersized
hole in the wood.
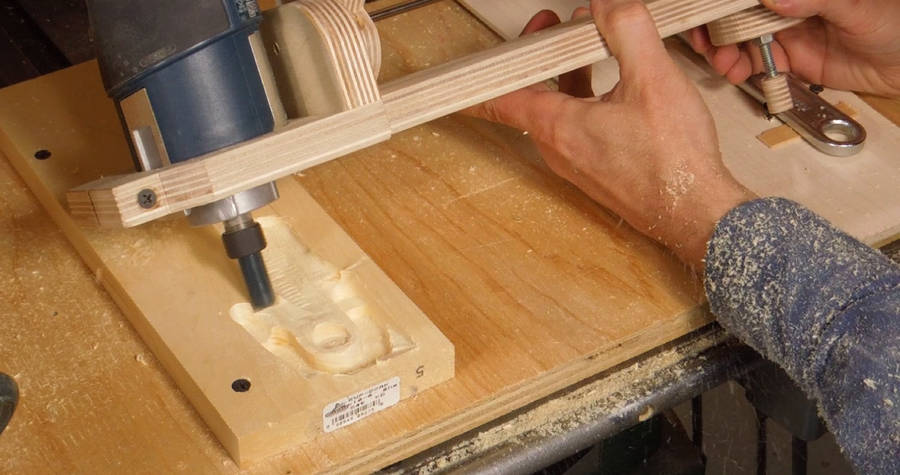
Spinning the threaded rod with a hand drill, and using another piece of wood to guide it. I'm grinding a spherical end on the end of the follower.
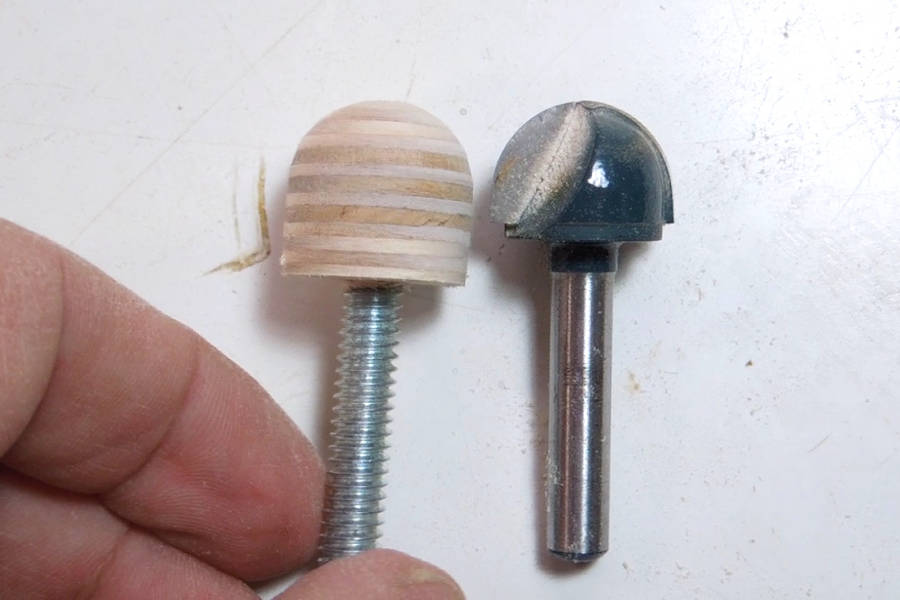 Follower and router bit. Pretty close match.
I also made a cylindrical follower to match a 1/2" bit - same procedure, but easier.
Follower and router bit. Pretty close match.
I also made a cylindrical follower to match a 1/2" bit - same procedure, but easier.
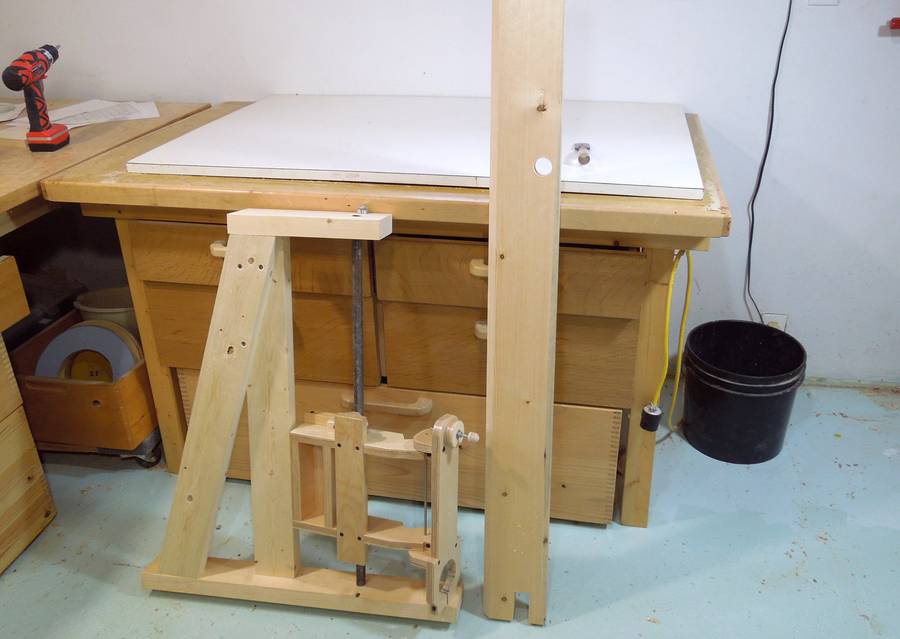
 For a base, I just clamped the rails to my old table saw.
I only anticipate using this copy carver from time to time, so clamping the rails directly
to the table saw means I don't have to make a bulky base for it.
For a base, I just clamped the rails to my old table saw.
I only anticipate using this copy carver from time to time, so clamping the rails directly
to the table saw means I don't have to make a bulky base for it.
 A router copier with no router tilt (three degrees of freedom) doesn't need
much calibration, because any relative difference between the router and follower position
will mostly result in the copied object being offset slightly.
A router copier with no router tilt (three degrees of freedom) doesn't need
much calibration, because any relative difference between the router and follower position
will mostly result in the copied object being offset slightly.
But with four or more degrees of freedom, there are different angles that the same spot on the carving can be approached from. Without careful alignment, the different angles will result in different physical cutter positions.
The shaft that the router mount tilts on needs to be exactly parallel to the shaft that the carriage slides on.
 The easiest way to adjust the alignment was to remove the crosspiece with the four
bearings on it and put a shim under one end. This would also be the best way to correct
for the shafts not being the same distance on either side, but I didn't need to make any
adjustments in that direction on mine.
The easiest way to adjust the alignment was to remove the crosspiece with the four
bearings on it and put a shim under one end. This would also be the best way to correct
for the shafts not being the same distance on either side, but I didn't need to make any
adjustments in that direction on mine.
 I needed to check that the router bit and the follower are aligned with each other.
First I make sure they both protrude down by the same distance.
Then, tilting the router and follower side to side, I check that the corner
of the router bit remains in contact with the plywood base through the rotation.
I needed to check that the router bit and the follower are aligned with each other.
First I make sure they both protrude down by the same distance.
Then, tilting the router and follower side to side, I check that the corner
of the router bit remains in contact with the plywood base through the rotation.
In the case of my router copier, it didn't stay in contact. This meant that the lateral position of the follower and router were are out of alignment. I had to move the follower by about 1.5 mm to fix the alignment. I ended up moving the follower by adjusting how the pivot (for the thin shaft) attaches to the router mount.
 Getting ready for my first test carving. The object to copy: An adjustable wrench.
I fastened it down with some drywall screws around the edges. It's no good if the object to be copied ends up moving.
 Carving, in progress
 Finished carving with the router. Note how the screws holding the wrench down resulted in
bumps along the side of the carved wrench. I just cut these off with the bandsaw when I
cut the wrench out.
Finished carving with the router. Note how the screws holding the wrench down resulted in
bumps along the side of the carved wrench. I just cut these off with the bandsaw when I
cut the wrench out.
Also note the ripples in the handle. These are from the writing on the handle of the original. I followed this very closely with the corner of the follower to see how close I could get it on the copy. Maybe if I'd had more room around those letters, it might have been legible.
I think I prefer a straight bit for copy carving - the finish isn't as smooth, but the sharp edges, combined with tilting the router really allow me to get into the corners.
 Finished carving. I added a bit more detail with a carving knife around the adjustment
screw.
Finished carving. I added a bit more detail with a carving knife around the adjustment
screw.
 A dedicated copy carving machine can be a bulky prospect. At the very least, the machine
needs to be twice as wide as the largest object that it can copy, plus room to work,
plus room for the rails.
A dedicated copy carving machine can be a bulky prospect. At the very least, the machine
needs to be twice as wide as the largest object that it can copy, plus room to work,
plus room for the rails.
I was originally going to build it on a dedicated plywood base, but then just clamped the rails on my table saw, and that worked fine. That way, when I'm not using the copy carver, there really isn't much to put away.