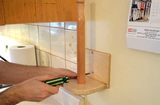
 I have this ledge in my house near the back door. It's a great place to put down your
keys and such when coming in the door. As the weather gets cold, it's also a great
place for gloves, toques, scarves, etc. And it's getting overcrowded.
I have this ledge in my house near the back door. It's a great place to put down your
keys and such when coming in the door. As the weather gets cold, it's also a great
place for gloves, toques, scarves, etc. And it's getting overcrowded.
I have this ledge in my house near the back door. It's a great place to put down your
keys and such when coming in the door. As the weather gets cold, it's also a great
place for gloves, toques, scarves, etc. And it's getting overcrowded.
 Rachel had the idea of making some
hooks or pegs to mount by the back door to put gloves and such on. I liked that
idea, but, because it was her idea, I figured she should be the one to build it.
Rachel had the idea of making some
hooks or pegs to mount by the back door to put gloves and such on. I liked that
idea, but, because it was her idea, I figured she should be the one to build it.
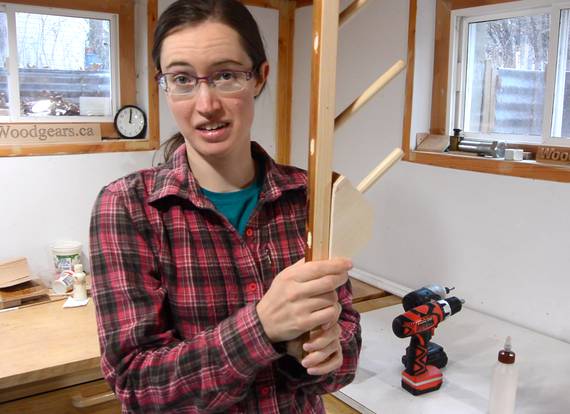
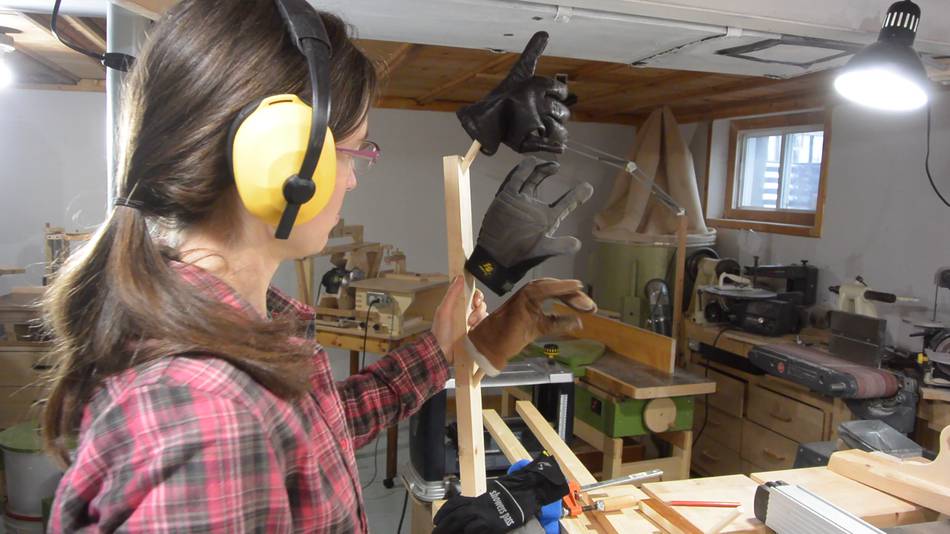
I did however experiment with putting a few dowels in a board at an angle, just to try out a particular angle and spacing. I also made a jig for drilling those 45-degree angle holes, which Rachel is showing at right, along with my experiment.
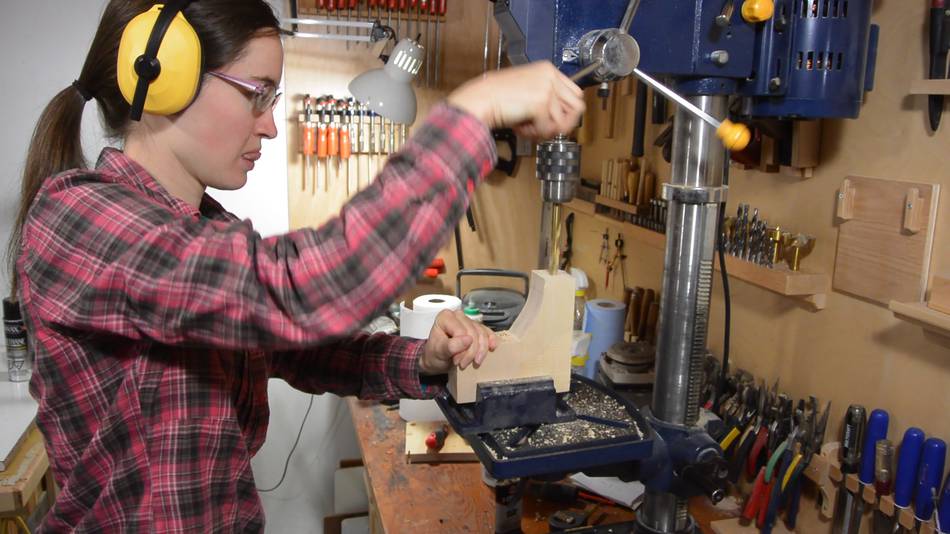
 Rachel figured it would be better to have an angle closer to vertical for the
hooks, so this required making a new drilling jig.
Rachel figured it would be better to have an angle closer to vertical for the
hooks, so this required making a new drilling jig.
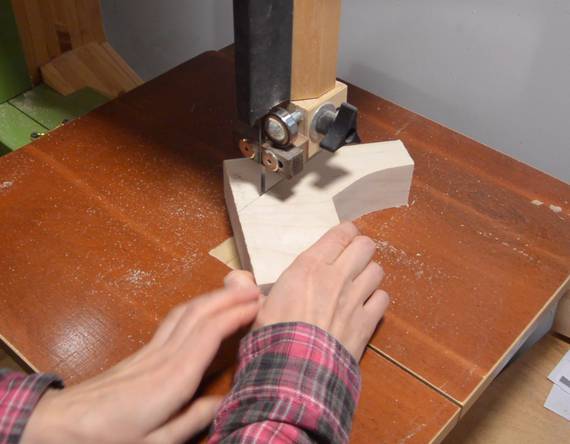
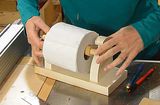
Here she's drilling a 1/2" hole in a scrap of wood, which she then cut off at 55 degrees (from square) on the bandsaw.
 Testing the jig on a scrap of wood. The jig works very much like a pocket hole jig,
but with a less shallow angle.
Testing the jig on a scrap of wood. The jig works very much like a pocket hole jig,
but with a less shallow angle.
There was some shaking of the drill, but it worked well enough.
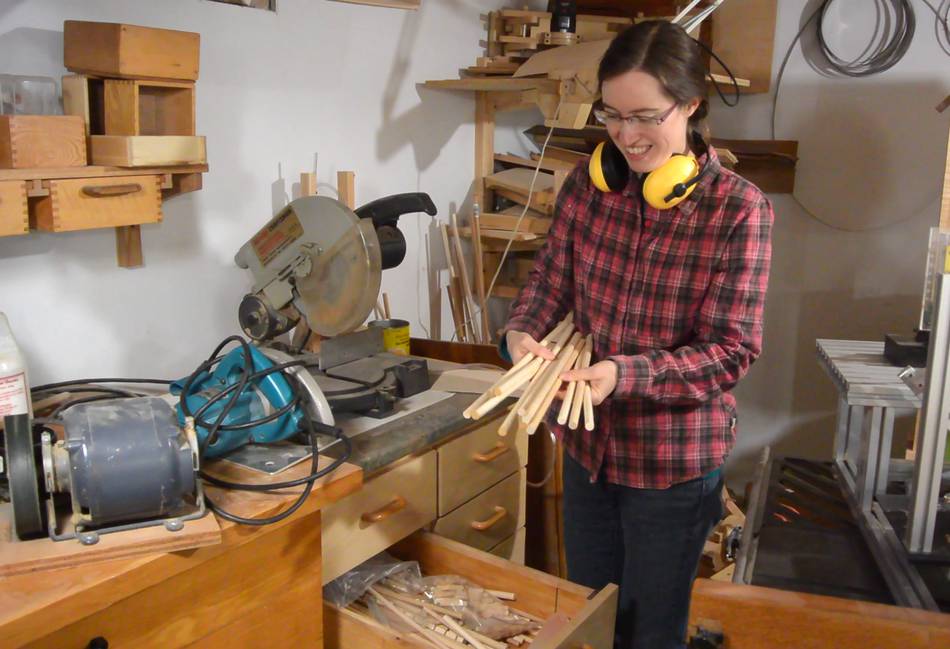 We needed a lot of 1/2" dowels. Fortunately, I had a lot of these on hand
from my last dowel making experiments
We needed a lot of 1/2" dowels. Fortunately, I had a lot of these on hand
from my last dowel making experiments
 The drill jig was also handy as a guide for cutting the dowels at an angle.
 Sticking a few dowels into the test piece. Seems to work ok.
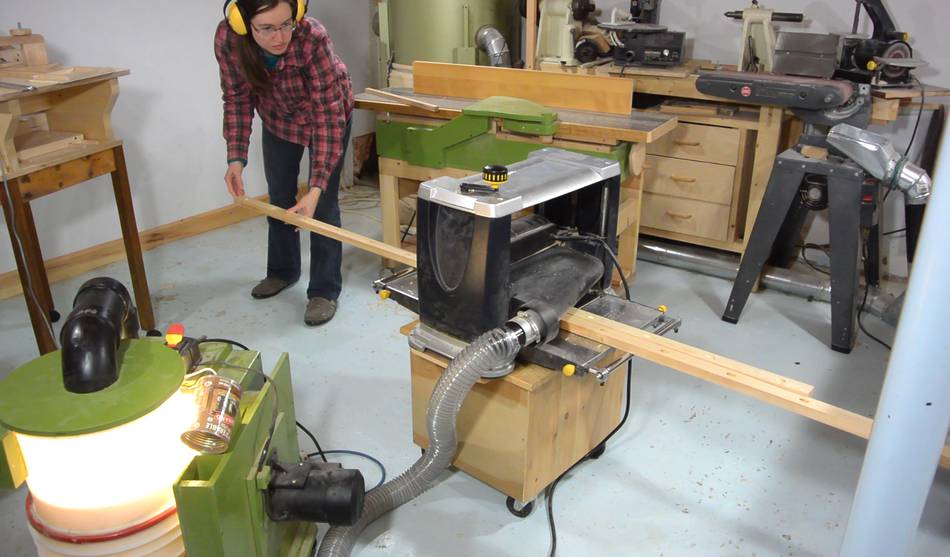
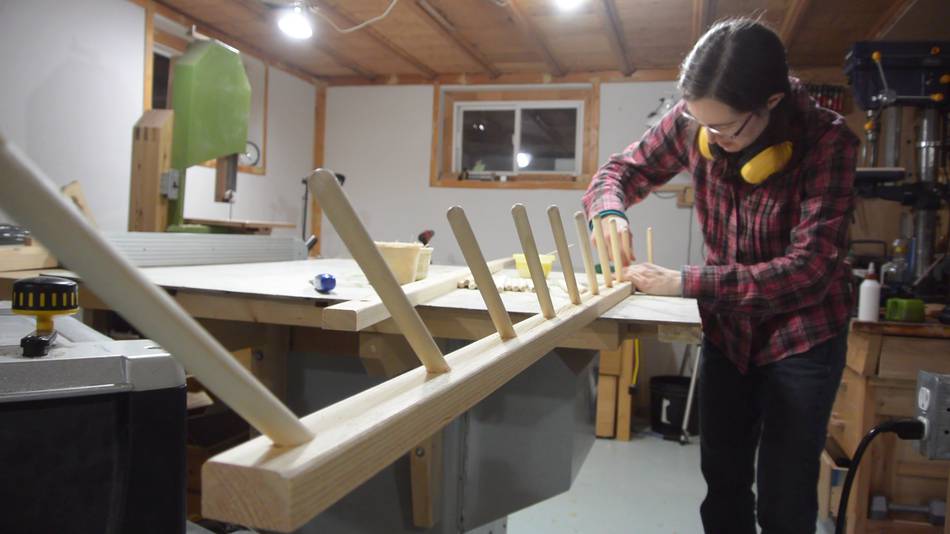
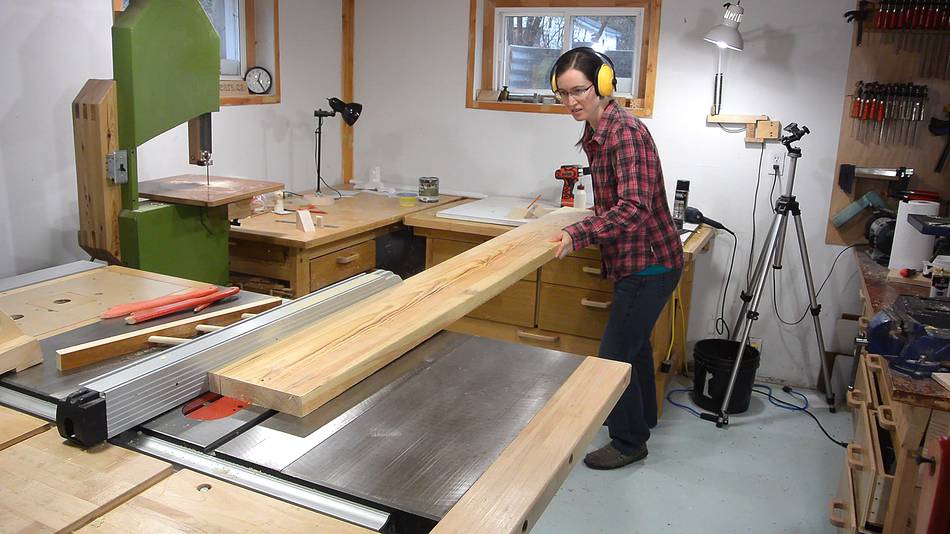 Now ripping two long strips of wood, as long as the door frame is high,
off a 2x10 piece of lumber.
Now ripping two long strips of wood, as long as the door frame is high,
off a 2x10 piece of lumber.
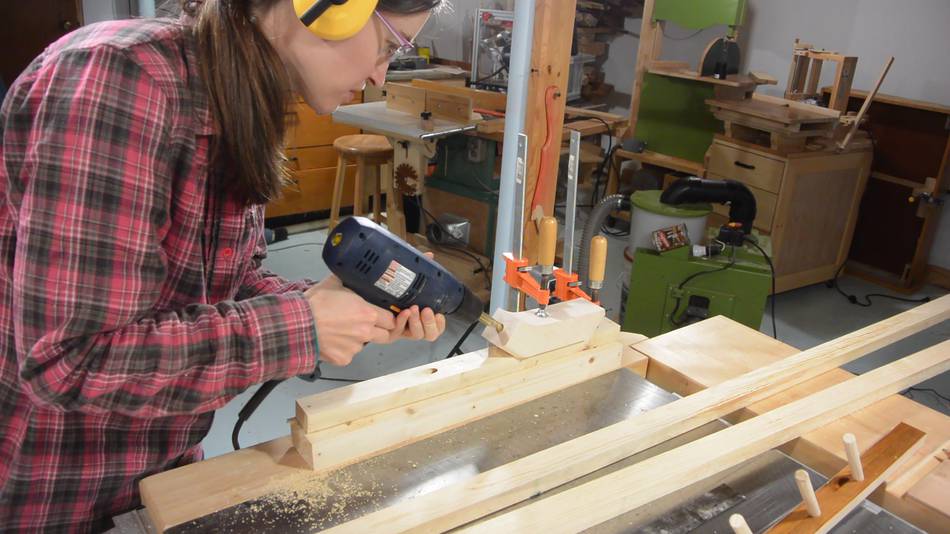
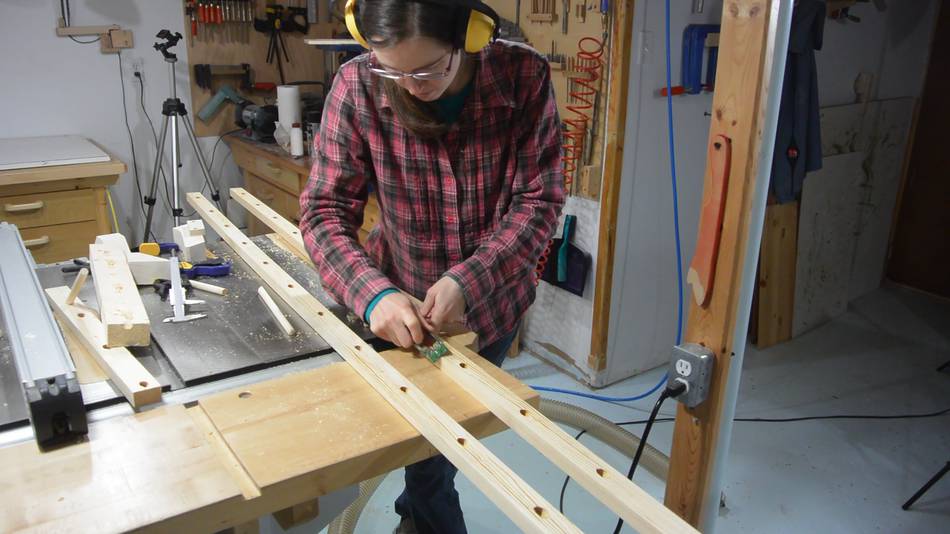
 Clamping the jig onto the end of the board, and the board on the table saw.
Rachel struggled a bit with getting this to work. A second clamp to clamp
the workpiece down before clamping the jig on solved that problem.
Clamping the jig onto the end of the board, and the board on the table saw.
Rachel struggled a bit with getting this to work. A second clamp to clamp
the workpiece down before clamping the jig on solved that problem.
Makes me appreciate some of the difficulties that beginner woodworkers encounter. I would have just grabbed a second clamp without realizing there could even be a problem.
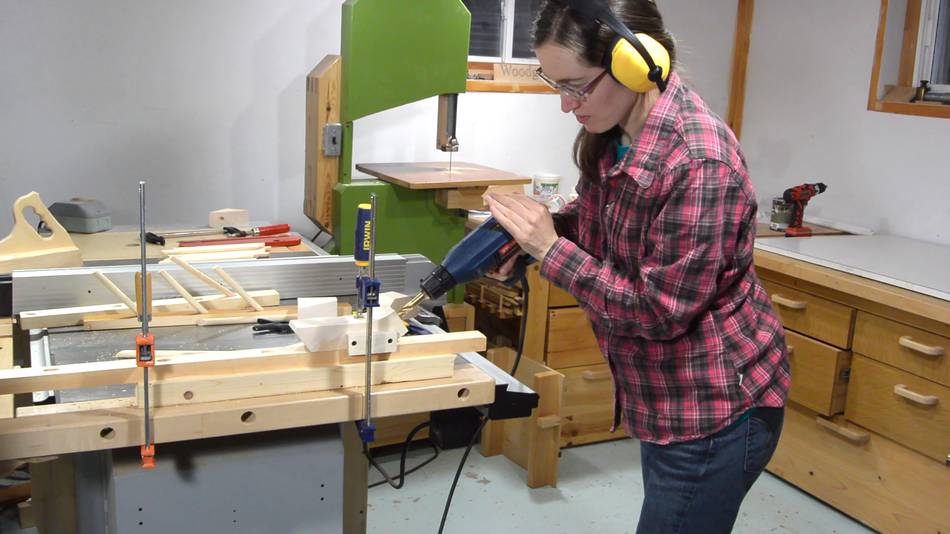 Lots of holes to drill. Including test holes, we used the jig 25 times.
The jig was a bit worn after that, but we also made it out of a relatively
soft piece of maple. With harder wood it would have been more durable.
Lots of holes to drill. Including test holes, we used the jig 25 times.
The jig was a bit worn after that, but we also made it out of a relatively
soft piece of maple. With harder wood it would have been more durable.
 After all that drilling, planing the pieces of wood down to final thickness.
That way, any tear-out from drilling gets planed off.
After all that drilling, planing the pieces of wood down to final thickness.
That way, any tear-out from drilling gets planed off.
 After planing, the edges were very square and sharp. Here
Rachel is adding a roundover
with a small hand plane.
After planing, the edges were very square and sharp. Here
Rachel is adding a roundover
with a small hand plane.
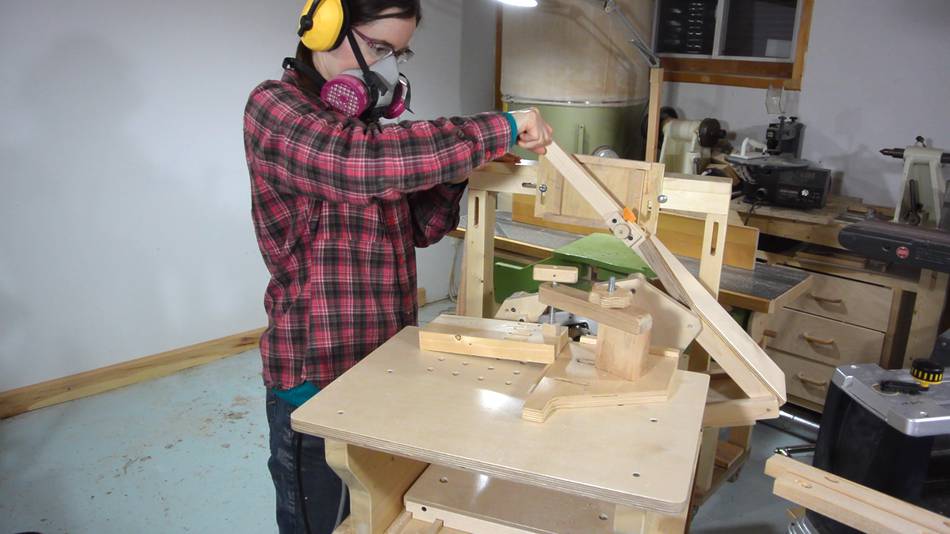
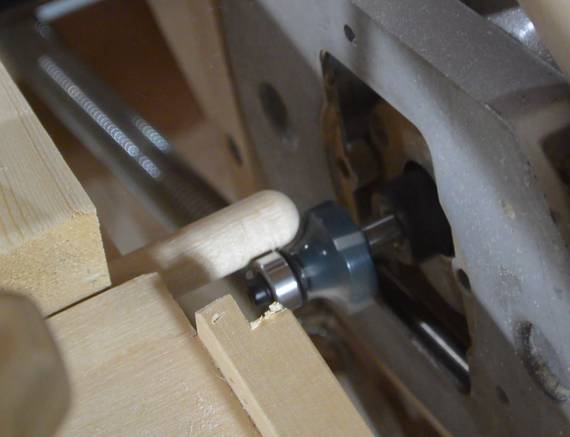 The ends of the dowels needed to be rounded a bit. A 1/4" roundover bit
in the pantorouter cut a hemispherical end on the dowels.
No template in the pantorouter, because the guide bearing on the router
bit runs along the dowel.
The ends of the dowels needed to be rounded a bit. A 1/4" roundover bit
in the pantorouter cut a hemispherical end on the dowels.
No template in the pantorouter, because the guide bearing on the router
bit runs along the dowel.
 Now gluing in the dowels, applying lots of glue inside the hole but just a
little to the dowels. That way, less glue gets scraped off as the dowel
is inserted.
Now gluing in the dowels, applying lots of glue inside the hole but just a
little to the dowels. That way, less glue gets scraped off as the dowel
is inserted.
 Then three coats of varnish, with light sanding in between.
I don't normally take pictures of the varnishing, but with Rachel doing it, I had my hands clean and dry to use the camera.
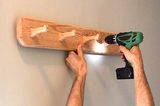
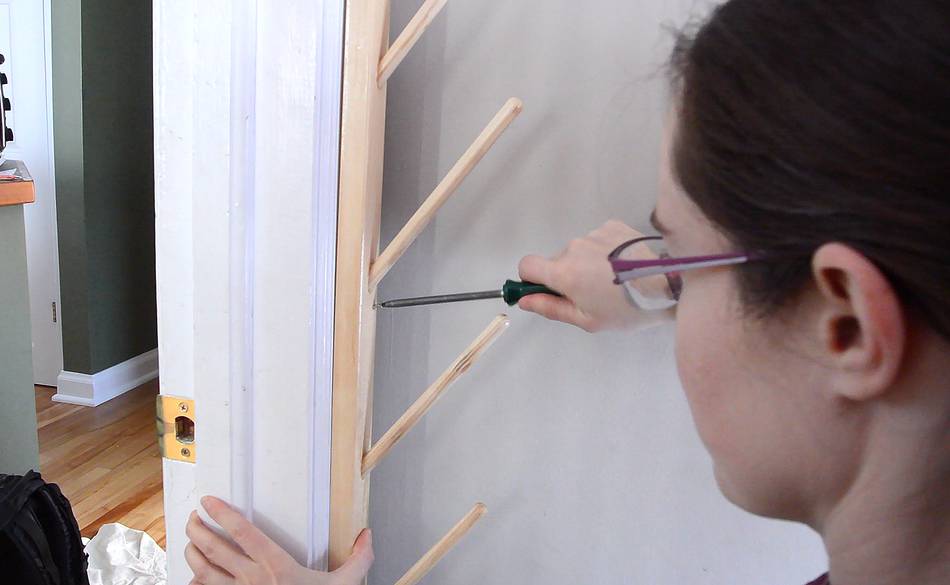 The rails are screwed to either side of the door frame with just
three screws, top, middle and bottom.
The rails are screwed to either side of the door frame with just
three screws, top, middle and bottom.
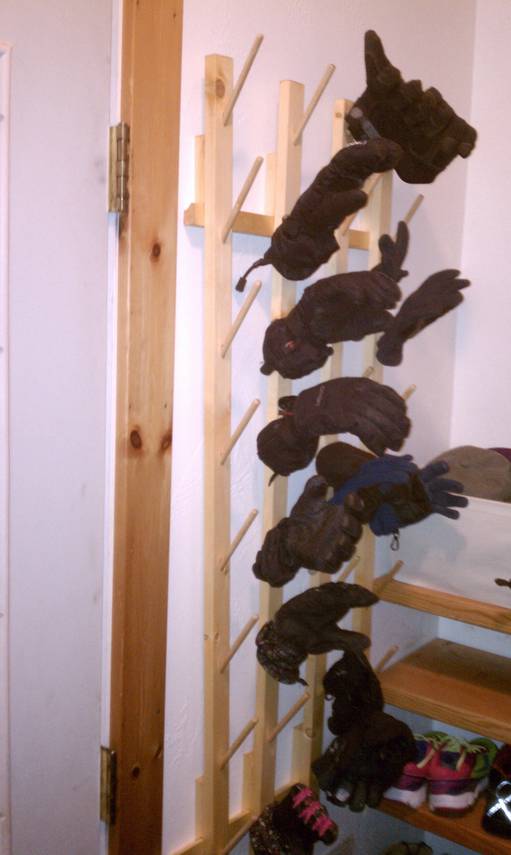
 And finally putting all the mitts and such on them. So nice to be
able to clear off the counter space.
And finally putting all the mitts and such on them. So nice to be
able to clear off the counter space.
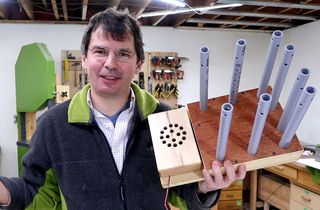
A few month after publishing this, I received an email from Jon Laflin about
his mitt hooks. I'm usually not a fan of french cleats, because the stuff you
put on them never moves anyway, but for how Jon is using these, french cleats
make a lot of sense. Cool idea!
 Jon writes:
Hi Matthias,
I had built a glove and hat drying rack similar to yours, but that was in a previous house I lived in. Seeing the hooks Rachel made inspired me to make a new one. The basic concept is the same, as far as the wooden "hooks" for hanging gloves, however the biggest difference is noticeable in the pictures.
I made 4 "sections" - each one with 8 hooks. My wife and I have 6 kids, and it seems like we always have lots of wet gloves needing a dry! Anyway, they are attached with a french cleat (of sorts). This way, the kiddos can set each section by the fireplace to get the gloves dry quickly - but then put it back on the wall cleats so the living rooms stays clean. Kids are happy for dry gloves, Mom is happy for a clean living room!
The other reason I used a "cleat" is so that there is more airflow behind the rack, and no hats or gloves are sitting directly against the wall. I have discovered that even without setting this by the fire, everything dries very quickly.
Jon Laflin
 Mitten dryer (video)
 Making coat hooks
 Frame for weaving
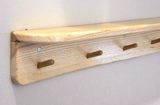 Coat hooks and shelf
 Installing a boot nook
 Paper towel holder
 Furnace vent grill
 Porch repairs
 Hooks for hanging coat