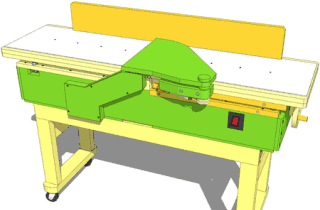
My homemade jointer uses a parallelogram
mechanism to raise and lower the infeed table. This article is about
making that mechanism.
A key to making the jointer parallelogram mechanism work well is making
the parts accurately. When I initially built the jointer, it all went
together well. But I thought of a better method to ensure accuracy,
so I built the parallelogram mechanism again to try the method
and document it better.
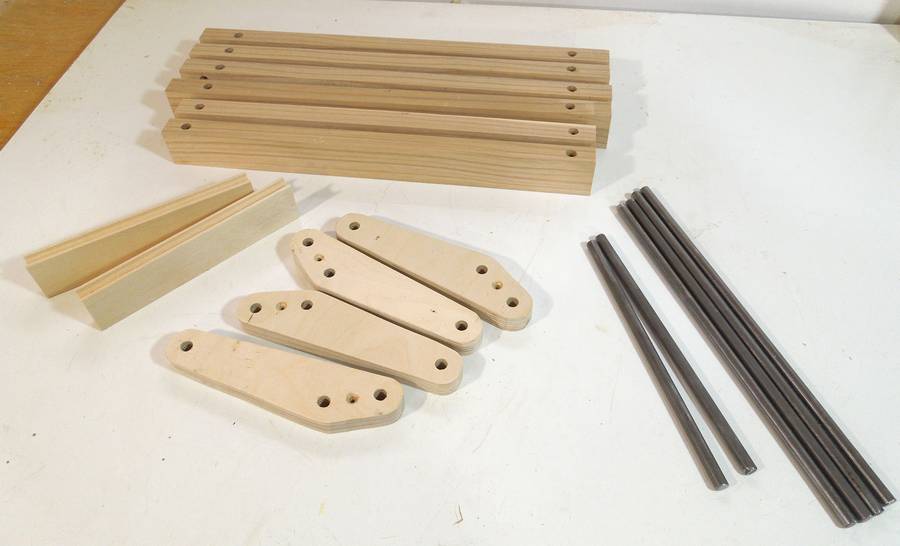
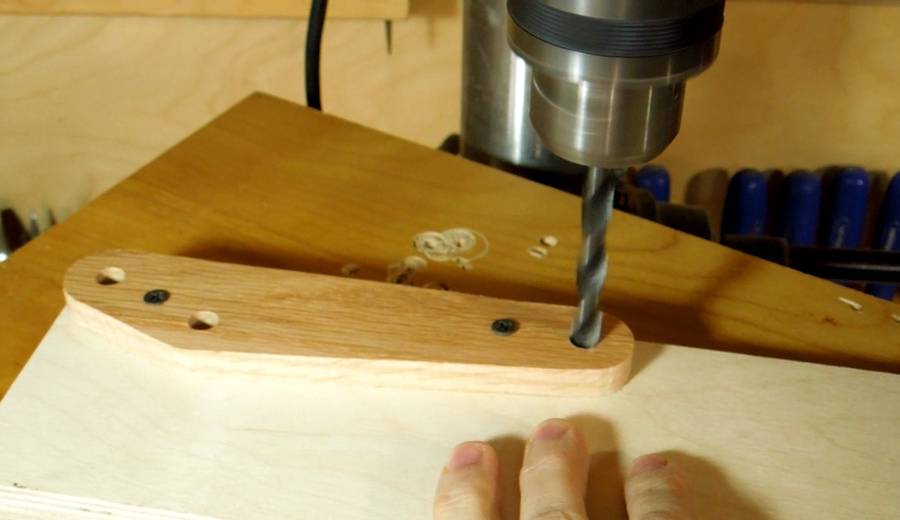
I made a pattern for the links out of a scrap of oak hardwood
and screwed it down onto a piece of Baltic birch. I then drilled
through the holes in the pattern, traced the outline, and
cut it out on the bandsaw.
I repeated those steps four times to make four identical links.
For an alignment check, I put three rods through all of the links.
The links don't need to be quite this consistent, but it was a good test.
Consistency between the links is more important than absolute accuracy.
If the holes are 1 mm out of place, as long as all the links have
the hole in the same place it doesn't matter that much.
I made a similar drill guide for the rails, to ensure that the holes are
all drilled consistently the same distance apart and the same distance
from either edge.
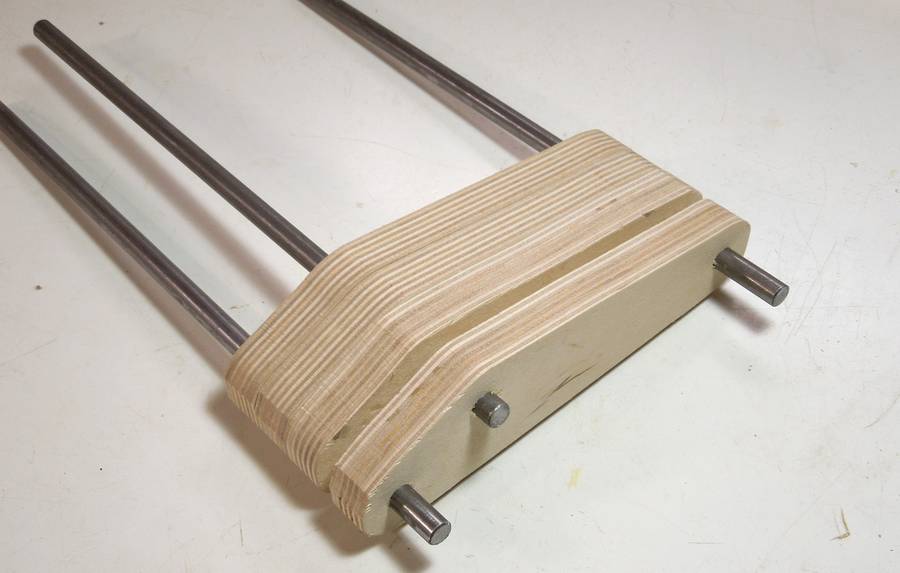
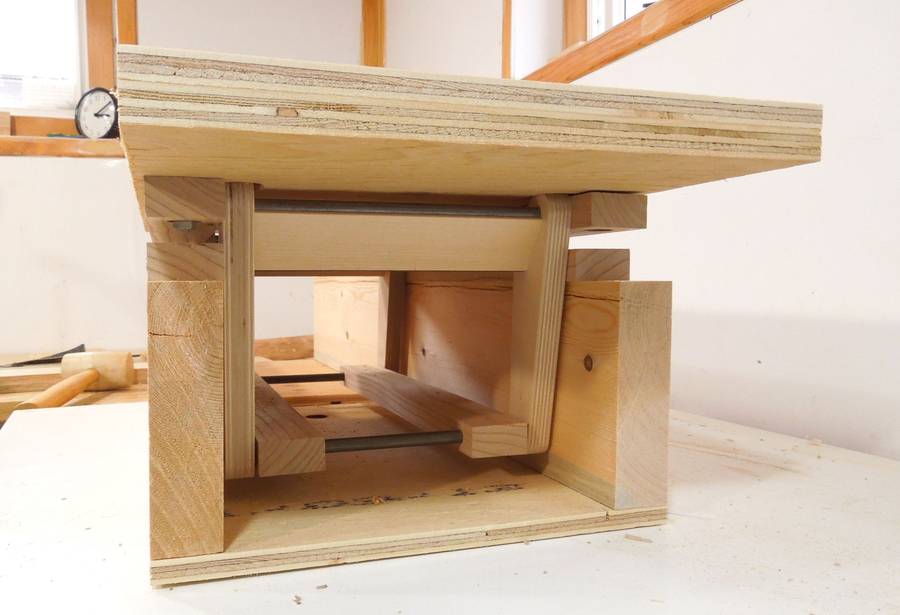
Here's all the parts of the parallelograms, ready for assembly.
A spacer slides between the two shafts. The links are screwed to this
spacer from both sides.
I made the slots in the spacer with a series of cuts on the table saw.
I could have cut that with a router, but it wasn't worth the trouble
to set it up.
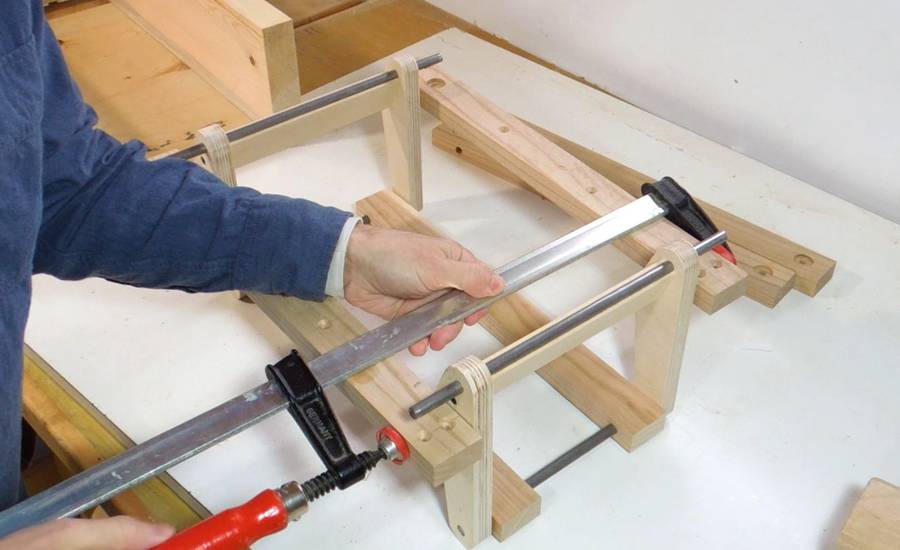
Assembling the parallelogram.
A clamp comes in handy for squeezing the wooden pieces and shafts together.
If you have slight misalignment, it may take more force to get it together.
But as long as you can still easily tilt the links once it's put
together, it's ok.
I screwed some pieces of threaded rod into slightly undersized holes
in the table. Note the poor quality of the plywood I'm using. This is
just for demonstrating the technique. For an actual jointer, I would be
using Baltic birch plywood. Baltic birch plywood is made of thin
plys of hardwood throughout.
Here I'm placing the table down on the parallelogram.
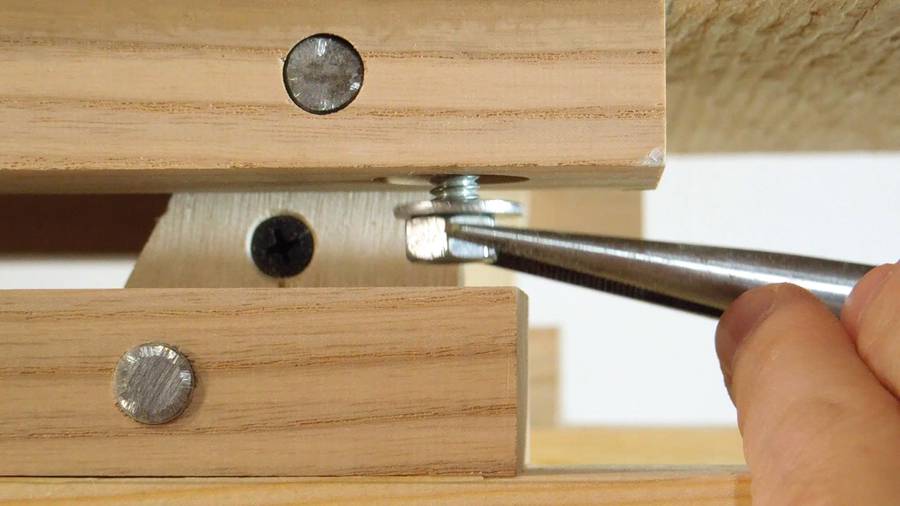
Getting a nut onto the end of the threaded rod was much easier than the method
I used when I built my jointer. Part of the reason I built the parallelogram
again was to check that this method would work well for mounting the table.
Looking into the infeed end of the jointer frame.
This is as far as I decided to take this construction, as it was only for the
sake of verifying my improved construction method and taking pictures and video.
This one is also a bit narrower than the jointer I built - my steel rods
were too short.
The parallelogram mechanism is more complicated than an inclined plane for adjusting the infeed table,
but I think it offers a lot of advantages.
Years later (in 2018) I made a video showing how the parallelogram adjusts for smooth
and precise adjustments, even while sitting on the jointer.
 A key to making the jointer parallelogram mechanism work well is making
the parts accurately. When I initially built the jointer, it all went
together well. But I thought of a better method to ensure accuracy,
so I built the parallelogram mechanism again to try the method
and document it better.
A key to making the jointer parallelogram mechanism work well is making
the parts accurately. When I initially built the jointer, it all went
together well. But I thought of a better method to ensure accuracy,
so I built the parallelogram mechanism again to try the method
and document it better.