Squaring twisted lumber on the jointer
A nice thing about owning a jointer is being able to deal with crooked and twisted lumber. As long as you don't need the full thikness of the wood, a piece can be planed down to just a straight portion of it.
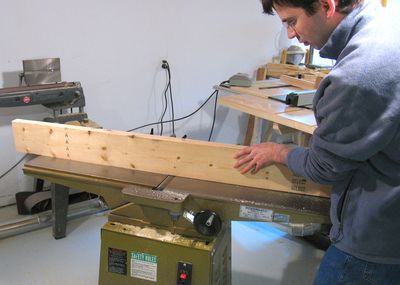
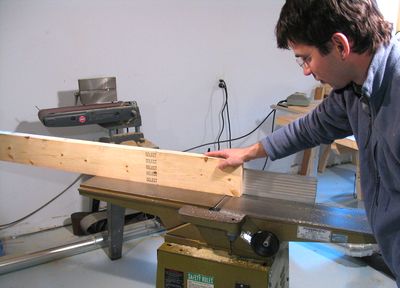
 Here is an example piece of twisted and slightly crooked 2x6. Most lumber is more
straight than this, but for this article, I picked the crookedest piece I had
lying around.
Here is an example piece of twisted and slightly crooked 2x6. Most lumber is more
straight than this, but for this article, I picked the crookedest piece I had
lying around.
Tists and bends are much easier to plane out from shorter pieces. For example, if you have
an 8 foot piece of lumber with a twist of 10 degrees end to end, and your project
requires cutting it into four equal sections, it's best to cut it to shorter
pieces before planing. Each piece would have on average just 2.5 degrees of twist, which
requirs much less planing to remove.
 It's best to start planing the wood so that you remove equal parts from each end.
That way, you don't get one corner that is much thinner than the rest of the piece
afterwards.
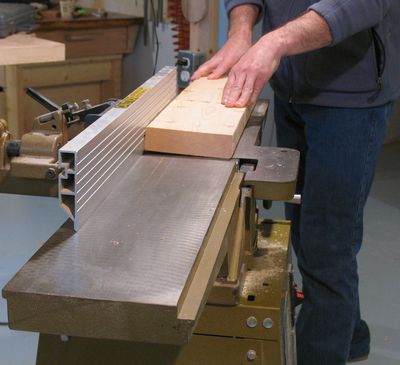
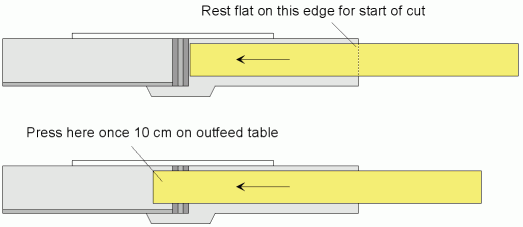
For pieces substantially longer than the bed of the jointer, it's easiest to make
sure it's flat on the edge of the infeed table when you start. Once the piece extends
a bit over the outfeed table, start pressing down on the outfeed table
to maintain the same angle as you plane through.
It's best to start planing the wood so that you remove equal parts from each end.
That way, you don't get one corner that is much thinner than the rest of the piece
afterwards.
For pieces substantially longer than the bed of the jointer, it's easiest to make
sure it's flat on the edge of the infeed table when you start. Once the piece extends
a bit over the outfeed table, start pressing down on the outfeed table
to maintain the same angle as you plane through.
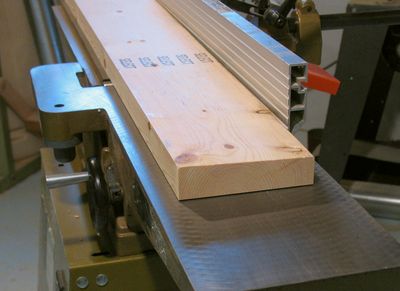
The shot below shows the just planed surface of the twisted 2x6 after the first pass over the jointer. I marked the surface with a pencil before planing to better illustrate where material was removed. As you can see, about the same amount was removed from the top left as the bottom right.

Starting twisted lumber by pressing down on the edge of the infeed table works well
for twisted lumber from about 2/3'rd the length of the infeed table to about 3x the length
of the infeed table.
For substantially twisted lumber longer than that, I actually start the twist freehand, without it resting flat on any part of the table.
For shorter pieces of lumber, I rock it back and forth on the infeed table to figure out where roughly the half way rocked point would be, and start it rocked half way.
 After flattening the one face of the wood, the other side is not flat yet.
It's best to use a thickness planer to plane the other side parallel to the just flattened
surface. If you don't have a thickness planer, you can use the same procedure on
the other side, though getting the faces exactly parallel is tricky. The other
thing you could do is use the table saw to cut it to thickness, by ripping it upright from either
side, but that makes a lot of dust.
After flattening the one face of the wood, the other side is not flat yet.
It's best to use a thickness planer to plane the other side parallel to the just flattened
surface. If you don't have a thickness planer, you can use the same procedure on
the other side, though getting the faces exactly parallel is tricky. The other
thing you could do is use the table saw to cut it to thickness, by ripping it upright from either
side, but that makes a lot of dust.
 To fully square it, also do the edges. This is much easier than the faces.
 For pieces longer than the bed of the jointer, it's important to press down on the outfeed
table towards the end of the pass. It's the outfeed table more than the infeed table
that ensures straightness of your work piece.
For pieces longer than the bed of the jointer, it's important to press down on the outfeed
table towards the end of the pass. It's the outfeed table more than the infeed table
that ensures straightness of your work piece.
Once you have straightened one edge, it's best to cut the other edge with a table saw, to
make sure your edges are parallel.
As you can see, I'm not fond of safety contraptions on the jointer. I really prefer
to have good visibility to what I am doing. And for some things, like dealing with
lumber that isn't quite flat, and positioning it carefully, push blocks can
be quite awkward. I also feel that the safety improvement of most guards is partially
offset by lack of visibility. Pushing things through a tool without seeing what's going
on actually scares me a bit. And I'm not nearly as worried about injuries from a
jointer as I am from any sort of circular saw. That said, your safety is your concern.
More Jointer articles
To my Woodworking website