Jim Harvey's box joint jig
Jim Harvey writes about his box joint jig:
"I was inspired by the box joint jigs, in particular the video at the end of woodgears.ca/box_joint/jig1.html though I thought the gear part was overkill. The premise is to use a lead screw to position the board while cutting the slots. The usual technique for finger joints is to use an indexing pin on a sliding sled. The problem with that method is any error in spacing between the pin and the blade will be cumulative, if you cut 10 pins and they are each off by 2 thousandths, the last one will be off by 20 thousandths. The lead screw should be more accurate, and it is easy to cut multiple pieces at once. This fixture will easily handle four inches of material stacked up. I used 16 Threads Per Inch rod for the screw which makes most fractional advances come out as full turns"
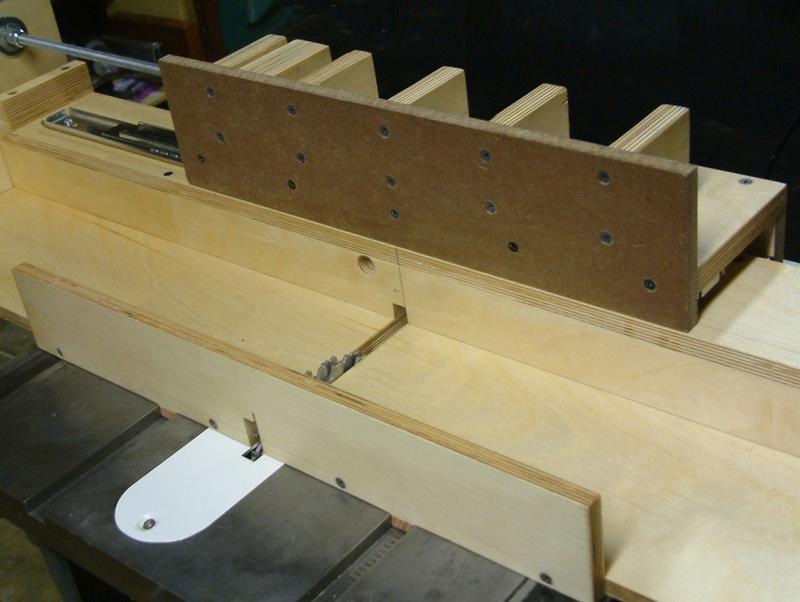
"This is the face of the carriage. Also shows the board added across the front of the sled for stiffness, and the two runners in the saw's miter gauge slots."
"It has an 18 inch capacity as is, but I did think about redoing the side gussets to handle larger pieces. If I need to, I will try that, though that 1950's Craftsman saw table is only 17" wide and would be a stability problem."

"I had those full extension drawer slides laying around so though I would try them in this project. They work well so far and greatly simplified the design. Just had to be careful that they were true with each other. The bearings are far from sealed though, it remains to be seen how well the slides last through a few years of sawdust."
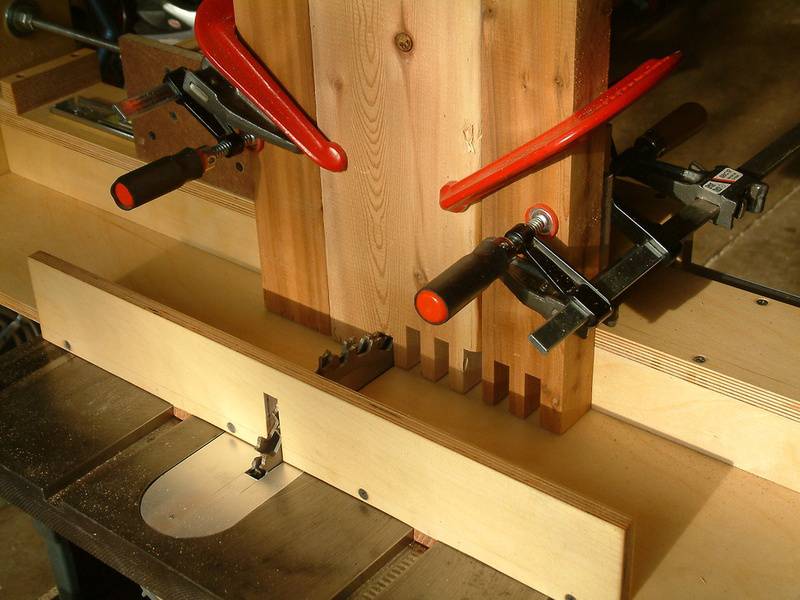
"I was pleased the jig easily handled the bulk and weight of two four foot long 2x6s which shows the stability of the drawer slides. The 3/4 horse saw motor is barely enough to chew through with a half inch dado stack."
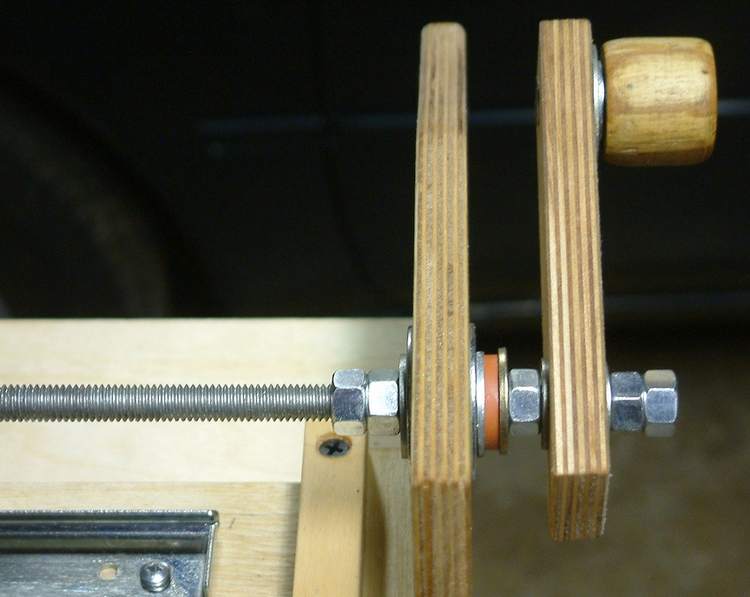
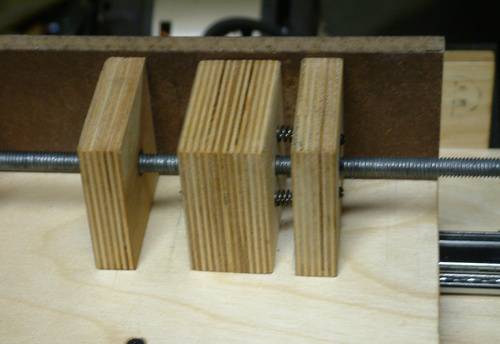
"The orange thing is a soft rubber washer of undetermined pedigree. It takes the slack out of the crank side. The carriage has a pair of spring loaded blocks to take the slop out of that end. The thin block is fixed to the carriage but the thicker block floats against the springs. I tried to describe that in the text accompanying the photos on Flickr, but it's obvious if you see it in action."
Matthias comments:
On my jig, I just decided to live with whatever slack it might have. I rely
on having enough friction in the carriage movement, but I have to keep in
mind to always approach my cuts from the same direction, so if I overshoot,
I have to back up and re-approach it from the same direction. The dovetail
I use provides enough friction, though if I was using drawer slides as
Jim is using, relying on friction to compensate for slack in the nuts and
bearing wouldn't be enough.
I asked Jim how he managed to get the fingers spacing for the sawblade
just right without being able to vary the amount of carriage movement
like I do with the different gear sets on my jig.
Jim's answer:
To tell the truth I don't remember. I think it was either a cheap 7 1/4 carbide tooth circular saw blade or one of the outer blades from the Freud dado set. Whichever one measured closer to an eighth of an inch. Then did some test cuts. My table saw arbor is a bit wobbly and unfortunately, not rebuildable which I think accounts for the slightly loose fits I'm getting.
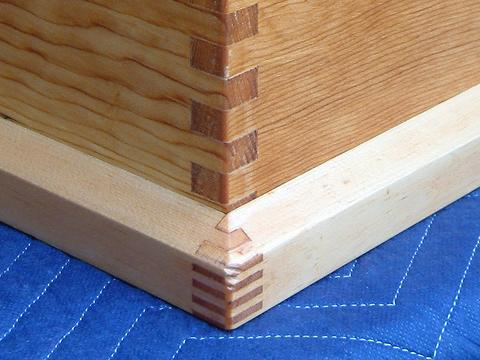
If I had to do it again I would not box joint the trim portion that was mitered. It does not look good. It was interesting fitting and gluing the bottom trim, the box joints cuts had to be very close to final dimension. Then I put glue on the joints but not the sticks and clamped the 3 pieces to the chest to set the box joints. Final attachment was glue on the assembled sticks and a few biscuits. The assembly flexed enough to snap over the biscuits.
Jim Harvey's lead screw box joint jig on flicker
See also:
Jim Harvey's Compound angled box joints
Screw advance box joint jig version 2
My first screw advance box joint jig experiment, also gear-less.
More reader projects