Circumferential & Radial Grain Solid Wood Wheels
for the Solaris clock
This article (and four videos) contributed by Ron Walters
 The idea was: How to make a solid wood clock wheel (or gear), which
would be more stable while subject to environmental changes.
The idea was: How to make a solid wood clock wheel (or gear), which
would be more stable while subject to environmental changes.
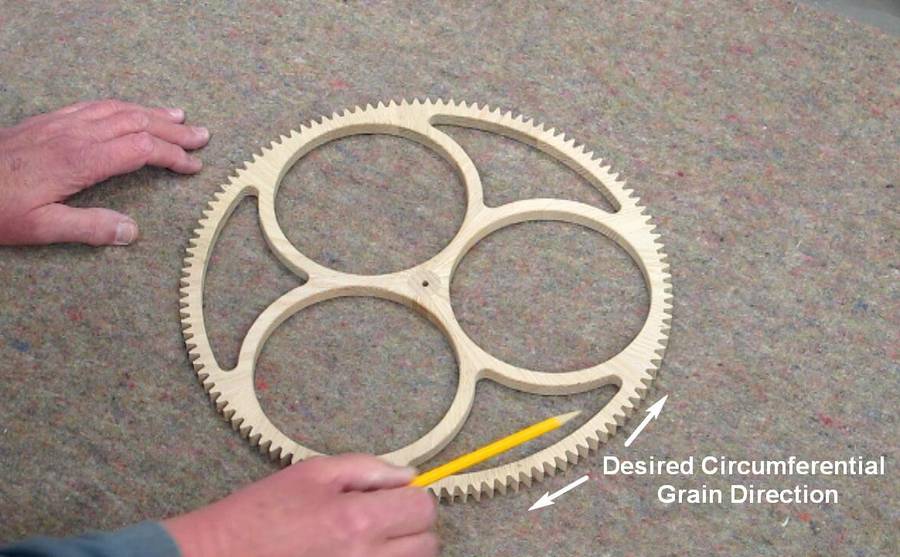
Ideally the wood grain would run circumferentially through the outside rim where the teeth are. Any diametric changes due to weather would be minimal. The radial thickness through the teeth is relatively small and any changes in this thickness would have minimal affect on the operation of the wheel.
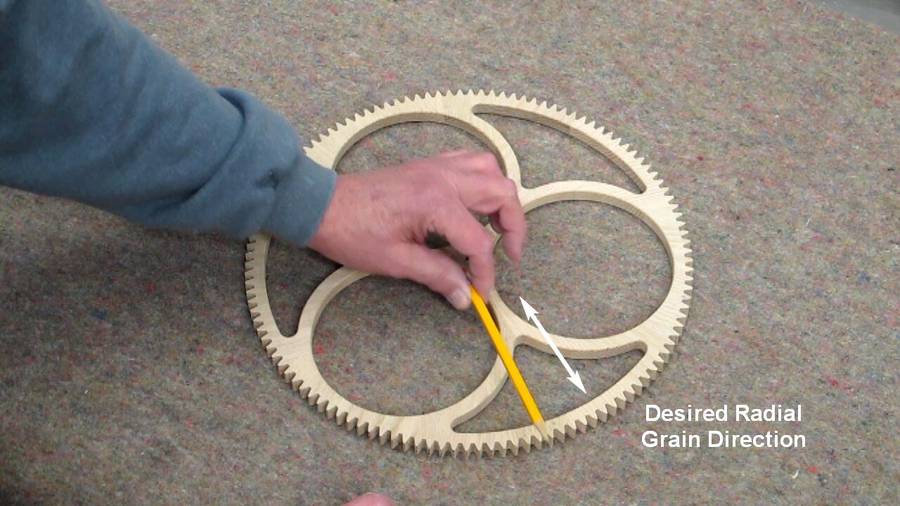 The wood grain would run radially through the spokes. The wood will not
change much in length so the spoke length will remain relatively
constant. The spokes are narrow so any change in thickness will have
minimal affect on the stability of the wheel. Clock wheels typically
have large cutout areas, which allow the wood to breath and remain
fairly consistent in terms of humidity fluctuation.
The wood grain would run radially through the spokes. The wood will not
change much in length so the spoke length will remain relatively
constant. The spokes are narrow so any change in thickness will have
minimal affect on the stability of the wheel. Clock wheels typically
have large cutout areas, which allow the wood to breath and remain
fairly consistent in terms of humidity fluctuation.
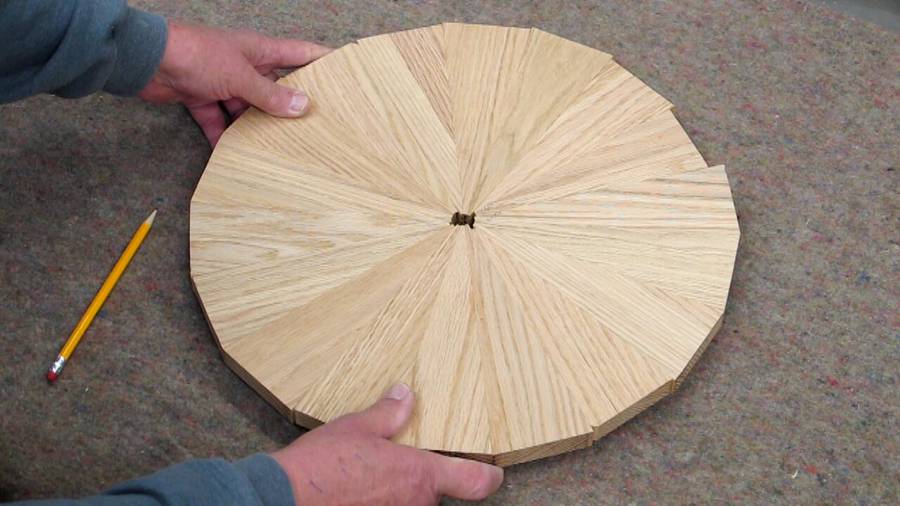
 How can we make a circumferential and radial wood grain wheel? A solid
disc made of wedges of wood with cross grain will approximate a
circumferential grain pattern. The narrower the wedges are, the closer
the approximation. Sand flat on the Drum Sander.
How can we make a circumferential and radial wood grain wheel? A solid
disc made of wedges of wood with cross grain will approximate a
circumferential grain pattern. The narrower the wedges are, the closer
the approximation. Sand flat on the Drum Sander.
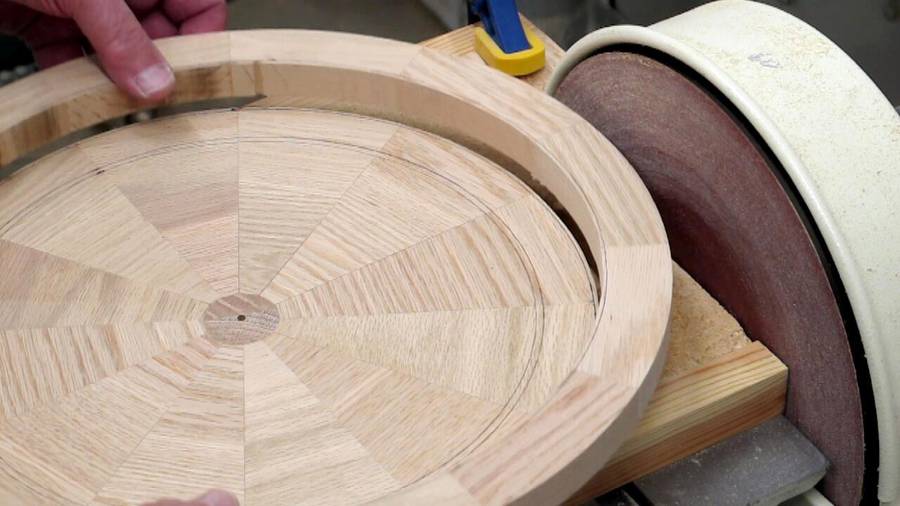
 The outside diameter can be accurately made with a Circle-Sanding Jig on
the disc sander.
The outside diameter can be accurately made with a Circle-Sanding Jig on
the disc sander.
 Cut the inside diameter smaller than the required completed rim using a
scroll saw.
Cut the inside diameter smaller than the required completed rim using a
scroll saw.
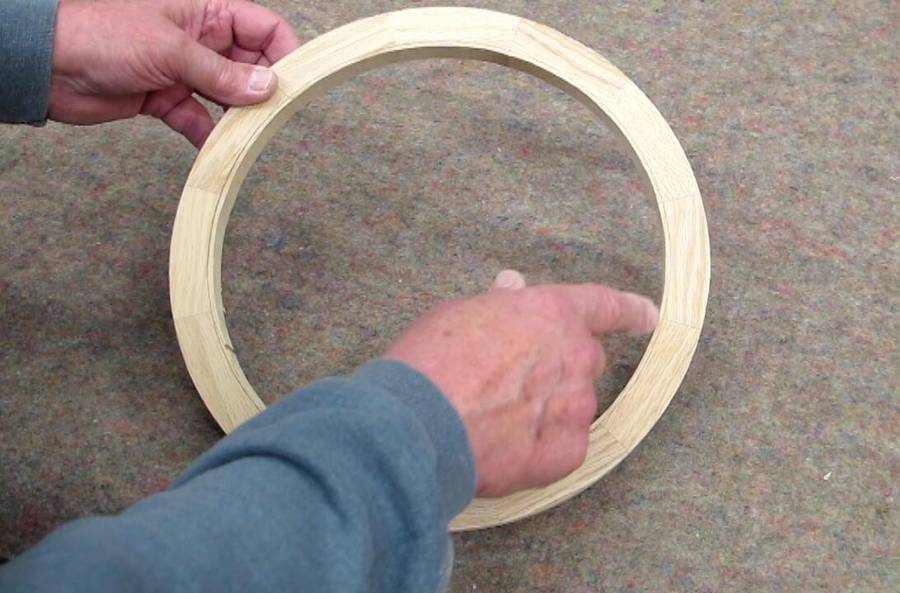 How to accurately make the inside diameter of the rim wood as perfect a
circle as possible?
How to accurately make the inside diameter of the rim wood as perfect a
circle as possible?
 I devised the "Inside Diameter Circle Sanding Jig" for my reciprocating
spindle sander.
I devised the "Inside Diameter Circle Sanding Jig" for my reciprocating
spindle sander.
 The accuracy of the outside diameter will determine the
accuracy of the inside diameter. Slowly skimming off the wood with the
reciprocating spindle sander while turning the rim wood, a nearly
perfect rim can be produced.
The accuracy of the outside diameter will determine the
accuracy of the inside diameter. Slowly skimming off the wood with the
reciprocating spindle sander while turning the rim wood, a nearly
perfect rim can be produced.
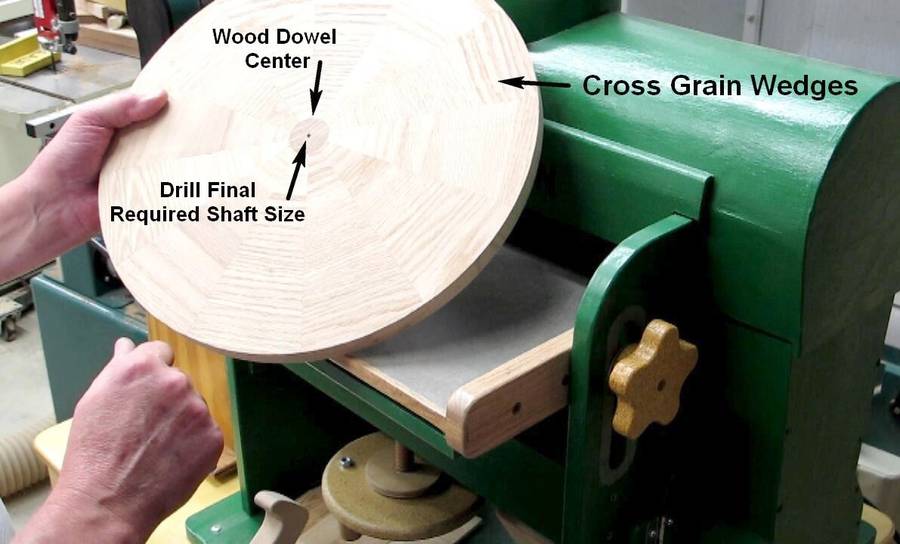
 A solid disc using wedges of wood with radial grain is made for the
inside portion of the wheel.
A solid disc using wedges of wood with radial grain is made for the
inside portion of the wheel.
 The center of the disc is drill out and a wood dowel installed. Sand
flat on the Drum Sander. The "final required diameter" is drilled dead
center in the dowel.
The center of the disc is drill out and a wood dowel installed. Sand
flat on the Drum Sander. The "final required diameter" is drilled dead
center in the dowel.
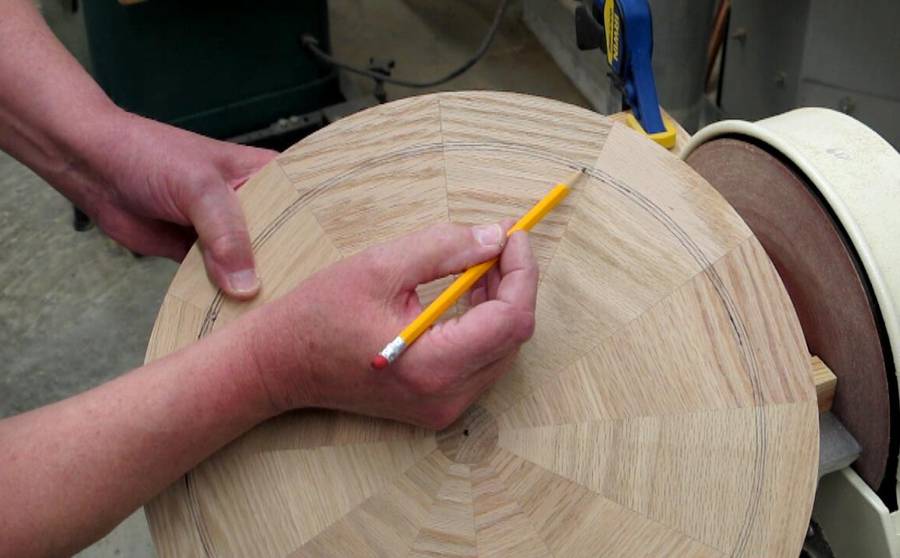
 Very carefully sand the outside diameter on the
Circle-Sanding Jig for the disc sander, and "sneak-up" on the perfect
diameter, which will just fit inside the rim, spinning freely and
allowing just enough room for the glue.
Very carefully sand the outside diameter on the
Circle-Sanding Jig for the disc sander, and "sneak-up" on the perfect
diameter, which will just fit inside the rim, spinning freely and
allowing just enough room for the glue.
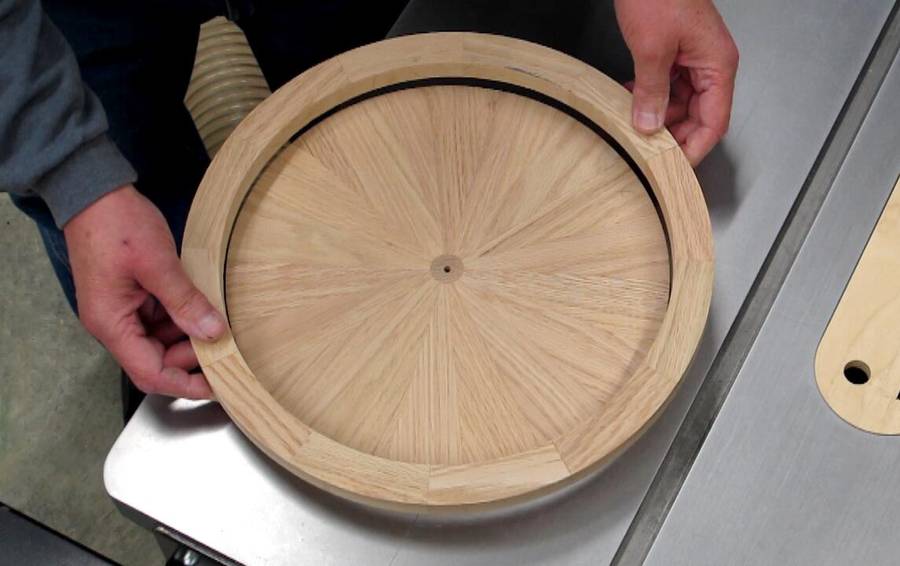
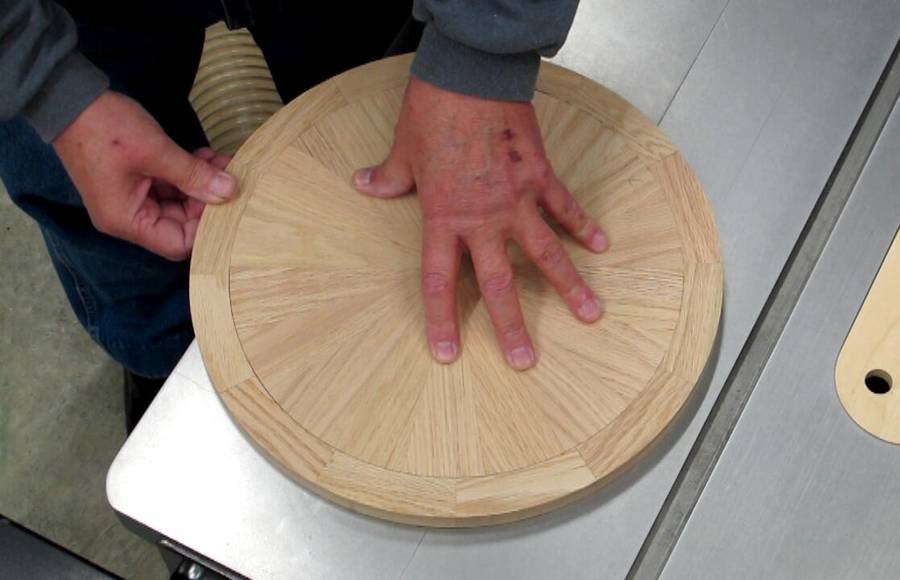
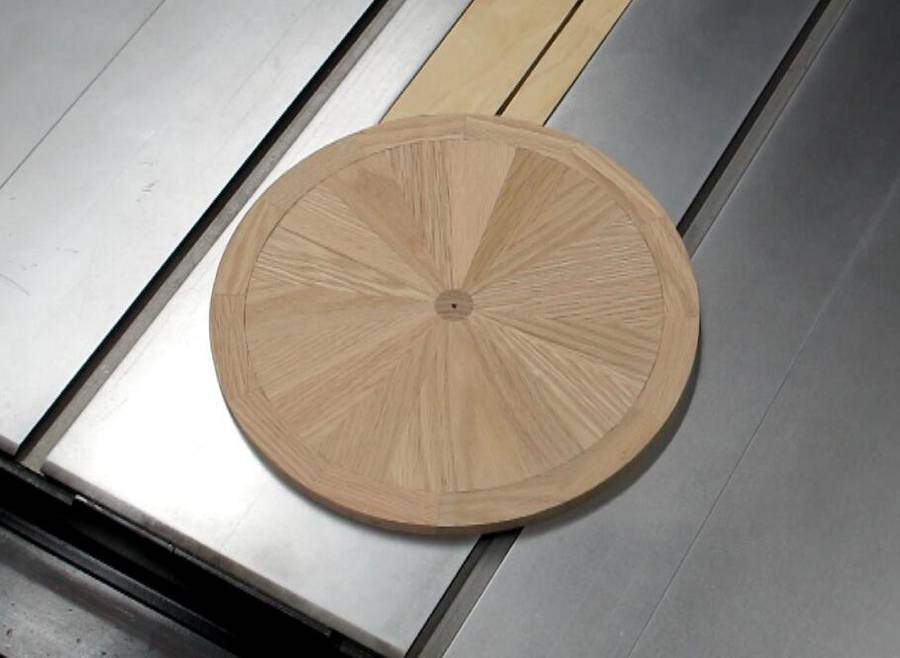 After joining the rim and the internal disc, the Drum Sander is used to
obtain the final thickness.
After joining the rim and the internal disc, the Drum Sander is used to
obtain the final thickness.
I feel it is important to immediately glue the pattern to the blank and proceed to cut out all of internal areas to allow the wood to breath. I believe this will help stabilize the wheel and avoid dimensional changes.
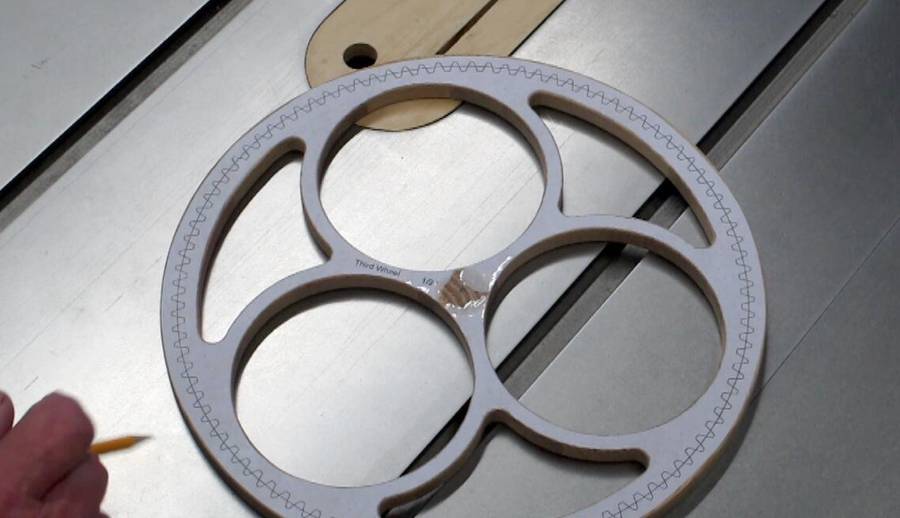
 The paper pattern needs to be precisely aligned with the wheel blank. I
have previously experienced problems doing this, so I was looking for a
better way.
The paper pattern needs to be precisely aligned with the wheel blank. I
have previously experienced problems doing this, so I was looking for a
better way.
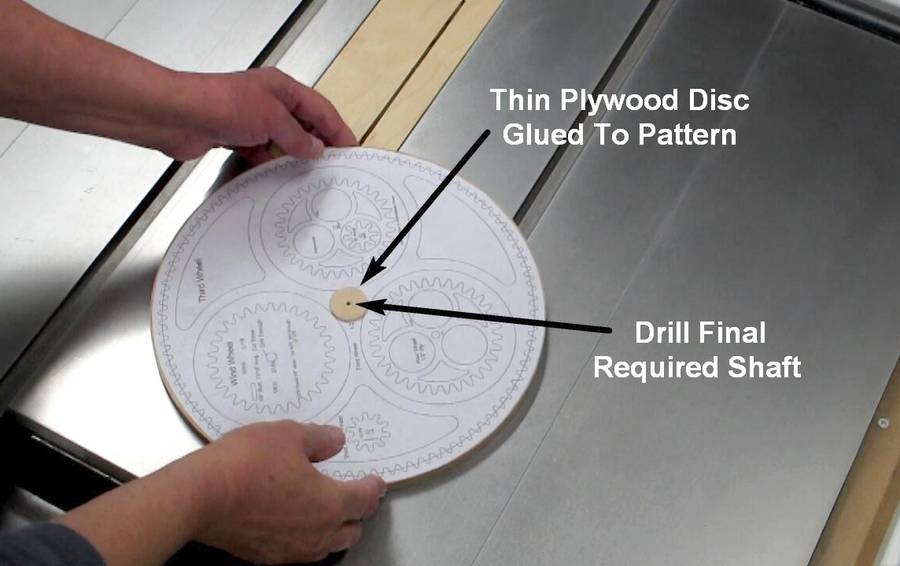
Using a pin, I marked the center of the pattern. A thin plywood disc was glued to the center of the pattern. When the glue is dry the center of the pattern is drilled from the backside to the same diameter as the wood blank, using the pin hole to locate the exact center.
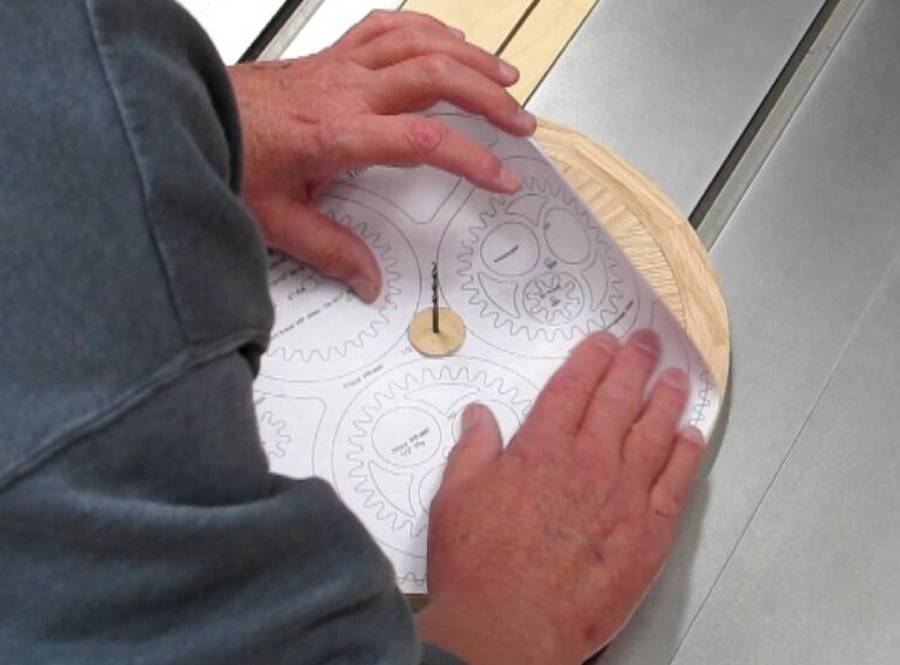 After spraying adhesive on the back of the pattern, a drill bit is used
to precisely align the pattern with the wood blank.
After spraying adhesive on the back of the pattern, a drill bit is used
to precisely align the pattern with the wood blank.
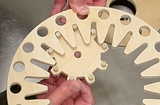
 Immediately cut out the internal areas of the wheel using a scroll saw,
sand the edges and round over the corners on the router table.
Immediately cut out the internal areas of the wheel using a scroll saw,
sand the edges and round over the corners on the router table.
There is a lot of work involved cutting and finishing the teeth. I first allowed the blank to sit for several weeks to see if there were any indications of a problem with the blank before working on the teeth.
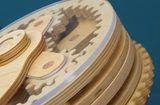
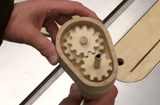
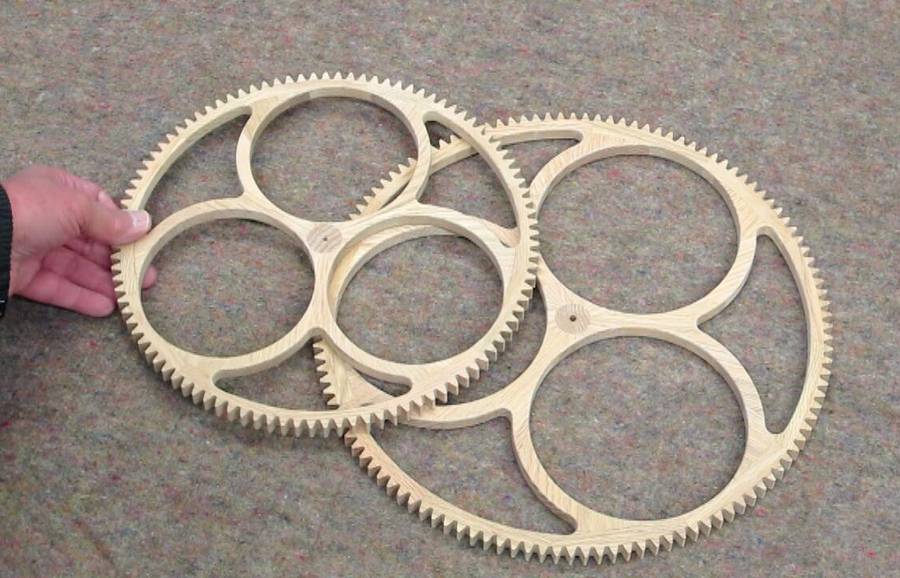 Six weeks later, the completed center and intermediate C & R wheels for
the Solaris Clock.
The two large clock wheels cut using this C&R Grain method (and the
previous two using only segmented wood) have all remained stable since I
cut them out.
Six weeks later, the completed center and intermediate C & R wheels for
the Solaris Clock.
The two large clock wheels cut using this C&R Grain method (and the
previous two using only segmented wood) have all remained stable since I
cut them out.
Other projects by Ronald Walters:
Various clock wheel building experiments |
Cutting wood gear and clock wheel teeth |
Pin gear experiment |
Planetary gear drive |
 Motorized clock winder
|