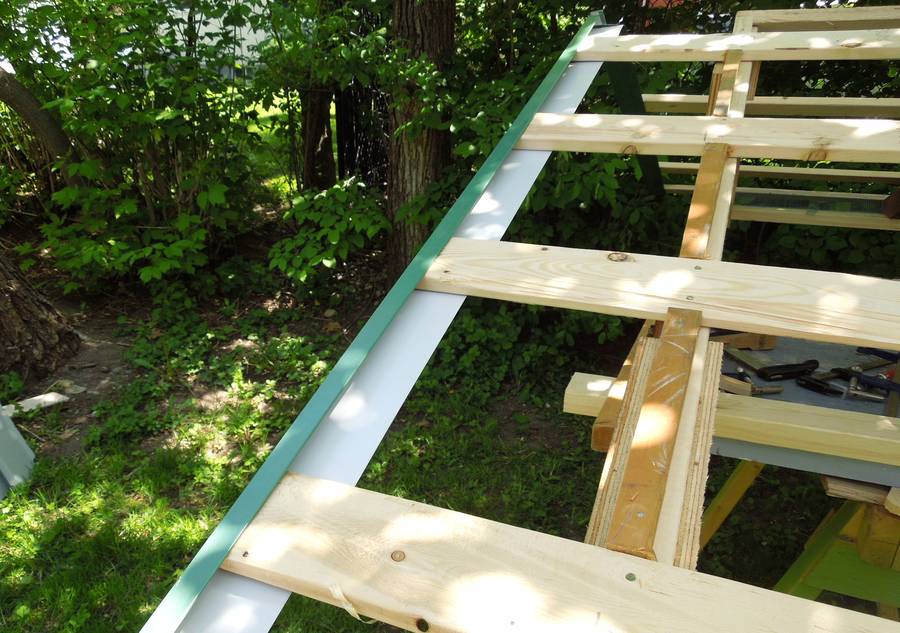
 I put some J-trim over the ends of the strapping, just to make it look nicer.
The J-trim is actually meant for covering up the edges of the sheet metal
when it's used as siding around windows, but it works pretty well for this too.
I put some J-trim over the ends of the strapping, just to make it look nicer.
The J-trim is actually meant for covering up the edges of the sheet metal
when it's used as siding around windows, but it works pretty well for this too.
I put some J-trim over the ends of the strapping, just to make it look nicer.
The J-trim is actually meant for covering up the edges of the sheet metal
when it's used as siding around windows, but it works pretty well for this too.
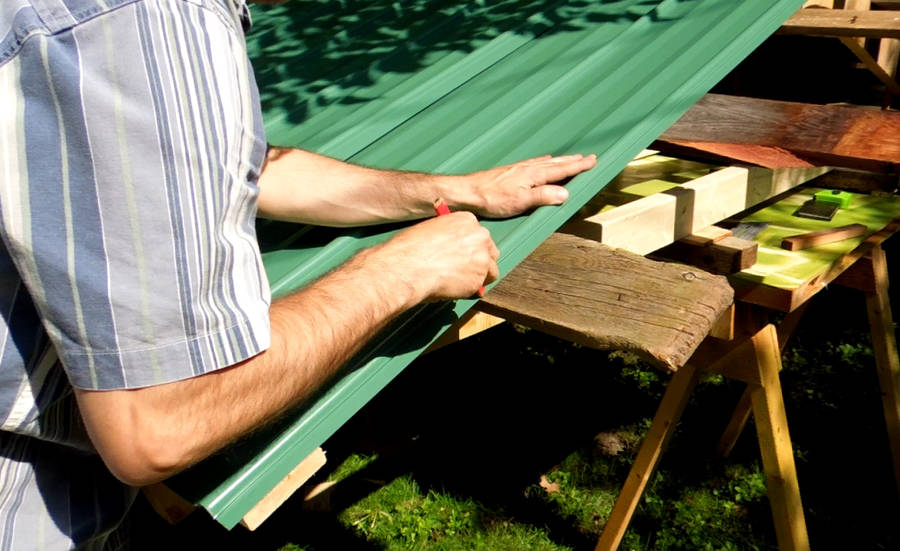
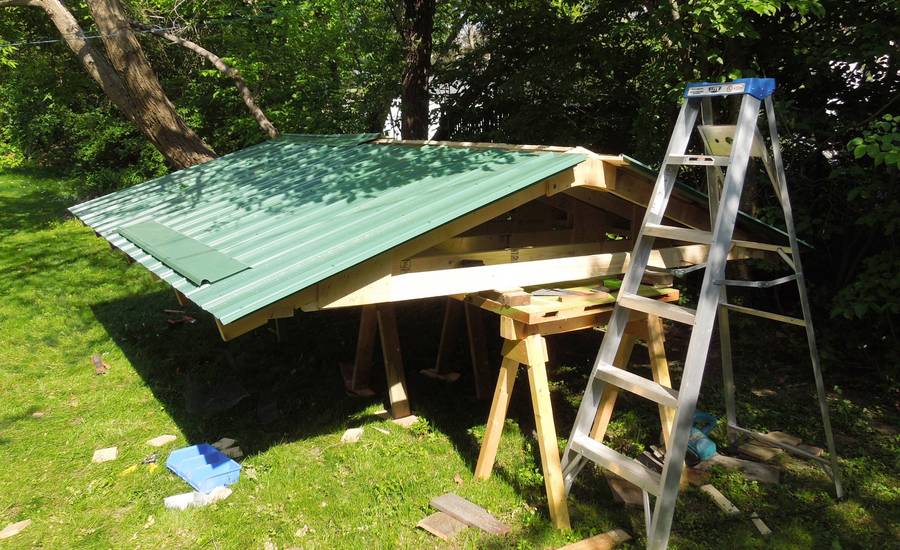
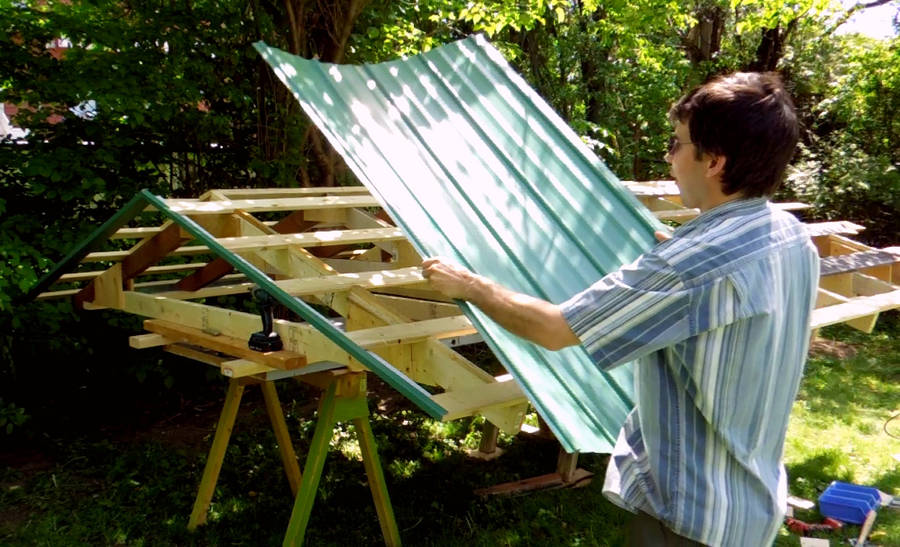 First sheet goes on. This is so much easier to do with the
roof on sawhorses.
No scaffold or ladder needed.
First sheet goes on. This is so much easier to do with the
roof on sawhorses.
No scaffold or ladder needed.
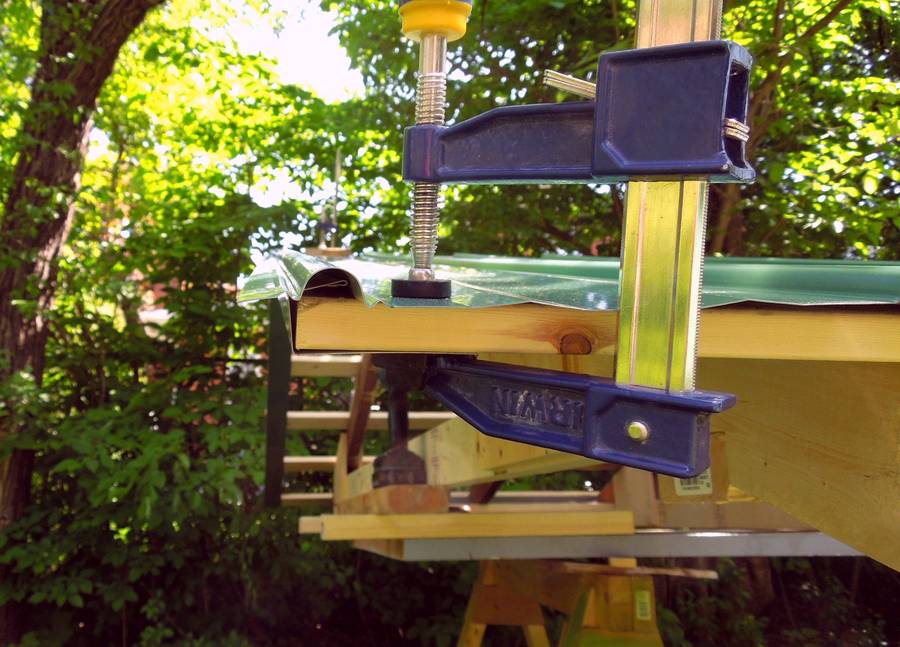 I lined up the first sheet so that the ridge is just over the ends of the
strapping. That leaves a bit of overhang to serve as a drip edge. I make sure
the overhanging edge curves down a little.
I lined up the first sheet so that the ridge is just over the ends of the
strapping. That leaves a bit of overhang to serve as a drip edge. I make sure
the overhanging edge curves down a little.
I have always started it this way. Just did a search on the net to see what the "proper" way is, but most of the stuff on the net is remarkably useless in this respect. It seems most of the instructions are written by people who have never done any roofing, so there isn't even a mention of what to do around the edges.
That's not to say the way I do it is the best way. There are different types of trim available for every edge of a roof, but for a backyard shed, it's not that critical.
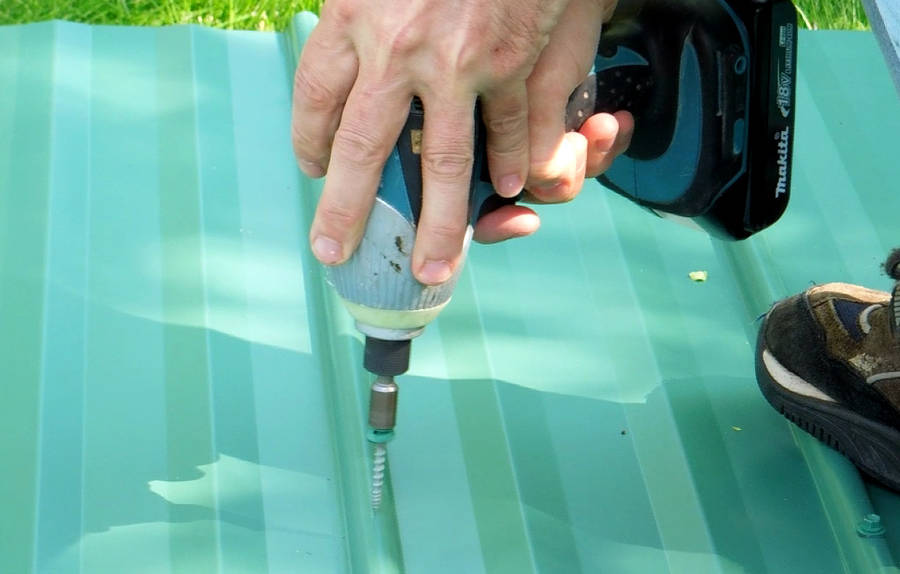 The screws have a very pointy end to them that self-taps into the metal,
although it can take quite a few turns for them to make it in, and sometimes
I slip with the drill and put dent in the roof.
The screws have a very pointy end to them that self-taps into the metal,
although it can take quite a few turns for them to make it in, and sometimes
I slip with the drill and put dent in the roof.
For the non self-tapping screws, the way I always started them was to drive them through the metal by whacking them in with a hammer, then screw it the rest of the way in.
When my dad roofed his workshop, he just dove the screws in all the way with a hammer, without screwing them (I was in school at the time). I thought that was a bad idea, but then I experimented with how hard the screws were to pull out of the wood with a claw hammer, and the hammered in ones held almost as well as the screwed in ones.
 The screws on the ribs vs. flats debate
I put the screws on the ribs. It used to always
be done with the screws (or nails, way back) on the ribs, but nowadays, manufacturers
often recommend putting the screws in the flat part next to the ribs.
I think the rationale for putting the screws on the flat part is that the expanding and contracting of the roof won't work the screws loose as much, and the rubber washer on the screws should keep the water that's flowing down from going through the screw holes. Another advantage of putting the screws next to the ribs is that if you overdrive the screws, you don't end up crushing the ribs.
I don't have that much faith in the washers staying tight either way, so I'd rather have the screws on the ribs. Water flows off the ribs on either side, and flows down the flat parts of the roof. A hole in a rib will only let in rain that falls directly on the hole or immediately above it. A hole in the flat part of the roof will potentially let in all the water that falls between the hole and the top of the roof.
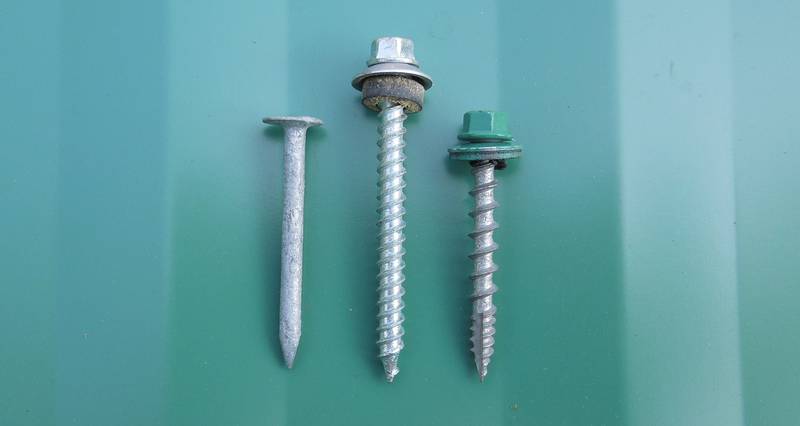 Far left, a roofing nail, similar to the ones that used to be used with sheet metal
roofing, although these were typically longer and had some deformable washer on them,
probably made from lead.
Far left, a roofing nail, similar to the ones that used to be used with sheet metal
roofing, although these were typically longer and had some deformable washer on them,
probably made from lead.
Middle, a sheet metal roofing screw, without the self tap, and a thicker washer (good for screwing on the ribs)
At right, the screws that came with my roof. These are self tapping, though the self tap doesn't work that well. It has a much thinner washer, probably because it's meant to go on the flat part next to the ribs. I screwed them into the ribs nevertheless.
 Way back, with aluminium roofing, and roofing nails instead of screws, the
thermal expansion and contraction of the aluminium would eventually
work the nails loose. Ideally, you'd go back on the roof every decade
or so and tap the nails back in.
With the nails coming loose, the wind eventually peels the aluminium roofing off
old barns. If it wasn't for the nails coming loose, aluminium roofing would last
practically forever. Unpainted galvanized sheet metal roofing can eventually
rust once the zinc coating wears off, but it should certainly last more than
50 years as well.
Way back, with aluminium roofing, and roofing nails instead of screws, the
thermal expansion and contraction of the aluminium would eventually
work the nails loose. Ideally, you'd go back on the roof every decade
or so and tap the nails back in.
With the nails coming loose, the wind eventually peels the aluminium roofing off
old barns. If it wasn't for the nails coming loose, aluminium roofing would last
practically forever. Unpainted galvanized sheet metal roofing can eventually
rust once the zinc coating wears off, but it should certainly last more than
50 years as well.
I haven't seen any screws come loose over time, even after 25 years on my dad's workshop and lumber shed. And some of those screws were only driven in with a hammer. Sheet metal roofing is a bit more expensive than asphalt shingles, but given it's durability, it makes me wonder why we bother with shingles that only last 20 years.
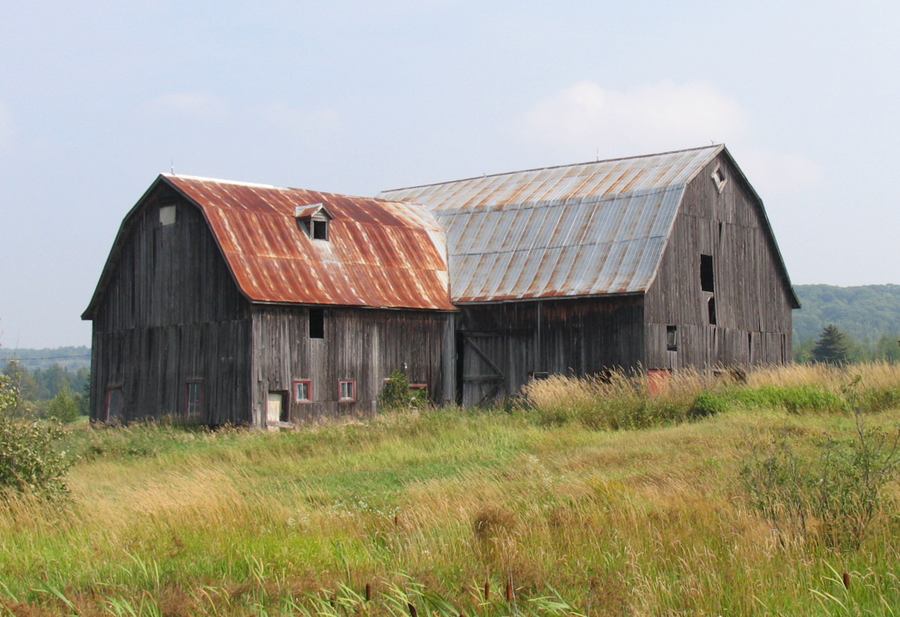
At left: A neglected old barn - roof is starting to rust, but still good.
 For the final edge, with this profile, you can overlaps the sheets by
some number of ribs at the end. But I needed exactly two more ribs on the end.
Not wanting to buy more materials than necessary, I had to cut the last sheet
right in the middle of a rib. I wouldn't cut corners
like that for a house, but for a shed, the risk of leakage from cutting corners
is more acceptable.
For the final edge, with this profile, you can overlaps the sheets by
some number of ribs at the end. But I needed exactly two more ribs on the end.
Not wanting to buy more materials than necessary, I had to cut the last sheet
right in the middle of a rib. I wouldn't cut corners
like that for a house, but for a shed, the risk of leakage from cutting corners
is more acceptable.
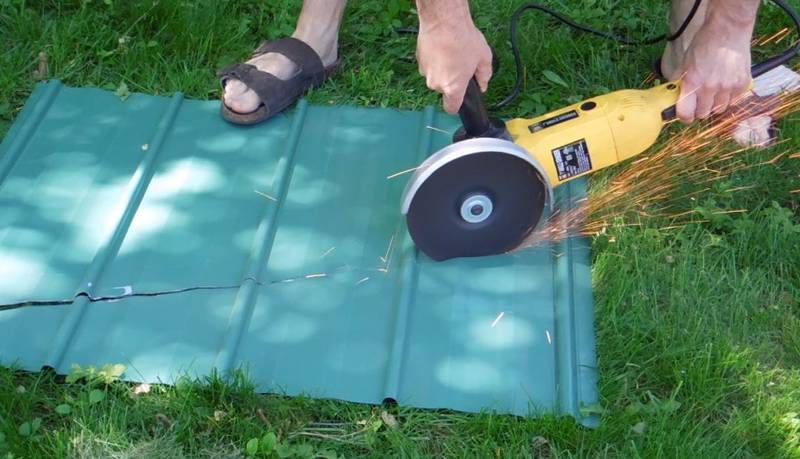 I have seen roofers make lengthwise cuts in roofing metal by scoring a line with
a utility knife, then bending the metal back and forth a few times until it breaks
along the scored line. In retrospect, I should have done that, but I already had
the angle grinder out for doing angled crosscuts for the gabled ends, so the angle
grinder was the first thing that came to mind.
I have seen roofers make lengthwise cuts in roofing metal by scoring a line with
a utility knife, then bending the metal back and forth a few times until it breaks
along the scored line. In retrospect, I should have done that, but I already had
the angle grinder out for doing angled crosscuts for the gabled ends, so the angle
grinder was the first thing that came to mind.
 With the final sheet test fitted in place, marking how far out it comes along the strapping...
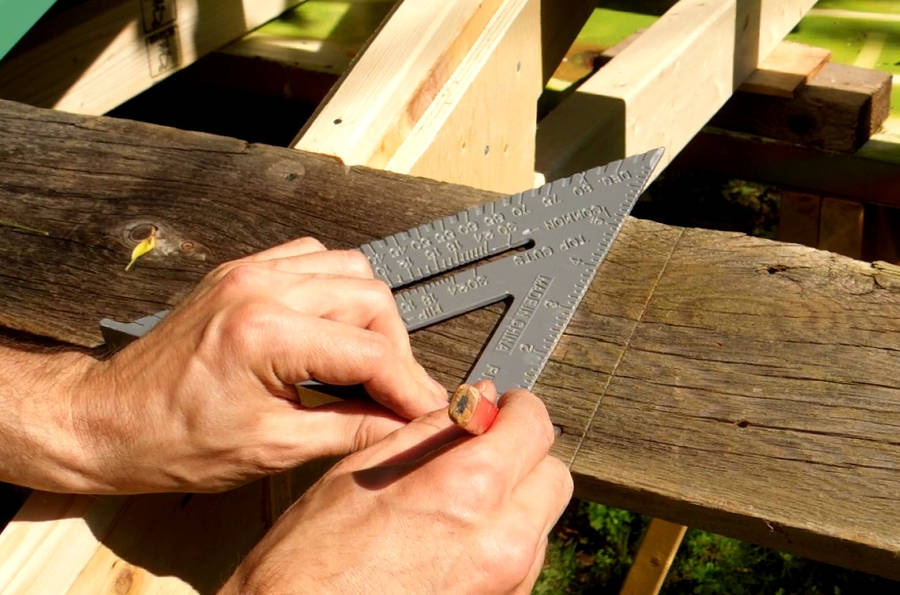 ... then transferring the line back by 1 1/6" (in inches, because the square I'm
using only has inches on it)
... then transferring the line back by 1 1/6" (in inches, because the square I'm
using only has inches on it)
 Next, cutting the strapping to its final length, then screwing down the last sheet.
 Final sheets installed, now working on installing the ridge cap. It's so much easier
with the roof on sawhorses close to the ground!
Final sheets installed, now working on installing the ridge cap. It's so much easier
with the roof on sawhorses close to the ground!
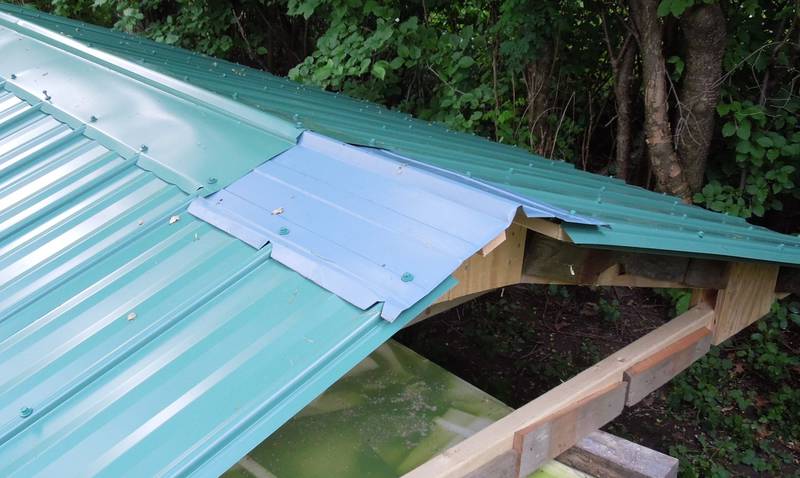
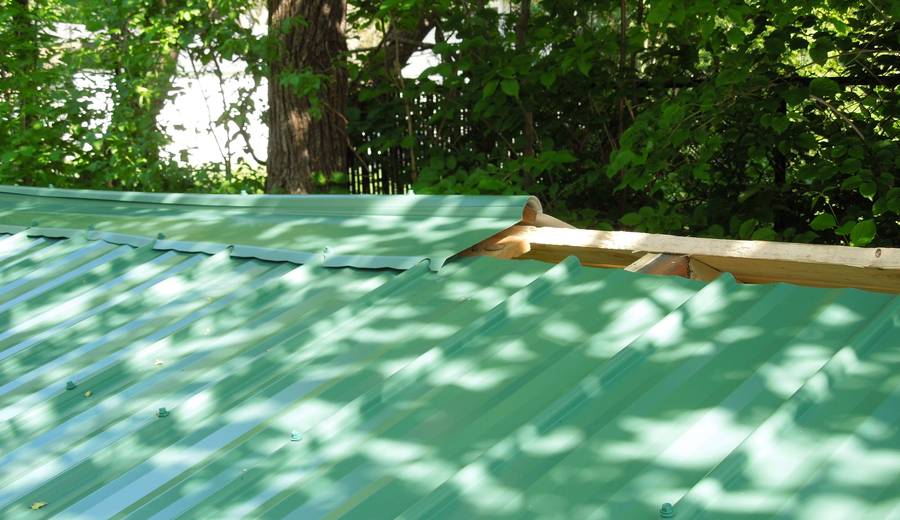 I had a hard time getting that ridge cap on nicely.
I think part of the problem was that I decided to widen the shed just a little after I ordered the sheet metal. By having the roofing not extend as far below the ridge cap, I was able to widen the shed by 15 cm without getting longer sheets. But on account of that, I didn't have enough support for the ridge cap, so it was hard to get it on straight. I ended up putting some pieces of wood under it for support.
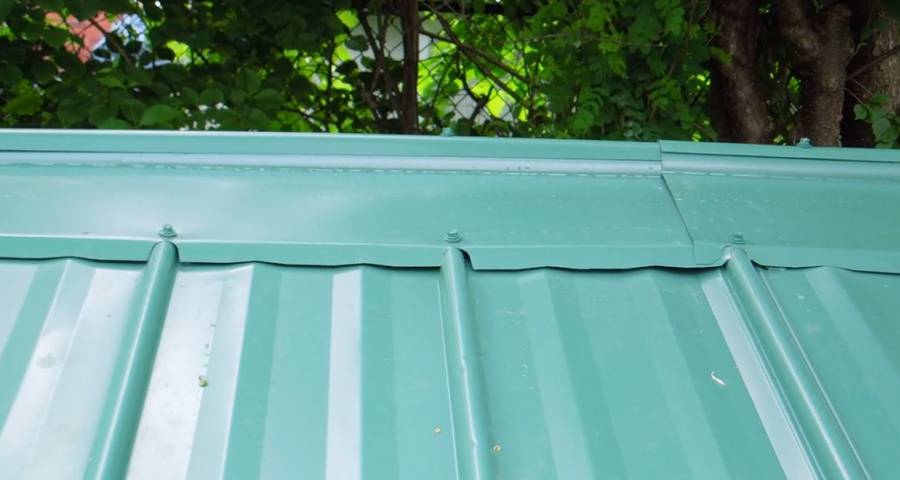 Another problem I ran into was that the notches in the ridge
cap didn't quite line up with the ribs on the roof.
The panels are nominally supposed to cover 31" (78 cm) in width, but depending
on how they have the machine set when they roll the profile, it may be slightly
more or less than nominal. Mine actually only covered 29.85" each.
The notches in the ridge cap assume nominal widths per sheet, so the rib
spacing was 0.3" off along the 5 foot length, or 0.15 inches on either end.
In metric, that's about 3.5 mm off on either end of 1.5 meters.
Another problem I ran into was that the notches in the ridge
cap didn't quite line up with the ribs on the roof.
The panels are nominally supposed to cover 31" (78 cm) in width, but depending
on how they have the machine set when they roll the profile, it may be slightly
more or less than nominal. Mine actually only covered 29.85" each.
The notches in the ridge cap assume nominal widths per sheet, so the rib
spacing was 0.3" off along the 5 foot length, or 0.15 inches on either end.
In metric, that's about 3.5 mm off on either end of 1.5 meters.
 I only bought 10 feet of the ridge cap, but with the roof overhang on either end,
the roof's ridge line was a bit longer. So I used some roofing scraps from another
job to make a ridge cap to cover the rest of it. That worked out really well,
and it made me wonder why I even bothered to buy the pre-made ridge cap in the first place.
I only bought 10 feet of the ridge cap, but with the roof overhang on either end,
the roof's ridge line was a bit longer. So I used some roofing scraps from another
job to make a ridge cap to cover the rest of it. That worked out really well,
and it made me wonder why I even bothered to buy the pre-made ridge cap in the first place.
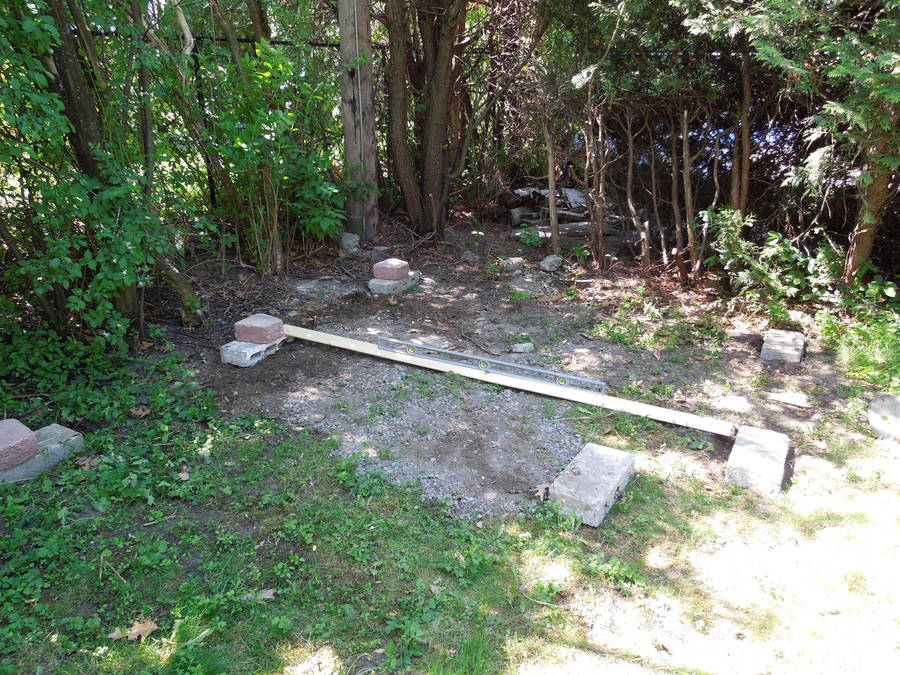 With the roof built on a set of sawhorses, and the walls assembled on the ground, it was time
to prepare the "foundation".
With the roof built on a set of sawhorses, and the walls assembled on the ground, it was time
to prepare the "foundation".
Except this shed won't really have a foundation. I'm just going to rest it on some cinder blocks, which are dug just a few cm into the ground. This means the shed will be subject to some frost heaving, but with the blocks just resting on the ground, at least I can count on the shed settling back to where it was after every winter instead of having the foundations gradually work their way out of the holes.
The completed shed should weigh about half a ton, so if I need to mess with the footings afterwards, it will be easy enough to lever it up with a 2x4.
For more information on metal roofing:
Using Google to search for information on installing metal roofing mostly turns up useless sites like eHow.com with articles written by professional writers that have never been up on a roof.
The most comprehensive sources of information are the installation guides by some of the manufacturers. Although looking at all the bits of sealant, trim and flashing in these manuals is a bit intimidating. Somehow, all the roofs we have done that weren't done with all the fancy trim work (and screws on the ridges) have held up just fine without leaking.
That said, none of those roofs we did had any valleys in them. I imagine valleys could make it much more challenging, with the snow sliding down the roof along the ribs, and all jamming up in the valley and forming a dam.
R-Panel Installation Manual from Best Buy metals
Next: Shed raising in 30 minutes
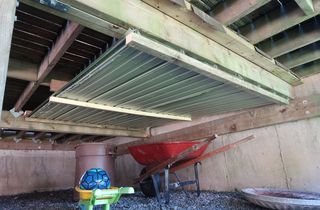 Adding a roof under a deck
 Cladding a door with sheet metal roofing
 Reshingling a small garage
 Low slope roof
 Framing the shed