Table saw throat plate insert
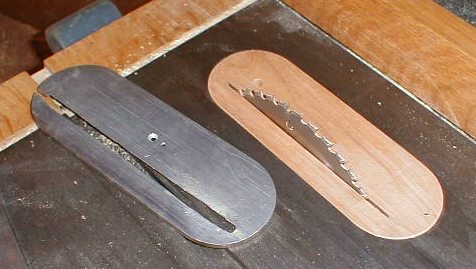
Old broken throat insert and new wooden insert |
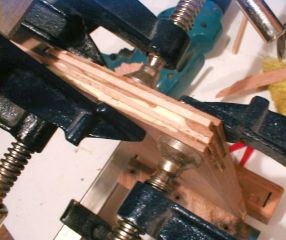 Gluing new throat insert |
The solution was to make two cuts in the end of a piece of wood for the new throat plate, and glue strips of wood into it cross-grained. This way, I was able to make the throat plate out of hardwood, and get the extra strength at the ends to keep it from splitting where the blade goes.
Naturally, the throat insert I made was a zero clearance insert - its just a matter of running the saw wile raising the saw blade.
My first throat insert had a screw near the front, to prevent the possibility of the front lifting.
I since then made one that incorporates two magnets to hold it down. I now use my original
home made insert for angle cuts and dado cuts.
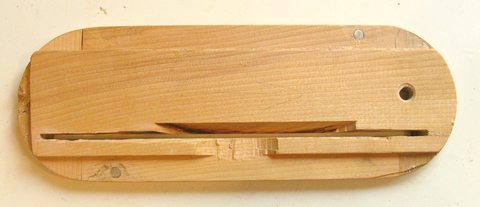
The above image shows the bottom view of my second throat insert. You can see the magnets press fit into holes top right and bottom left. Also note that some material was cut away to conform to the shape of the inside of the slot and leave room for the arbor. For rigidity, the throat plate is a few millimeters thicker than what the saw was originally designed for.
I have since written a more detailed article on
making a table saw insert