Drawers for the mobile tool stand

I built my mobile tool stand to house three drawers on full extension drawer slides. I had been experimenting with full extension drawer slides when I built my slot mortising machine, so I was curious to try this style of slide for actual drawers.
 One of the things that my slot mortising machine is ideally suited for is to
cut a series of precisely spaced mortises side by side.
The T-joint that I needed for the front of these drawers was a good place to
try out this type of joint.
One of the things that my slot mortising machine is ideally suited for is to
cut a series of precisely spaced mortises side by side.
The T-joint that I needed for the front of these drawers was a good place to
try out this type of joint.
For material, I used wood that came from some Ikea-like desk that, strangely enough, was constructed from solid wood, not particle board. The material had a dark brown finish on both sides, which is why the pieces of wood look dark.
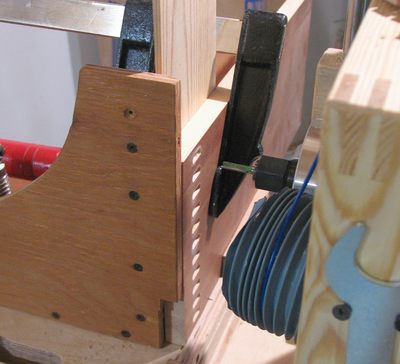 The vertical adjustment feature and the turns counter wheel on the mortising machine
came in handy for controlling the spacing of multiple slots. I cut 1/4" wide mortises, and spaced them
at 5/8" intervals, leaving
3/8" of material between the mortises. That way, I could cut the tenons using
my box joint jig set to cut 3/8" wide slots to cut the tenons.
The vertical adjustment feature and the turns counter wheel on the mortising machine
came in handy for controlling the spacing of multiple slots. I cut 1/4" wide mortises, and spaced them
at 5/8" intervals, leaving
3/8" of material between the mortises. That way, I could cut the tenons using
my box joint jig set to cut 3/8" wide slots to cut the tenons.
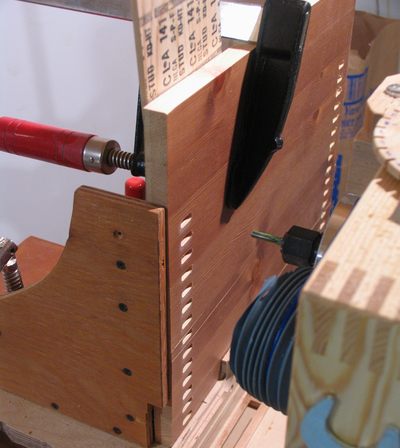 I had no problem cutting the joints for the top two drawers, but for the extra deep
bottom drawer, I ran out of vertical adjustment range on my mortising machine. I have
about 25 cm of vertical range, which I thought was overkill, but in this case it wasn't
enough.
I had no problem cutting the joints for the top two drawers, but for the extra deep
bottom drawer, I ran out of vertical adjustment range on my mortising machine. I have
about 25 cm of vertical range, which I thought was overkill, but in this case it wasn't
enough.
I ended up getting around this problem by flipping the work piece over, lining up the router bit with the last slot I had previously cut, and then indexing down by 5/8" increments from there to cut the rest of the slots.
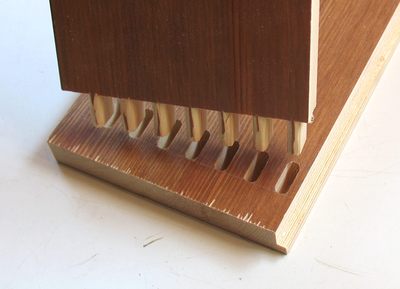
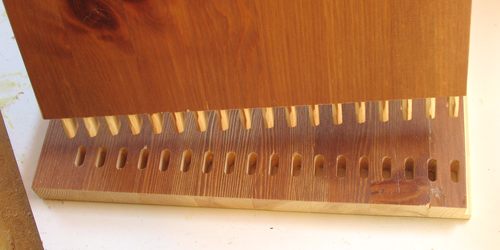 The front of the bottom drawer ended up attaching with eighteen mortises in all.
And it fit together quite well too.
The front of the bottom drawer ended up attaching with eighteen mortises in all.
And it fit together quite well too.
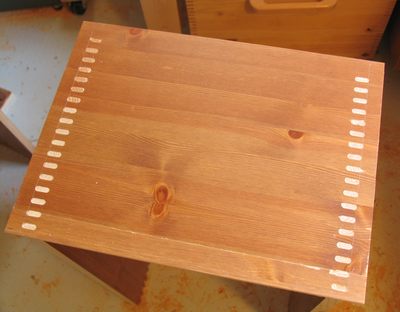 The front of the drawer, after partial assembly. I did end up planing the varnish off of
of the drawer fronts after assembly so that I could glue a hardwood veneer onto the
front of the drawers. With a hardwood front, the drawers are less susceptible to
getting nicked and banged.
The front of the drawer, after partial assembly. I did end up planing the varnish off of
of the drawer fronts after assembly so that I could glue a hardwood veneer onto the
front of the drawers. With a hardwood front, the drawers are less susceptible to
getting nicked and banged.
Veneering
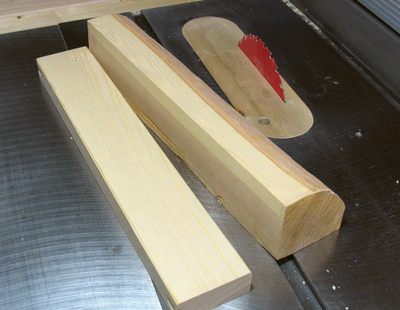 I wanted to use white ash for the font of the drawers, because it is especially
hard and tough. But these two pieces were all the white ash I still had kicking around,
so I had to be very frugal using it.
I wanted to use white ash for the font of the drawers, because it is especially
hard and tough. But these two pieces were all the white ash I still had kicking around,
so I had to be very frugal using it.
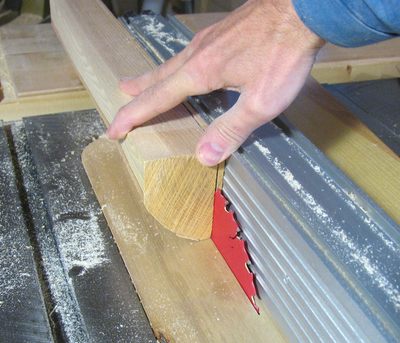 I used a skillsaw blade with a kerf of less than 2 mm to cut the pieces into slices.
I had to cut from both sides, because I could only get about 5 cm depth
of cut with the skillsaw blade. I cut the slices to be about 5 mm thick, so with
the kerf of the blade, I only removed about 7 mm of thickness from my stock for each slice.
I used a skillsaw blade with a kerf of less than 2 mm to cut the pieces into slices.
I had to cut from both sides, because I could only get about 5 cm depth
of cut with the skillsaw blade. I cut the slices to be about 5 mm thick, so with
the kerf of the blade, I only removed about 7 mm of thickness from my stock for each slice.
With only a 2 mm kerf, and cutting 5 cm deep, I had plenty of power left to push the stock through the blade at a relatively high feed rate, even though my hybrid saw only has a 1.75 Hp motor.
With the blade so close to the fence, and not very high, I felt quite comfortable pushing the wood with my fingers like that. The thing is to always reach from the right, so that if something were to kick or snap, my fingers would have a hard time reaching down to the blade. Not shown in this photo, but I often put the palm of my hand right over the fence, with my fingers to the right of it, and only the thumb sticking over the left edge.
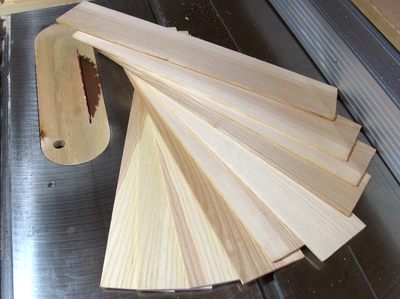 The finished slices of veneer cut from my pieces of wood.
 I planed the finish off the fronts of the drawer on my jointer. The top two drawers I could
do in one pass. For the bottom drawer, I planed 6" from the top and from the bottom, but
still had about 1" of the old surface that I couldn't reach with the jointer. I ended up taking
that out with a hand plane and a scraper.
I planed the finish off the fronts of the drawer on my jointer. The top two drawers I could
do in one pass. For the bottom drawer, I planed 6" from the top and from the bottom, but
still had about 1" of the old surface that I couldn't reach with the jointer. I ended up taking
that out with a hand plane and a scraper.
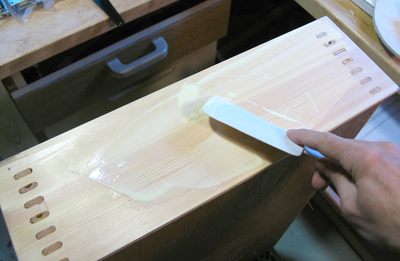
I spread the glue on with a rubber spatula, and then laid the strips of white ash side by side on the glue.
 I used lots of clamps to hold the pieces of wood to the front.
I also used a few clamps to push the strips sideways against each other, so that I wouldn't end up
having any gaps between them.
I used lots of clamps to hold the pieces of wood to the front.
I also used a few clamps to push the strips sideways against each other, so that I wouldn't end up
having any gaps between them.
Drawer slides
 I used some 26" (55 cm) long full extension drawer slides to guide the drawers.
These are relatively pricey, they cost me about $20 CDN a pair after taxes and all. With much of
the wood for the stand coming from recycled wood or cheap 2x4's, these drawer slides
ended up being about two thirds of my material costs for this project.
I used some 26" (55 cm) long full extension drawer slides to guide the drawers.
These are relatively pricey, they cost me about $20 CDN a pair after taxes and all. With much of
the wood for the stand coming from recycled wood or cheap 2x4's, these drawer slides
ended up being about two thirds of my material costs for this project.
I mounted them in the gaps that I had left in the frame specifically for these slides. The slides ended up about 1 mm wider than I had thought they would be, so I had to chisel out the gaps a little bit wider to make them fit. But on the plus side, they now fit exactly in the gaps in the frame.
 I found that figuring out the alignment of the slides was made much easier by laying the
whole case on its side. Without gravity pulling the drawer down, I could actually slide
them in and out with the slides even before I screwed the slides to the drawers. If I ever
use full extension drawer slides like that again, I'll try to take advantage of that trick.
I found that figuring out the alignment of the slides was made much easier by laying the
whole case on its side. Without gravity pulling the drawer down, I could actually slide
them in and out with the slides even before I screwed the slides to the drawers. If I ever
use full extension drawer slides like that again, I'll try to take advantage of that trick.
 I really really optimized how much space the drawer occupied in this cabinet. I have
about a millimeter and a half on each side of the drawer between the drawer and the case.
And the gap above the drawers is actually still space that is usable, because the drawer
contents can be taller than the drawer. So I don't count the gap between the
drawers as "wasted" space.
I really really optimized how much space the drawer occupied in this cabinet. I have
about a millimeter and a half on each side of the drawer between the drawer and the case.
And the gap above the drawers is actually still space that is usable, because the drawer
contents can be taller than the drawer. So I don't count the gap between the
drawers as "wasted" space.
The only unexploited space in the cabinet is that the drawers are 1 cm less deep than the cabinet, and the only reason for that is that the recycled pieces of wood that I started with were almost exactly the right length. So by making the drawers 1 cm less deep, I could cut them from the wood with almost no scrap.
Handle mounting
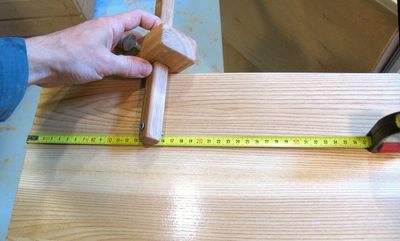 Mounting the handles is easy using this trick.
I calculate the lateral position with a pocket calculator, and the vertical position is set
by my marking gauge. I use the tip of the marking gauge to score a small hole where the hole
needs to be drilled, and then use an awl to expand the hole before drilling.
Mounting the handles is easy using this trick.
I calculate the lateral position with a pocket calculator, and the vertical position is set
by my marking gauge. I use the tip of the marking gauge to score a small hole where the hole
needs to be drilled, and then use an awl to expand the hole before drilling.
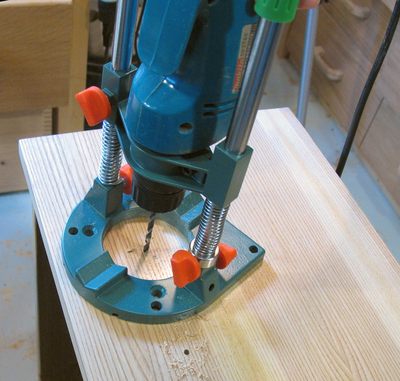 I used this handy dandy drilling jig that I just bought recently to make sure I drilled the holes
square into the handles.
I used this handy dandy drilling jig that I just bought recently to make sure I drilled the holes
square into the handles.
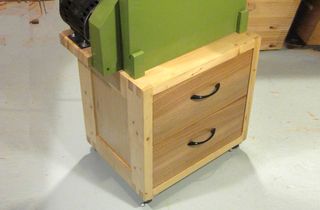
For the handles this time, I used some black plastic drawer handles that came from some piece of lab furniture that I had recycled at some point. They don't stick out too much, so they won't get in the way of my knees when I'm standing in front of the machine. And they cost no money or effort, because I already had them.
I'm asked from time to time about the drilling jig that I used. If you shop online,
search for the terms "drill guide". The one I used is a particularly compact and
cheap one that clamps directly to the drill housing, assuming the drill has a 43 mm cylindrical
part of the housing at the front (most drills don't,
my drill does).
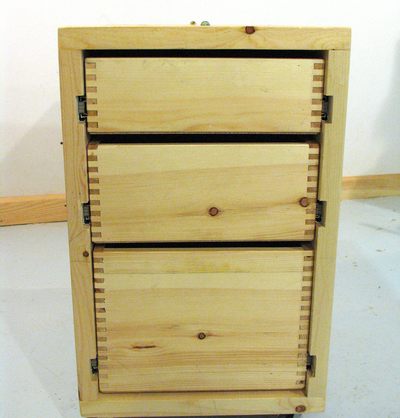
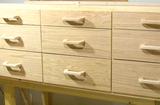
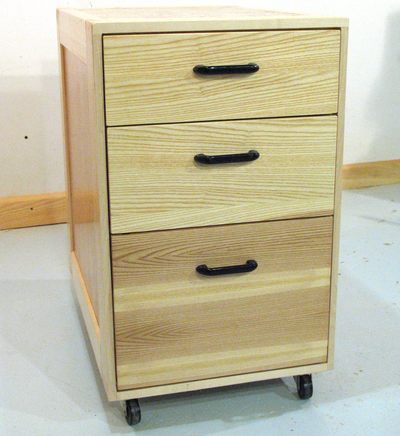 Here's the cabinet, all done. The handles look ok.
A nice thing about these drawer slides is that they can be fine adjusted just a little bit, so I was able to get the gap around the drawers to be very consistent.
The drawers, fully closed, still stick out a few millimeters at the front, so from this angle, this makes the gaps on the right side look just a little bit smaller.
The whole cabinet looks quite nicely finished - nice enough to be upstairs furniture. And who knows, maybe some day I will use it as upstairs furniture.
See also:
 Mobile bandsaw stand
 Tool stand / parts cabinet
 Mobile tool stand
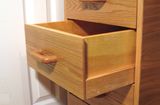
 Workbench drawers
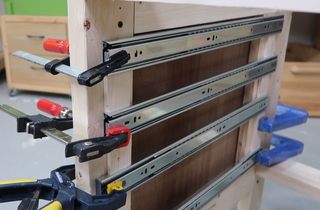 Using spacers to lay out drawer slides
Back to Mobile tool stand
![]()