 I started by marking the edges of my over-bending form on the side pieces...
Conventionally, when assembling a ukulele or a guitar body, one uses an external form to clamp the pieces inside until the body is assembled. I figured, because my bending method produced pieces already the right shape, and because the sides were thick and the instrument small, I didn't need an external mold.
However, in retrospect, I think using an external mold, like Pat Hawley does, would have been better because it assures that the final instrument shape is free of distortion.
I started by marking the edges of my over-bending form on the side pieces...
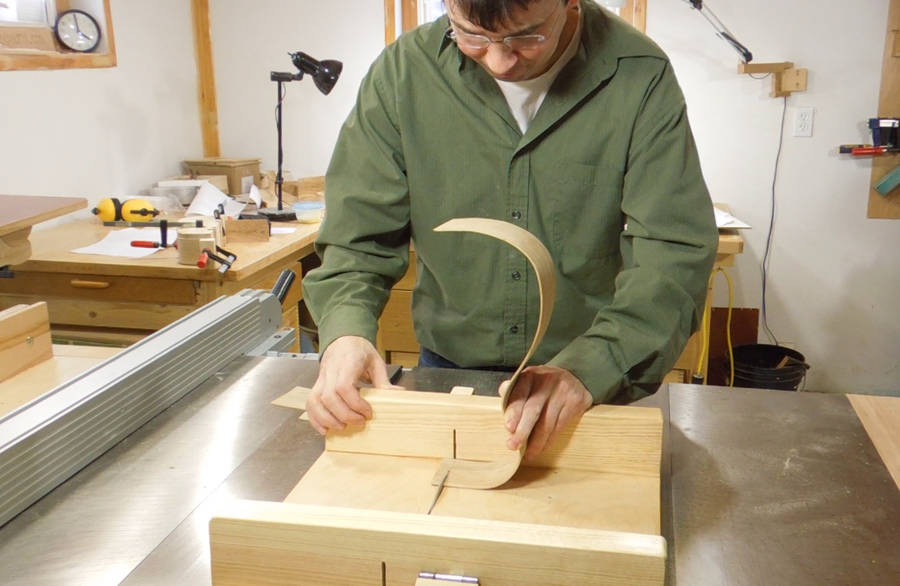 ...then trimmed off the excess on the table saw using my
table saw sled.
...then trimmed off the excess on the table saw using my
table saw sled.

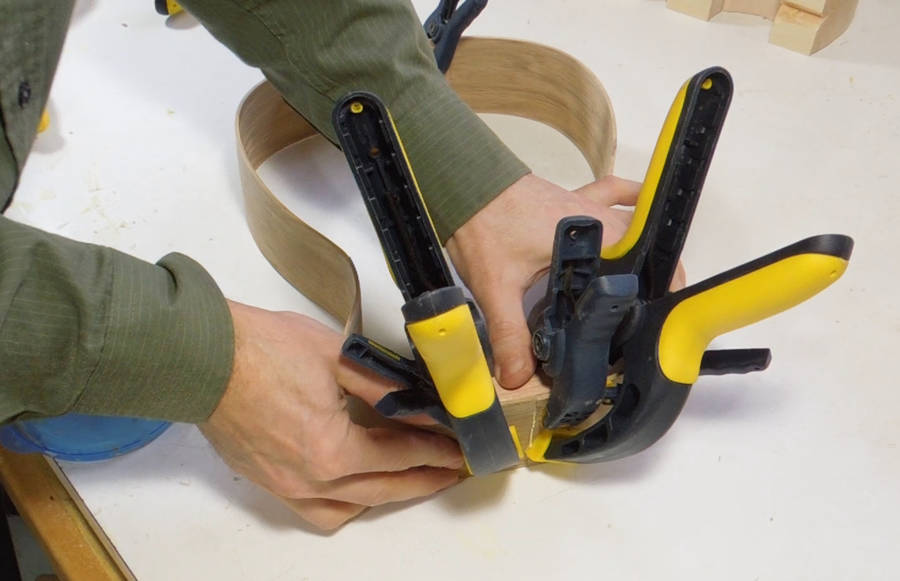
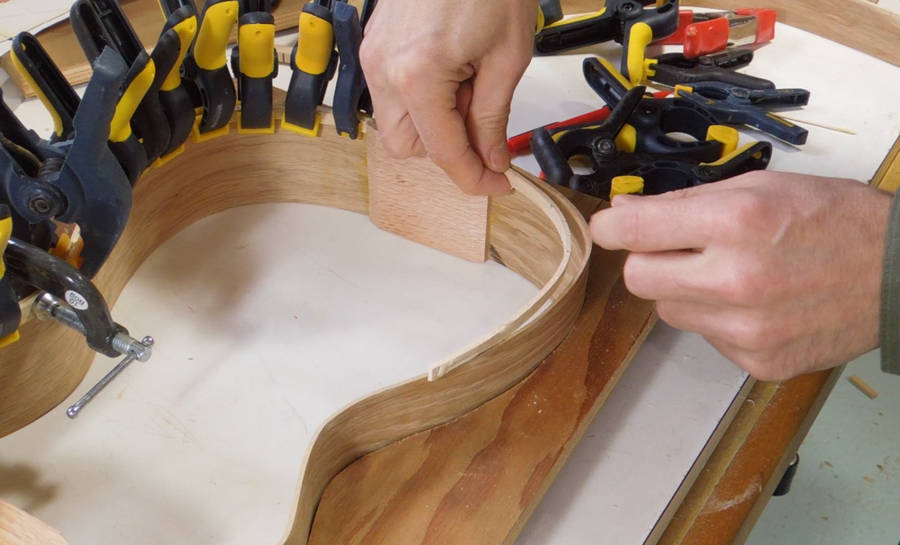
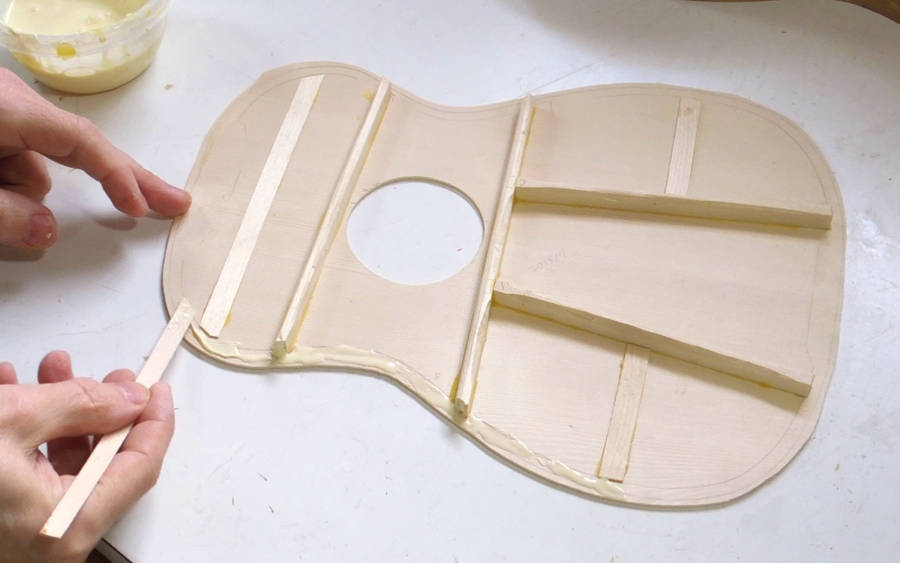
 Then I made the neck and tail blocks. I cut these to have a slight taper towards either
end to better match the curvature of the side pieces. I cut the taper
with my table saw, then used a belt sander to give it some curvature.
Then I made the neck and tail blocks. I cut these to have a slight taper towards either
end to better match the curvature of the side pieces. I cut the taper
with my table saw, then used a belt sander to give it some curvature.
 I also chamfered the inside corners of the block. Although, in retrospect, that chamfer made clamping
the block more difficult, so I'm not sure if that was a good idea.
I also chamfered the inside corners of the block. Although, in retrospect, that chamfer made clamping
the block more difficult, so I'm not sure if that was a good idea.
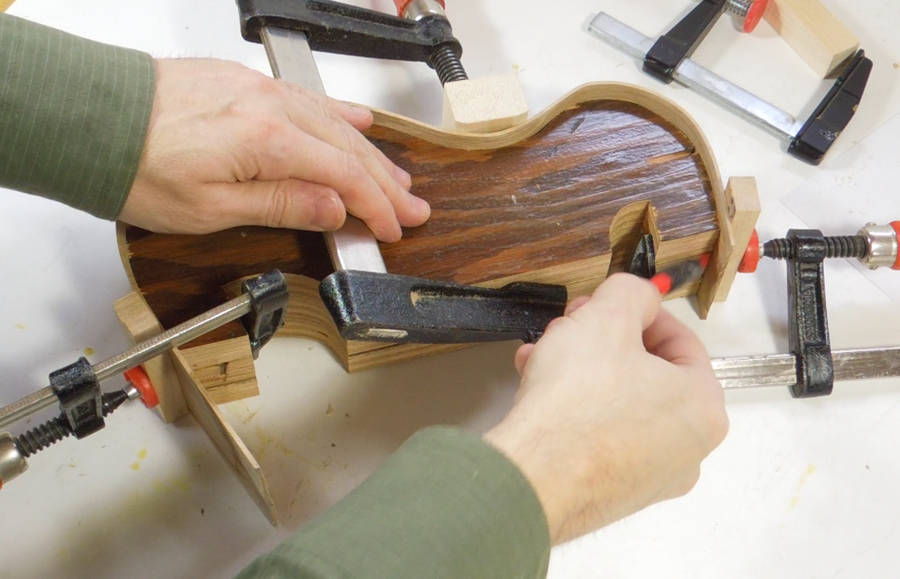
 Checking the fit of the neck and tail blocks. The neck block is larger and thicker because
the neck will attach to it. The neck needs to support the tension of the strings.
Checking the fit of the neck and tail blocks. The neck block is larger and thicker because
the neck will attach to it. The neck needs to support the tension of the strings.
Neck blocks are usually made thicker than I made mine, I just didn't know any better.
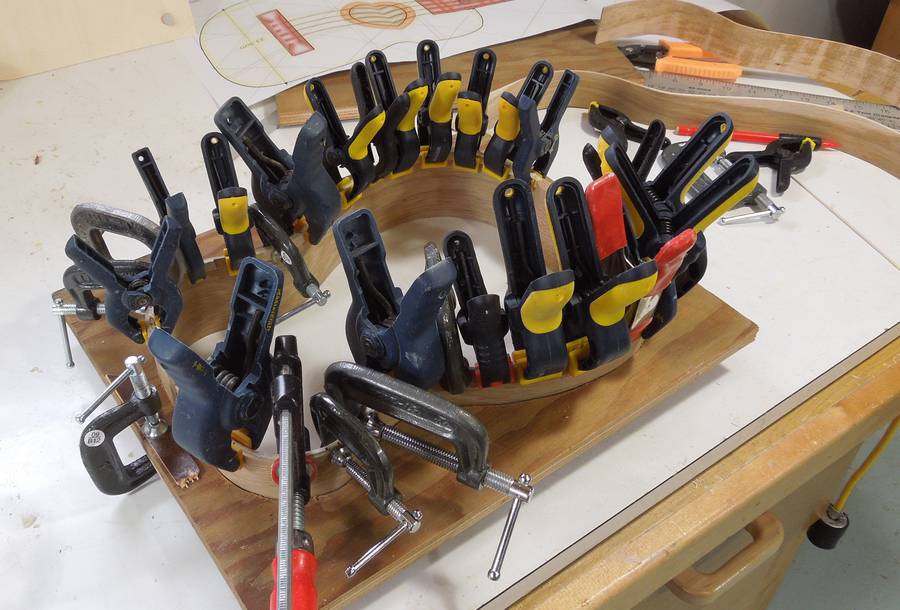
 Clamping on the neck block with spring clamps.
 Next I mark where the ribs on the front side will go. The ribs will extend all
the way to the sides, so the "lining" should have gaps in it where the ribs
meet the sides.
Next I mark where the ribs on the front side will go. The ribs will extend all
the way to the sides, so the "lining" should have gaps in it where the ribs
meet the sides.
 Next comes the lining.
The lining makes for a larger glue surface to attach the front and back of the
instrument.
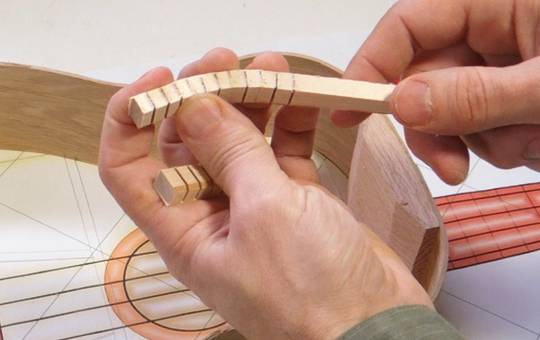
Traditionally, the lining is made of a strip of wood with many narrow slots cut into
it most of the way through. The slots make it easier to bend the lining along
the curves of the sides.
Next comes the lining.
The lining makes for a larger glue surface to attach the front and back of the
instrument.
Traditionally, the lining is made of a strip of wood with many narrow slots cut into
it most of the way through. The slots make it easier to bend the lining along
the curves of the sides.
Traditionally, the corner between the sides and the front or back is cut away to install an exotic wood "binding", so the "lining" on the inside needs to be wider to accommodate that. But I won't be installing any binding on this instrument, so I don't need the lining to be as thick.
Instead of traditional lining, I cut bent strips form my previous bending experiment scraps and glued these in place...
 ... using lots of spring clamps. Canadian Tire had spring clamps on sale recently,
so I bought another bag of them.
... using lots of spring clamps. Canadian Tire had spring clamps on sale recently,
so I bought another bag of them.
I realized that clamping the lining on could cause the body to distort a little, so I traced around the shape of the body with a pencil and cut that shape out of a scrap of plywood. I clamped that plywood around the body to preserve its shape. So I ended up making a simple sort of external mold after all.
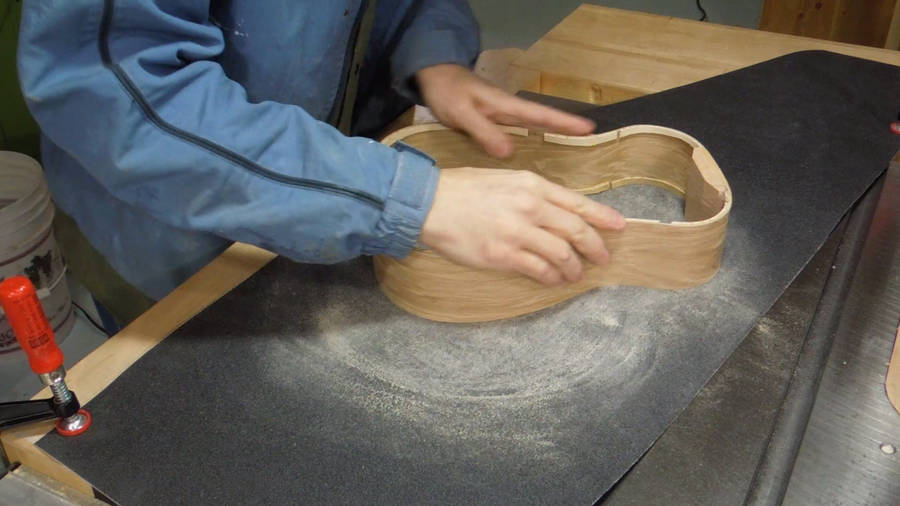
 Next, sanding the just installed lining flush with the body.
I used some very rough (80 grit) sandpaper, which I clamped to my table saw, and I just rubbed the body back and forth until the lining was flush with the sides all around.
 In guitar building, this is often done with what is called a "radius dish" - essentially,
a slightly concave surface of sandpaper. Good quality guitars have a slightly convex
curvature on the front and back, but ukuleles are usually flat.
In guitar building, this is often done with what is called a "radius dish" - essentially,
a slightly concave surface of sandpaper. Good quality guitars have a slightly convex
curvature on the front and back, but ukuleles are usually flat.
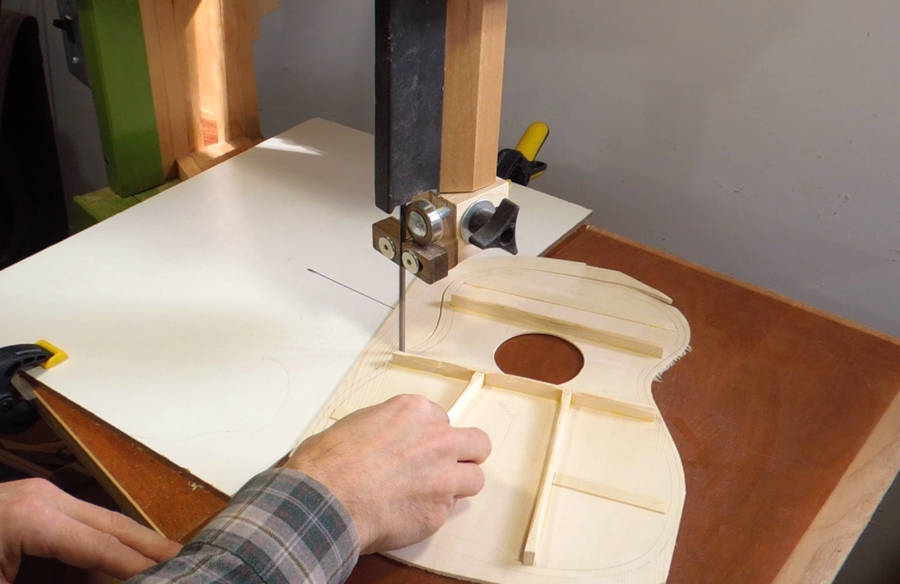
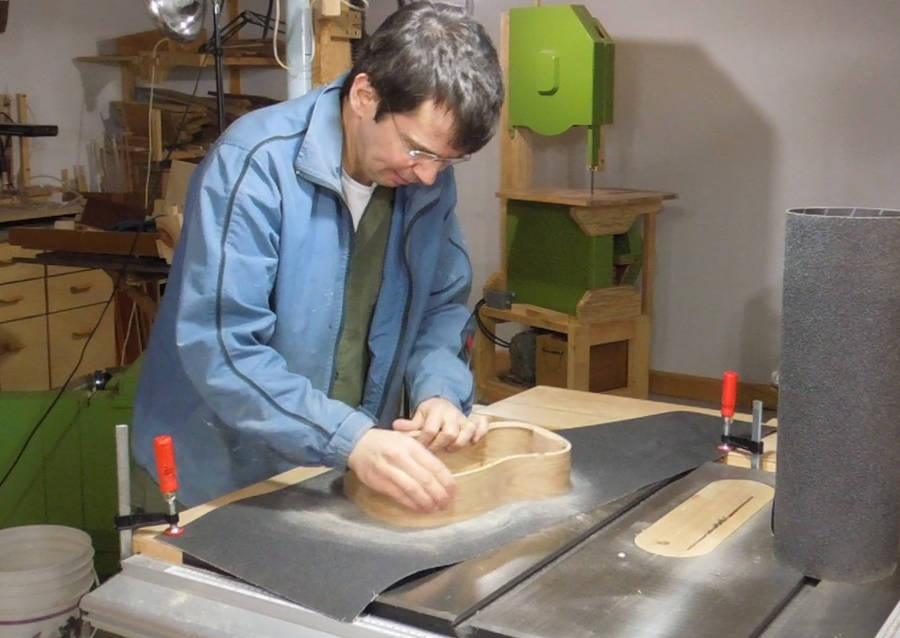
 Next I decided to trim my sound board to near its
final shape. I used my bandsaw for this. To avoid getting tear-out on the front,
I cut slightly into a sheet of material to act like a
zero clearance bandsaw insert. I can also
make zero clearance inserts for my saw,
but they don't stay "zero clearance" for that long, so this method is more convenient.
Next I decided to trim my sound board to near its
final shape. I used my bandsaw for this. To avoid getting tear-out on the front,
I cut slightly into a sheet of material to act like a
zero clearance bandsaw insert. I can also
make zero clearance inserts for my saw,
but they don't stay "zero clearance" for that long, so this method is more convenient.
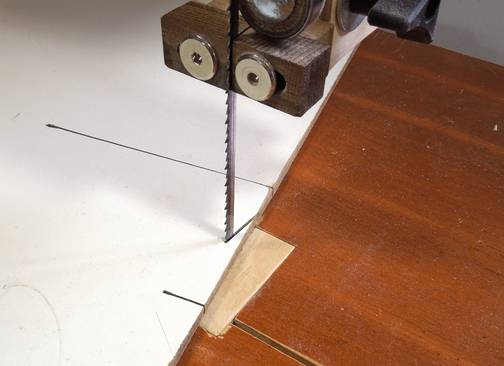
 It worked well, with no tear-out, though I did have a few fibers sticking out from
some edges.
It worked well, with no tear-out, though I did have a few fibers sticking out from
some edges.
 I applied the glue to the front, figuring that way there would be less glue spilling onto
the sides of my ukulele.
I applied the glue to the front, figuring that way there would be less glue spilling onto
the sides of my ukulele.
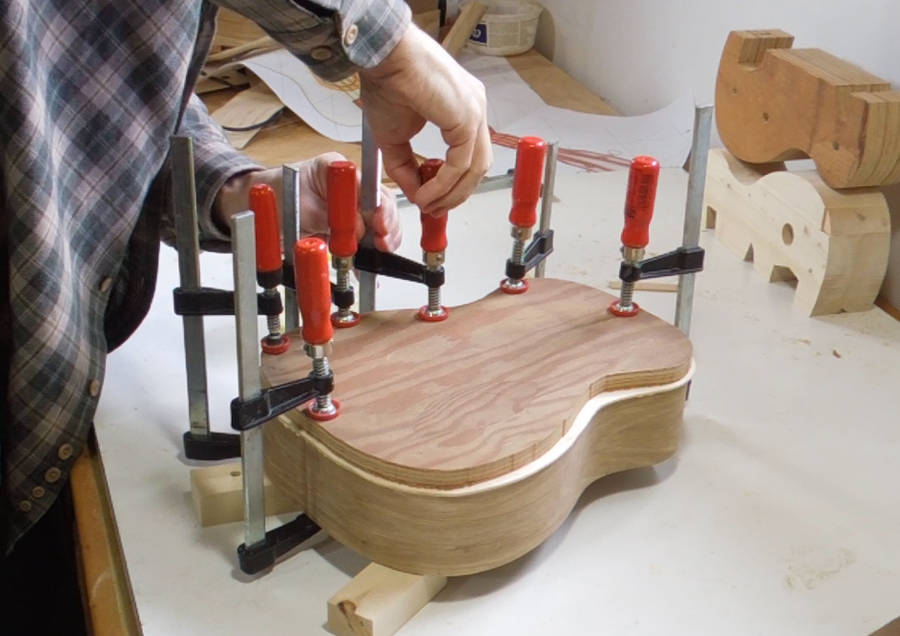 I then put a piece of plywood on the front, and used a lot of clamps to press it together
all around.
I then put a piece of plywood on the front, and used a lot of clamps to press it together
all around.
Traditionally, the instrument would be in the external form until at least one side is glued on. But the external mold can get in the way of clamps, so guitar makers will often wrap rubber bands or string around the mold to clamp the front or back on.
I think if I made an external mold, I'd try to make it narrow enough to still be able to reach around it with bar clamps.
See also: Pat making a ukulele body
Next: Making the neck
![]()