 Pat Hawley writes:
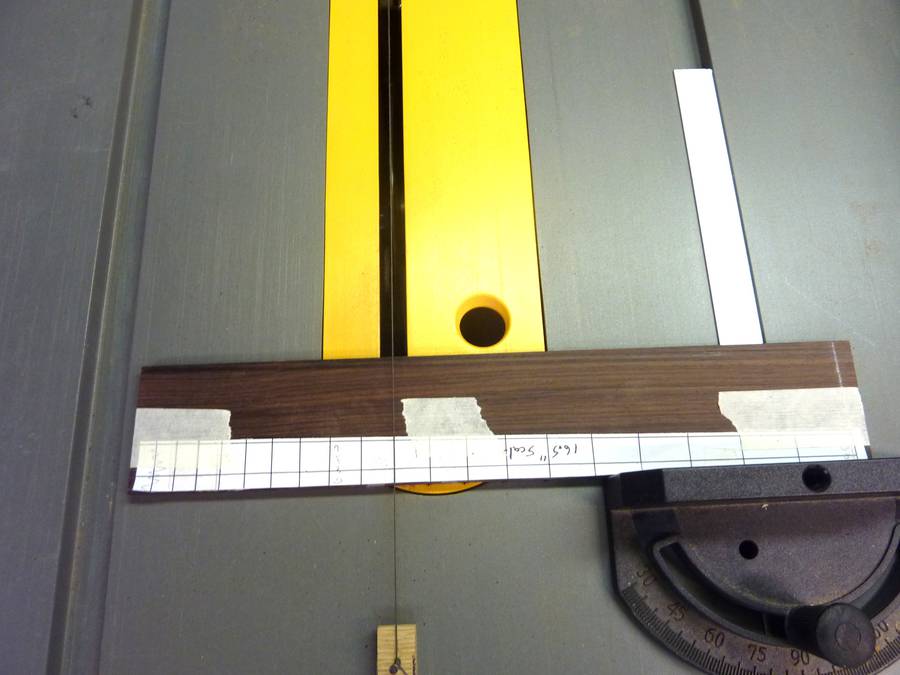
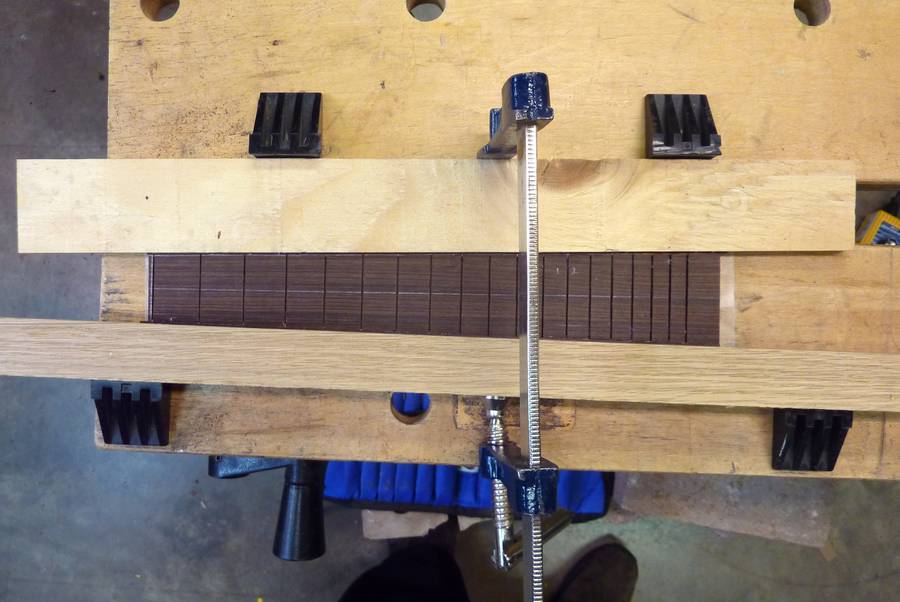
Fret spacing template attached to the back of the fretboard.
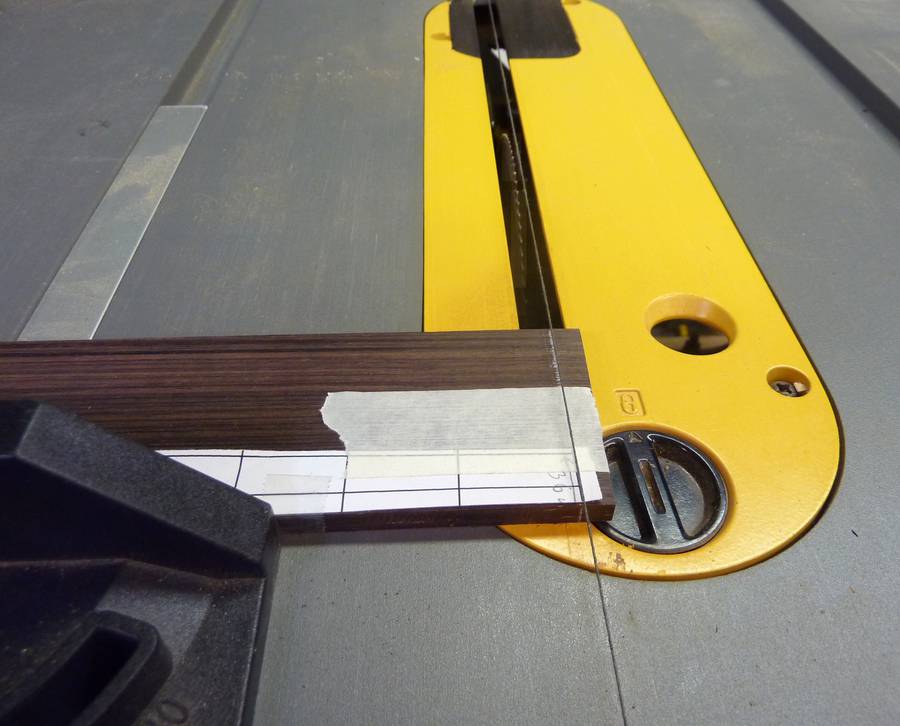 The lines on the template are lined up with a wire strung directly
above the saw blade. The saw blade is a special very thin fret saw blade.
The lines on the template are lined up with a wire strung directly
above the saw blade. The saw blade is a special very thin fret saw blade.
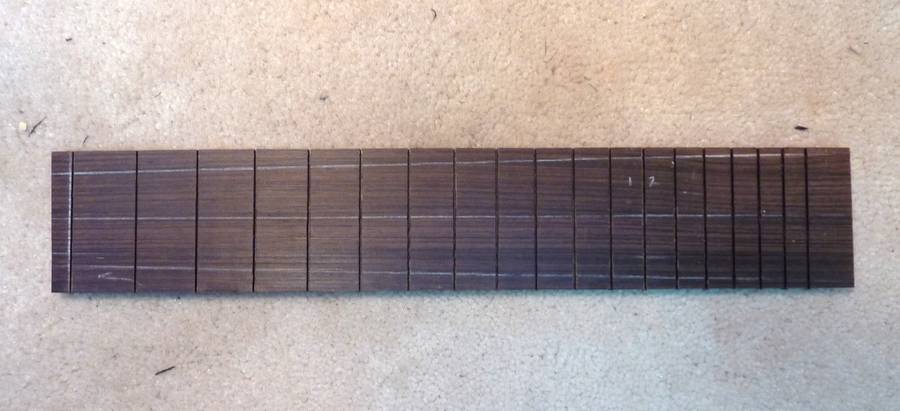 Fret slots cut.
 I like putting binding on my fretboards to cover up the ends of the fret
tangs. Often I will use a contrasting wood for appearance, but using the
same wood as the fretboard results in a very "clean" look that I also like.
In this case, since the uke body was bound in rosewood, I decided to bind
the rosewood fretboard in the same wood and, in fact, I had saved an
off-cut from the fretboard for this purpose.
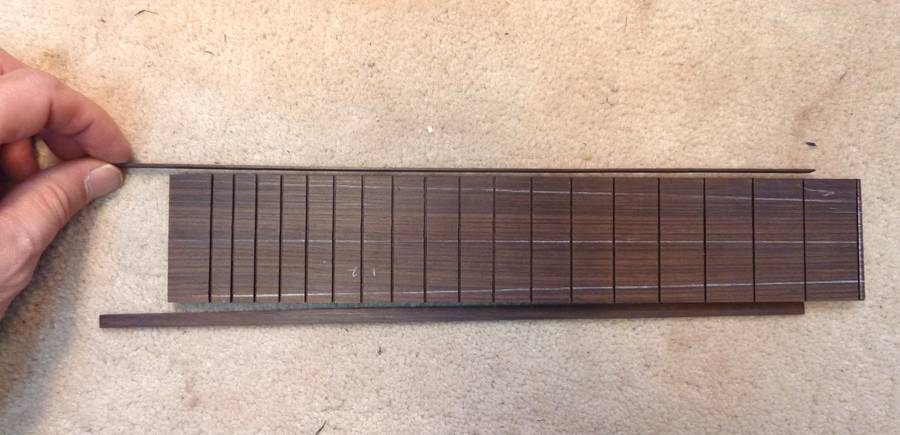
Here I'm rough cutting some strips from the fretboard off cut.
I like putting binding on my fretboards to cover up the ends of the fret
tangs. Often I will use a contrasting wood for appearance, but using the
same wood as the fretboard results in a very "clean" look that I also like.
In this case, since the uke body was bound in rosewood, I decided to bind
the rosewood fretboard in the same wood and, in fact, I had saved an
off-cut from the fretboard for this purpose.
Here I'm rough cutting some strips from the fretboard off cut.
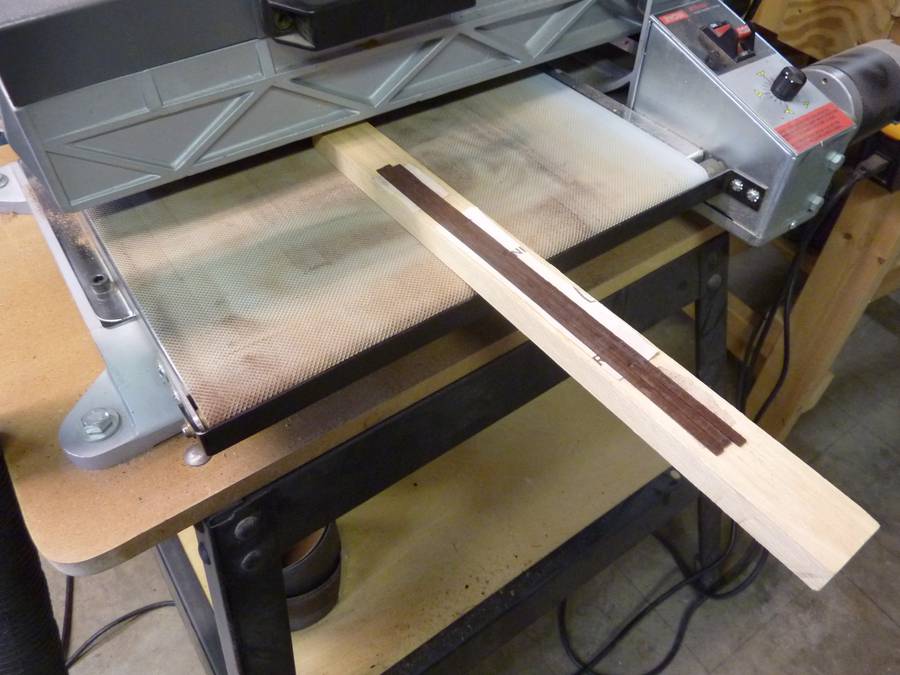 Then I mounted them on a
support board and got them down to about 1 mm thickness in my drum sander.
Then I mounted them on a
support board and got them down to about 1 mm thickness in my drum sander.
 Sanded bindings against the un-tapered fretboard
 Gluing the bindings to the fretboard (after I had tapered it).
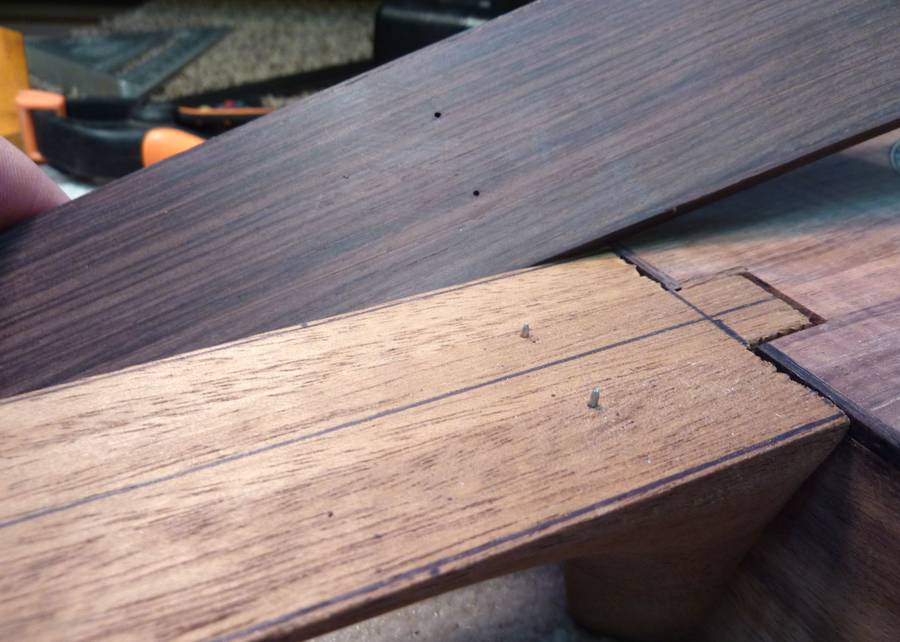 I "pinned" the fretboard to the neck by drilling some small holes through a
couple of fret slots and into the neck. Then I inserted some nipped small
nails into the neck, leaving the tips sticking out so that I could re-locate
the fretboard and have it stay in place for final shaping of the neck. The
pins will also ensure that the fretboard won't move around when it comes
time to glue it in place.
I "pinned" the fretboard to the neck by drilling some small holes through a
couple of fret slots and into the neck. Then I inserted some nipped small
nails into the neck, leaving the tips sticking out so that I could re-locate
the fretboard and have it stay in place for final shaping of the neck. The
pins will also ensure that the fretboard won't move around when it comes
time to glue it in place.
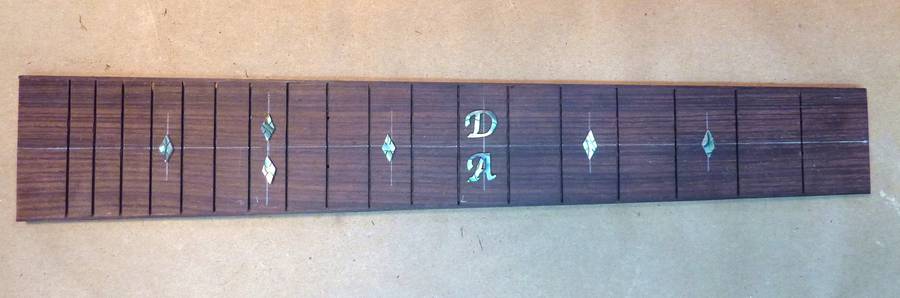 This ukulele is going to have blue paua abalone fretboard inlays to go with
the rosette that was done in the same shell. My first step is to lay the
shell out on the fretboard the way I will want it inlayed.
This ukulele is going to have blue paua abalone fretboard inlays to go with
the rosette that was done in the same shell. My first step is to lay the
shell out on the fretboard the way I will want it inlayed.
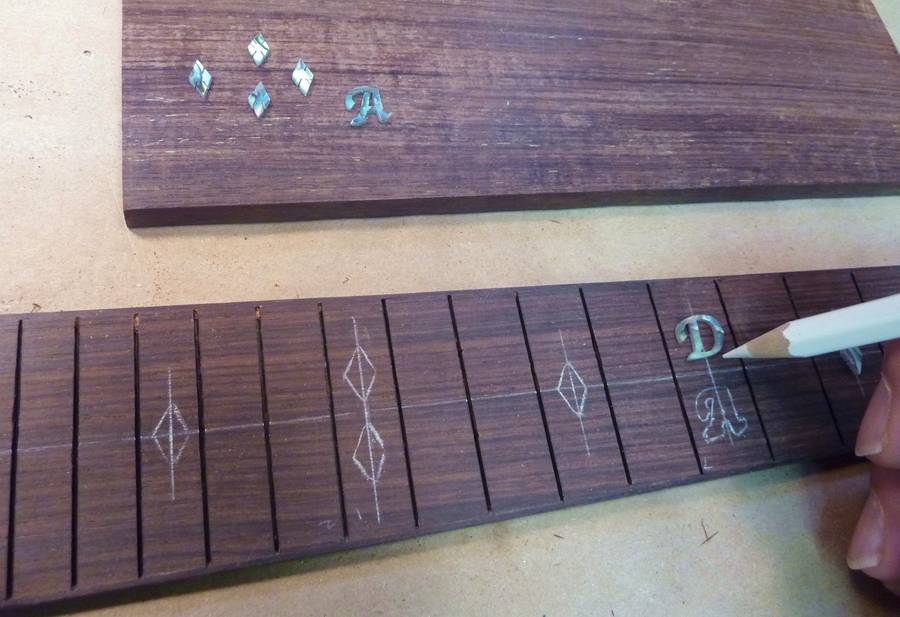 The inlay consists of small slotted diamonds and the initials of the lovely Danielle
Allard for whom this ukulele is being built. Danielle already
plays one of my guitars
and sings in the Ottawa based group Go Long(!).
The inlay consists of small slotted diamonds and the initials of the lovely Danielle
Allard for whom this ukulele is being built. Danielle already
plays one of my guitars
and sings in the Ottawa based group Go Long(!).
I trace the inlay on to the fretboard using a sharp white pencil.
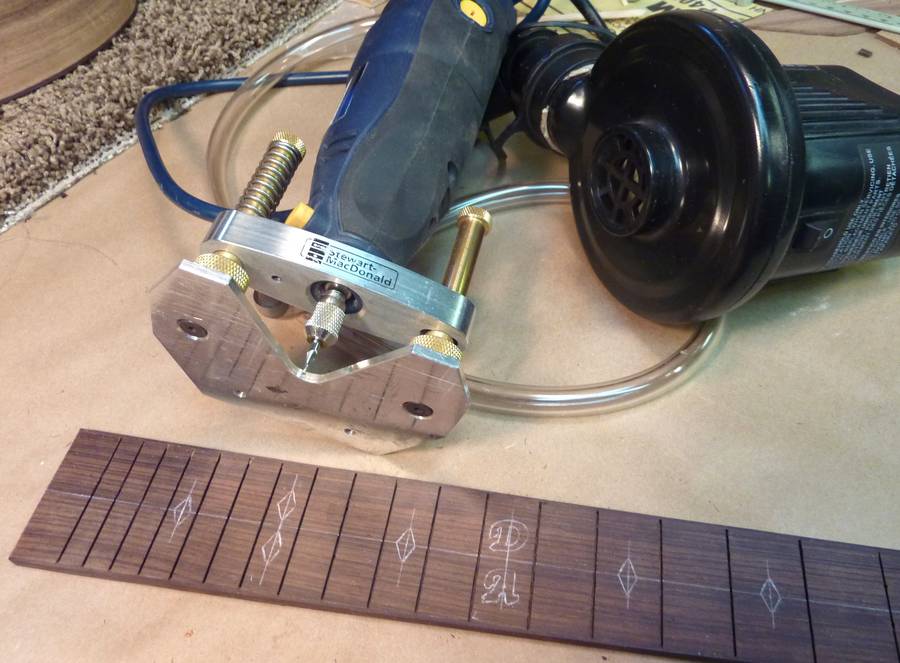 The tools for routing the pockets are a rotary tool with a small bit and a
router base attachment, an air blower that attaches to the router base to
blow away debris so the traces lines remain visible and, not shown in the
picture, some magnifying goggles and bright light so I can see. That little
air blower is the noisiest tool I own and I always have to wear ear plugs
when I'm doing inlay.
The tools for routing the pockets are a rotary tool with a small bit and a
router base attachment, an air blower that attaches to the router base to
blow away debris so the traces lines remain visible and, not shown in the
picture, some magnifying goggles and bright light so I can see. That little
air blower is the noisiest tool I own and I always have to wear ear plugs
when I'm doing inlay.
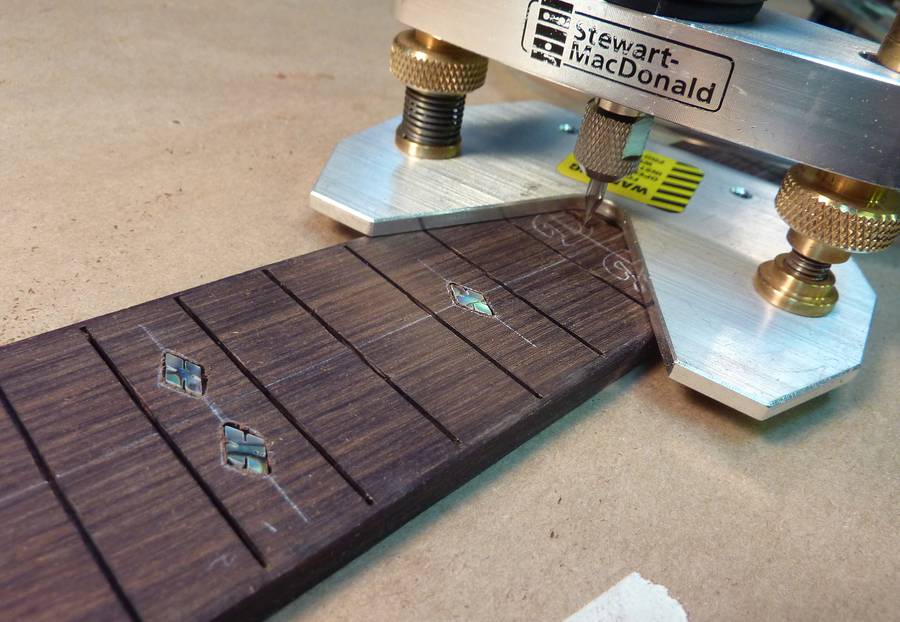 Cutting the pockets takes a steady hand. Sometimes the router wants to move
on its own into the wood so I have to be vigilant not to let it get away and
ruin the fretboard.
Cutting the pockets takes a steady hand. Sometimes the router wants to move
on its own into the wood so I have to be vigilant not to let it get away and
ruin the fretboard.
See inlay carving experiments with the pantograph.
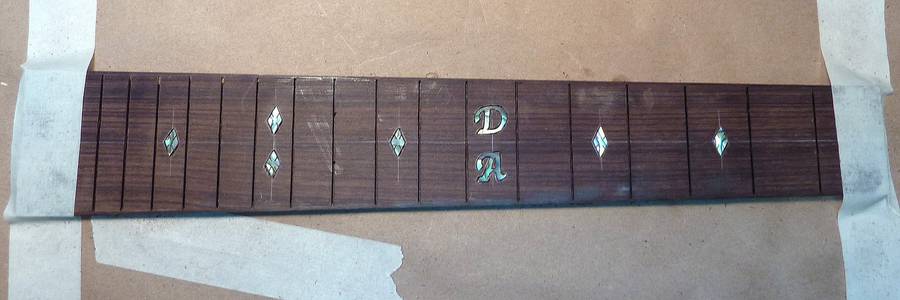
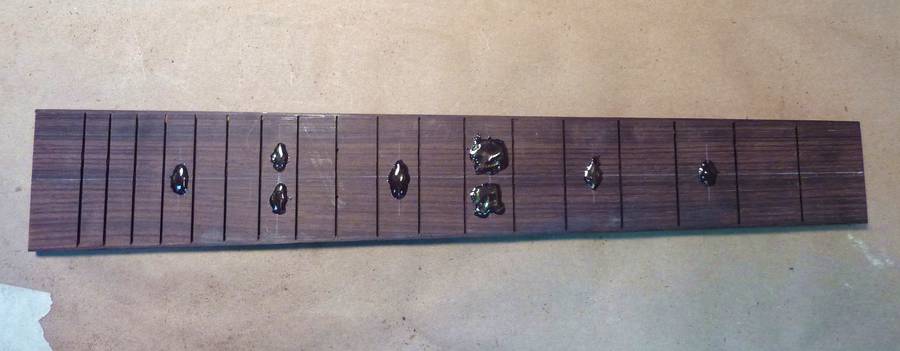 When all the pockets are routed, I mix up some epoxy with rosewood dust and
glue in the shell with a generous amount of glue so it can sink in to all
the cracks around the shell. After the glue has cured, I will level it off
by first running through my drum sander just until the shell is exposed then
I will sand by hand up to 600 grit to get the shell nice and shiny and make
the fretboard ready for fretting.
When all the pockets are routed, I mix up some epoxy with rosewood dust and
glue in the shell with a generous amount of glue so it can sink in to all
the cracks around the shell. After the glue has cured, I will level it off
by first running through my drum sander just until the shell is exposed then
I will sand by hand up to 600 grit to get the shell nice and shiny and make
the fretboard ready for fretting.
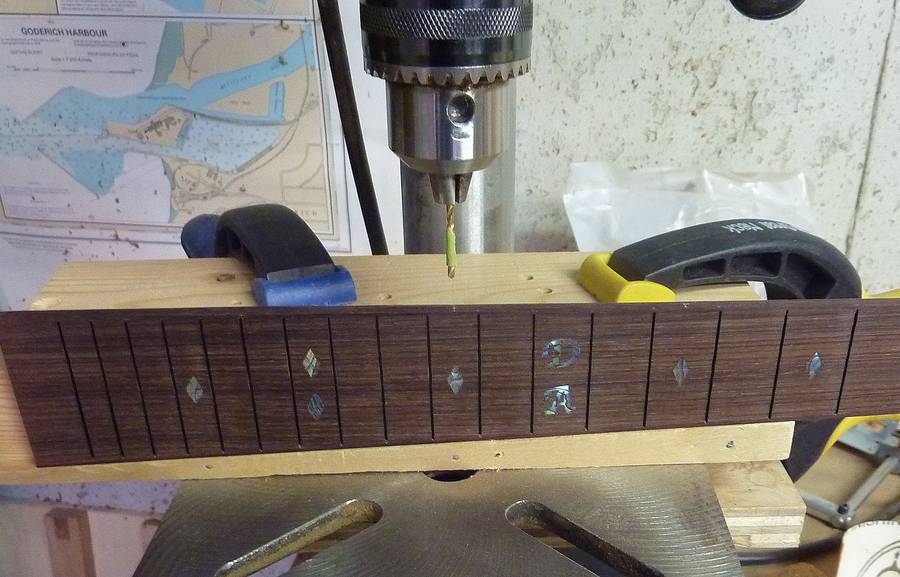 Drilling the holes for the dots to go in the side of
the fretboard. I put it on a simple jig to make the fretboard level for
this under the drill.
Drilling the holes for the dots to go in the side of
the fretboard. I put it on a simple jig to make the fretboard level for
this under the drill.
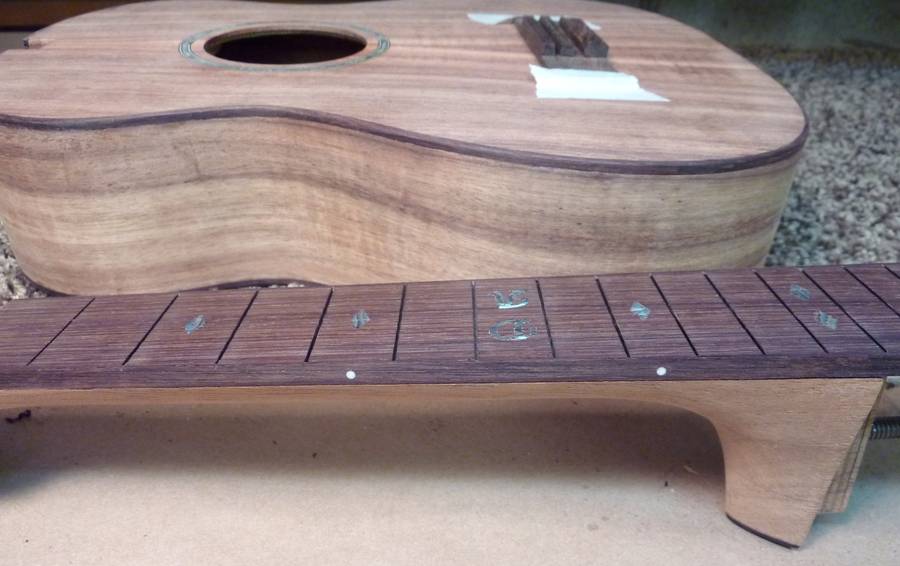 The dots are just plastic rod that I shove in the hole
and sand level. It's the side dots, not the fret markers on top of the fret
board, that actually help the player get visually oriented as he or she goes
up the fretboard. For this purpose, only a couple are actually needed
although most guitars have more.
The dots are just plastic rod that I shove in the hole
and sand level. It's the side dots, not the fret markers on top of the fret
board, that actually help the player get visually oriented as he or she goes
up the fretboard. For this purpose, only a couple are actually needed
although most guitars have more.
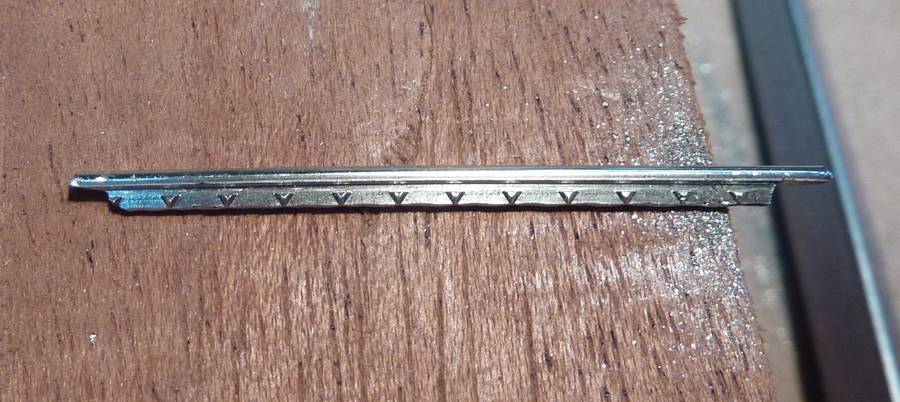 Since I bound the fretboard, I had to file back the tangs on the end of
each fret so that only the top part of the fret goes over the binding.
Since I bound the fretboard, I had to file back the tangs on the end of
each fret so that only the top part of the fret goes over the binding.
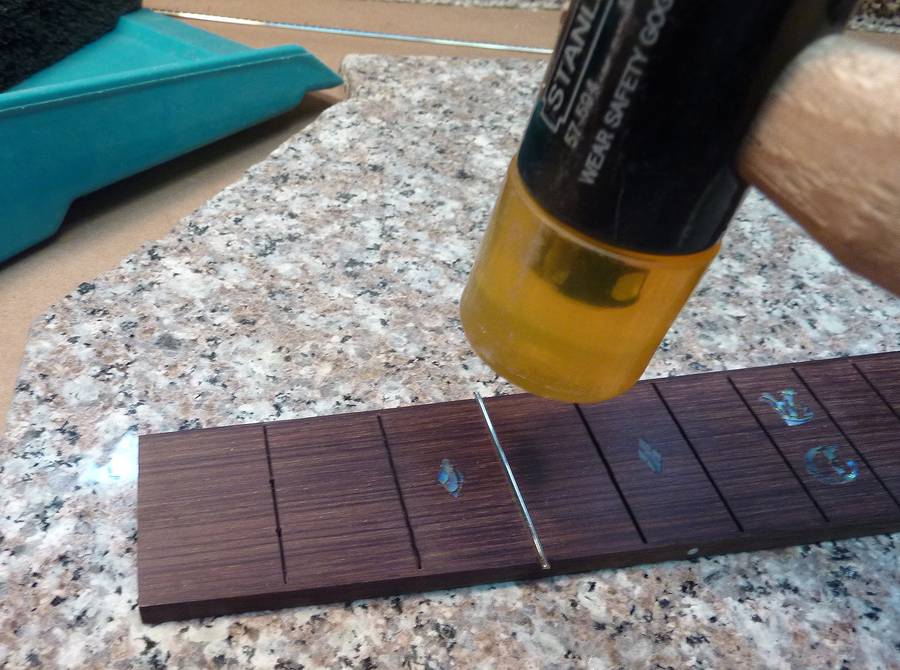 I install them with a soft-faced hammer.
 When I sand back the bevel on the
frets, I also break the edge of the fretboard so it won't feel sharp for
the player. Even after that, it is necessary to file back the edges of the
frets further so that there are no sharp edges on them.
When I sand back the bevel on the
frets, I also break the edge of the fretboard so it won't feel sharp for
the player. Even after that, it is necessary to file back the edges of the
frets further so that there are no sharp edges on them.
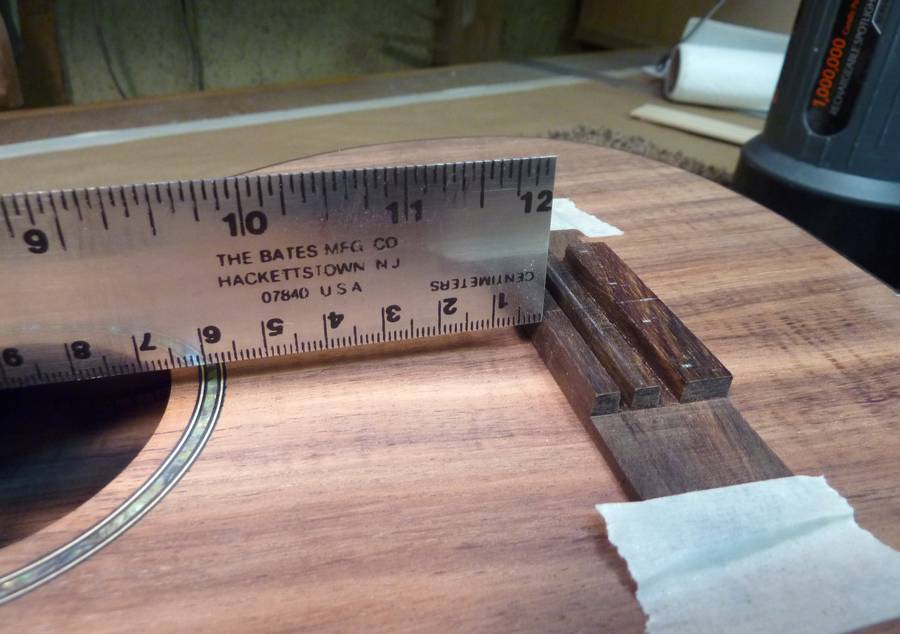 Once I have the fretboard fretted, I check the up and down angle of the
neck by running a ruler along the top of the frets and seeing how it would
match up to a bridge. As you can see in the first picture, the ruler was
hitting the bridge rather than clearing it
Once I have the fretboard fretted, I check the up and down angle of the
neck by running a ruler along the top of the frets and seeing how it would
match up to a bridge. As you can see in the first picture, the ruler was
hitting the bridge rather than clearing it
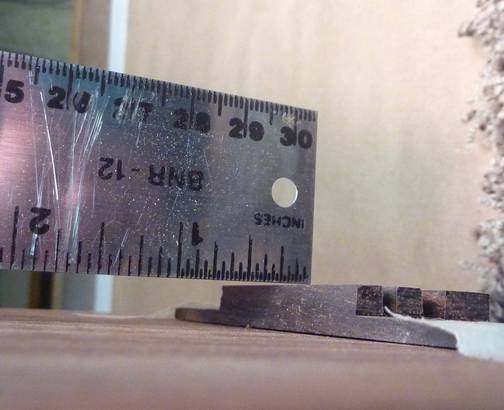 So I shaved and sanded the face
of the heel until the ruler cleared the bridge as shown here.
Actually, it was close enough that it probably would have worked
without this adjustment. The difference being in the first case I would have
had a saddle shorter in height. I prefer to have a "healthy" saddle height
in case the top bellies up a little. That way I can just sand the saddle
shorter.
So I shaved and sanded the face
of the heel until the ruler cleared the bridge as shown here.
Actually, it was close enough that it probably would have worked
without this adjustment. The difference being in the first case I would have
had a saddle shorter in height. I prefer to have a "healthy" saddle height
in case the top bellies up a little. That way I can just sand the saddle
shorter.
If, on the other hand, you run out of saddle height, you are forced to do a neck re-set which is a non-trivial repair.
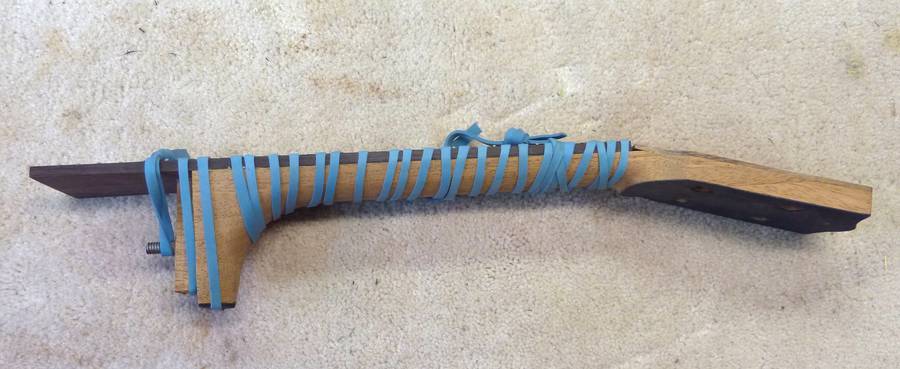 When I was satisfied with the neck angle I glued the fretboard to the neck
using a big elastic for a clamp.
When I was satisfied with the neck angle I glued the fretboard to the neck
using a big elastic for a clamp.
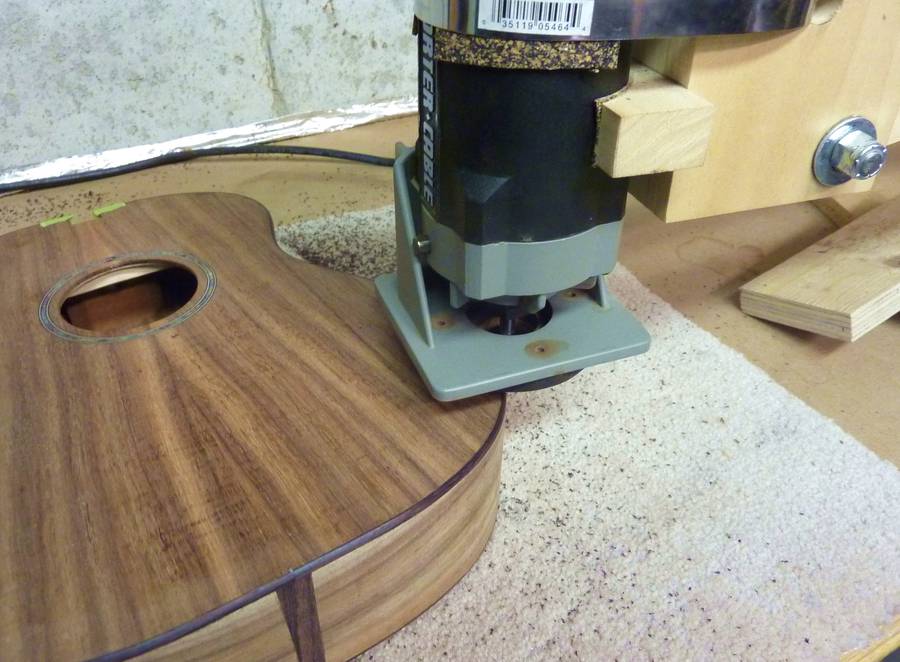 After that I routed all the bindings with a
1/8" radius round over bit. This improves the look of the bindings and makes
the instrument much nicer to hold. I then did some sanding and put it
together for the last picture.
After that I routed all the bindings with a
1/8" radius round over bit. This improves the look of the bindings and makes
the instrument much nicer to hold. I then did some sanding and put it
together for the last picture.
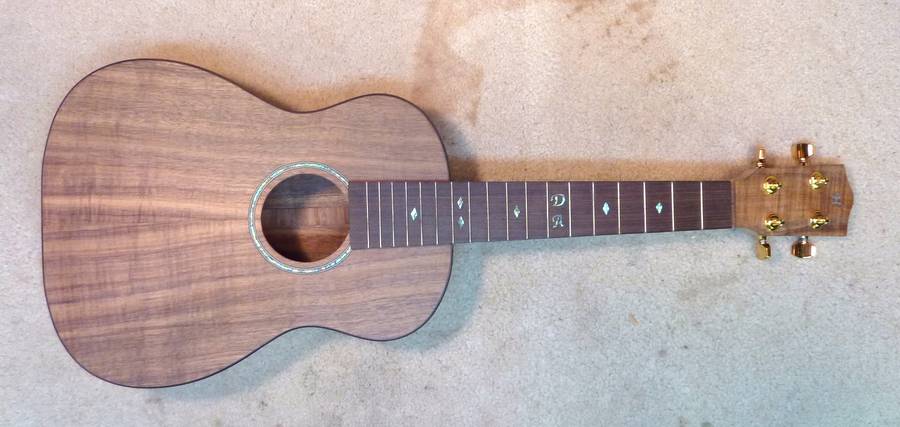 Aside from the bridge, nut and saddle, the build part is complete. I will
start the finishing tomorrow. The curl in the koa should look great under
finish.
Aside from the bridge, nut and saddle, the build part is complete. I will
start the finishing tomorrow. The curl in the koa should look great under
finish.
See also: Matthias making the fretboard
Next: Pat finishing up the ukulele
![]()