 The sound board is made of two "bookmatched" halves.
The two halves need to have a very straight edge where they meet for a consistent glue joint.
The sound board is made of two "bookmatched" halves.
The two halves need to have a very straight edge where they meet for a consistent glue joint.
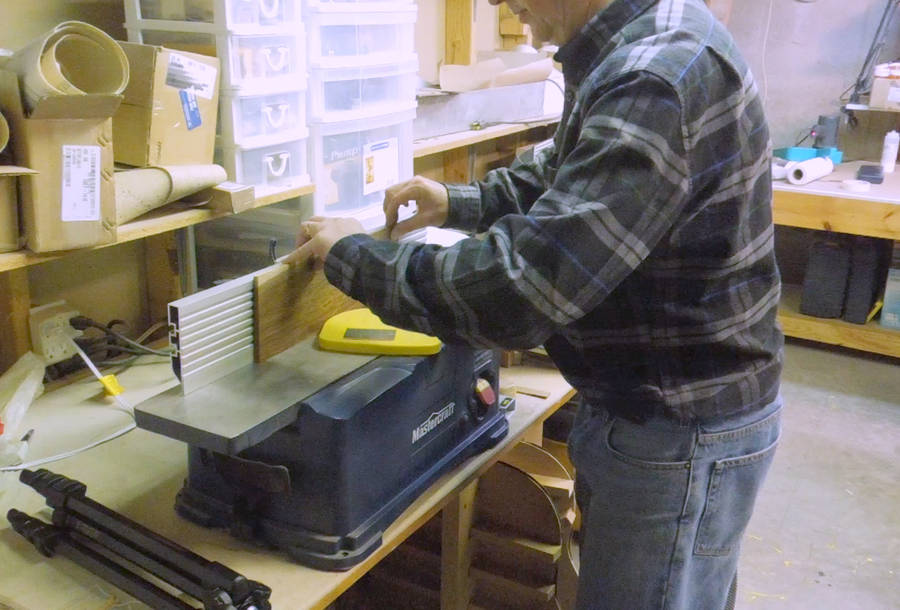
Here Pat straightens the joint lines on the jointer...
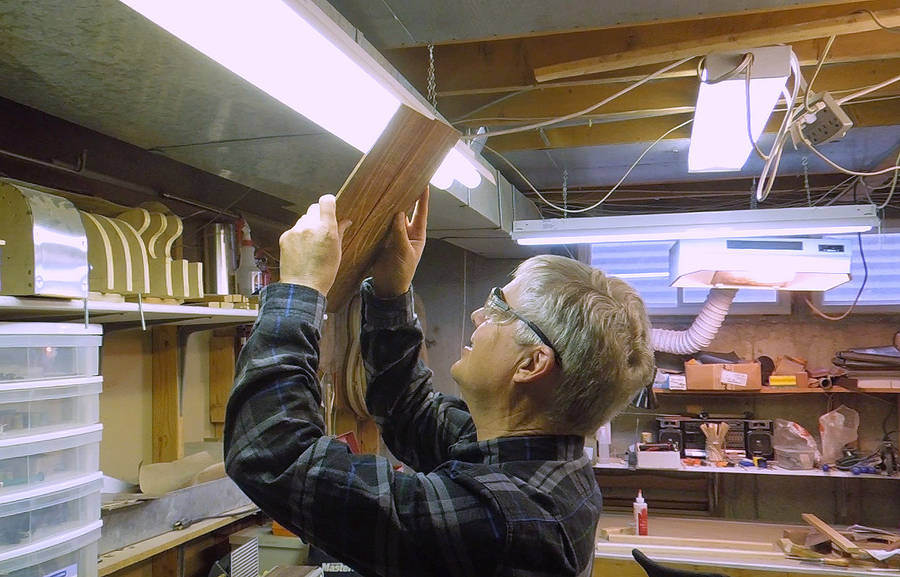 ... and checking it against the light. The jointer edges were not quite straight enough.

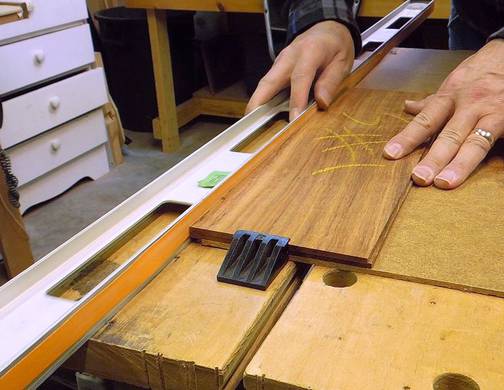 So Pat uses a strip of sandpaper, attached to a level (used as a straight edge) to
fine-tune the edge. It's a time consuming process.
So Pat uses a strip of sandpaper, attached to a level (used as a straight edge) to
fine-tune the edge. It's a time consuming process.
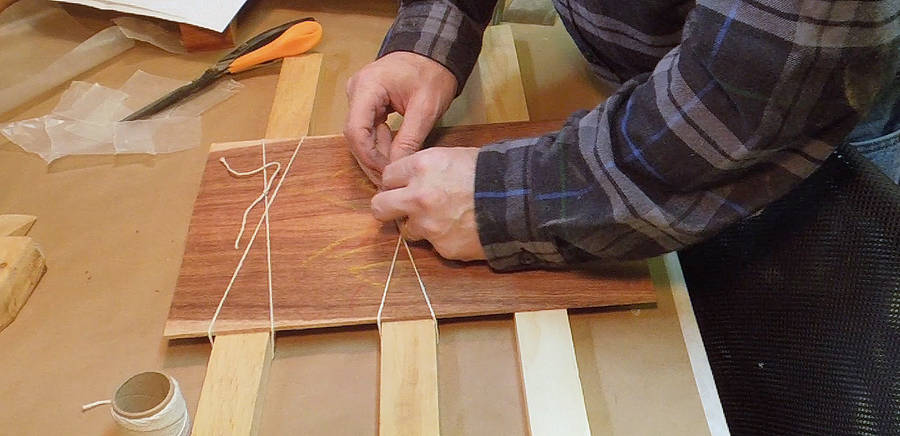 Next, using an interesting trick to glue the two halves together.
Pat places them side-by-side on some strips of wood, and ties some string around the wood and the pieces.
 Then glue is applied to one edge of the wood.
 Then the edges of the wood are pressed together, and wedges pushed under
the strings. The wedges tighten the strings, which causes the string to push the
edges together. The string also pushes down on the wedges, ensuring the boards
are flat.
Then the edges of the wood are pressed together, and wedges pushed under
the strings. The wedges tighten the strings, which causes the string to push the
edges together. The string also pushes down on the wedges, ensuring the boards
are flat.
 The wedges Pat uses were a bit thick for a workpiece this narrow. These wedges work well for
guitar-sized fronts and backs, but for a smaller ukulele, thinner wedges would be easier.
The wedges Pat uses were a bit thick for a workpiece this narrow. These wedges work well for
guitar-sized fronts and backs, but for a smaller ukulele, thinner wedges would be easier.
 Once the glue has dried, the front and back are brought down to their final thickness
using his thickness sander. A thickness sander, though not very fast, is less work than
my method of getting the sound board to its final thickness.
Once the glue has dried, the front and back are brought down to their final thickness
using his thickness sander. A thickness sander, though not very fast, is less work than
my method of getting the sound board to its final thickness.
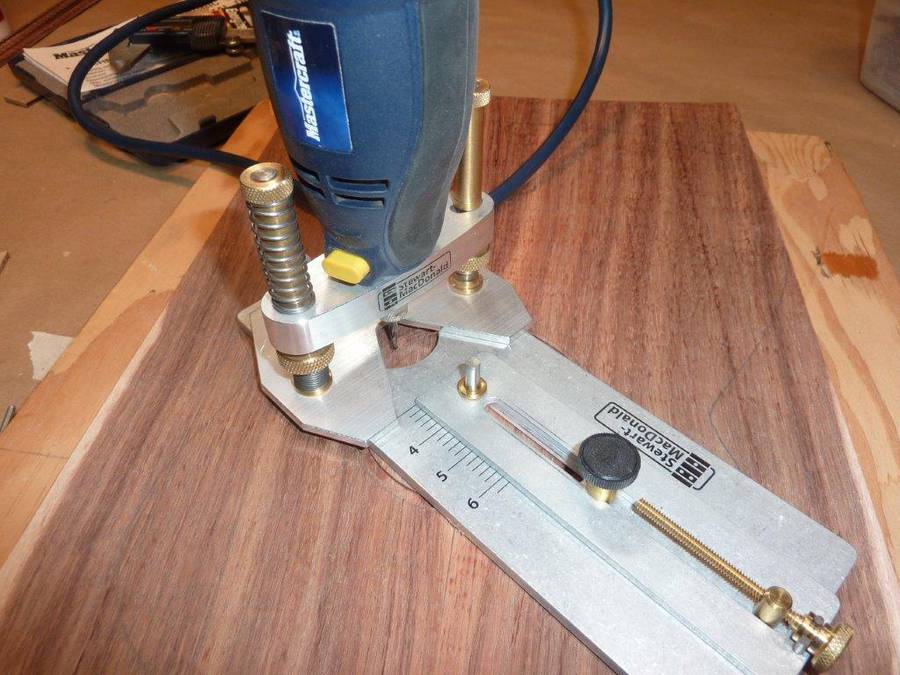
Pat then uses a circle cutting jig from Stuart-MacDonald for cutting a groove for a decorative rosette around the sound hole.
 Rosette groove cut.
 Gluing in the rosette with cyanoacetate glue.
After gluing in the rosette, the sound hole is cut with the same router jig.
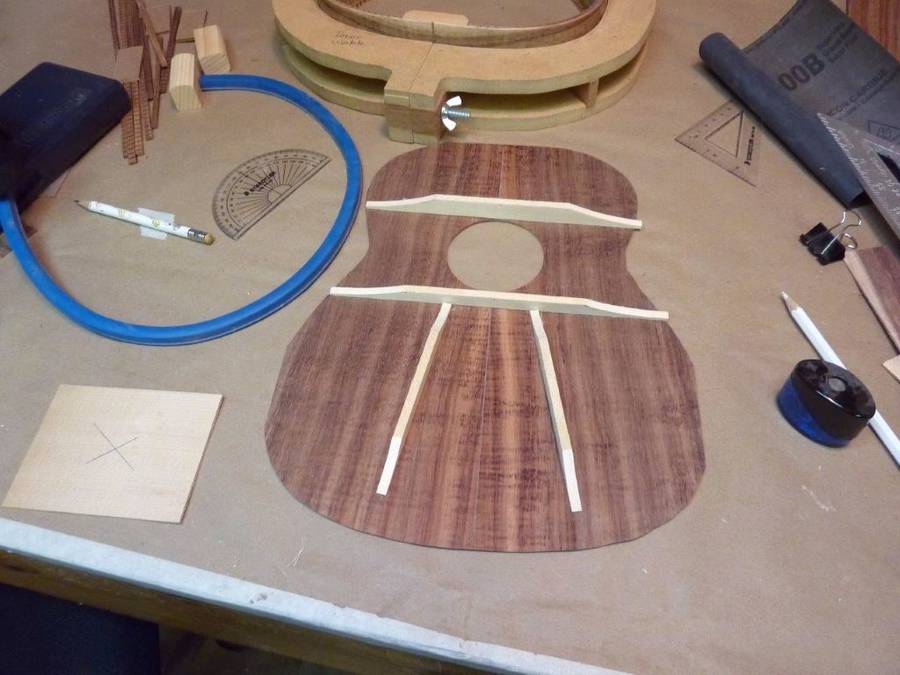 Laying out where the ribs will go on the back of the sound board.
 Gluing down the ribs, and a thin layer of reinforcing wood around the sound hole.
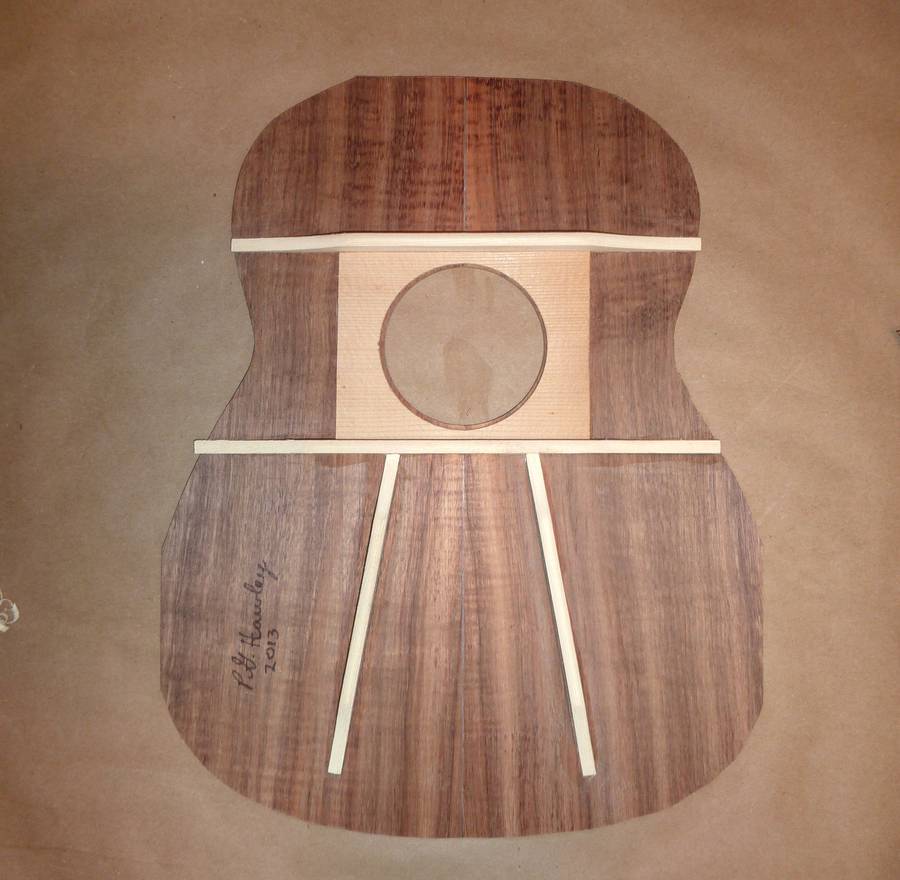 Ribs and reinforcement glued. The wood around the sound hole is oriented
with the grain perpendicular to the main soundboard.
This ensures the front won't crack around the sound hole.
Ribs and reinforcement glued. The wood around the sound hole is oriented
with the grain perpendicular to the main soundboard.
This ensures the front won't crack around the sound hole.
Please note:
I don't have any video of this or subsequent stages of Pat Hawley's ukulele build.
From here on, I'm using photos that Pat sent me along with his description of
the steps. But capturing a build on video would be much more involved.
See also:
Next: Assembling the body
To my ukulele page
![]()