Pulling wires through walls
One of the downsides of owning an older house is that older houses often don't have as many electrical circuits as one would like. For example, 1950's style houses, such as my house, usually don't have a light fixture in the living room ceiling. Bungalows, with accessible basements and attics, are however relatively less difficult to add wiring to after the fact.This article describes what installing an extra light fixture in an older bungalow involves.
 After figuring out that I could indeed run wires where I wanted, I started by
making a hole in the ceiling for an octagonal box. Postwar housing up to some
point in the 1960's generally use a "wet wall" style of plaster. This involves
gypsum board nailed to the studs and joists, followed by a layer of mortar,
followed by a layer of gypsum, and then paint. This makes for a very sturdy
wall. But also more difficult to work
with than installing a socket in drywal.
After figuring out that I could indeed run wires where I wanted, I started by
making a hole in the ceiling for an octagonal box. Postwar housing up to some
point in the 1960's generally use a "wet wall" style of plaster. This involves
gypsum board nailed to the studs and joists, followed by a layer of mortar,
followed by a layer of gypsum, and then paint. This makes for a very sturdy
wall. But also more difficult to work
with than installing a socket in drywal.
Stud finders are often useless with walls this thick. I ended up locating a point about half way between two joists just by knocking along the ceiling, and picking the point where the sound was hollowest.
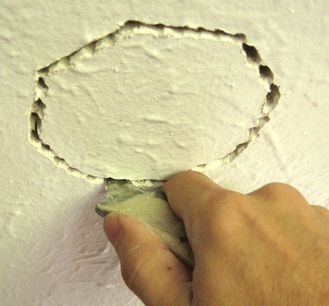
I started by outlining the shape of the octagonal box with a pencil, and drilling
a closely spaced series of 3/8" holes with a masonry bit. After drilling the
holes, I used a utility knife to chip away the bits of plaster between the holes.
The piece of ceiling came out fairly nicely, and only minor chipping was needed
to the resulting hole to make the octagonal box fit.

To subsequently mount the socket, I cut a piece of 2x4 to the length of the space between the joists. Two small blocks on either end lift it to the right height for the octagonal socket to be flush with the ceiling. I nailed this piece of 2x4 in with diagonal nails on either end. The two little blocks are not actually attached - just made them to help me position the piece of 2x4.
I wouldn't recommend this technique if your house uses wood lath (1920s or earlier). If your house uses wood lath, it's probably best to mount a surface box near a joist, because the wood lath plaster is just too fragile and tends to detach itself from the lath whenever you do anything to it.
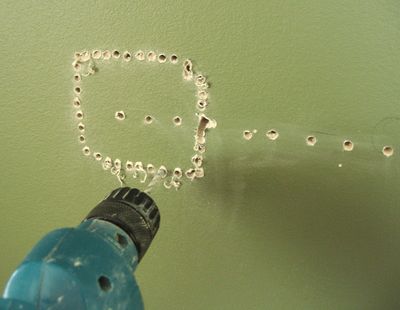 For the light switch, I couldn't really find a spot between the studs using
my knocking technique, the first few holes I drilled ended up hitting wood.
Hence the series of five individual hoes to the right of the outline for the switch.
This sort of work is often hit and miss.
For the light switch, I couldn't really find a spot between the studs using
my knocking technique, the first few holes I drilled ended up hitting wood.
Hence the series of five individual hoes to the right of the outline for the switch.
This sort of work is often hit and miss.
I wasn't overly worried
about the mess though, because I still had some of the paint left over from
when the living room was painted. It only took a bit of plaster of Paris
and paint to hide them completely.
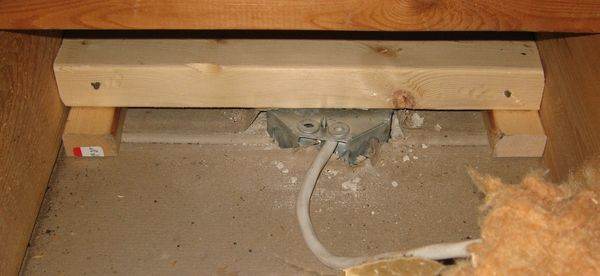
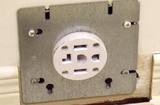
 As a result of having to hunt for where the stud was not, I ended up putting
the electrical box right next to a stud, so that it could be screwed straight
into the stud. This made the special 'rework' electrical box which has the ability
to clamp itself to the plaster wall unnecessary. The photo shows the box inserted
just for a test fit. It wouldn't be a good idea to install the box before
pulling the wires through the walls.
As a result of having to hunt for where the stud was not, I ended up putting
the electrical box right next to a stud, so that it could be screwed straight
into the stud. This made the special 'rework' electrical box which has the ability
to clamp itself to the plaster wall unnecessary. The photo shows the box inserted
just for a test fit. It wouldn't be a good idea to install the box before
pulling the wires through the walls.
Running the wires
I ran the wire from the ceiling to the light switch in the attic
 To run the wire into the wall, I drilled into wall's top plate (the 2x4 that runs
horizontally along the studs) into the cavity inside the wall.
I used a 1/2" drill for metal. That's as big a metal drill that fits in
most hand drill chucks. Any sort of wood bit would not be a good idea, because
hitting a nail is not alltogether unlikely - even more so if drilling through
a subfloor. Spade drills are especially
unadvisable, as they are not good at removing chips from deeper holes.
To run the wire into the wall, I drilled into wall's top plate (the 2x4 that runs
horizontally along the studs) into the cavity inside the wall.
I used a 1/2" drill for metal. That's as big a metal drill that fits in
most hand drill chucks. Any sort of wood bit would not be a good idea, because
hitting a nail is not alltogether unlikely - even more so if drilling through
a subfloor. Spade drills are especially
unadvisable, as they are not good at removing chips from deeper holes.
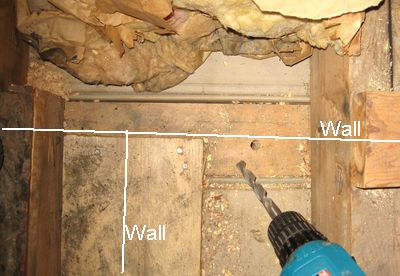 Fortunately, it's easy to tell where the walls run from the attic. For walls that
run perpendicular to the ceiling joists, one can see the top plate between
the pieces of gypsum board (the horizontal
line in the image at left). For walls parallel to the joists, there's usually
a board nailed to the top plate of those walls, to give a nailing surface for
the drywall or gypsum board on either side. So it's just a matter of measuring
from the nearest corner in a wall to figure out where you are on the walls.
Fortunately, it's easy to tell where the walls run from the attic. For walls that
run perpendicular to the ceiling joists, one can see the top plate between
the pieces of gypsum board (the horizontal
line in the image at left). For walls parallel to the joists, there's usually
a board nailed to the top plate of those walls, to give a nailing surface for
the drywall or gypsum board on either side. So it's just a matter of measuring
from the nearest corner in a wall to figure out where you are on the walls.
For drilling up from the basement, the walls are a bit harder to locate.
Usually, for walls parallel to the joists, there will be two joists very close
together where the wall is. For walls perpendicular to the joists, sometimes
you can see rows of nails sticking out of the subfloor. Any sort duct work or pipes
going through the floor is useful as a reference point to measure to. It's also
advisable to use a smaller drill for the initial hole up from the basement,
and then check the floors before going to a larger drill. That way, if your drill
ends up in a room and not a wall, there's less damage to your floor.
 When running wires to a switch box, getting the wire in is relatively easy.
I like to set up a lamp shining into the hole, so that when I drill from the
top, I can see the light through the hole, and I know I'm in the right spot.
When running wires to a switch box, getting the wire in is relatively easy.
I like to set up a lamp shining into the hole, so that when I drill from the
top, I can see the light through the hole, and I know I'm in the right spot.
Because the hole for the switch is large enough to reach, there's no need for any sort of fish tape to get the wire through. The wire itself tends to have enough rigidity that it can be up or down, and then just watch for it from the hole in the wall, and when you see it reach in and pull it out.
Sadly, one doesn't have x-ray vision, which makes for surprises and frustrations sometimes. Where I put the switch box, I got very close to a horizontal brace, as you can see in the photo. I had to chisel away part of that to make room for the switch.
I could have still drilled a hole down from that to get to the basement, but in my
basement, directly below the switch is the main heating duct, so going down from
the switch was not an option. Instead, I ran another
wire back up into the attic, and ran it back down through another wall.
Fishing wires through the walls
Fishing a wire from the attic to the basement, without cutting a hole in the wall makes for more of a challenge though. I suppose a solution would have been to just install an extra electrical outlet in the hallway, just to have an excuse to cut another hole in the wall and avoid a difficult wire fishing job. But that didn't occur to me until after I had fished the wire through.
 Although I have a handy dandy fish tape, I have to admit that I have never successfully
used it for a job that could not just as well have been done with coathanger wire.
For this job, involving fishing the wire between two half inch holes from the
basement and the attic, the fish tape was no use.
Life was further complicated by an I-beam directly below the wall, so I had to drill
the bottom hole at an angle to get into the wall. This really makes it impossible
to direct a fish tape.
Although I have a handy dandy fish tape, I have to admit that I have never successfully
used it for a job that could not just as well have been done with coathanger wire.
For this job, involving fishing the wire between two half inch holes from the
basement and the attic, the fish tape was no use.
Life was further complicated by an I-beam directly below the wall, so I had to drill
the bottom hole at an angle to get into the wall. This really makes it impossible
to direct a fish tape.
My method of using a piece of metal and a magnet has served me well though, and once I gave up on the fish tape and used a magnet, it worked for me quickly. For this type of job, I have also seen suggestions of dropping a chain in from the top, and hooking it in from the bottom. I'm very skeptical of that method myself - I can't imagine the chain not getting caught or jammed as you try to hook it somewhere from below, unless you drill a really big hole.
Basically, my method consists of attaching a small rare earth magnet to the end of a piece of copper wire or coathanger wire, and passing it up from below, so that the magnet is a few centimeters into the stud cavity.
Then, from above, lower a nail or other narrow piece of metal attached to a thread. As you first lower the nail, be sure that it pulls in an amount of string that corresponds to the height of the wall. If the nail hits something before going down the full wall height, there's likely some sort of cross brace or fire stop in the wall. If jerking the string repeatedly doesn't make it go down further, pick a different spot to run the wire, or resort to cutting a hole in the wall at the height of the obstruction to get around it.
Once your have lowered the nail all the way down, bounce it around the bottom of the cavity by repeatedly jerking the string up and down a little bit, until you feel resistance to pulling the nail up, at which point it should be stuck to the magnet.
 Once you have the nail stuck to the magnet, go to the basement and carefully pull
it out through the hole. You might get the nail stuck and lose it, but fortunately,
getting the nail stuck to the magnet again doesn't take that much trying from above.
Once you have the nail stuck to the magnet, go to the basement and carefully pull
it out through the hole. You might get the nail stuck and lose it, but fortunately,
getting the nail stuck to the magnet again doesn't take that much trying from above.
It may be tempting to just use steel wire from the bottom, and lower the magnet by the thread instead. That however would be a bad idea, as the magnet may end up attaching itself to things other than your steel wire, and it could be very difficult to get it to detach by pulling on the thread.
 Once you have pulled the string into the basement, tie a bigger string to it,
and carefully pull it up into the attic.
Once you have pulled the string into the basement, tie a bigger string to it,
and carefully pull it up into the attic.
Once you have the string through, tie a loop to the end of it, and strip the wire, and hook it around the loop. Strip it down to just the copper for the hook part, to make the hook narrower, just to give it less opportunity to snag as you pull it.
 Tightly wrap some electrical tape around the wire, both to hold the loop hook
closed, and to hopefully cover anything that the wire might snag on. Don't use
too much tape though, because the tape itself can bunch up and snag too.. Also note how
I made it so that all my potential snag points are a few inches apart, so they hopefully
won't combine to make it worse.
Tightly wrap some electrical tape around the wire, both to hold the loop hook
closed, and to hopefully cover anything that the wire might snag on. Don't use
too much tape though, because the tape itself can bunch up and snag too.. Also note how
I made it so that all my potential snag points are a few inches apart, so they hopefully
won't combine to make it worse.
If you had to drill your holes at a bit of an angle, it could take a surprisingly large amount of force to pull the wire through. There's few things as disappointing as having the wire detach from the string as you pull it through, and having to start over again!
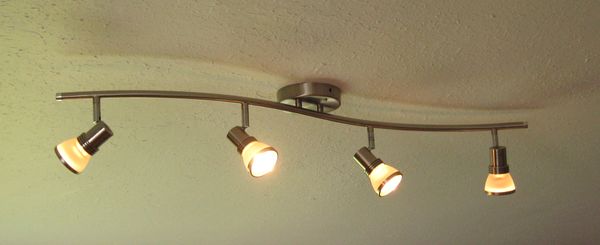 And here's my installed light. I used a double switch, and made it so I can control
half the light separately. I'm no fan of dimmer switches, but this way, I can
turn on just two bulbs at a time if I don't need as much light.
And here's my installed light. I used a double switch, and made it so I can control
half the light separately. I'm no fan of dimmer switches, but this way, I can
turn on just two bulbs at a time if I don't need as much light.
Years later, in 2021, I had a similar wire fishing problem. This time, I made a video of the process.
 Installing a 240 volt circuit
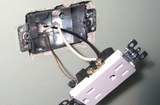 Installing a socket in finished drywall
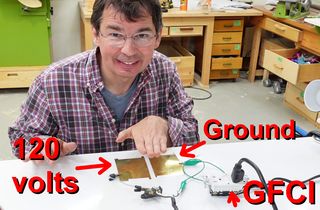 How badly do you get zapped before you trip a GFI?
 240 volt from dryer plug
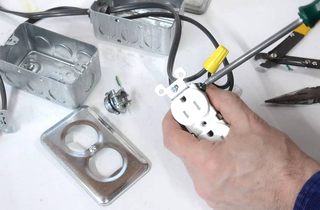 Simple remote switch
 Building a small
 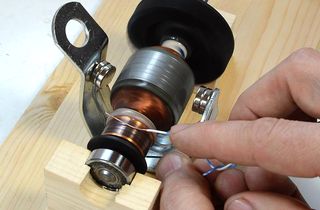 How DC motors and universal motors work
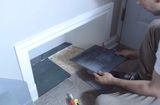 Installing a boot nook
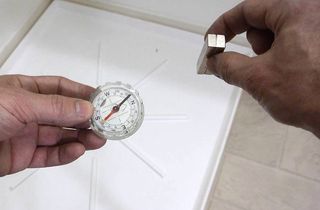 Thu the floor (or wall) magnet alignment trick