Making bandsaw wheels
This article chronicles the start of my homemade bandsaw project.
It started with me realizing that I rarely bother changing the bandsaw blade
to suit the cuts that I am making.
So the solution would be to have a second, smaller
bandsaw that I'd always keep a fine blade in. And why not build this
bandsaw myself? But when I found out that a new 9" bandsaw could be bought
for under $150, I realized there would be little point in building
one myself. But larger bandsaws are more expensive. So instead of a
smaller bandsaw, I decided to build a bigger one, with 18" wheels.
 I started by buying some 7/8" (22 mm) shaft
from the Metal Supermarket, and some bearing blocks from Princess Auto for a
total cost of around $60. I had no idea whether I'd be successful
at building a bandsaw, but I needed to spend that much just to start
experimenting.
I started by buying some 7/8" (22 mm) shaft
from the Metal Supermarket, and some bearing blocks from Princess Auto for a
total cost of around $60. I had no idea whether I'd be successful
at building a bandsaw, but I needed to spend that much just to start
experimenting.
The first thing I made was a large drive pulley. I made this drive pulley
from a piece of hardwood panel from some furniture that I had taken apart.
 Although technically, my lathe is big enough that I could have mounted the pulley
on my lathe to turn the V-groove, I chose to use the table saw to cut it
instead. That way, I didn't have to figure out how to mount the pulley on my lathe,
and the V-groove would follow the wood exactly. My piece of wood was barely thick
enough, so I didn't have any room for error.
Although technically, my lathe is big enough that I could have mounted the pulley
on my lathe to turn the V-groove, I chose to use the table saw to cut it
instead. That way, I didn't have to figure out how to mount the pulley on my lathe,
and the V-groove would follow the wood exactly. My piece of wood was barely thick
enough, so I didn't have any room for error.
I cut the V-groove by first cutting a rectangular slot in the edge, and then cutting
two angled slots on either side to turn the slot into a V-shaped slot. I used
a featherboard to make sure my wheel was always pressed against the fence, and then
slowly rotated it above the blade. It's not the safest operation, but
I didn't need to get my fingers near the blade, and with the work piece positioned
the way it was, there would be little risk or consequences of kickback.
A safer method, but requiring more set-up, is to
make the pulley on the router table
 I glued a block of wood on either side of the pulley to give it more area
where it makes contact with the shaft.
I glued a block of wood on either side of the pulley to give it more area
where it makes contact with the shaft.
I had an old one-third horsepower 1750-RPM motor kicking around, and I used that
motor to test my pulley. It had maybe a millimeters of side-to-side
wobble, but it ran quite nicely. So far so good.
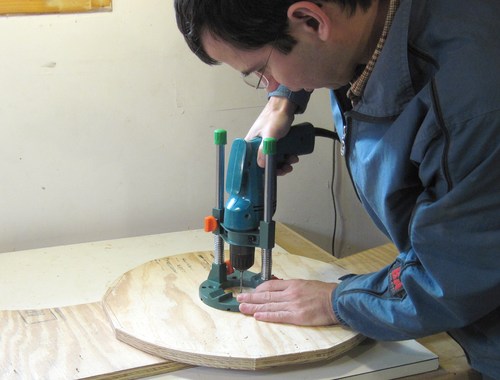 I used some scrap plywood from an old shipping crate to make the bandsaw wheels.
My drill press doesn't have enough distance between the chuck and the vertical
post to be able to drill a hole in the middle of an 18" (45 cm) wheel, so I
had to resort to using a hand drill and a drill guide to drill the center hole.
Here I'm drilling a 1/8" pilot hole.
I used some scrap plywood from an old shipping crate to make the bandsaw wheels.
My drill press doesn't have enough distance between the chuck and the vertical
post to be able to drill a hole in the middle of an 18" (45 cm) wheel, so I
had to resort to using a hand drill and a drill guide to drill the center hole.
Here I'm drilling a 1/8" pilot hole.
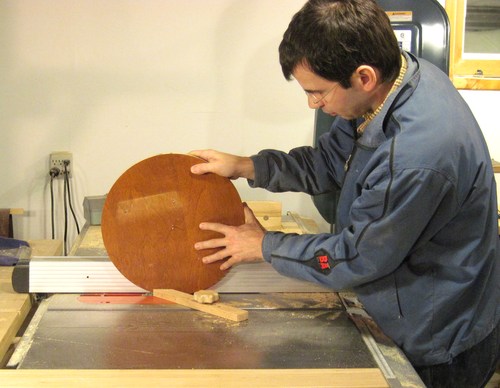
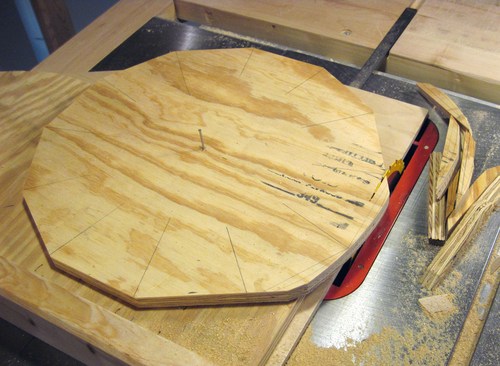 I cut my wheel blank to be a 12-sided polygon. I used a nail in the pilot hole as a
pivot point, and placed this on my table saw sled to accurately cut each of the
12 sides. I'm lining up the lines on the wheel with some pencil marks on
the base to get the angle.
I cut my wheel blank to be a 12-sided polygon. I used a nail in the pilot hole as a
pivot point, and placed this on my table saw sled to accurately cut each of the
12 sides. I'm lining up the lines on the wheel with some pencil marks on
the base to get the angle.
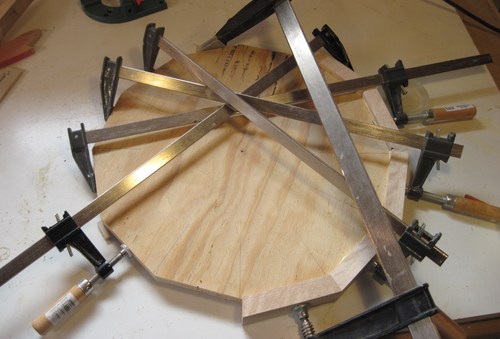 Next I glued a piece of maple to each side of my wheel. I cut these
to length one at a time. That way, I could make sure all my joints closed nicely
on the corners. If I'd cut the pieces to length ahead of time, I'm sure
by the time I'd gone around the circle I'd either have a gap or the pieces would
be too long.
Next I glued a piece of maple to each side of my wheel. I cut these
to length one at a time. That way, I could make sure all my joints closed nicely
on the corners. If I'd cut the pieces to length ahead of time, I'm sure
by the time I'd gone around the circle I'd either have a gap or the pieces would
be too long.
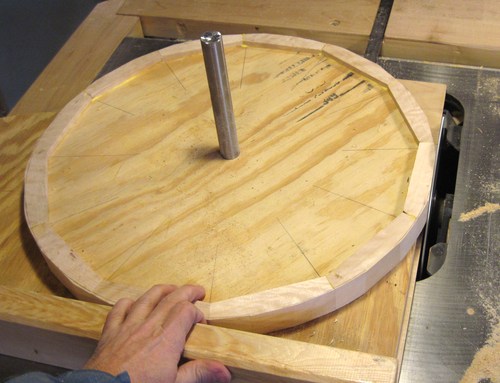 I drilled the 7/8" center hole in the wheel using the same drill guide as
I used for the pilot hole, and then used a piece of my 7/8" shaft as a point
for turning the wheel on. I put
a piece of plywood on my table saw sled with a 7/8" hole in it to hold the
shaft in place. I then slowly turned the wheel as I pushed the sled forward to
cut the perimeter of the wheel to be a circle.
I drilled the 7/8" center hole in the wheel using the same drill guide as
I used for the pilot hole, and then used a piece of my 7/8" shaft as a point
for turning the wheel on. I put
a piece of plywood on my table saw sled with a 7/8" hole in it to hold the
shaft in place. I then slowly turned the wheel as I pushed the sled forward to
cut the perimeter of the wheel to be a circle.
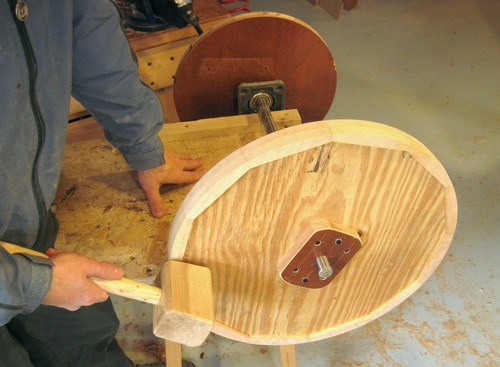 Like I did with the pulleys, I added a block of hardwood to either side
to give the bandsaw wheel more contact with the shaft. To make sure the wheel runs
true without any side to side wobble, I actually glued the blocks onto it while
it was on the shaft, and then spun it around to see if it would wobble. With
the glue still wet, I could budge the wheel with a mallet to get it into trueness.
Once the glue dried, that position was locked in place.
Like I did with the pulleys, I added a block of hardwood to either side
to give the bandsaw wheel more contact with the shaft. To make sure the wheel runs
true without any side to side wobble, I actually glued the blocks onto it while
it was on the shaft, and then spun it around to see if it would wobble. With
the glue still wet, I could budge the wheel with a mallet to get it into trueness.
Once the glue dried, that position was locked in place.
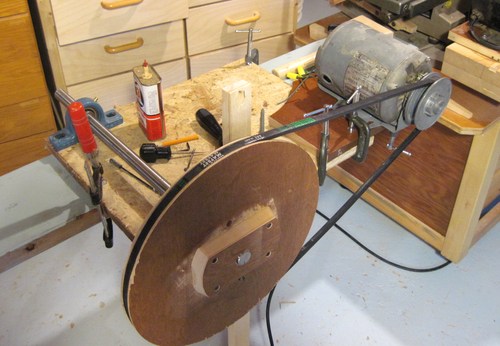
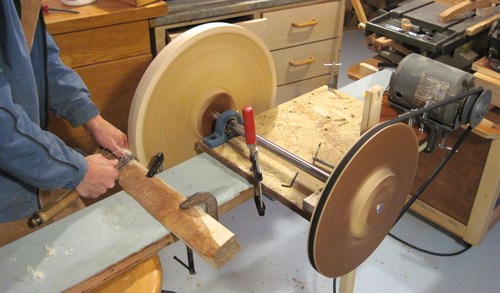 To get my wheel to run really true, and also to shape the "crown" needed for
bandsaw wheels, I just spun it up with my motor and turned the edges
as if it were on a lathe. This worked really well, and with the chisel cutting
along the grain direction of the wood all the way around made for a very
smooth surface.
To get my wheel to run really true, and also to shape the "crown" needed for
bandsaw wheels, I just spun it up with my motor and turned the edges
as if it were on a lathe. This worked really well, and with the chisel cutting
along the grain direction of the wood all the way around made for a very
smooth surface.
Update: Newer bandsaw wheel building technique
 A crowned pulley is one that
has a slight hump in the middle of it. It's an odd bit of physics
that a flat-belt will always climb to the highest point when running on a pulley.
Bandsaws employ the same principle, with the steel blade acting like a flat belt.
A crowned pulley is one that
has a slight hump in the middle of it. It's an odd bit of physics
that a flat-belt will always climb to the highest point when running on a pulley.
Bandsaws employ the same principle, with the steel blade acting like a flat belt.
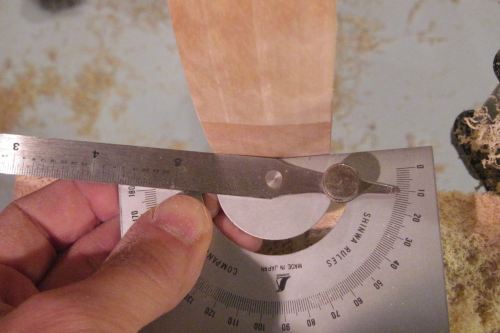
I measured this hump to have about 10 degrees between the two tapers (so 5 degrees on
each side) on my 14" bandsaw's wheels, so I figured I'd make about as much of a hump
on mine too. This photo shows me checking the angle on my crown with
an angle gauge. Of course, I also had to make sure that I had equal amounts
of drop off on either side. I checked that by holding a square against the wheel
and just eyeballing it to make sure the drop off was about the same on both sides.
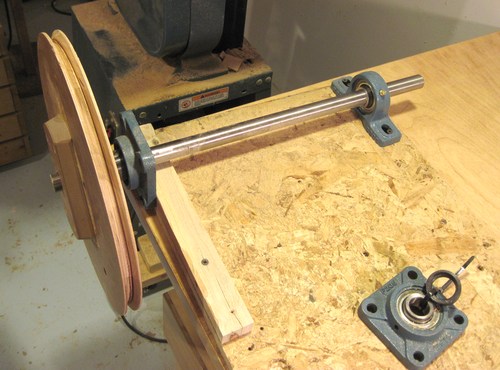
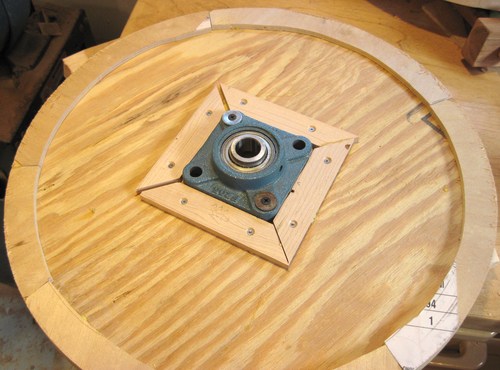 The lower wheel for my bandsaw experiment was fixed on the shaft, but the
unpowered upper wheel turns around a fixed shaft.
I used two flange-mount bearing blocks
and mounted them on either side of the plywood wheel. These flange bearings would
have a lot of sideways force applied to them, so I glued pieces of wood
tightly against the edges of the bearing to fix it in place. Like the lower wheel,
I trued it by tapping it with a mallet as I spun it around on a shaft.
The plywood I used for this wheel was a little warped though, so I couldn't get
it completely true.
The lower wheel for my bandsaw experiment was fixed on the shaft, but the
unpowered upper wheel turns around a fixed shaft.
I used two flange-mount bearing blocks
and mounted them on either side of the plywood wheel. These flange bearings would
have a lot of sideways force applied to them, so I glued pieces of wood
tightly against the edges of the bearing to fix it in place. Like the lower wheel,
I trued it by tapping it with a mallet as I spun it around on a shaft.
The plywood I used for this wheel was a little warped though, so I couldn't get
it completely true.
I have my bearings held on with just two drywall screws, because the bulk of the
load is sideways and that is taken up by the pieces of wood that I screwed
and glued around the bearing blocks.
I tried a simpler approach to make this wheel. Instead of gluing
pieces of maple to the edge, I just glued some pieces of 1/4" birch plywood to
the edges to widen the wheel's rim. Like the first wheel, I then turned
it to get a crown on it. Even with it wobbling a bit, the crown itself
doesn't wobble because it was turned as it was spinning.
This wheel isn't as good as my first one. Aside from being slightly warped,
the quality of the edge wasn't the best. I later ended up
making another wheel of the same design as my first bandsaw wheel. Although
I suspect the plywood edges would have been good enough even without
a maple rim if I had made it from the good quality Baltic birch plywood.
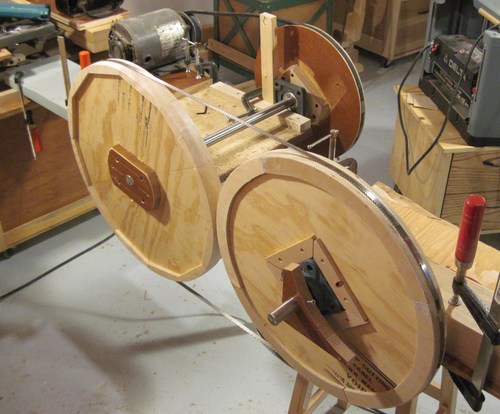 Having made two wheels, I used one of the blades from my 14" bandsaw to see if
it would track properly on the crowned wheels.
My 14" bandsaw uses 92" long blades, and that turned
out to be just barely long enough to go around both wheels without
having the wheels touch each other. I hadn't bought a longer blade yet, but
this was adequate to check that the blade would actually track properly.
I was very thrilled to see the blade running smoothly on my wooden wheels.
To me, it was proof that my homemade bandsaw project was feasible.
Having made two wheels, I used one of the blades from my 14" bandsaw to see if
it would track properly on the crowned wheels.
My 14" bandsaw uses 92" long blades, and that turned
out to be just barely long enough to go around both wheels without
having the wheels touch each other. I hadn't bought a longer blade yet, but
this was adequate to check that the blade would actually track properly.
I was very thrilled to see the blade running smoothly on my wooden wheels.
To me, it was proof that my homemade bandsaw project was feasible.
Normal bandsaws have rubber, polyurethane, or cork "tire" on the wheels.
But it seems that the blade would track just fine on a crowned wooden
wheel even without a tire.
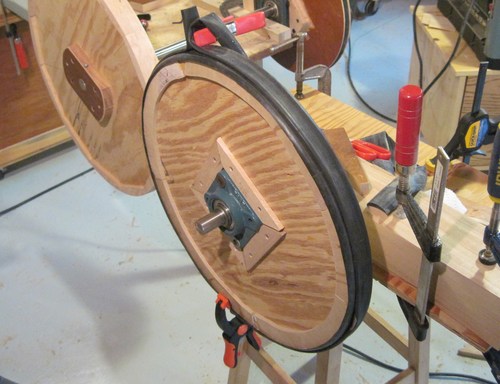 With the blade running so well on just the wood, I figured I didn't really need
much of a "tire" on my bandsaw. So I cut up an old bicycle inner tube and glued it
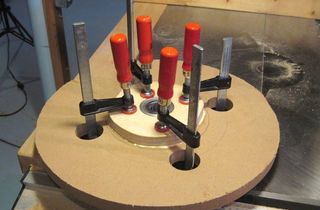
around the wheel with some "Shoe Goo" as glue. I stretched another inner tube around my tire
and clamped it on with a spring clamp to provide even pressure around
the circumference of the wheel while the glue dried.
With the blade running so well on just the wood, I figured I didn't really need
much of a "tire" on my bandsaw. So I cut up an old bicycle inner tube and glued it
around the wheel with some "Shoe Goo" as glue. I stretched another inner tube around my tire
and clamped it on with a spring clamp to provide even pressure around
the circumference of the wheel while the glue dried.
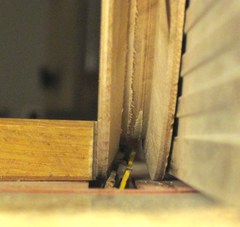
The old inner tube I used was longer than the 18" wheel circumference, so
to deal with the splice, I cut a notch into the wheel and pulled both ends
of my inner tube section into that.
Update:
The shoe goe, being very thick, caused a bit of bumpiness, so it wasn't an ideal
glue to use. The blade ran just fine on wooden wheels, so I then went without
any tires. Later, I used some much smaller
bicycle innertubes as bandsaw tires,
which worked really well without the need to splice or glue.
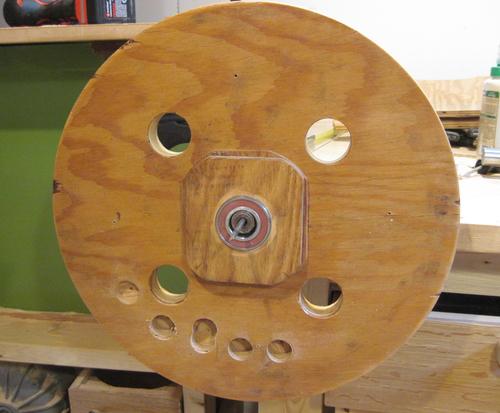 Experimenting with the bandsaw, especially once I got more of it built up, I found
that it would shake a lot. It turned out that my top wheel was a fair
bit out of balance. I drilled a couple of holes to do a rough balance, but the
bearings I used didn't turn easily enough to do a fine balance with. But I was
able to put smaller rollerblade bearings (3/4" outer diameter) inside the shaft
holes of my 7/8" ball bearings. With the rollerblade bearings supported
by a screwdriver clamped to my workbench, I was able to identify the heavy
spot (marking that spot with a pencil in the photo) and drilled a third hole to
bring it into much better balance. This was more of a stopgap measure though.
I had at this point already decided to rebuild the top wheel, but in
the mean time, I wanted to do cut down on shaking a bit.
Experimenting with the bandsaw, especially once I got more of it built up, I found
that it would shake a lot. It turned out that my top wheel was a fair
bit out of balance. I drilled a couple of holes to do a rough balance, but the
bearings I used didn't turn easily enough to do a fine balance with. But I was
able to put smaller rollerblade bearings (3/4" outer diameter) inside the shaft
holes of my 7/8" ball bearings. With the rollerblade bearings supported
by a screwdriver clamped to my workbench, I was able to identify the heavy
spot (marking that spot with a pencil in the photo) and drilled a third hole to
bring it into much better balance. This was more of a stopgap measure though.
I had at this point already decided to rebuild the top wheel, but in
the mean time, I wanted to do cut down on shaking a bit.
Next: Building the bandsaw frame
 Making bandsaw wheels
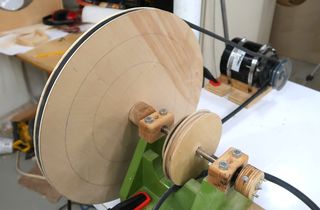 Making a big pywood pully on the router table
 How crowned pulleys
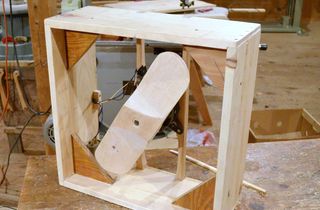 More wooden machines
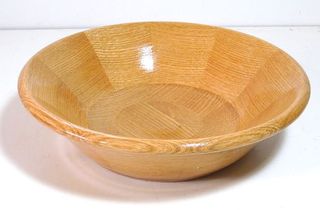 Turning a segmented bowl