
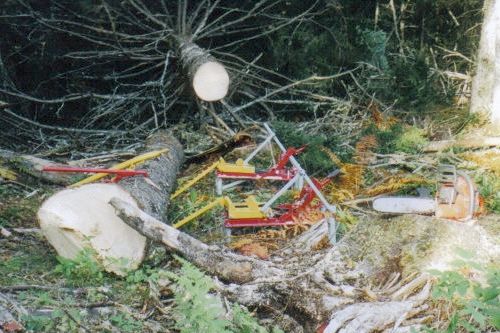
Walter Rodler sent me some pictures of his eco logging setup. This consists of equipment of his own design used to help mill a log into lumber on location. This cuts down on the destruction that would usually be caused by skidding the log out of the woods with heavy machinery.
I thought this would be an interesting thing to share, so with his permission, I am posting some of his pictures with an explanation of the process.
The milling process is based on a chainsaw mill, of the that essentially uses a bar to help guide a chainsaw to cut flat boards. There are many makes of chainsaw mill, such as Granberg, Griffiths & Beerens, or Accutech, Roll-o-matic, Zimmer, or Westford.
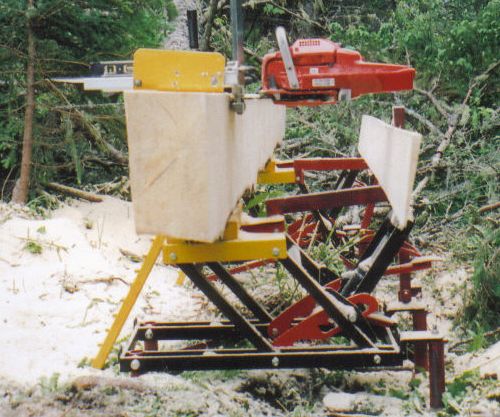
Walter has adapted two motorcycle jacks similar to these ones into milling tables to use on location. They are used to get the log off the ground and to an easily workable height. The jacks normally come with wheels. These are replaced with legs. Other bits are added to help get the log onto the jacks and hold it in place. But the lifting mechanism is essentially that of the motorcycle jack.
 The jacks are modified in that two cradles are added to the top to hold the log, and
posts (also yellow) are added to the side to help roll the log onto the mill tables and
into the cradles. These posts have cleats welded onto them to keep the log from slipping
as it is rolled up onto the table. The log is rolled up by turning it with a
cant hook. Having an assistant helps, so that one person can hold the log with a cant
hook while the other person repositions theirs.
When working alone and with heavier logs, sometimes he wraps a chain two
turns around the log and uses a come along winch to get it up onto the cradles.
The jacks are modified in that two cradles are added to the top to hold the log, and
posts (also yellow) are added to the side to help roll the log onto the mill tables and
into the cradles. These posts have cleats welded onto them to keep the log from slipping
as it is rolled up onto the table. The log is rolled up by turning it with a
cant hook. Having an assistant helps, so that one person can hold the log with a cant
hook while the other person repositions theirs.
When working alone and with heavier logs, sometimes he wraps a chain two
turns around the log and uses a come along winch to get it up onto the cradles.
Once the log is on the milling tables, the tables are jacked up to a working height.
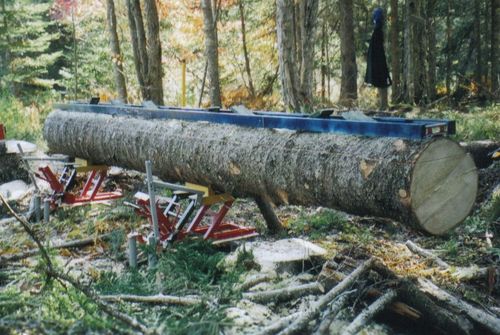 The next step is to attach the mill setup's guide rail to the log. This guide rail
comes in sections that are pieced together. It is attached by nailing the pivoting
cleats into the log with short double headed scaffolding nails. The cleats can
be nailed down on either end to avoid potentially having to nail them into a knot
or branch.
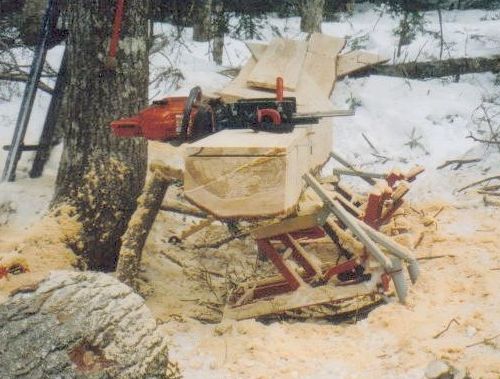
The shot above was actual taken after the first cut was made but before the slab was removed.
You can just see the cut line in the log. This particular log is about 20 feet in length.
More typically, logs of 10 ft in length would be milled.
The next step is to attach the mill setup's guide rail to the log. This guide rail
comes in sections that are pieced together. It is attached by nailing the pivoting
cleats into the log with short double headed scaffolding nails. The cleats can
be nailed down on either end to avoid potentially having to nail them into a knot
or branch.
The shot above was actual taken after the first cut was made but before the slab was removed.
You can just see the cut line in the log. This particular log is about 20 feet in length.
More typically, logs of 10 ft in length would be milled.
 After the first slab is cut, the scaffolding nails are pulled out with a claw hammer,
the guild bar removed, and finally the slab removed. The log is turned to bring the flat
side to a vertical. This is done with the log still on the milling table.
After the first slab is cut, the scaffolding nails are pulled out with a claw hammer,
the guild bar removed, and finally the slab removed. The log is turned to bring the flat
side to a vertical. This is done with the log still on the milling table.
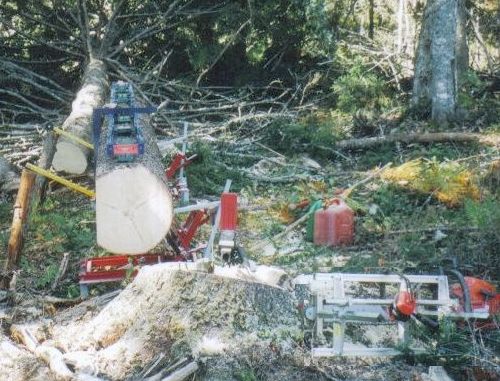
Seen from the side the above photo was taken, the log has to be turned counterclockwise. This is done by shifting it sideways onto the supports (painted gray) from one end at a time with levers, and then rolling it counterclockwise from the supports back onto the cradles.
The log is fairly heavy, so it's own weight is all that is needed to hold it down.
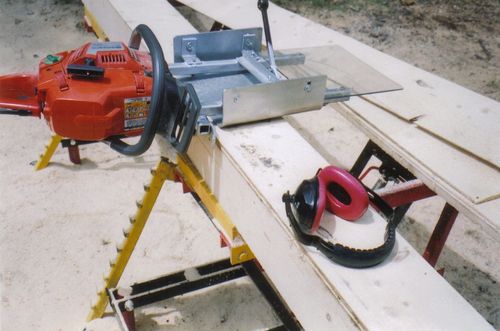
The next step is to once again mount the guide bar, ensuring that it's at 90 degrees to the face already cut. You can see the framing square on the log used to check the angle.
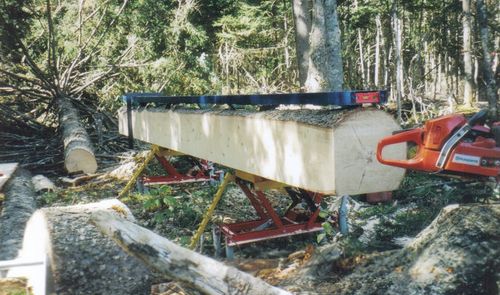
The same process is repeated for the third face as well. However at this point, one must also ensure that the rail is mounted not just perpendicular to the vertical face but parallel to the bottom face of the log. The above shot shows the setup, again with the framing square in place to check the angle.
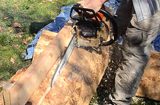
Subsequent boards are easiest cut off with a jig for cutting off individual boards. This jig is of Walter's own design. Basically, it's a jig that allows cutting a slice of a certain thickness off with the chainsaw.
The process is not overly fast. Walter says it takes about a minute to cut a board 1 ft wide by 8 foot long. He sharpens the chain to have .040" of cut on each tooth, increasing it to .060" as the chain gets worn. Although there are specialized chainsaw chains for this kind of work, a regular chain will do just fine.
This jig can also be adjusted to make wedge shaped boards, for making clapboard siding.
Another view of the jig in use to make siding. You can see one of the wedge shaped boards to the right. Also note the slanted face on top of the log. Each cut slants the face, then the next cut is made from the opposite side to bring it straight again.
 In order to avoid having to drag the log out of the bush, it is of course necessary
to bring the milling equipment to the log, preferably with less destruction to the bush
than extracting the log would have caused.
In order to avoid having to drag the log out of the bush, it is of course necessary
to bring the milling equipment to the log, preferably with less destruction to the bush
than extracting the log would have caused.
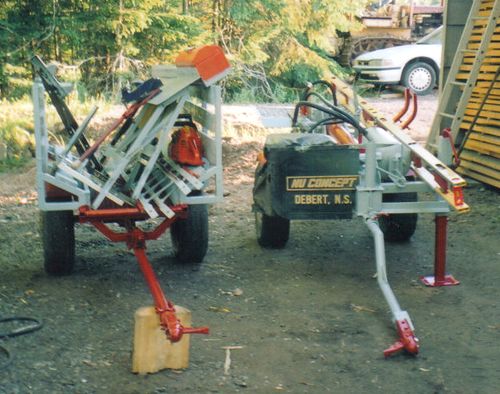
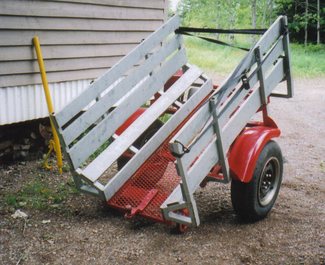
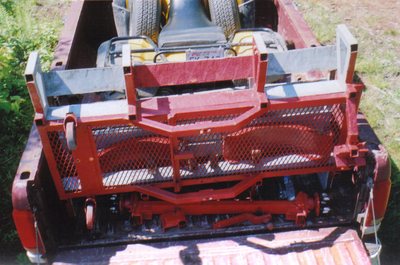
Walter has built a small trailers to tow behind an ATV. The trailer is at left in the image above, with the milling equipment loaded onto it. The tailer like device to the right is actually a log splitter. That way, any part of the tree trunk that is not milled to lumber can be split into firewood on site, and hauled out with the trailer.
The cool thing about the trailer is that it comes apart so it can be loaded on the back of a pickup truck together with an ATV. After removing the wheels, it's just seven more bolts to come out to get it into pieces.
The log splitter can be towed behind the pickup truck.
If you have any questions about this - please contact Walter Rodler at this email address:

 Chainsaw milling experiment
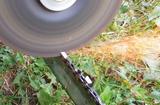 Chainsaw sharpening
 backyard sawmilling
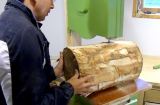 Cutting up a log
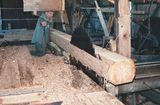 My dad's old sawmill
 Asam brothers steam