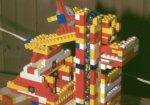
Way back in 1985, I built my original domino row building
machine
out of Lego.
I thought it would be neat to have some video of it to post on YouTube, but
of course, the original machine was long disassembled.
So this gave me reason to pull out the old Lego again and build a new domino
row building machine on a visit to my parents at chrismas 2009.
The set hadn't been played with since building the
Lego marble machine in 1996!
The new machine is an improvement on the original one. Primarily, it's more
compact. The first machine from way back
was an experiment and I never went back to optimize it. With this machine
I already knew that the concept worked so I focused on trying
to make it as compact as possible.
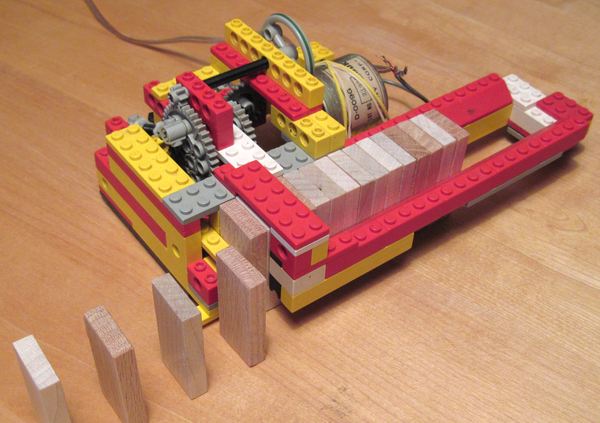
The machine works by having a magazine of dominoes that is dragged along the table
and a slider that moves back and forth sliding one domino out
of the magazine at a time. All along, the machine is driving forward, which
causes the released dominoes to be spaced out.
The key idea that makes the machine work is that the magazine is just a row of
dominoes dragged along the table. This avoids the problem of having to somehow
lower the dominoes onto the table. My first unsuccessful attempts back in 1985 involved
dropping the dominoes out of the magazine onto the table. But the impact of
dropping the dominoes would often cause them to tip over, with ruinous consequences.
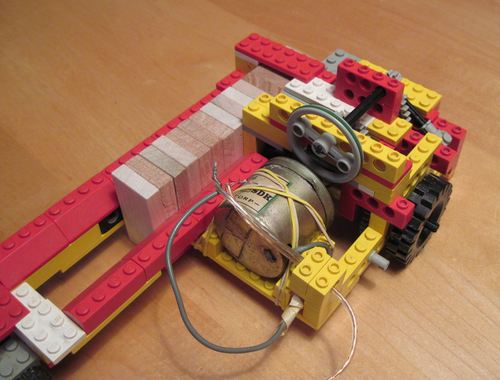
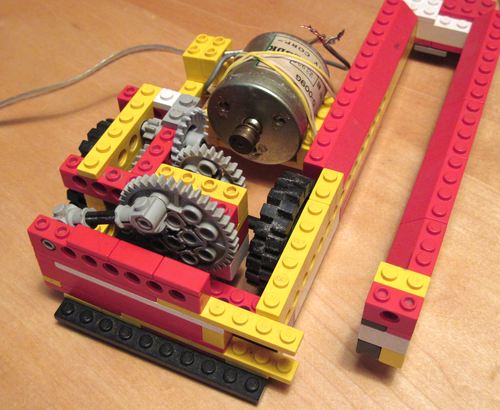
I used an old tape deck motor for the drive. I'm powering it off of a long
wire to a
home made benchtop power supply. A Lego motor would have been more elegant
but I didn't have one handy.
All Lego motors have some built in reduction gearing, so the first belt
and pulley would have been unnecessary.
The tape deck motor is fairly heavy, which
helps give the machine enough traction. Putting the batteries on board the machine
would have been a sensible thing to do, not just to add weight but also avoid the
nuisance of having to worry about what the wire dragged by the machine might knock over.
But I didn't have batteries or a battery holder handy.
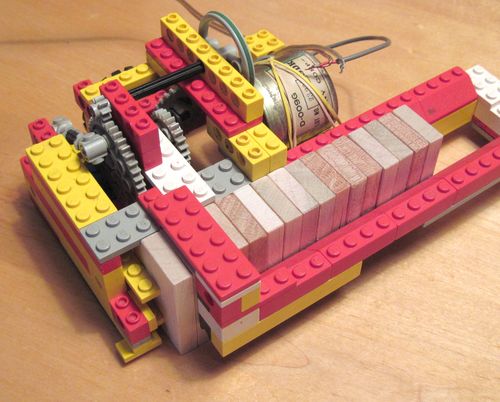
The domino releasing mechanism is a little bit tricky. I made my domino
blocks to be just
slightly less than one Lego stud (8 mm) thick and slightly less than three studs (24 mm)
wide. To push the dominoes out reliably I needed a stop for the dominoes that was not
exactly on a stud boundary. In retrospect, if I had made my dominoes just
over one stud thick it would have been simpler. I could have had an opening
on the side that was two studs
wide, and push out one domino with a slider that was one stud wide. With 9 mm thick
dominoes, a two stud opening of 16 mm would prevent a second one from being slid
out, and a one stud thick slider would never catch a second domino by accident.
But I hadn't thought this part fully through when I made my blocks. And besides,
the thinner blocks are more elegant.
What I ended up doing is to make an opening that was effectively one and a half studs
wide by restricting the front of the opening where the slider
is by half a stud with some Lego pieces mounted at an odd angle.
You can see the bit that sticks out in a funny way on the bottom
and the side-mounted yellow piece on the red 1x2 brick with a hole in it.
I found that it's very important to push the dominoes forward along the table as close
to the bottom as possible. Pushing the dominoes at the middle
will cause them to tip over inside the magazine once it gets low.
That in turn causes the slider to jam and the machine to disassemble itself.
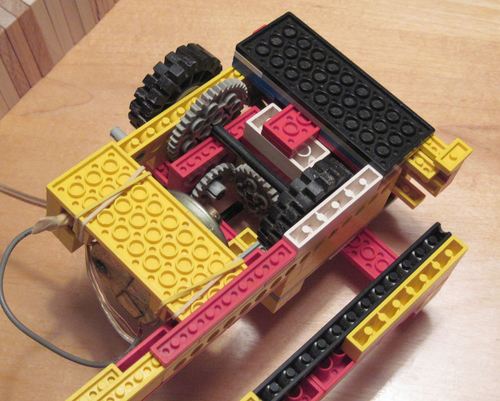
This partially disassembled photo shows how the pushing slider is just two
prongs for the part that pushes the dominoes out so that there is room for
the fixed bits of Lego that prevent the dominoes from moving forward too far.
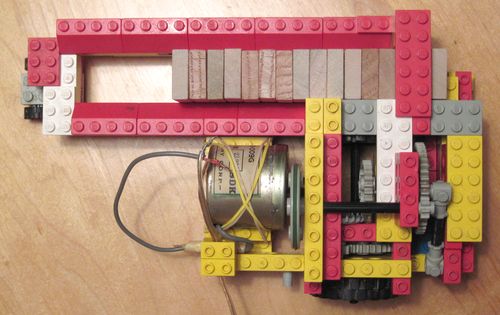
The slider is activated by the connecting rod attached to the big 40-tooth gear.
Smooth sliding is achieved with the little stud-less 1x2 tiles on
top of the slider. The base plate that the slider slides on also has 1x2 tiles.
The smooth stud-less tiles are really handy for mechanisms like that. It's too
bad most of the Lego Technic sets don't include them.
I used some pieces of 45-degree Lego roof tiles for the sides of the
domino magazine. This makes it easier to get the dominos into the machine
quickly. The machine uses up a lot of dominoes and I tend to refill
it on the fly.
The machine's gearing is very straightforward. The motor drives a pulley, which
drives an 8-tooth gear on the other end of a shaft. The 8-tooth gear
drives the 40-tooth main gear that has the connecting rod mounted to it.
Every 5 turns of the pulley is one turn of the crank, one back and forth cycle
of the slider, and one domino released.
The 40-tooth crank gear also drives a 24-tooth
gear on the same shaft, which drives a 24-tooth crown gear. That 24-tooth crown
gear drives an 8-tooth pinion which meshes with a 40-tooth gear on the main
axle with the drive wheels on it.
That makes for a 5:1 reduction from the crank to the main axle so that
the machine releases five dominoes for every turn of the drive wheels.
A lot of people have asked for instructions on how to build this machine.
As it happened, three years later, that machine was still in one piece in the box of Lego, so I took
photos of it, as I disassembled it piece by piece and made a video out of it.
I hope that is sufficient for figuring out how to build it.
Of course, you will have to modify the design to accomodate whatever size dominos you are using.
 Way back in 1985, I built my original domino row building
machine
out of Lego.
I thought it would be neat to have some video of it to post on YouTube, but
of course, the original machine was long disassembled.
Way back in 1985, I built my original domino row building
machine
out of Lego.
I thought it would be neat to have some video of it to post on YouTube, but
of course, the original machine was long disassembled.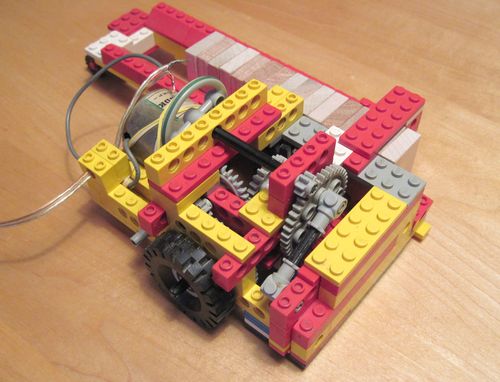 The new machine is an improvement on the original one. Primarily, it's more
compact. The first machine from way back
was an experiment and I never went back to optimize it. With this machine
I already knew that the concept worked so I focused on trying
to make it as compact as possible.
The new machine is an improvement on the original one. Primarily, it's more
compact. The first machine from way back
was an experiment and I never went back to optimize it. With this machine
I already knew that the concept worked so I focused on trying
to make it as compact as possible.
 The key idea that makes the machine work is that the magazine is just a row of
dominoes dragged along the table. This avoids the problem of having to somehow
lower the dominoes onto the table. My first unsuccessful attempts back in 1985 involved
dropping the dominoes out of the magazine onto the table. But the impact of
dropping the dominoes would often cause them to tip over, with ruinous consequences.
The key idea that makes the machine work is that the magazine is just a row of
dominoes dragged along the table. This avoids the problem of having to somehow
lower the dominoes onto the table. My first unsuccessful attempts back in 1985 involved
dropping the dominoes out of the magazine onto the table. But the impact of
dropping the dominoes would often cause them to tip over, with ruinous consequences.
 The domino releasing mechanism is a little bit tricky. I
 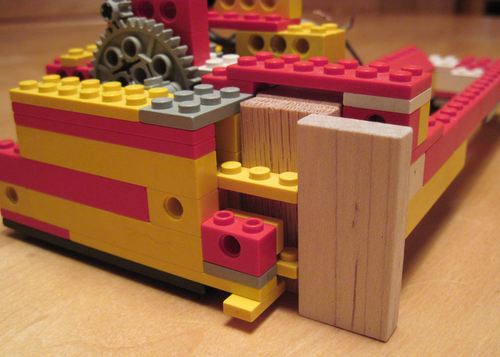 I found that it's very important to push the dominoes forward along the table as close
to the bottom as possible. Pushing the dominoes at the middle
will cause them to tip over inside the magazine once it gets low.
That in turn causes the slider to jam and the machine to disassemble itself.
I found that it's very important to push the dominoes forward along the table as close
to the bottom as possible. Pushing the dominoes at the middle
will cause them to tip over inside the magazine once it gets low.
That in turn causes the slider to jam and the machine to disassemble itself.
 This partially disassembled photo shows how the pushing slider is just two
prongs for the part that pushes the dominoes out so that there is room for
the fixed bits of Lego that prevent the dominoes from moving forward too far.
This partially disassembled photo shows how the pushing slider is just two
prongs for the part that pushes the dominoes out so that there is room for
the fixed bits of Lego that prevent the dominoes from moving forward too far.
 I used some pieces of 45-degree Lego roof tiles for the sides of the
domino magazine. This makes it easier to get the dominos into the machine
quickly. The machine uses up a lot of dominoes and I tend to refill
it on the fly.
I used some pieces of 45-degree Lego roof tiles for the sides of the
domino magazine. This makes it easier to get the dominos into the machine
quickly. The machine uses up a lot of dominoes and I tend to refill
it on the fly.
 The machine's gearing is very straightforward. The motor drives a pulley, which
drives an 8-tooth gear on the other end of a shaft. The 8-tooth gear
drives the 40-tooth main gear that has the connecting rod mounted to it.
Every 5 turns of the pulley is one turn of the crank, one back and forth cycle
of the slider, and one domino released.
The machine's gearing is very straightforward. The motor drives a pulley, which
drives an 8-tooth gear on the other end of a shaft. The 8-tooth gear
drives the 40-tooth main gear that has the connecting rod mounted to it.
Every 5 turns of the pulley is one turn of the crank, one back and forth cycle
of the slider, and one domino released.
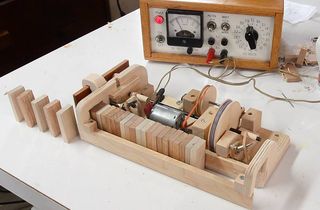 Wooden domino row building machine
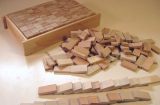
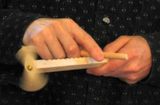
 The slinky machine
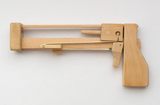
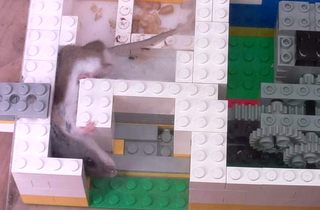 Mouse gap squeezer teaser machine
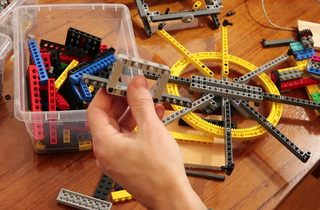 Lego technic new vs. old