Using a dowel jig to build a shoe rack
 While visiting my sister, I wanted to build her a shoe rack. I had already
brought along a dowel jig for another job,
and figured I'd try the jig on another project.
While visiting my sister, I wanted to build her a shoe rack. I had already
brought along a dowel jig for another job,
and figured I'd try the jig on another project.
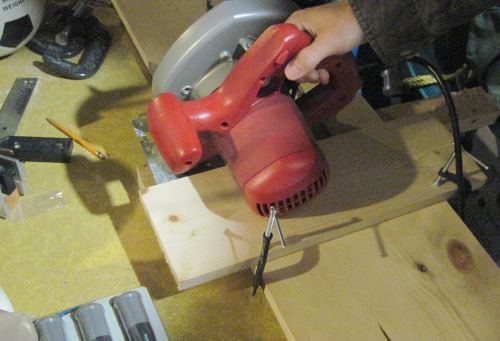 I made the shoe rack out of simple pine boards. I clamped a piece
of wood to the boards to act as a guide for the circular saw to make
accurate crosscuts.
I made the shoe rack out of simple pine boards. I clamped a piece
of wood to the boards to act as a guide for the circular saw to make
accurate crosscuts.
It would have been easier to just use a large square as the guide, but I didn't
have a big enough one handy, so I just clamped a board to the wood instead.
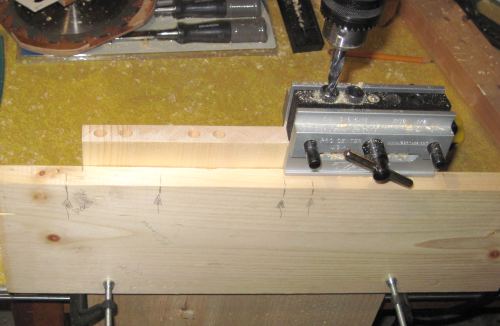
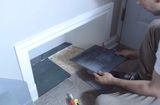
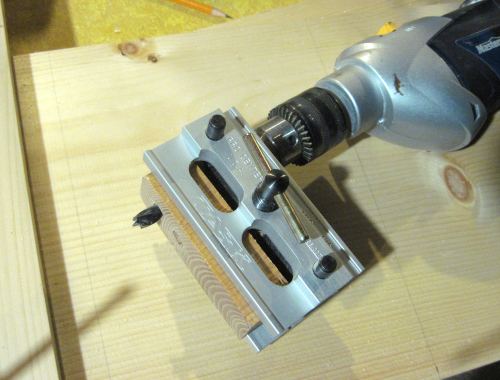 I clamped a piece of scrap wood onto the dowel jig to allow me to use it
as a drill guide for drilling the holes in the faces of the board.
The jig, used this way, also conveniently allowed me to precisely
limit the depth of the holes I was drilling.
I clamped a piece of scrap wood onto the dowel jig to allow me to use it
as a drill guide for drilling the holes in the faces of the board.
The jig, used this way, also conveniently allowed me to precisely
limit the depth of the holes I was drilling.
There are, of course, better ways of accomplishing this, such as using a
drill press or a jig meant for
this purpose, but I had to make do with what I had at hand at my sister's.
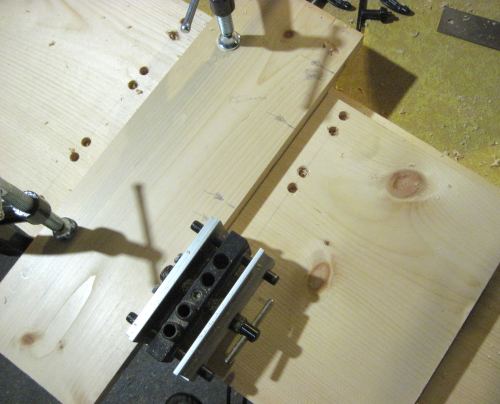 I clamped a piece of wood to the boards to serve as a sort of fence to
align the dowel jig against.
I also made several pencil marks on this board to
serve as guides for where to position the jig across the board.
I clamped a piece of wood to the boards to serve as a sort of fence to
align the dowel jig against.
I also made several pencil marks on this board to
serve as guides for where to position the jig across the board.
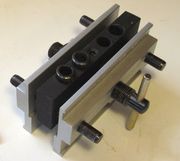
I drilled pairs of holes, seeing that the jig has two holes for the 3/8" size.
 I also clamped that same board, with its pencil marks. against the end of the
pieces of wood that I had to drill. That way, I could use the same pencil
marks to get the same spacing of holes as on the other boards.
I also clamped that same board, with its pencil marks. against the end of the
pieces of wood that I had to drill. That way, I could use the same pencil
marks to get the same spacing of holes as on the other boards.
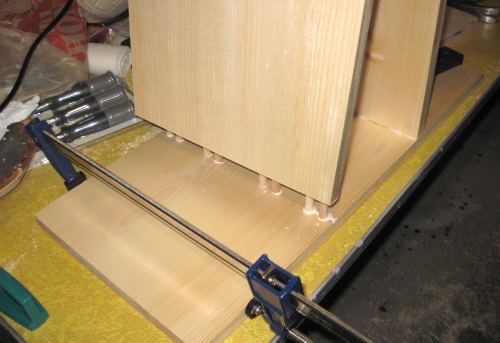 Assembling the shoe shelf. This part turned out to be very frustrating
because I only had one clamp that was big enough.
Assembling the shoe shelf. This part turned out to be very frustrating
because I only had one clamp that was big enough.
They only had the "Irwin" clamps at The Home Depot when I went shopping at my
sister's, and they cost $25 each. So I only bought one long one of those.
Unfortunately, assembling this shoe rack would normally have been
a four-clamp job minimum.
I wasn't able to apply force to the shelves evenly enough on account of this, and
split one side of the shelf when I tried to bang it together.
And then I didn't have enough clamps to glue that
back together. The one clamp I had that was long enough was also the clamp
I needed to force the shelves together.
The dowels fit quite tight in the ends of the shelves, and I wasn't able to
close the gaps before the glue set. It wasn't exactly what you would call
"fine woodworking".
I would have had an easier time if I had used fewer dowels, but the shoe rack wasn't going
to have any sort of diagonal bracing, so I wanted these T-joints to be stiff enough
to keep the shelf square.
The whole "not enough clamps" problem could also have been avoided if I had screwed
the shelf together. But I didn't want screws showing from the outside, and I don't much
like covering up screw holes. Besides, screws alone would not have been rigid enough,
so I would still have had to dowel it. Pocket hole screws from the underside of the
shelves would have been OK, but I don't have a pocket hole jig. But really,
the simplest solution would have been to just get more clamps!
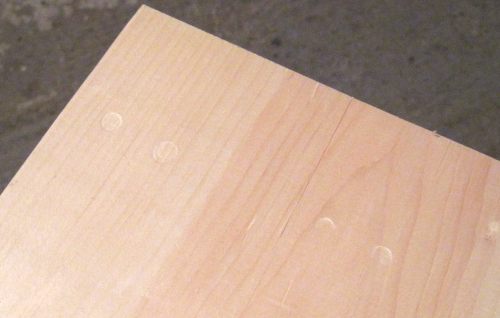 To make sure my dowel holes for the top ended up in the right position, I
only drilled the dowel holes on the left side of the top.
Then, I did a dry fit but without the dowel holes drilled on the right side of
the top. I pounded the top onto the dowels sticking out of the right upright.
This left some divots in the wood. I then drilled my dowel holes exactly where
the divots were.
To make sure my dowel holes for the top ended up in the right position, I
only drilled the dowel holes on the left side of the top.
Then, I did a dry fit but without the dowel holes drilled on the right side of
the top. I pounded the top onto the dowels sticking out of the right upright.
This left some divots in the wood. I then drilled my dowel holes exactly where
the divots were.
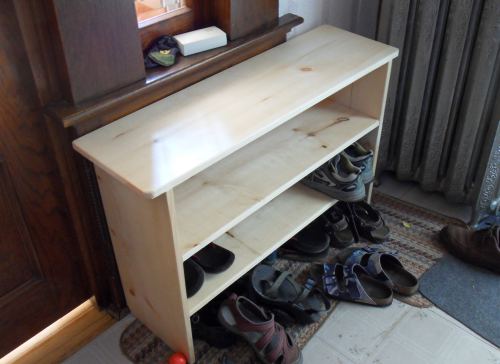 Here's the shoe rack put together. Thankfully, the one millimeter wide gaps at
the sides don't visually jump out, so as long as you aren't a woodworker and
don't look closely at the joinery, it looks decent enough.
Here's the shoe rack put together. Thankfully, the one millimeter wide gaps at
the sides don't visually jump out, so as long as you aren't a woodworker and
don't look closely at the joinery, it looks decent enough.
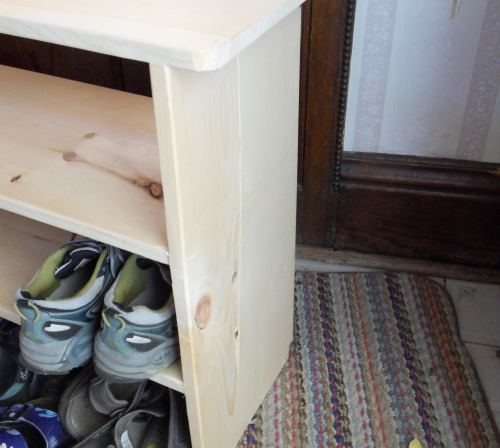 The side with the crack on it is against the wall normally. I had oriented all the boards
to have the "good edge" towards one side, and I was lucky that this orientation just happened
to put the cracked board into the corner of the hallway.
The side with the crack on it is against the wall normally. I had oriented all the boards
to have the "good edge" towards one side, and I was lucky that this orientation just happened
to put the cracked board into the corner of the hallway.
The dowel jig was a pretty good solution to this problem, but a bit awkward to use.
I have since built a jig for the dowel jig, something I like to call the
dowel jig T-square . It's essentially a jig for the doweling
jig to make this sort of shelf T-joint much easier to set up.
 Installing a boot nook
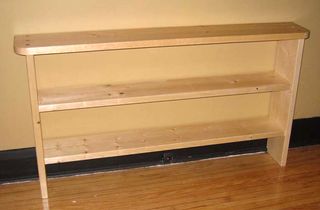 Low bookshelf
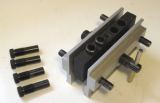 Self centering dowel jig
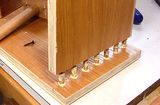 A bookcase joined