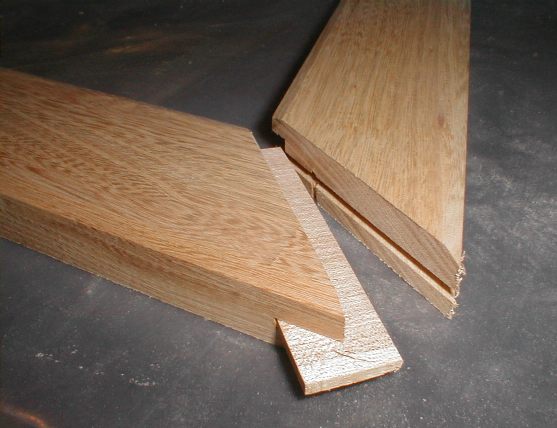
45 degree miter joint with joining piece
The perfect way to do corners is of course the way good cabinet makers make doors, which is to avoid miters altogether. This would require expensive router or shaper bits if any sort of profile is to be used, and even then doesn't look that good on picture frames.
The main problem with gluing the miter joint is that after it has glue applied to it, it becomes very slippery. This is compounded by the fact that you can't apply the clamp to just press one joint together. Any pushing together of the joint will also usually cause it to slip a little bit. Even if you clamp it with two clamps from either side at once, you never get the forces quite balanced, and the darned thing slips. As if slipping sideways wasn't enough, the pieces also slip up and down, so getting a nicely aligned miter joints very frustrating.
To eliminate part of the slippage, I like to slit the pieces of wood
and insert a piece of wood, cut in such a way that the grain goes across,
not along the piece of wood:
Cutting the piece of wood to go into the slot is tricky, and it usually
takes me a couple of tries to get one of just the right thickness so that
it takes force to insert into the slot, but doesn't require a hammer.
If the piece is loose, it can't control alignment that well, and won't
glue that well either, resulting in a weaker joint. For this, I like
to use my tenon cutting jig also. The insert also has to be exactly
twice as wide as the depth of the slot, or you end up with a joint that
won't close, or a hole where the piece doesn't quite fill the slots.
This is where the clever part comes in:
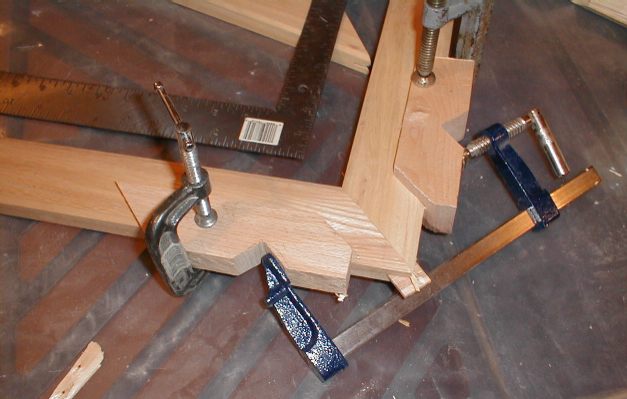
I made a bunch of special blocks for attaching a clamp at a 45 degree angle to the wood. These pieces are clamped to the flat part of the picture frame (usually the back, if the front has some fancy profile). You have to be careful to put something soft on the other side of the clamp, so the clamp doesn't crush part of the profile. I like to use C clamps for this purpose, because you can really apply a lot of force with them. That way, I can be sure the pieces I clamp on don't slip.
Once these pieces are clamped on, I can apply a regular clamp against them, and apply force at exactly 45 degrees, centered on the joint. This really cuts down on slippage. The other nice thing is that you can glue just ONE joint at a time, instead of having to worry about all four joints at once. It is important to make sure that the joint goes together square, and I always keep my trusty framing square close at hand when I do this sort of thing.
If there is ever any doubt about the squareness of a joint, I always resort to the framing square. My experience is that a framing square is least likely to be out of square. Drafting triangles tend to be pretty good too. If you find this to be paranoid, you probably haven't checked the squareness of squares. (and don't even get me started about levels that aren't)
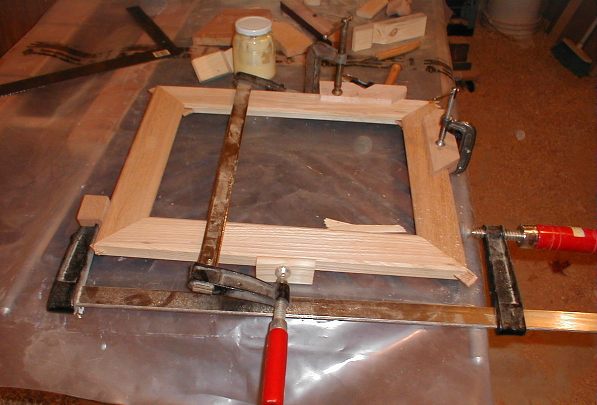
Anyways, after having glued two joints (joining three pieces) check that the ends are the right distance for the third piece. If they aren't, be quick to apply enough force to make it right. On a really well fitting joint, carpenter's glue can become rigid within minutes, so you have to be very fast. I keep a mallet handy for this sort of work. I like using a white rubber mallet - I can hit the wood without a block in between, without worry of damaging or dirtying the wood.
The last piece can be clamped in by regular means, because at this point, there are much fewer degrees of freedom. The picture below shows how I glue in the last piece. This should be done without too much force on the clamps, because the middle piece can bend under excessive clamping force.
 Large picture frame
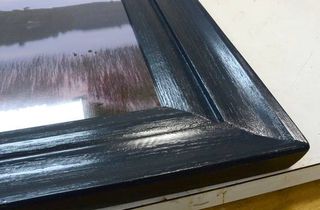 Another picture frame
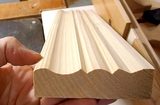 Molding tricks with a
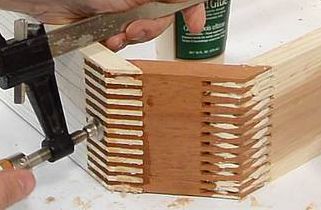 Octagonal box joined box
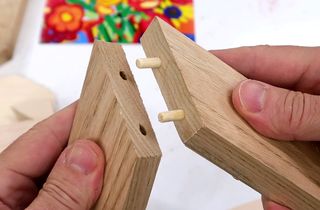 A clever jig for drilling miter dowel holes accurately