Tuna can drums
Lower tuna can drum
 The lower of the drums uses a 170 gram (6 ounce) tuna can drum
mounted at an angle so that when a marble is dropped on it it will bounce
off at an angle. The can is screwed to a wedge-shaped piece of wood
that fits inside it.
The lower of the drums uses a 170 gram (6 ounce) tuna can drum
mounted at an angle so that when a marble is dropped on it it will bounce
off at an angle. The can is screwed to a wedge-shaped piece of wood
that fits inside it.
 Starting with a piece of wood 6 cm thick, glue the wedge shaped side-view template
onto it and cut it out on the bandsaw.
Starting with a piece of wood 6 cm thick, glue the wedge shaped side-view template
onto it and cut it out on the bandsaw.
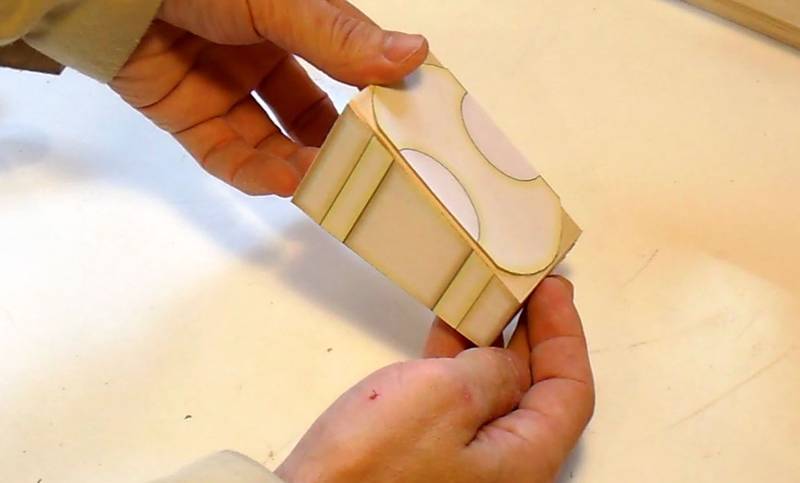 Next add the face template to the inclined face. The face template is a
little bit longer than the side view template because it goes on at an angle.
Next add the face template to the inclined face. The face template is a
little bit longer than the side view template because it goes on at an angle.
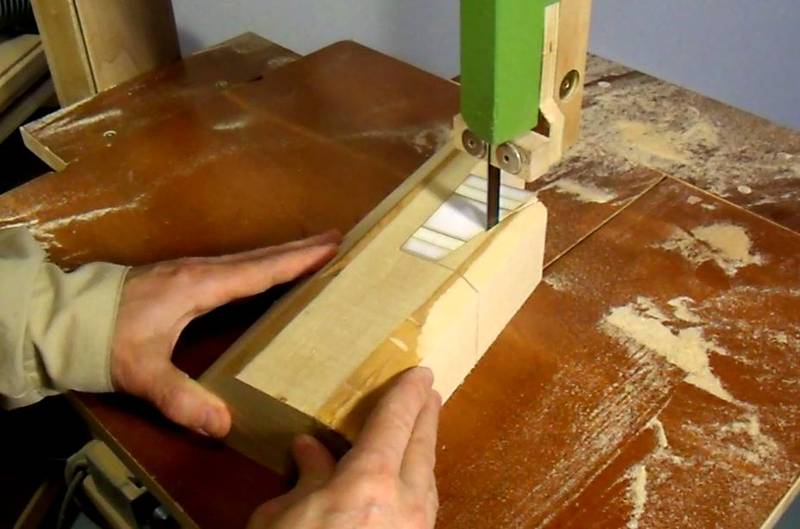
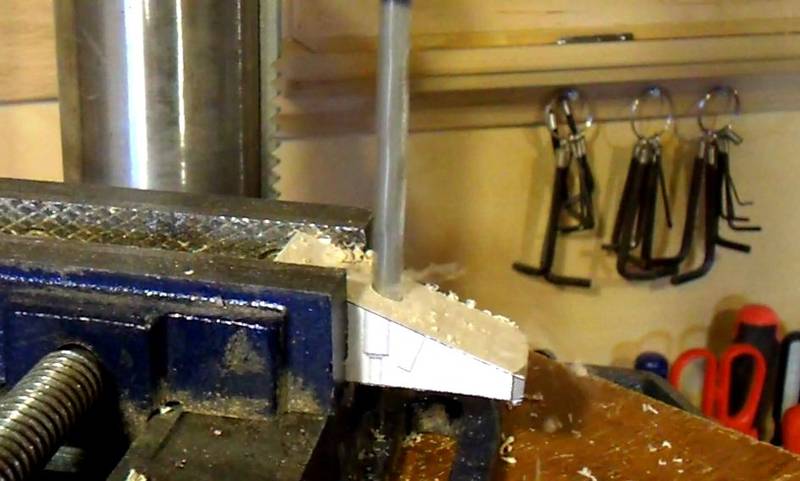
 Cutting the outline of that shape
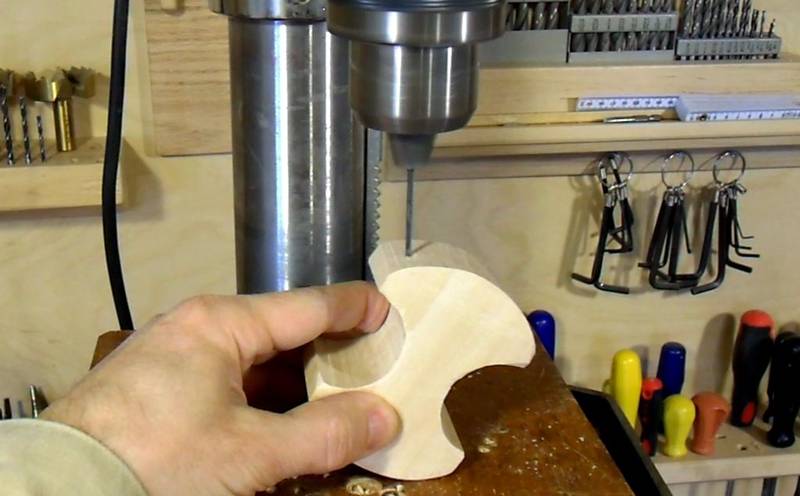
 The resulting shape should just fit inside the tuna can. If not, sand it to fit.
Next mark four screw hole positions. The screw holes should be near the corners of the wooden part and about 5 mm from the edge of the can.
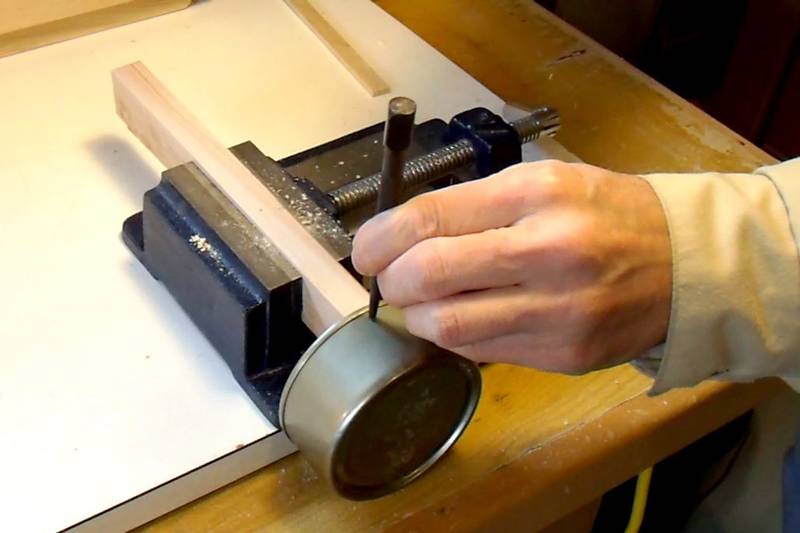 Before drilling the holes, put a divot where each of the four holes will go,
using a center punch.
Before drilling the holes, put a divot where each of the four holes will go,
using a center punch.
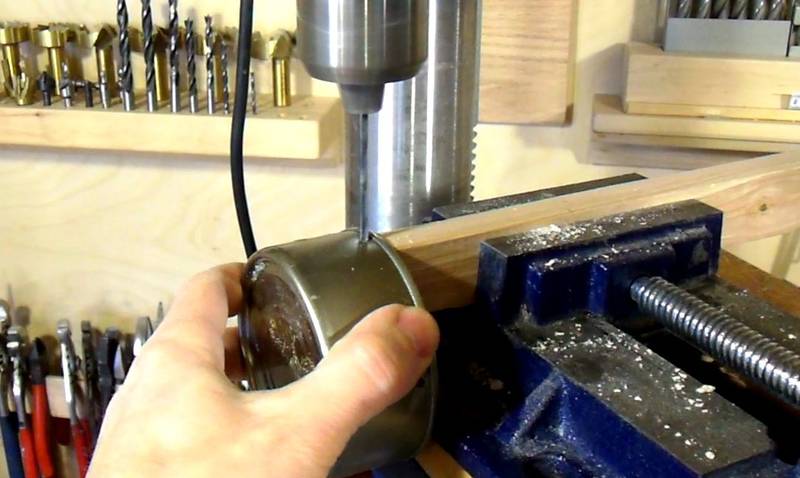 Use a 5/32" or 4 mm drill to drill the holes in the can.
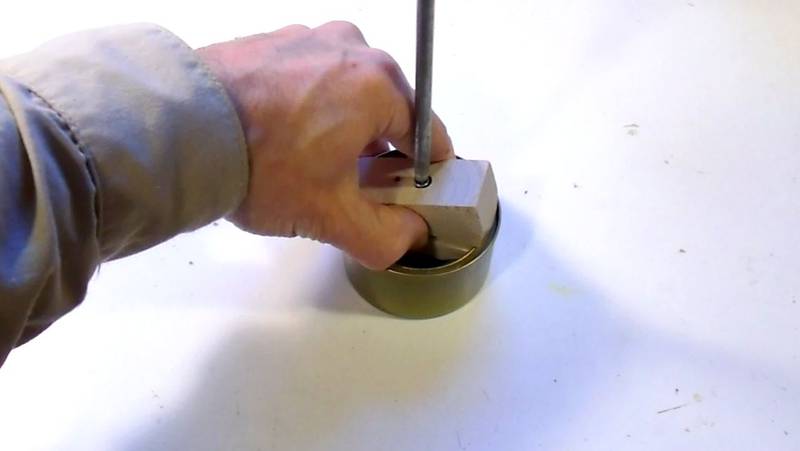
After drilling the holes, put the can back on the wooden plug and mark the pilot hole positions through the holes that were just drilled. The piece of wood should stick about 1.2 cm out of the can on the short side and 3.3 cm on the long side. Also mark the orientation of the can so that you will be able to put it back on the same way.
 Drilling the pilot holes. I couldn't figure out a good way to support this odd
shaped workpiece. But holding it by hand worked ok.
Drilling the pilot holes. I couldn't figure out a good way to support this odd
shaped workpiece. But holding it by hand worked ok.
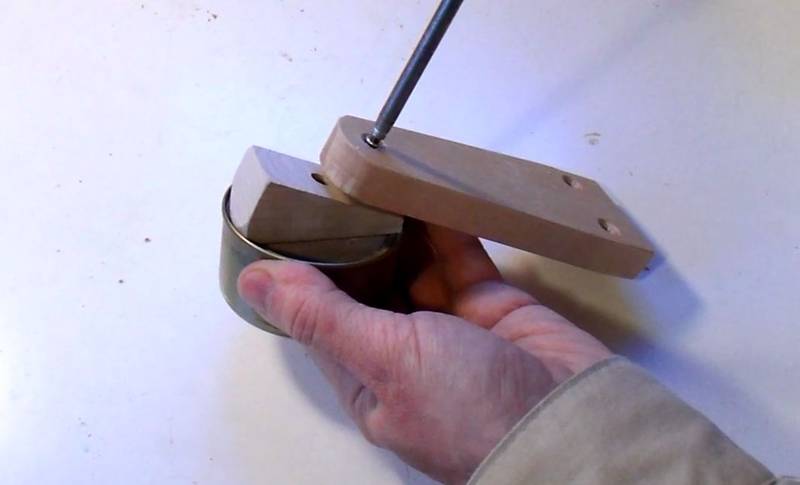
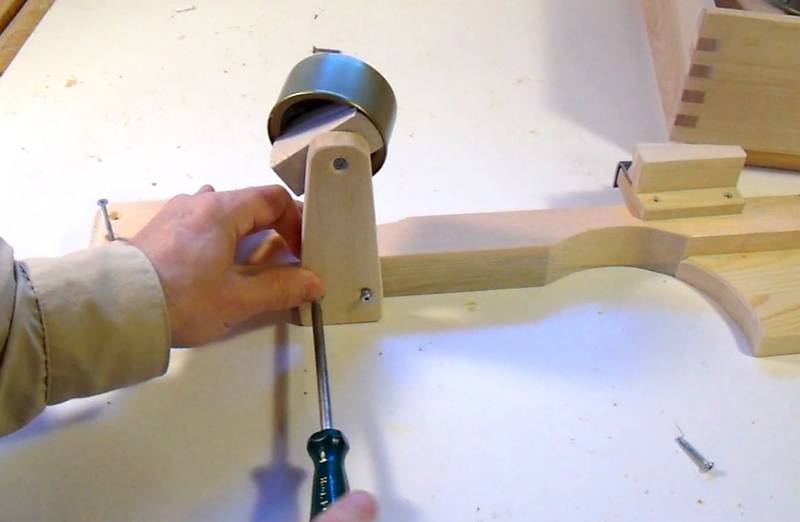
 Now screwing the drum onto the wooden plug. The screws should be fairly tight so that
the can is firmly attached to the block of wood. This will ensure a better sound and
higher bounce of the marbles.
Now screwing the drum onto the wooden plug. The screws should be fairly tight so that
the can is firmly attached to the block of wood. This will ensure a better sound and
higher bounce of the marbles.
Upper (small) tuna can drum
 The upper small tuna can drum sits on an extension arm. It is positioned so that marbles
falling out of the right-most hole in the bowl will fall directly onto it. The drum
bounces the marbles over to the xylophone board.
The upper small tuna can drum sits on an extension arm. It is positioned so that marbles
falling out of the right-most hole in the bowl will fall directly onto it. The drum
bounces the marbles over to the xylophone board.
The can I used had a lip on the inside edge, so the mounting procedure is different.
 Start with a piece of wood 26 mm thick and 4 cm wide. Mark circular arcs on it,
32 mm radius (or whatever size fits in your can)
Start with a piece of wood 26 mm thick and 4 cm wide. Mark circular arcs on it,
32 mm radius (or whatever size fits in your can)
 Cut out the circular arc on the bandsaw.
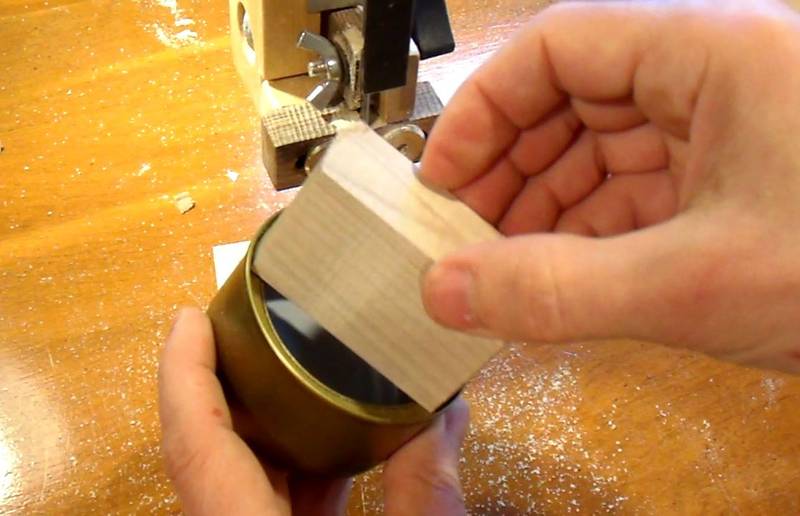 Check that it fits on the end of the can. Because of the lip on the inside edge,
it's not possible to insert this block very far.
Check that it fits on the end of the can. Because of the lip on the inside edge,
it's not possible to insert this block very far.
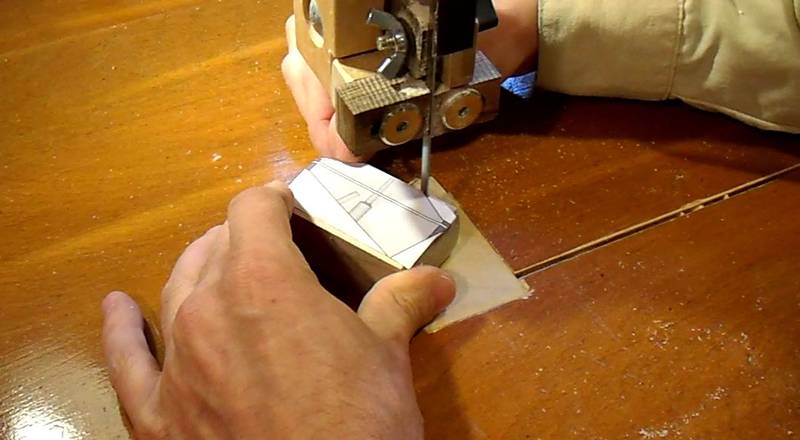 Next glue the side template onto the block and cut it out.
Note that the block will be cut into two pieces, but it's best not to cut it in two
just yet.
Next glue the side template onto the block and cut it out.
Note that the block will be cut into two pieces, but it's best not to cut it in two
just yet.
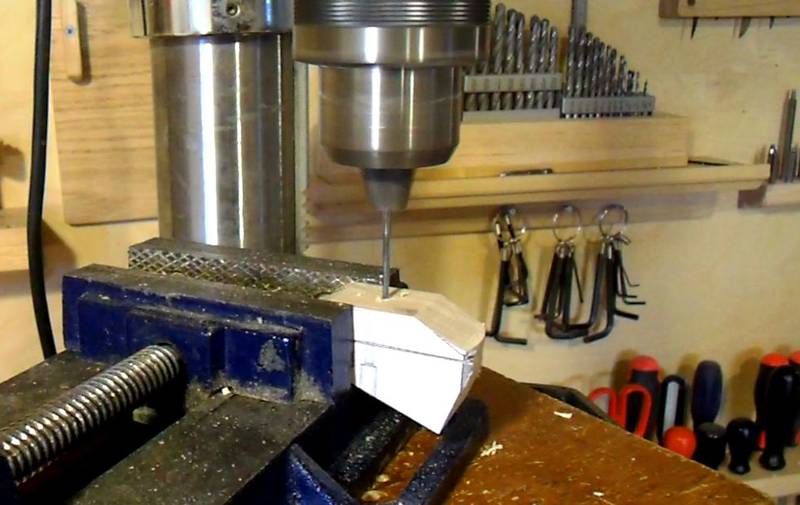 Drilling a 1/8" (3 mm) small hole through both pieces. This is easier if you haven't cut
the two blocks apart yet. It's also best to put the block fully into the drill press
vise. I only put it on the edge of the vise so that you can see the part I'm actually drilling.
Drilling a 1/8" (3 mm) small hole through both pieces. This is easier if you haven't cut
the two blocks apart yet. It's also best to put the block fully into the drill press
vise. I only put it on the edge of the vise so that you can see the part I'm actually drilling.
With the two parts of the block cut apart, next cut a 5/32" (4 mm) hole for the screw shank, and then a 1/4" (6 mm) hole to about 5 mm depth to sink the head of the screw below the surface.
Also drill the 1/8" pilot hole for the mounting screw next to this hole. This hole is perpendicular to the surface. You can barely see the outline of it on the paper template in the photo.
 Mounting the blocks in the can turned out to be tridky. Here's the procedure that worked
for me:
Mounting the blocks in the can turned out to be tridky. Here's the procedure that worked
for me:
Take the small block that is tapered on both ends, and insert it into the can (at an angle, to get it past the lip). Then pull it up against the lip, holding it with thumb and index finger.
Bring the wedge-shaped block above it. The screw is already in the wedge shaped block. Without letting go of the block in the can, squeeze the wedge-shaped block between your fingers and get the screw to go in the pilot hole in the lower piece.
 Without letting go of the block inside the can, now tighten the screw until the two
pieces of wood clamp together on the can's lip.
Without letting go of the block inside the can, now tighten the screw until the two
pieces of wood clamp together on the can's lip.
 Next, cutting out the support arm for the can
 The support arm has three holes, 9/64" (3.5mm) diameter with countersinks.
Mounting the can drum on the end of the block.
The support arm has three holes, 9/64" (3.5mm) diameter with countersinks.
Mounting the can drum on the end of the block.
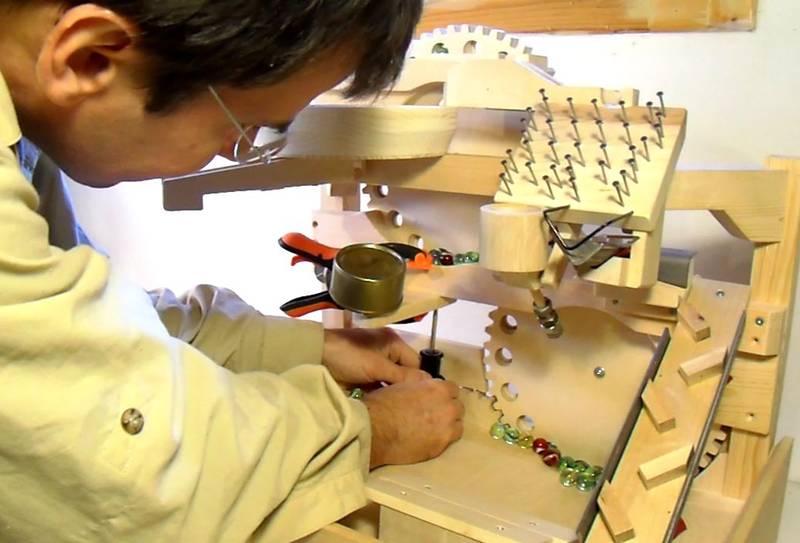
 Dropping some marbles through the bowl to make sure we have the right position
for the can drum and that it can be aimed to bounce marbles onto the xylophone boards.
Dropping some marbles through the bowl to make sure we have the right position
for the can drum and that it can be aimed to bounce marbles onto the xylophone boards.
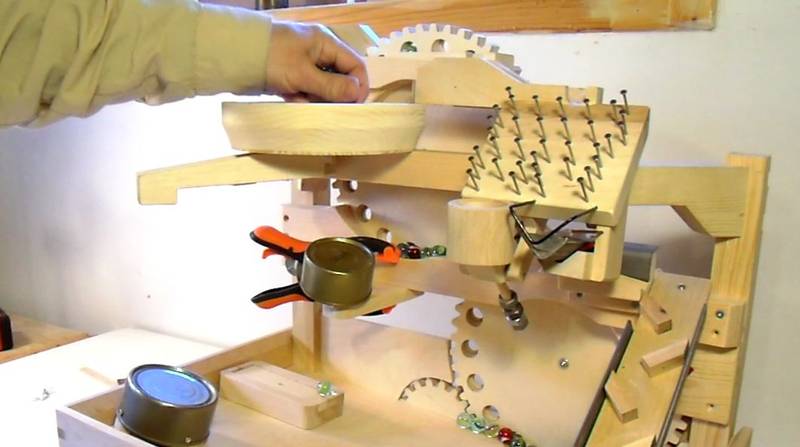 Now clamped in place, doing more test drops
 With the position of the drum and mount verified, I'm now marking where the screws need
to go by punching through the mounting holes with an awl.
With the position of the drum and mount verified, I'm now marking where the screws need
to go by punching through the mounting holes with an awl.
 Removing that cross member from the machine to drill the pilot holes, then
mounting the support arm to it.
Removing that cross member from the machine to drill the pilot holes, then
mounting the support arm to it.
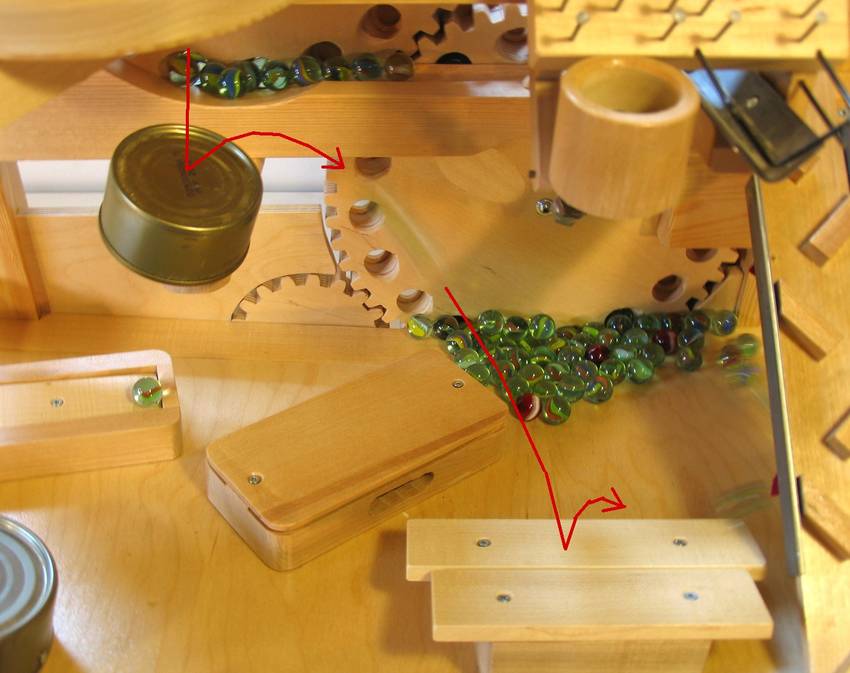 The drum, bouncing marbles towards the xylophone boards makes a very satisfying
"dong-plink" as the marble hits the drum and then the xylophone boards.
The drum, bouncing marbles towards the xylophone boards makes a very satisfying
"dong-plink" as the marble hits the drum and then the xylophone boards.
Next: Percussion elements
Back to Marble machine 2.1