The clanking iron
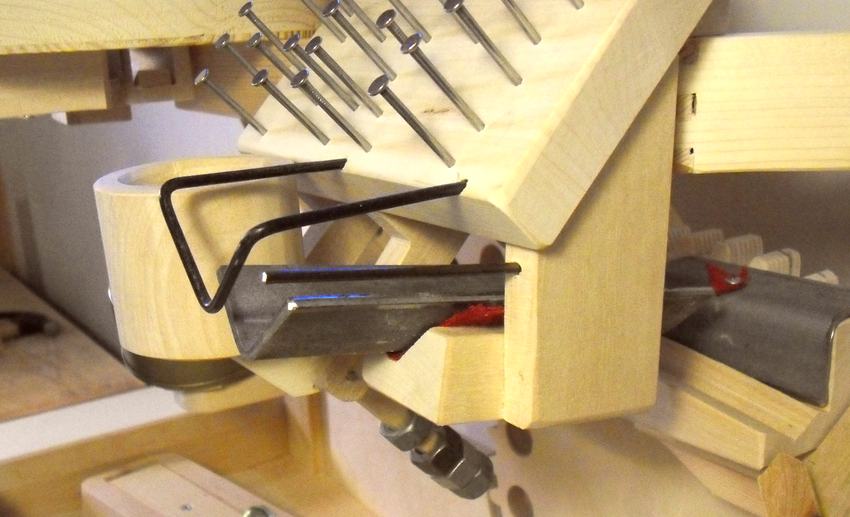 The pin board drops marbles onto the dump-o-matic and the clanking iron.
The clanking iron is a piece of 1" (25 mm) angle iron acting as a V-channel to guide the marbles to the back of the machine. The angle iron is loosely mounted so that it can vibrate freely to make more noise.
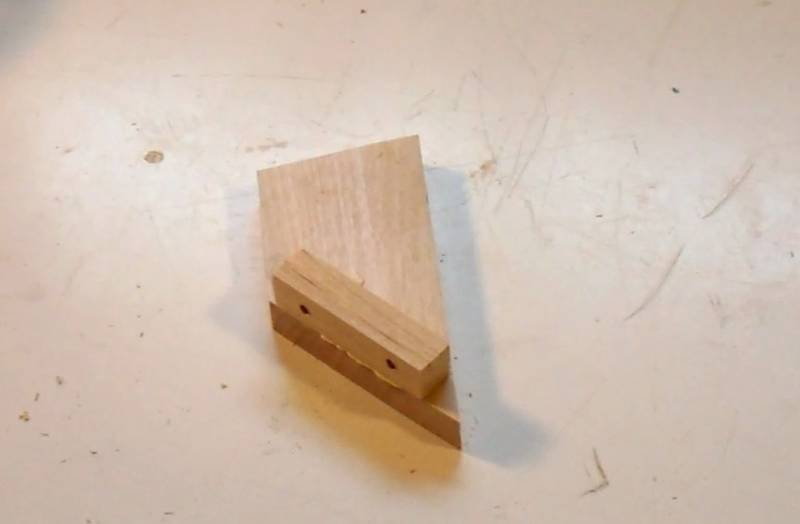
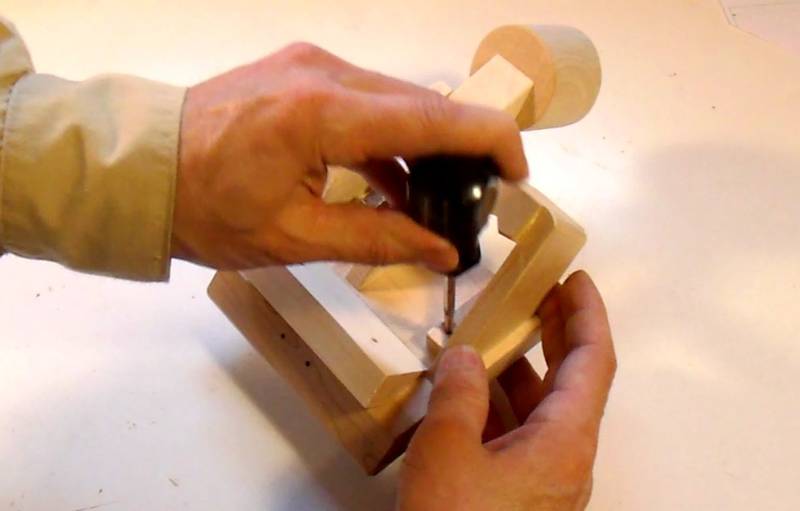
 A small V-block cradles the angle iron. This V-block would be a bit tricky to cut
on the table saw. But with the block only 5.5 cm long, it's easy enough to cut it
upright out of a block of wood on the bandsaw. The block is oriented
with the grain up and down.
A small V-block cradles the angle iron. This V-block would be a bit tricky to cut
on the table saw. But with the block only 5.5 cm long, it's easy enough to cut it
upright out of a block of wood on the bandsaw. The block is oriented
with the grain up and down.
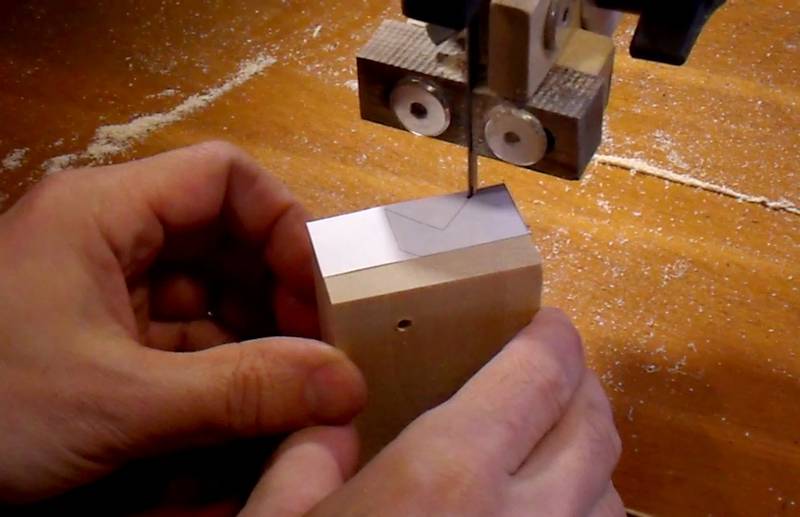 It's important that the block used is somewhat larger than what needs to be cut out
so that there is adequate support on the bandsaw while making the cuts.
It's important that the block used is somewhat larger than what needs to be cut out
so that there is adequate support on the bandsaw while making the cuts.
Cut the V first, and cut it away from the larger block last.
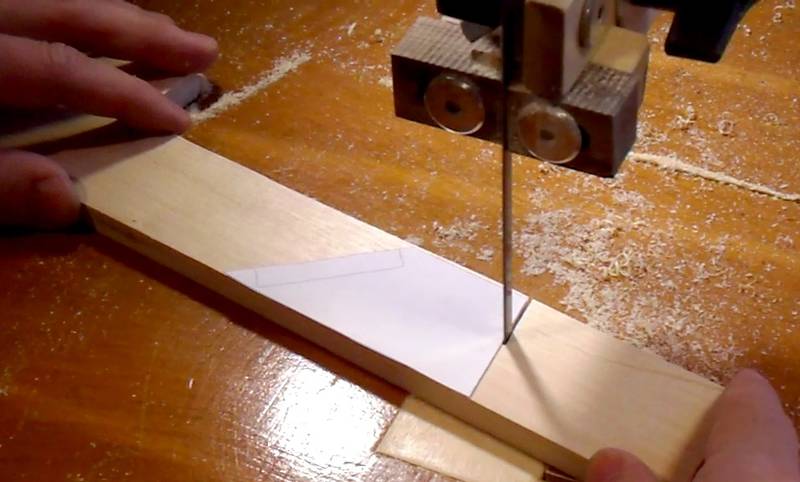 The support for this block is also cut on the bandsaw.
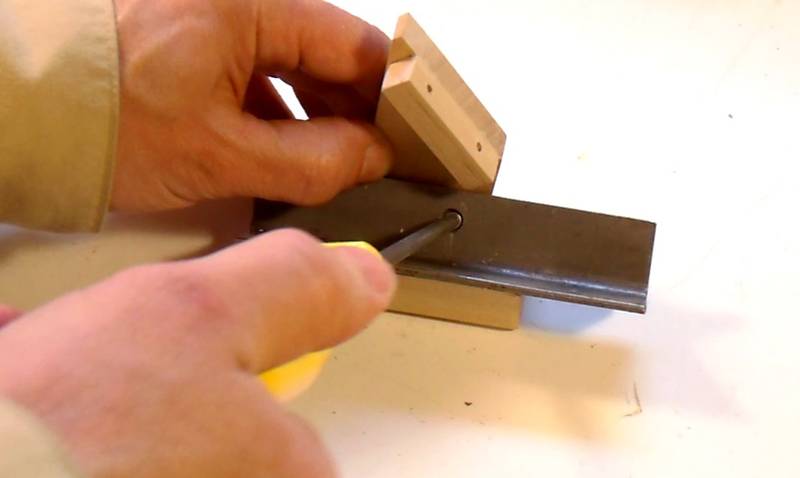
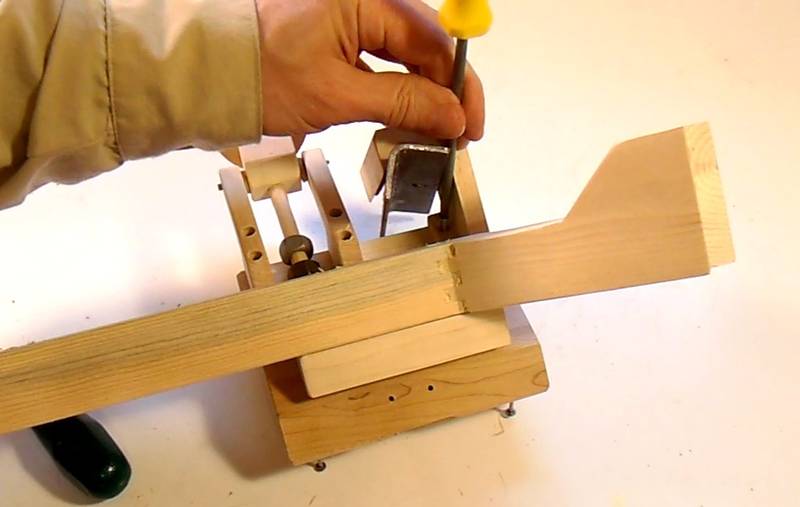
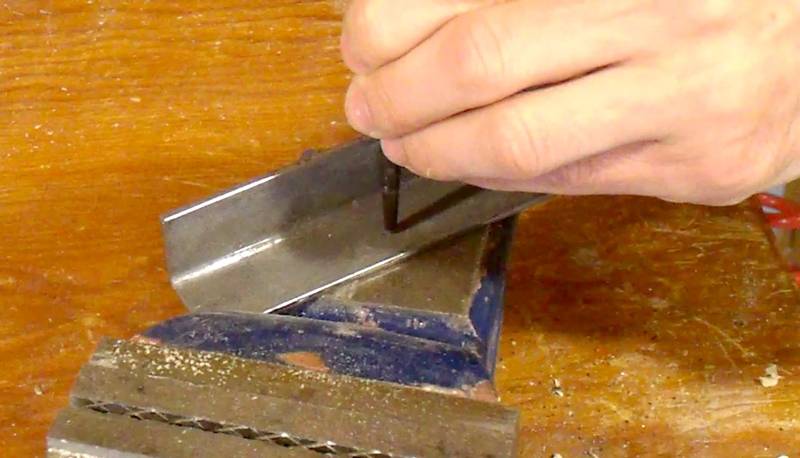 The piece of angle iron is 11.5 long. Here I'm using a center punch to make
a divot in the side of this angle iron, 1 cm from the edge and half way along its
length. The divot is to help start the hole in the right spot.
The piece of angle iron is 11.5 long. Here I'm using a center punch to make
a divot in the side of this angle iron, 1 cm from the edge and half way along its
length. The divot is to help start the hole in the right spot.
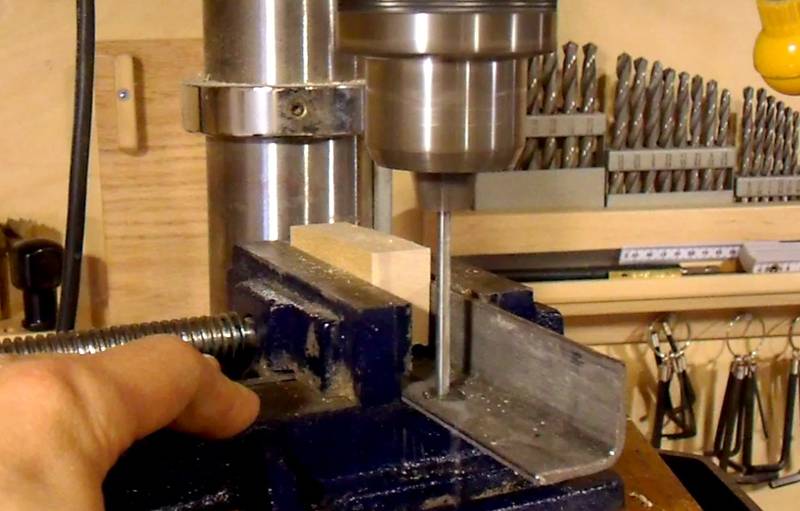 Drilling out the hole. I'm drilling a 5/32" hole for the screw's shank.
The hole is just smaller than the head of a #4 screw so that the
angle iron will have some play.
Drilling out the hole. I'm drilling a 5/32" hole for the screw's shank.
The hole is just smaller than the head of a #4 screw so that the
angle iron will have some play.
 Next I use a 5/16" drill to make a countersink. I'm only drilling a millimeter in,
just enough for the tip of the drill to cut a cone around the hole.
Next I use a 5/16" drill to make a countersink. I'm only drilling a millimeter in,
just enough for the tip of the drill to cut a cone around the hole.
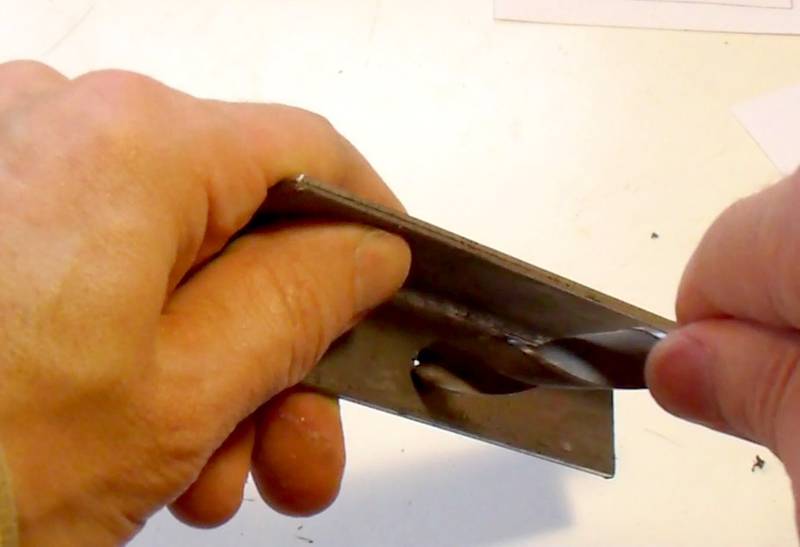 Next I use an even larger drill bit in my hands to cut away the burrs from the
previous drilling operations.
Next I use an even larger drill bit in my hands to cut away the burrs from the
previous drilling operations.
 Drilling the pilot hole for the mounting screw in the V-block.
I marked the location of this hole by placing the angle iron and its padding into the V-block, then using an awl to punch through the mounting hole in the angle iron to make a divot in the wood.
 Gluing a small piece to the side of the mount. This piece will be screwed to the
bottom of the pin board.
Gluing a small piece to the side of the mount. This piece will be screwed to the
bottom of the pin board.
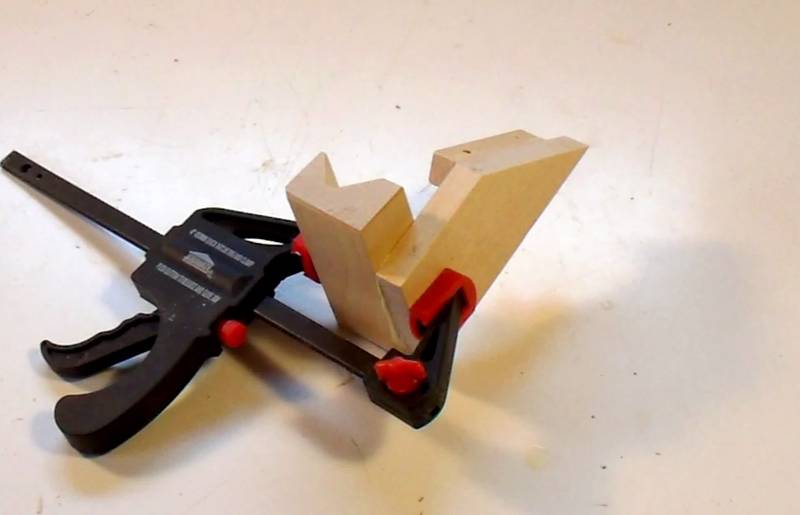 Next gluing the V-block to the mounting piece.
I glued this together, but I realized afterward that I would have been better off using two screws instead. It turned out to be quite tricky getting everything together. The angle iron really gets in the way of screwing on the part that holds the angle iron. I changed the plans to have this joint as screwed instead of glued so that the V-block and angle iron can be added last.
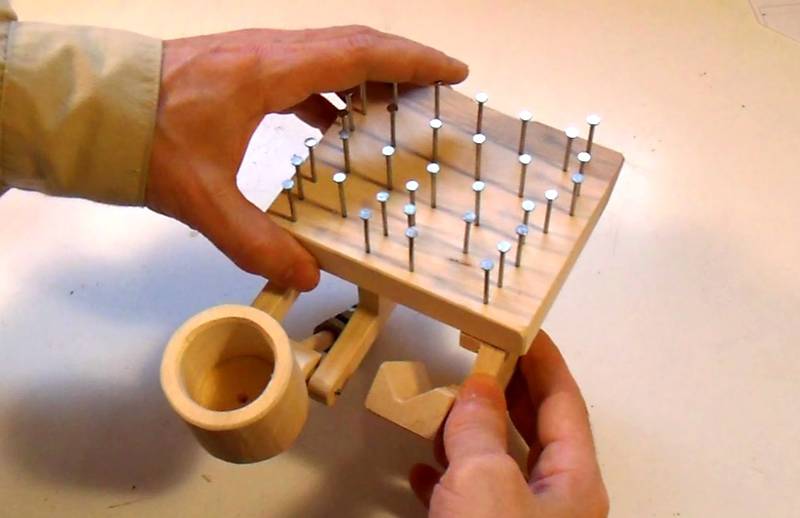 This is the position that the mount needs to have on the pin board. The V-block needs
to be centered below the gap between the nails, so that the marbles will hit the
angle iron.
This is the position that the mount needs to have on the pin board. The V-block needs
to be centered below the gap between the nails, so that the marbles will hit the
angle iron.
 To mark the pilot hole locations in the bottom of the pin board. I positioned the
clanking iron mount, then turned it over and punched through the
mounting holes with an awl to mark where the pilot holes need to be drilled.
To mark the pilot hole locations in the bottom of the pin board. I positioned the
clanking iron mount, then turned it over and punched through the
mounting holes with an awl to mark where the pilot holes need to be drilled.
 Place a piece of soft cloth (or felt) in the V-block before adding the
angle iron.
Place a piece of soft cloth (or felt) in the V-block before adding the
angle iron.
 Screwing the angle iron in place
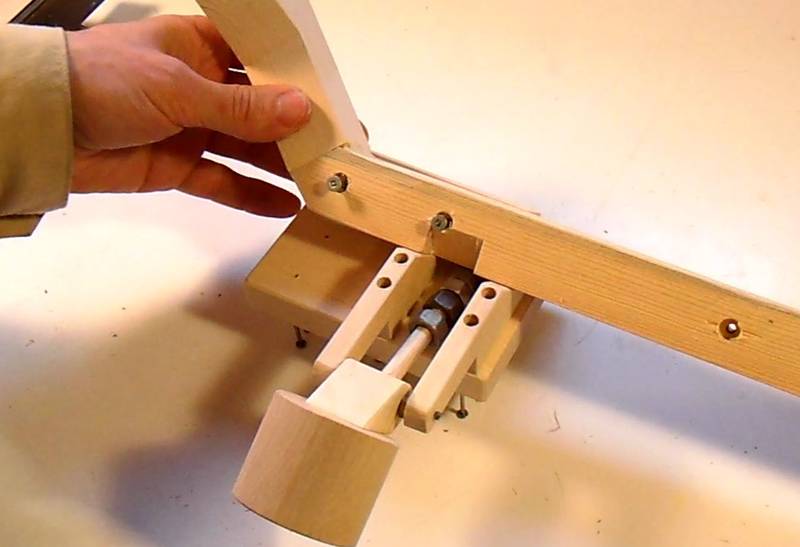 This is where assembling it becomes tricky. The clanking iron obstructs the
screws that mount the pin board on the support arm. So I'm attaching the pin board
to the support arm before attaching the clanking iron.
This is where assembling it becomes tricky. The clanking iron obstructs the
screws that mount the pin board on the support arm. So I'm attaching the pin board
to the support arm before attaching the clanking iron.
 Because the angle iron is mounted a little bit loose, it can be pushed aside just enough
to screw in the mounting screws.
Because the angle iron is mounted a little bit loose, it can be pushed aside just enough
to screw in the mounting screws.
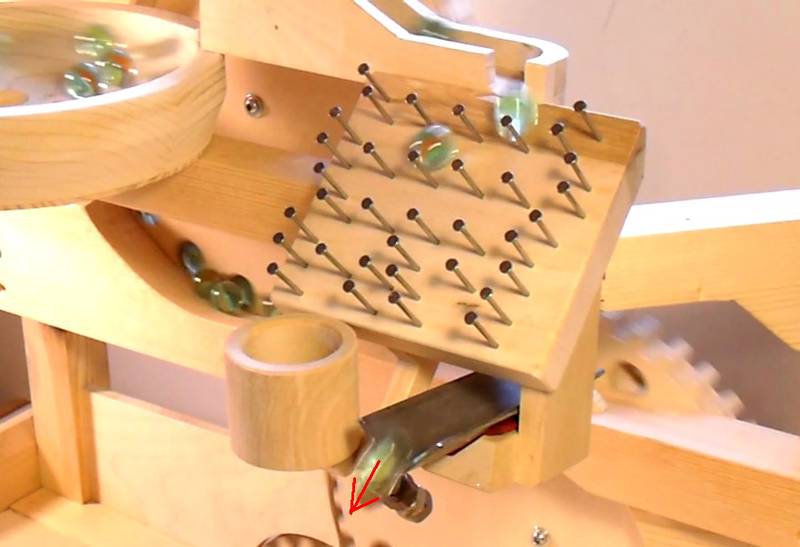 Testing it on the machine. I found that most of the marbles would shoot off
the top end of the clanking iron (see small red arrow)
Testing it on the machine. I found that most of the marbles would shoot off
the top end of the clanking iron (see small red arrow)
 So I made a guard by bending a relatively thin piece of coat hanger wire. This guard
prevents the marbles from rolling off the top end of the clanking iron.
It also prevents the marbles from bouncing off the side of the clanking iron.
So I made a guard by bending a relatively thin piece of coat hanger wire. This guard
prevents the marbles from rolling off the top end of the clanking iron.
It also prevents the marbles from bouncing off the side of the clanking iron.
If you don't have any coat hangers to use, any piece of wire about 2 mm in diameter would be perfect.
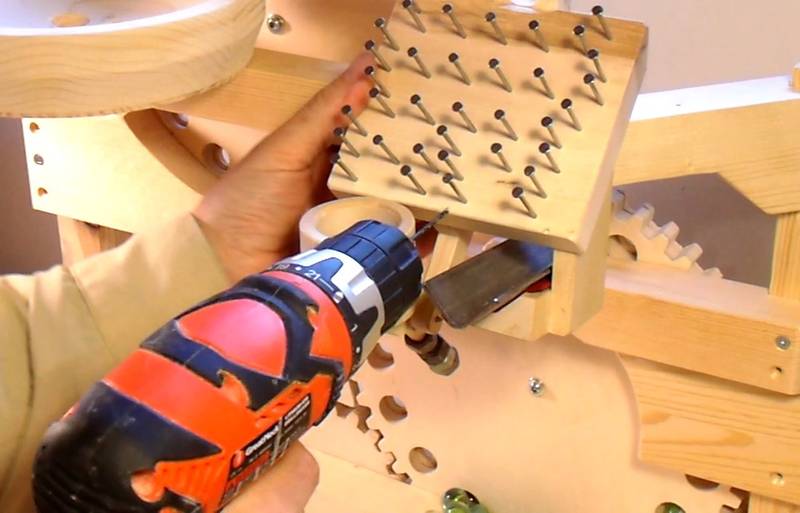 The wire is mounted in two small holes drilled into the pin board. Drilling the holes
is tricky. I pre-punched the holes with an awl, then used a small (1/32") drill to
drill a pilot hole, then the larger hole for the wire. I drilled a small pilot hole
first because the smaller drills will follow the divot from the awl more
easily. Once a pilot hole is there, the larger drill will follow it.
The wire is mounted in two small holes drilled into the pin board. Drilling the holes
is tricky. I pre-punched the holes with an awl, then used a small (1/32") drill to
drill a pilot hole, then the larger hole for the wire. I drilled a small pilot hole
first because the smaller drills will follow the divot from the awl more
easily. Once a pilot hole is there, the larger drill will follow it.
Next: Zigzag descent
Back to Marble machine 2.1