Marble distribution
Making the flipflop
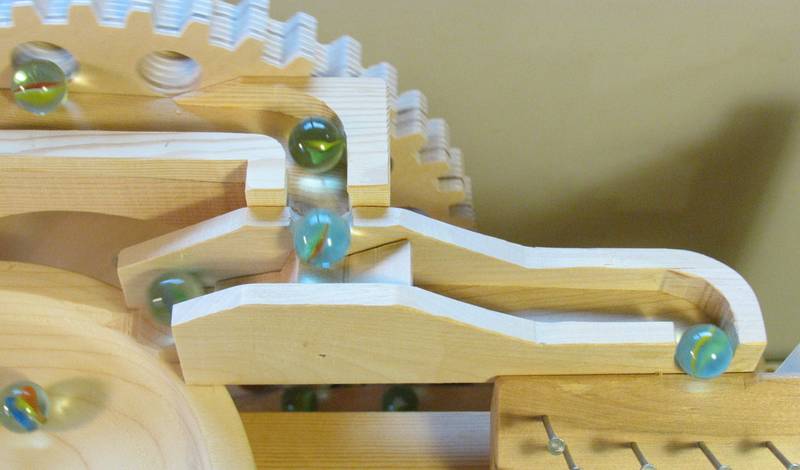 The "flipflop" at the top of the machine sends the marbles alternately left and right.
As each marble passes the flipflop, it toggles the rocker in the flipflop so that the next one is sent in the opposite direction.
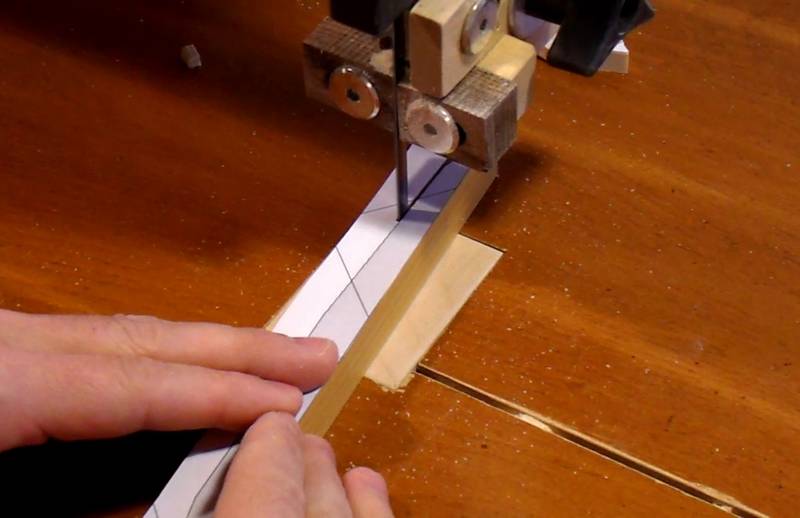
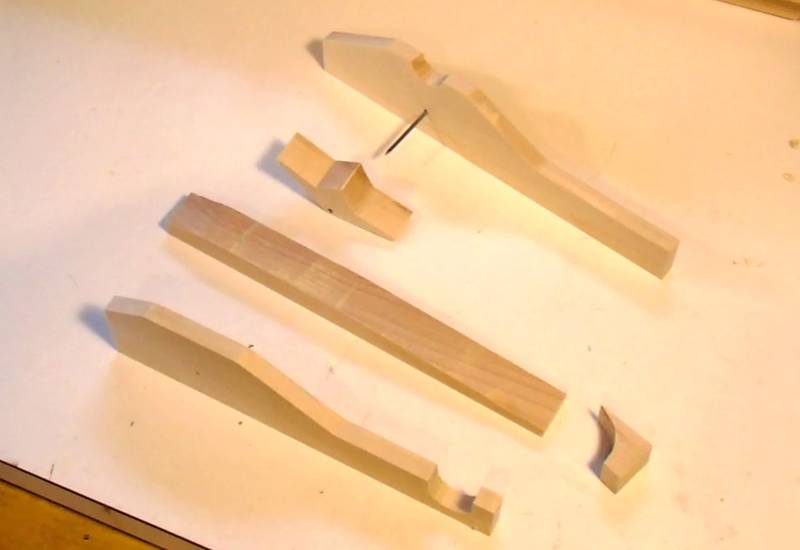
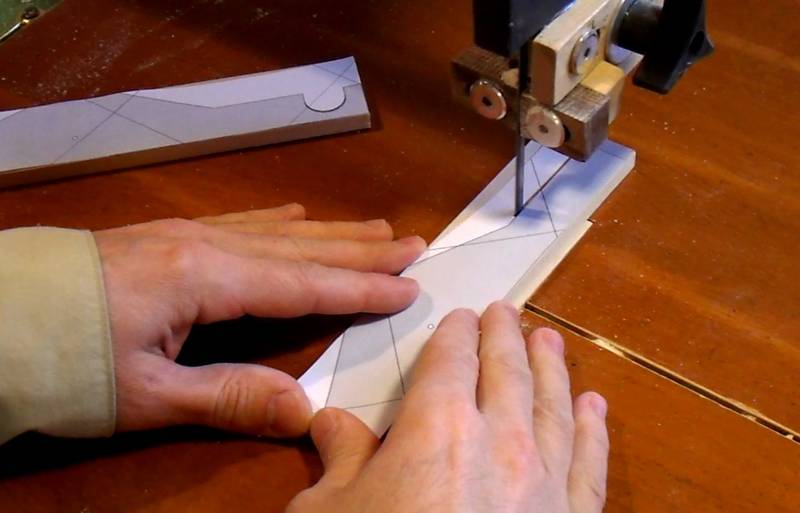 I'm cutting the flipflop parts using paper templates. Bandsawing along the edges
is accurate enough, and it saves me having to make measurements.
The pieces I'm cutting out here are 7 mm thick.
I'm cutting the flipflop parts using paper templates. Bandsawing along the edges
is accurate enough, and it saves me having to make measurements.
The pieces I'm cutting out here are 7 mm thick.
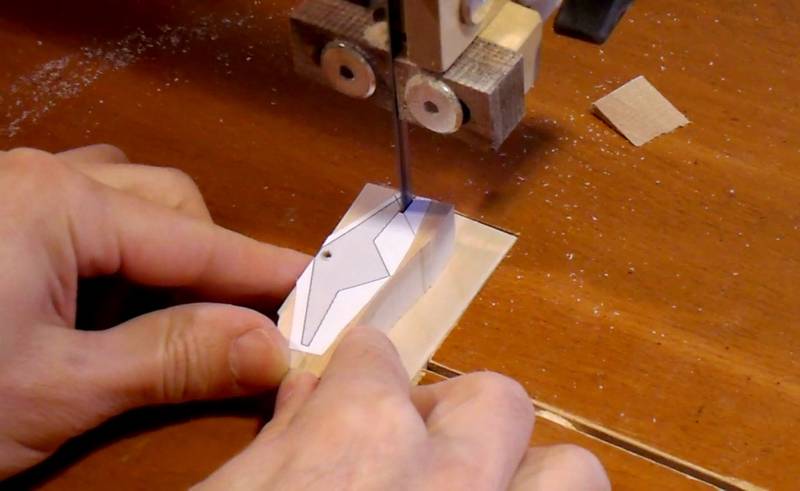 Here's cutting out the toggle. I drilled the pivot hole before cutting
the outline. That hole is very close to the edge so it would be
difficult to drill afterwards. The pivot hole is just slightly
larger than the nail it will pivot on.
Here's cutting out the toggle. I drilled the pivot hole before cutting
the outline. That hole is very close to the edge so it would be
difficult to drill afterwards. The pivot hole is just slightly
larger than the nail it will pivot on.
 Cutting the flipflop floor. It slopes downwards on either side.
I sanded those slopes after bandsawing them to provide a
smoother rolling surface for the marbles.
Cutting the flipflop floor. It slopes downwards on either side.
I sanded those slopes after bandsawing them to provide a
smoother rolling surface for the marbles.
 The pieces of the flipflop ready to assemble.
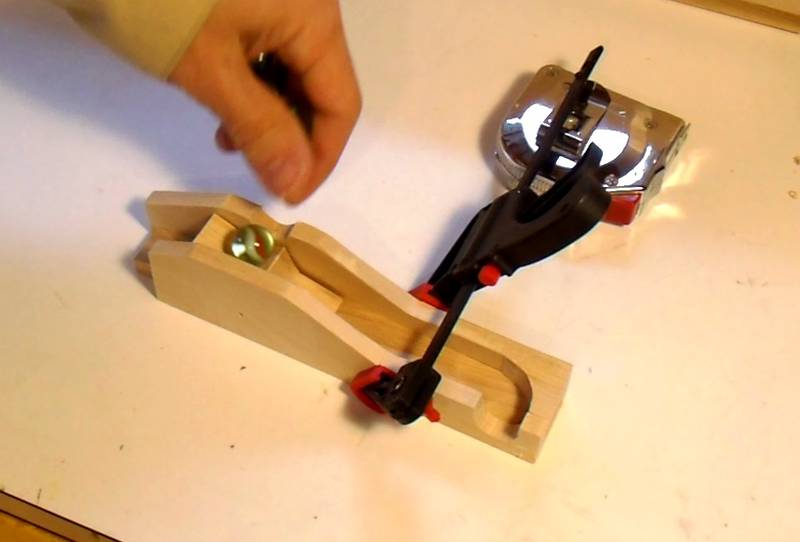 I loosely clamped the pieces together and tested it by dropping some marbles onto it.
 The flipflop worked OK, so here I'm gluing it together.
 The flipflop entrance needs to be just below the exit at the top, so
that marbles will roll into it freely without bouncing or using up too much
height.
The flipflop entrance needs to be just below the exit at the top, so
that marbles will roll into it freely without bouncing or using up too much
height.
I'm holding the piece in place and marking the outline of the mating part with a pencil.
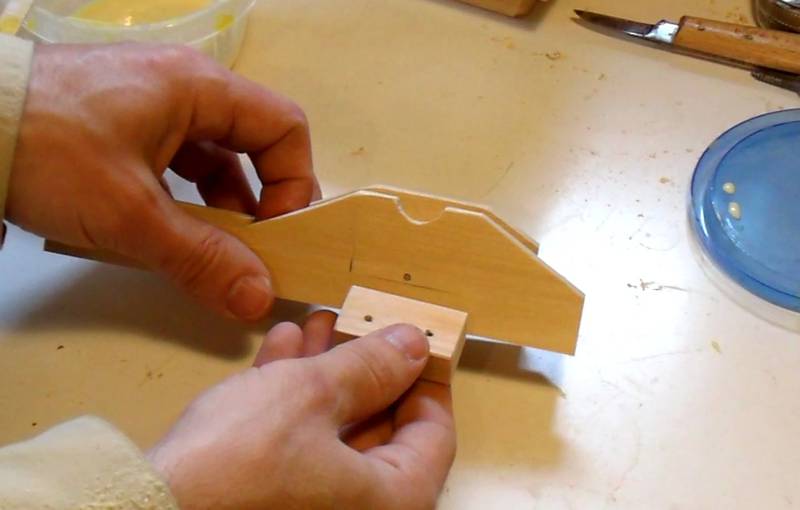 Now gluing the mounting block in place, aligned with the pencil marks I just made.
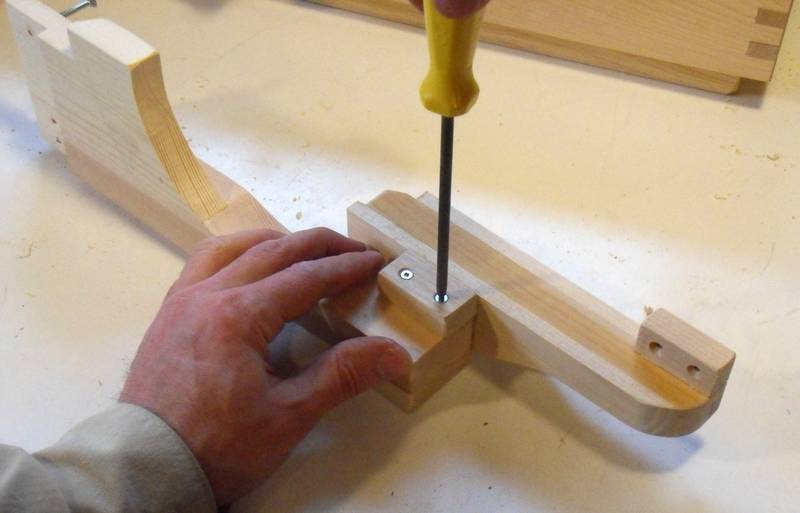 After the glue on the mounting block dried, I removed the top part of the
machine and screwed the flipflop part in place (upside down in this photo)
After the glue on the mounting block dried, I removed the top part of the
machine and screwed the flipflop part in place (upside down in this photo)
Making the bowl
 The bowl is a fun element - marbles swirl around in it for a long time before
dropping down one of the three holes in the middle. Each hole leads to a different
noise making element below.
The bowl is a fun element - marbles swirl around in it for a long time before
dropping down one of the three holes in the middle. Each hole leads to a different
noise making element below.
![]() The bowl needs to be 4 cm high. Regular 2x4 type lumber is not quite thick enough,
so I glued on an extra board to add thickness. This board doesn't need to be
the full size of the blank because the bowl tapers a bit towards the bottom.
The bowl needs to be 4 cm high. Regular 2x4 type lumber is not quite thick enough,
so I glued on an extra board to add thickness. This board doesn't need to be
the full size of the blank because the bowl tapers a bit towards the bottom.
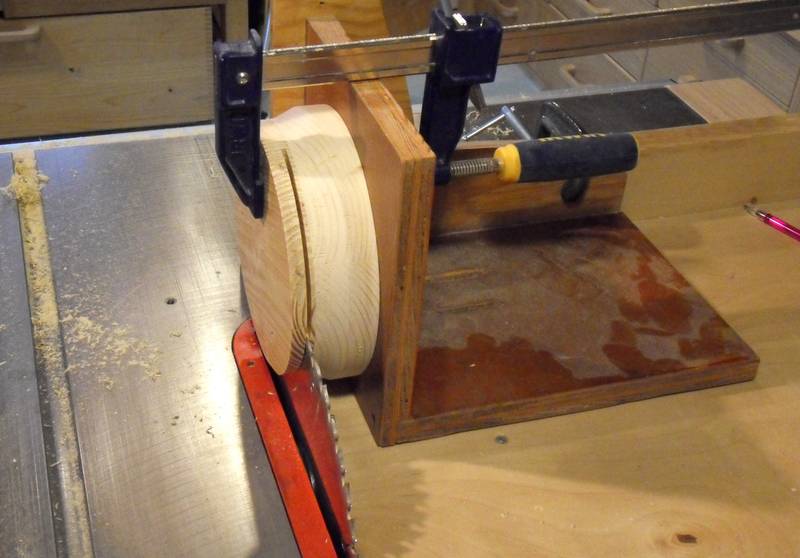
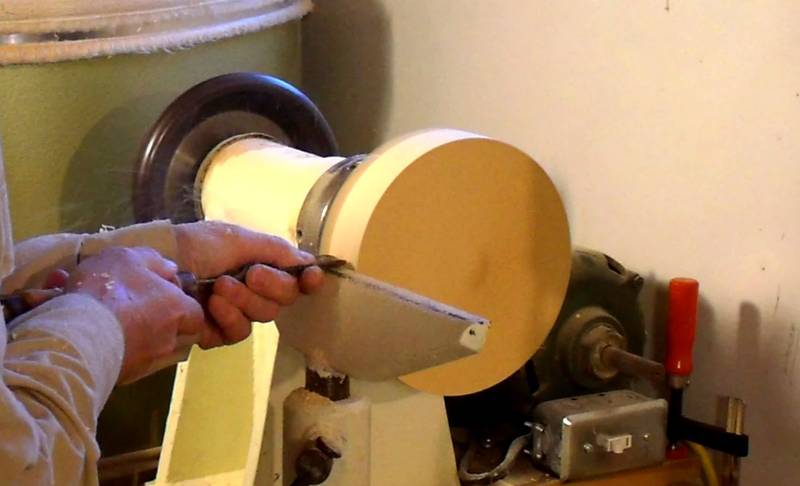 Turning the blank round, then working the face of it to cut the bowl cavity.
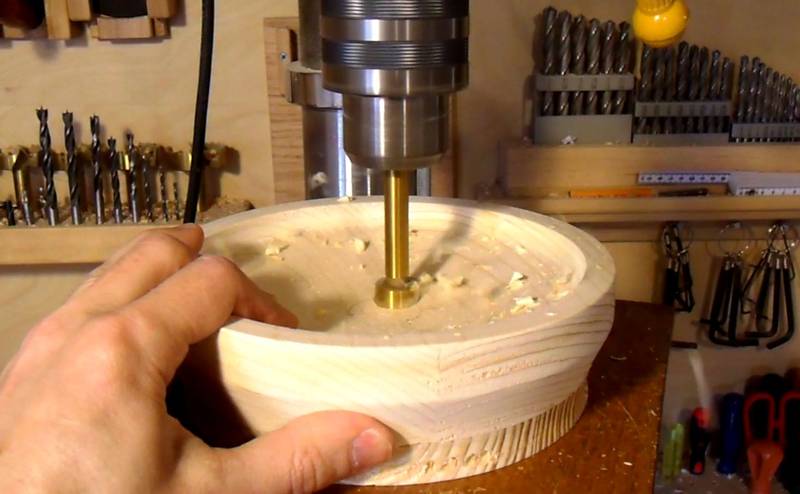
 Checking the cavity against a profile it needs to be.
I had superimposed a profile view on the top view of the bowl,
so that looks a bit confusing in this photo.
I changed the plans to have separate profiles for checking
the bowl with.
Checking the cavity against a profile it needs to be.
I had superimposed a profile view on the top view of the bowl,
so that looks a bit confusing in this photo.
I changed the plans to have separate profiles for checking
the bowl with.
I'm sometimes asked how to make the bowl without a lathe. Unfortunately, I can't thnk of a good method. But you could always try building a lathe.
 The blank I turned was a bit thicker than needed, and I hadn't turned it all the
way down. So I'm using a simple jig to slice the bottom off the bowl. With the blade
all the way up, it reaches almost half way through the bowl. For the last few cuts,
I had to put a spacer in the top side of the kerf so I could still clamp it.
The blank I turned was a bit thicker than needed, and I hadn't turned it all the
way down. So I'm using a simple jig to slice the bottom off the bowl. With the blade
all the way up, it reaches almost half way through the bowl. For the last few cuts,
I had to put a spacer in the top side of the kerf so I could still clamp it.
This method was the only reasonably safe method that I could think of to cut a layer off the bottom. Please note that the face of the jig also has a ledge towards the operator side, which helps to hold it steady. The clamp reaches over the top, so that even if bad things were to happen, it wouldn't fall down on the blade.
You can avoid all this trouble by making sure your blank is only slightly thicker than the final bowl.
 Next I mark the layout of the holes on the bottom. The holes are 3/4" (or 18 mm)
in size, each 1.5 cm from the center of the bowl. They are spaced 120 degrees apart -
easy enough to mark with just a compass. The orientation should be such that a line
drawn between two of the hole centers is parallel to the wood grain direction.
Next I mark the layout of the holes on the bottom. The holes are 3/4" (or 18 mm)
in size, each 1.5 cm from the center of the bowl. They are spaced 120 degrees apart -
easy enough to mark with just a compass. The orientation should be such that a line
drawn between two of the hole centers is parallel to the wood grain direction.
 Drilling out the holes. I'm using a 3/4" drill bit (19 mm). In metric countries,
use an 18 mm drill bit.
Drilling out the holes. I'm using a 3/4" drill bit (19 mm). In metric countries,
use an 18 mm drill bit.
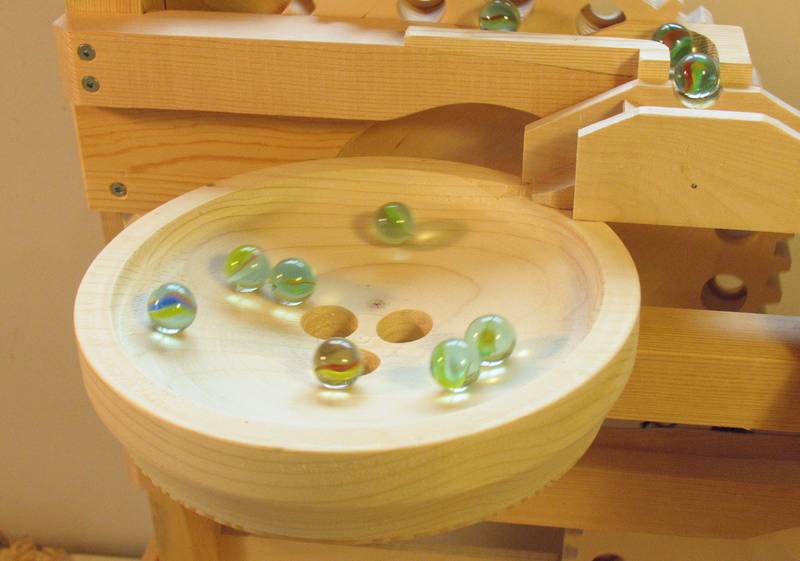
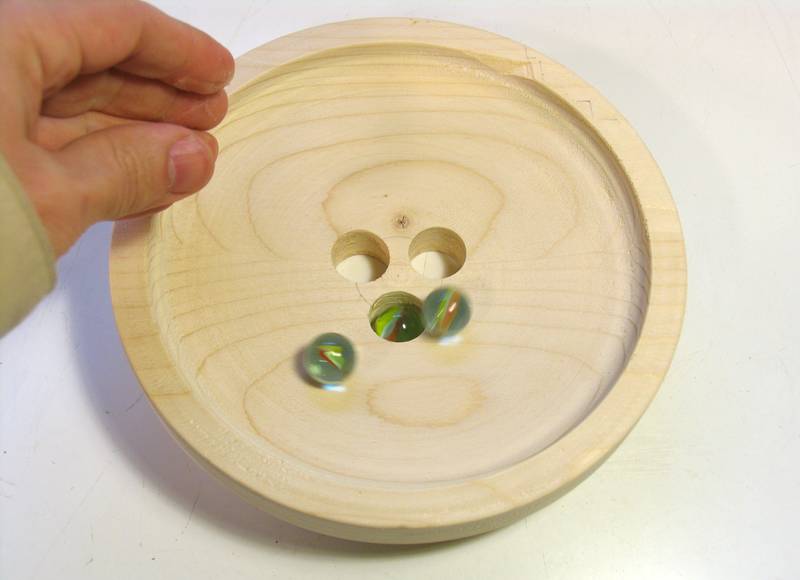 Swirling some marbles around the bowl, just to test it.
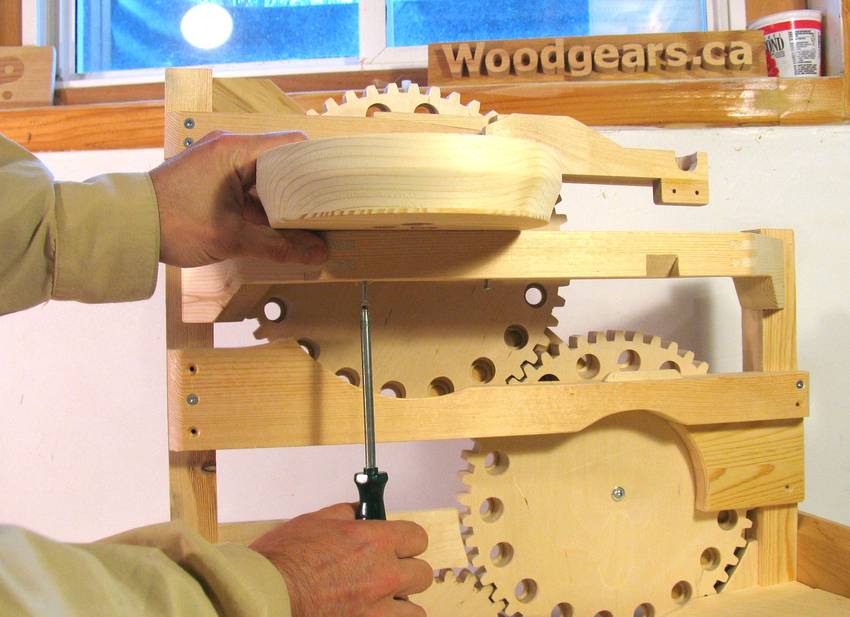 The bowl gets mounted on the support arm by two screws from below.
Making the pin board
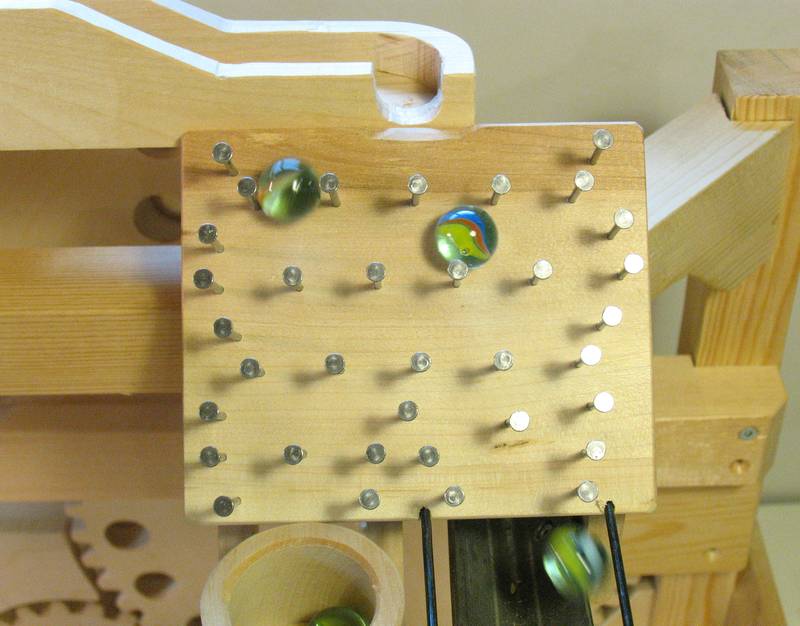 The pin board allows marbles to bounce against the nails as they descend.
Marbles navigate the path between the nails in a surprisingly random fashion.
The pin board allows marbles to bounce against the nails as they descend.
Marbles navigate the path between the nails in a surprisingly random fashion.
 The pin board has a 45-degree chamfer on the top edge.
I cut the board to size first, at which point it
was too short and wide to safely rip against the fence. So I used
my table saw sled
as a support, with a stop clamped to the sled to prevent the stock sliding.
If you don't have a table saw sled, I suggest you cut that pin board longer than you
need, then rip the chamfer (safer with a longer piece), and then cut it to
final length.
The pin board has a 45-degree chamfer on the top edge.
I cut the board to size first, at which point it
was too short and wide to safely rip against the fence. So I used
my table saw sled
as a support, with a stop clamped to the sled to prevent the stock sliding.
If you don't have a table saw sled, I suggest you cut that pin board longer than you
need, then rip the chamfer (safer with a longer piece), and then cut it to
final length.
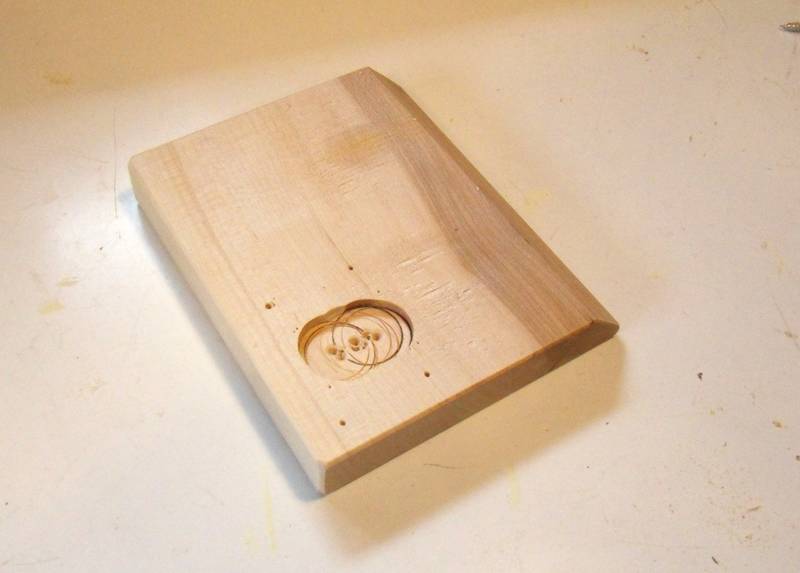 The pin board has a shallow cavity carved out of the bottom. This is to give the
dump-o-matic counterweight more room. Best to cut that before adding any nails to it.
The pin board has a shallow cavity carved out of the bottom. This is to give the
dump-o-matic counterweight more room. Best to cut that before adding any nails to it.
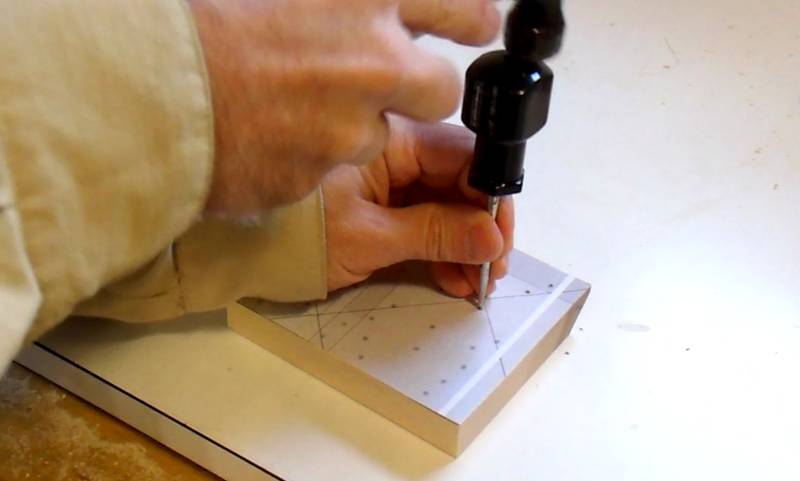 I tacked the template down on the piece with just a dab of glue, and am using
an awl to punch a divot through the template for every nail position.
I tacked the template down on the piece with just a dab of glue, and am using
an awl to punch a divot through the template for every nail position.
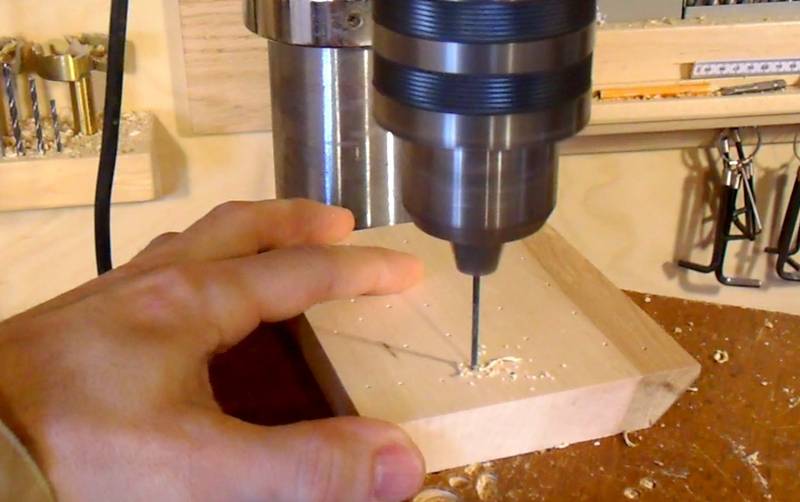
 I'm using a drill just slightly smaller than the diameter of the nails I'll use.
Here's checking the depth to make sure I have the nails sticking out to the right
height for the marbles.
I'm using a drill just slightly smaller than the diameter of the nails I'll use.
Here's checking the depth to make sure I have the nails sticking out to the right
height for the marbles.
 Drilling all the nail holes. With divots in all the nail positions, I didn't need
the template anymore. Drilling often makes a mess of the template, so I just
pulled it off. It's hard to see the divots in this image, but you can click
on it to enlarge it.
Drilling all the nail holes. With divots in all the nail positions, I didn't need
the template anymore. Drilling often makes a mess of the template, so I just
pulled it off. It's hard to see the divots in this image, but you can click
on it to enlarge it.
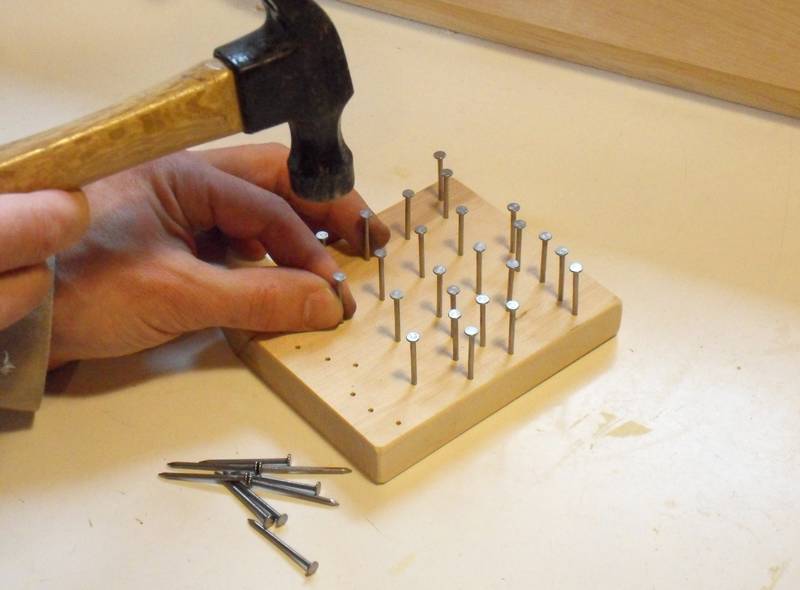 Now adding the nails.
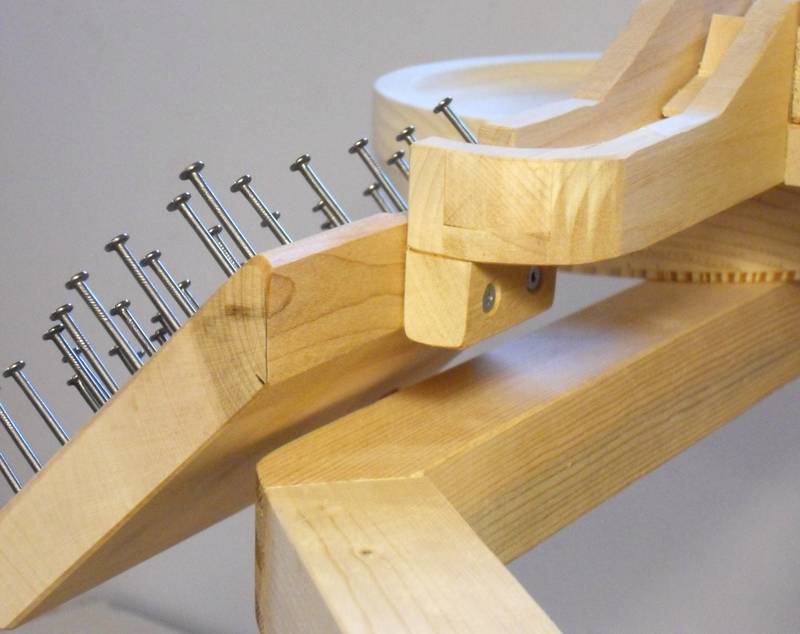 The pin board screws to the exit of the flipflop to ensure it stays aligned properly.
It's best to hold the pin board in place, then push the screws through the holes in
the mounting block to mark the pilot hole locations.
The pin board screws to the exit of the flipflop to ensure it stays aligned properly.
It's best to hold the pin board in place, then push the screws through the holes in
the mounting block to mark the pilot hole locations.
 There is also a beveled block that goes between the support arm and the pin board.
Here's marking where that beveled block will meet the pin board.
I have that location marked in the plans drawings, but it's better to mark that off
the machine as you build it.
There is also a beveled block that goes between the support arm and the pin board.
Here's marking where that beveled block will meet the pin board.
I have that location marked in the plans drawings, but it's better to mark that off
the machine as you build it.
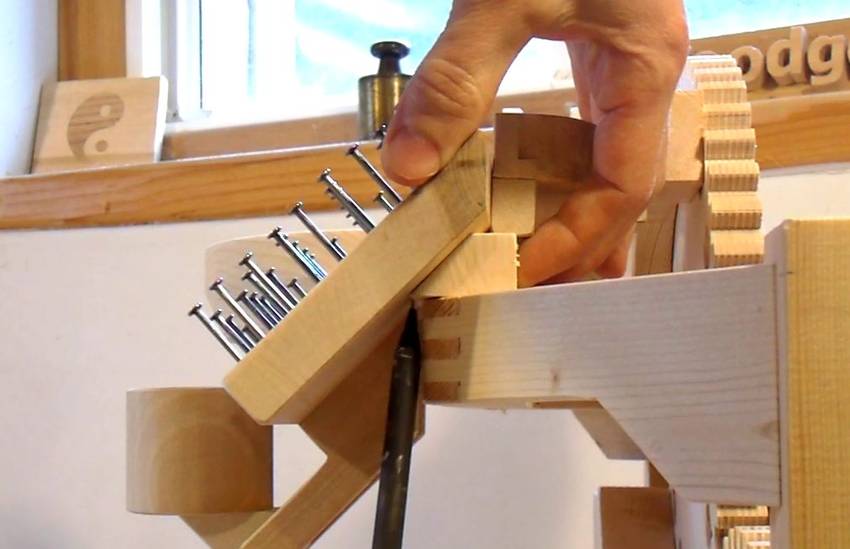
 With the pin board removed again, gluing that beveled block to the pin board, making
sure it's aligned with the pencil marks from the previous step.
With the pin board removed again, gluing that beveled block to the pin board, making
sure it's aligned with the pencil marks from the previous step.
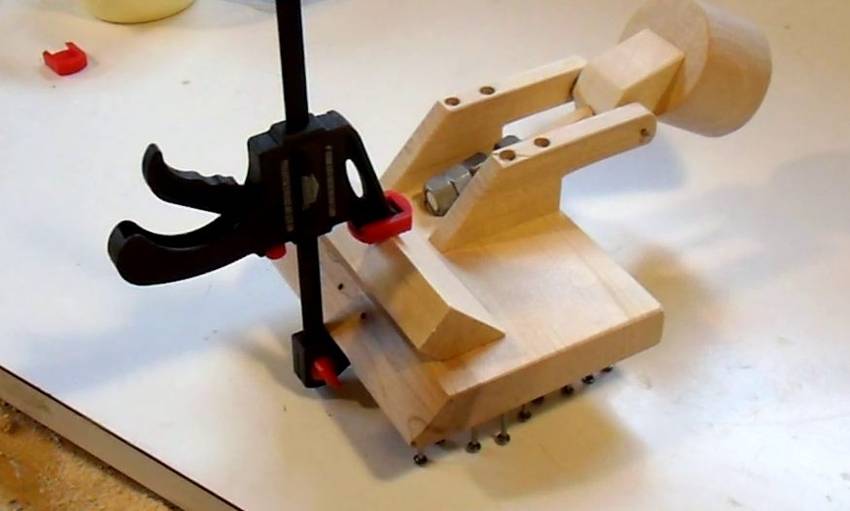
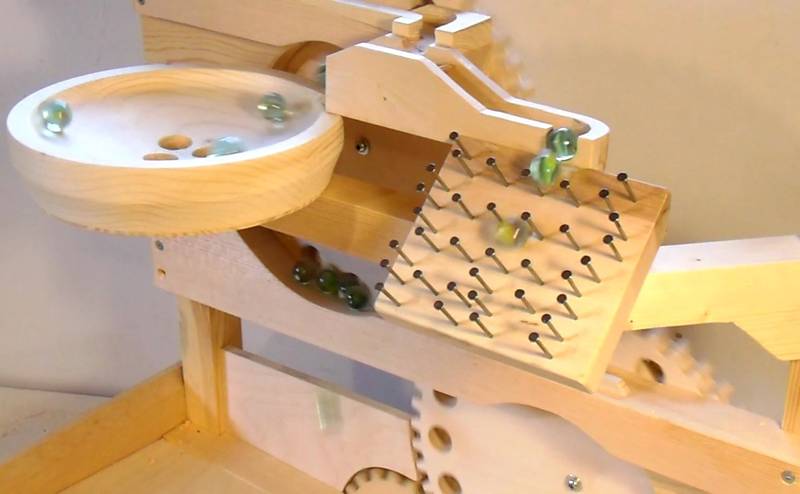 Testing the just constructed elements. It's always fun to do the testing at every step.
Next: Dump-o-matic
Back to Marble machine 2.1