Making the headboard
The logical place to start with is the headboard.
 I started out by drawing the layout for the headboard in
Google SketchUp. Google SketchUp
doesn't natively support splines, just circular arcs. But circular arcs can easily
be copied to the wood with a compass, so this worked out well.
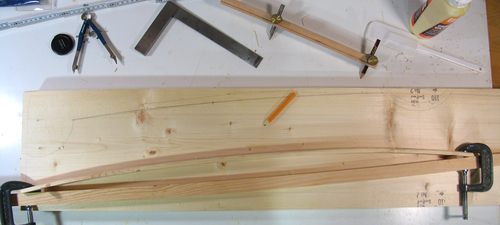
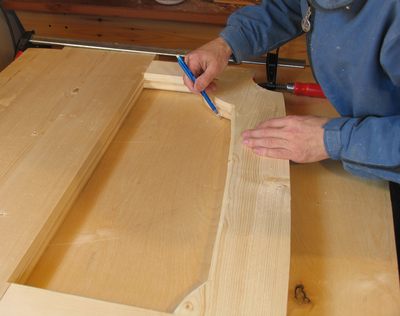
Though for the low curvature arcs, the actual radius would have been
on the order of several meters, so I just temporarily clamped some strips of wood
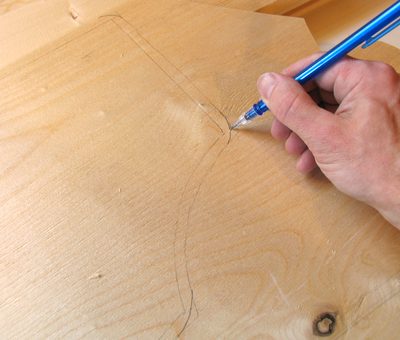
together to make for a slight curvature for the purpose of layout. I had marked
the ends and center points of the large curves on the piece of wood already, so
it was just a matter of finding the right degree of bending to get the curve
to fit my marked points.
I started out by drawing the layout for the headboard in
Google SketchUp. Google SketchUp
doesn't natively support splines, just circular arcs. But circular arcs can easily
be copied to the wood with a compass, so this worked out well.
Though for the low curvature arcs, the actual radius would have been
on the order of several meters, so I just temporarily clamped some strips of wood
together to make for a slight curvature for the purpose of layout. I had marked
the ends and center points of the large curves on the piece of wood already, so
it was just a matter of finding the right degree of bending to get the curve
to fit my marked points.
Note that the curve formed by a piece of wood is closer to a circular arc if
only bending force is applied from both ends, which is why I only jammed two small
blocks between the pieces of wood right near the clamps, instead of one big one in
the middle.
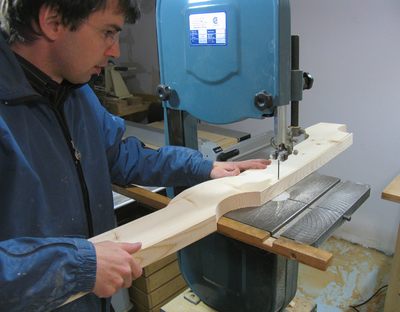 The top outline of the headboard I cut out of one solid piece of 2x12. I cut it out
in two stages, first cutting about half a centimeter away from the lines. Once
most of the excess was cut away, the piece became much easier to handle, and I made
a second cut right on the line. I did most of the cuts from the ends of the board
towards the middle, so that the long end of the board was always on my side of the saw.
The top outline of the headboard I cut out of one solid piece of 2x12. I cut it out
in two stages, first cutting about half a centimeter away from the lines. Once
most of the excess was cut away, the piece became much easier to handle, and I made
a second cut right on the line. I did most of the cuts from the ends of the board
towards the middle, so that the long end of the board was always on my side of the saw.
I had to move my bandsaw closer to the middle of the room especially because the quarter-circle cutouts at the ends of the piece required me to sweep the whole piece over a large area as I turned it to cut that arc.
After cutting out the arc on the bandsaw, I used my belt sander to smooth out the
curves.
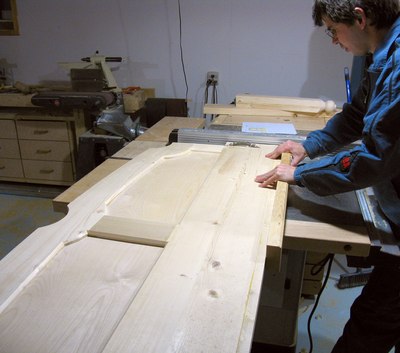
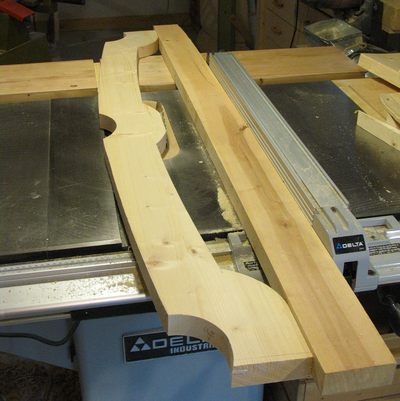 Where the middle arc dips in the middle, the cut needs to be perfectly flat for
joining the middle vertical piece against it. I had already cut all the outline
by the time I needed to cut this, so I used a long piece of wood against my table
saw fence so that I could guide the board by the flat spots on either end.
Where the middle arc dips in the middle, the cut needs to be perfectly flat for
joining the middle vertical piece against it. I had already cut all the outline
by the time I needed to cut this, so I used a long piece of wood against my table
saw fence so that I could guide the board by the flat spots on either end.
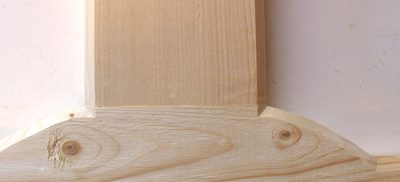
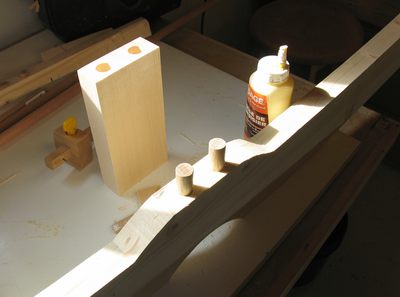 Next I drilled the dowel holes, and joined the vertical pieces of the headboard
against the top. I glued these on before shaping the chamfers and slots for the
panels into them. This formed a sort of 'E' shape.
Next I drilled the dowel holes, and joined the vertical pieces of the headboard
against the top. I glued these on before shaping the chamfers and slots for the
panels into them. This formed a sort of 'E' shape.
![]() Next I transferred the lateral positions of the dowel holes to the rail that this
'E' shaped top mates on to. I just used the positions from the top part
to mark the bottom part. That way, the pieces would mate better, even if there was some
inaccuracies. Because it's hard to guess the center of a hole, I offset the top piece
sideways by half the diameter of a dowel, and transferred the edge positions
instead, which I then used as the center in the holes of the bottom rail.
Next I transferred the lateral positions of the dowel holes to the rail that this
'E' shaped top mates on to. I just used the positions from the top part
to mark the bottom part. That way, the pieces would mate better, even if there was some
inaccuracies. Because it's hard to guess the center of a hole, I offset the top piece
sideways by half the diameter of a dowel, and transferred the edge positions
instead, which I then used as the center in the holes of the bottom rail.
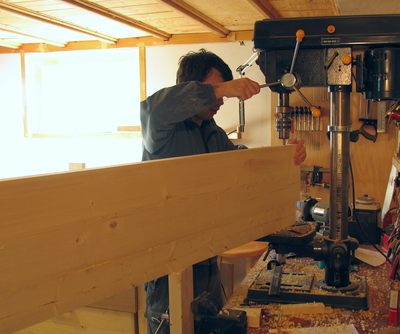 The bottom rail was actually a bit of an unwieldily piece to put on the drill press.
Fortunately, my vise is near the drill press, and I clamped a piece of 2x4 into it
to give me an extra support for this board.
The bottom rail was actually a bit of an unwieldily piece to put on the drill press.
Fortunately, my vise is near the drill press, and I clamped a piece of 2x4 into it
to give me an extra support for this board.
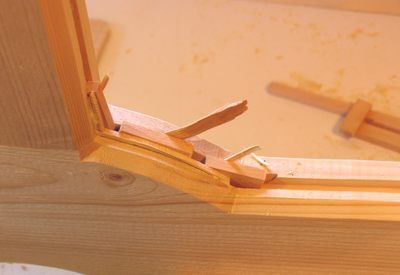
 I next assembled the top E shaped piece and bottom rail, with dowels in, but without
any glue. I used some bar clamps to hold it together while I worked on it.
I started by routing a chamfer on the inside edge with a chamfer bit.
I next assembled the top E shaped piece and bottom rail, with dowels in, but without
any glue. I used some bar clamps to hold it together while I worked on it.
I started by routing a chamfer on the inside edge with a chamfer bit.
 Next I used a slotting bit to route the slot for the panels.
I had some 5/16" plywood lying around, and have a T-slotting bit
that cuts a slot of that width. It has no guide roller though, so
I had to improvise a guide onto the router.
Next I used a slotting bit to route the slot for the panels.
I had some 5/16" plywood lying around, and have a T-slotting bit
that cuts a slot of that width. It has no guide roller though, so
I had to improvise a guide onto the router.
I had initially wanted to use veneered 1/4" plywood, but at the Home Depot,
the veneered stuff was 3/8", which I thought was a little thin. Plus, I would
have had to spend another $30 on a slot cutter and arbour for it. So I went
with the 5/16" plywood that I had, of which I had just barely enough.
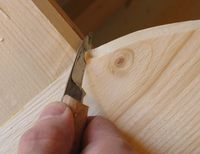
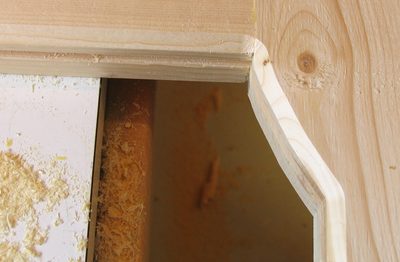 The chamfer bit can't really cut nice corners, and I find the look of these rounded
corners somewhat unsatisfying. But carving them all the way into the corner with
a carving knife doesn't take very much time.
The chamfer bit can't really cut nice corners, and I find the look of these rounded
corners somewhat unsatisfying. But carving them all the way into the corner with
a carving knife doesn't take very much time.
 I'm pretty happy with what the result looks like.
 Next it was time to cut out the plywood for the panel. The piece of 7/16" plywood
I had was just barely big enough for the two panels while avoiding any
major defect, such as the knot hole on the bottom right of the shot at left.
I marked a line 1 cm in from the square edges first, then lined that up with the
square edges inside my frame. Then I traced the arched parts of the inside
panel outline onto the plywood.
Next it was time to cut out the plywood for the panel. The piece of 7/16" plywood
I had was just barely big enough for the two panels while avoiding any
major defect, such as the knot hole on the bottom right of the shot at left.
I marked a line 1 cm in from the square edges first, then lined that up with the
square edges inside my frame. Then I traced the arched parts of the inside
panel outline onto the plywood.
 I then offset the traced line by about 9 mm just by eyeballing it. I rounded the
edges with about a 20 mm radius, because my slot cutter is limited to cutting
the inside corners round as well. It was much easier rounding the panel edges
than to carve my slots to be angular with a chisel. And this part gets hidden anyway
so, unlike the chamfers, there is no aesthetic issue.
I then offset the traced line by about 9 mm just by eyeballing it. I rounded the
edges with about a 20 mm radius, because my slot cutter is limited to cutting
the inside corners round as well. It was much easier rounding the panel edges
than to carve my slots to be angular with a chisel. And this part gets hidden anyway
so, unlike the chamfers, there is no aesthetic issue.
 Before gluing in the panel, I had to fix a spot where I slipped with the router a little
and cut away more than I should have. I glued a piece of wood to the inside
of the slot, and wedged it in with a few other pieces. Once the glue dried on
that, I carved it to the right shape, and chiseled the slot to its proper width again.
Before gluing in the panel, I had to fix a spot where I slipped with the router a little
and cut away more than I should have. I glued a piece of wood to the inside
of the slot, and wedged it in with a few other pieces. Once the glue dried on
that, I carved it to the right shape, and chiseled the slot to its proper width again.
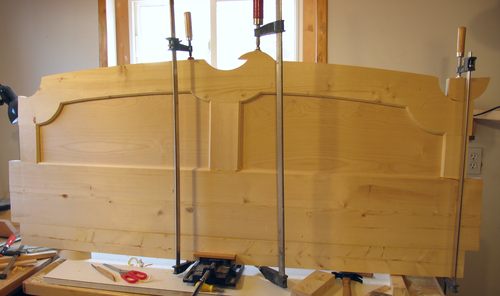 Next I glued the panels into the top part, and then glued that to the bottom part.
With the panels made of plywood, I didn't have to worry about expansion and contraction
of the panels, so it was safe to just glue the panels in along all its edges.
Next I glued the panels into the top part, and then glued that to the bottom part.
With the panels made of plywood, I didn't have to worry about expansion and contraction
of the panels, so it was safe to just glue the panels in along all its edges.
You can see I made the bottom rail a little longer than it needed to be. In fact, I made
the whole headboard a little bit wider than I needed it.
 With the headboard a little wider than needed, I could just trim the edges flush
on my table saw. A sturdy table saw sled comes in handy for that sort of thing.
If you don't already have a table saw sled,
this project would be a good reason to build one.
With the headboard a little wider than needed, I could just trim the edges flush
on my table saw. A sturdy table saw sled comes in handy for that sort of thing.
If you don't already have a table saw sled,
this project would be a good reason to build one.
At this point, I still needed to shape the top edge of the headboard with a router,
but I saved that step until quite late in the process, so that any nicks or dents
I might put in the top edge of the headboard would hopefully be in part of the wood
to be cut away.
Next: Making the bed posts
Back to Building a queen size bed
![]()