 Pat Hawley writes:
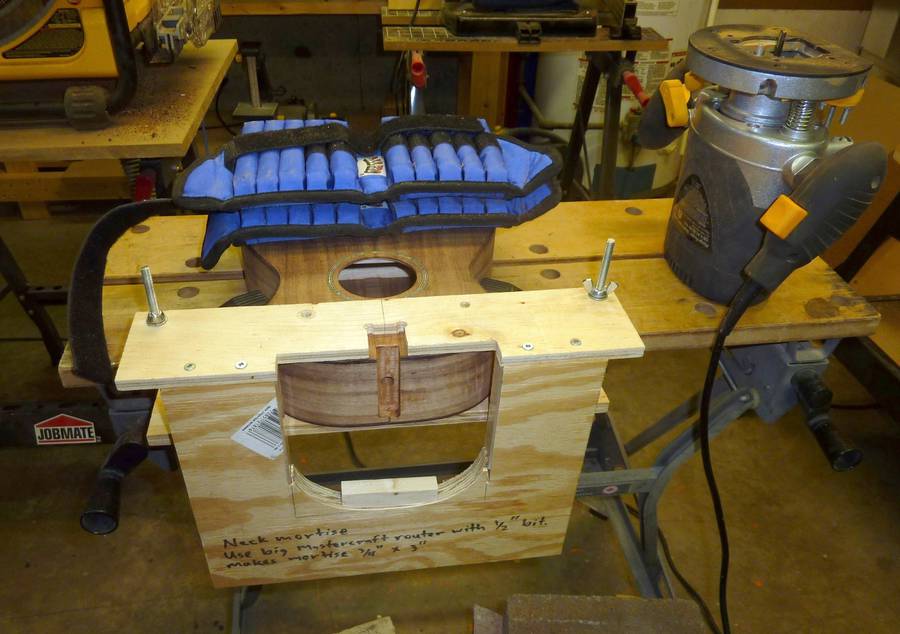
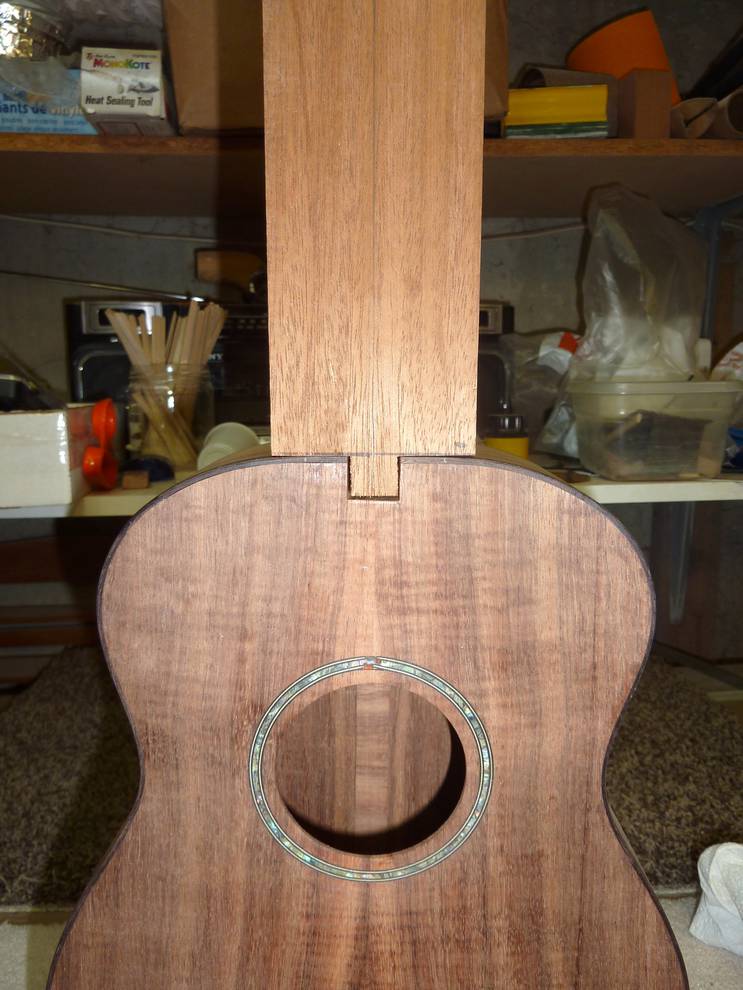
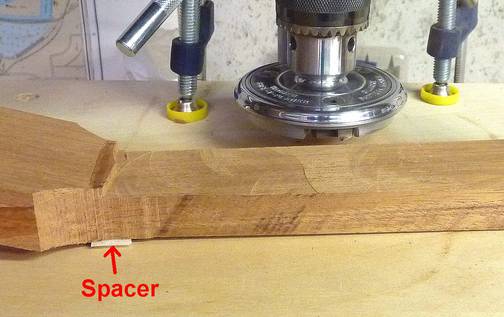
The simple jig I use for doing the neck mortise. The router base slides directly against the ukulele's body. It's the same one I use for guitars except I use a smaller bit and put a stop at the bottom to end up with a smaller mortise.
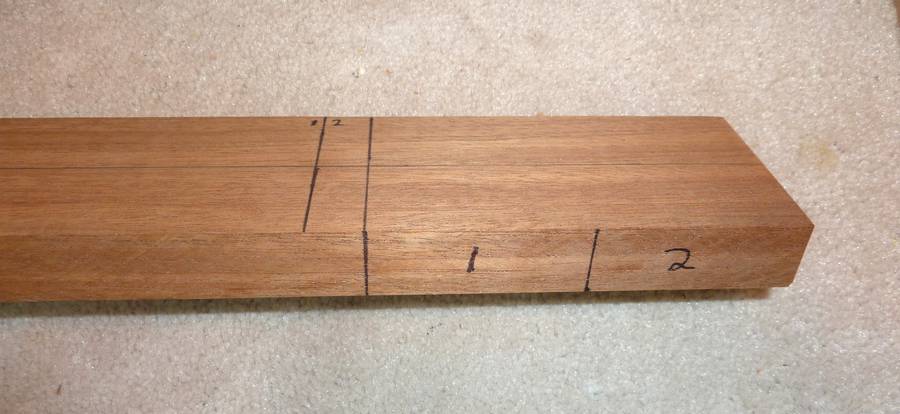
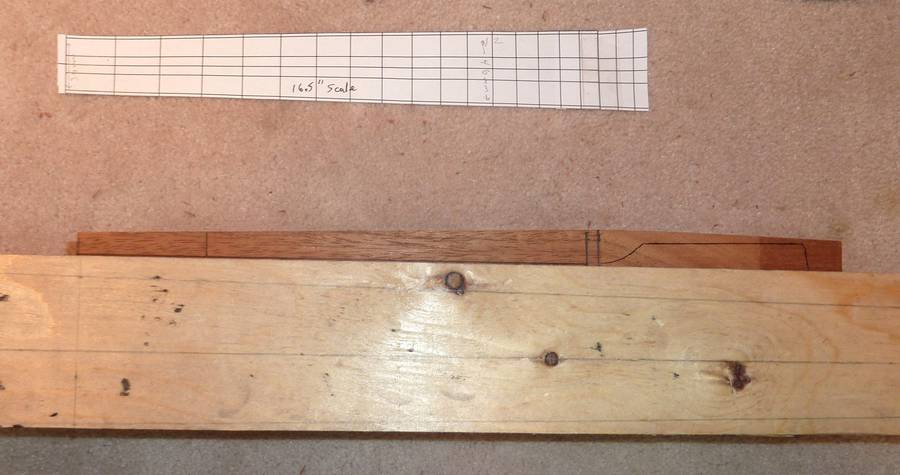
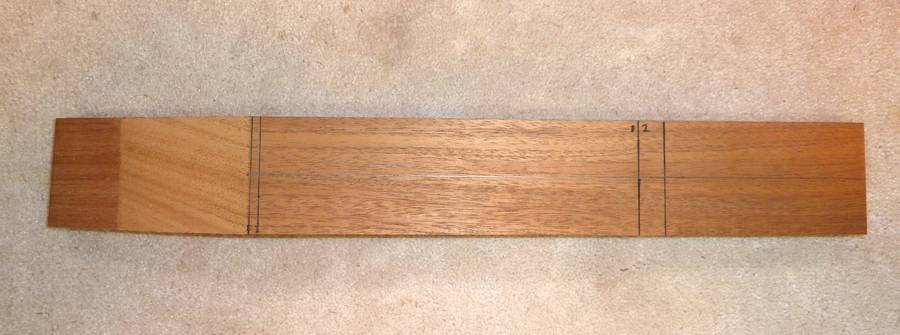 For the neck, I start from the angle for the head, measure 5mm to allow for
the nut, then out to the 12th fret location, then out further to allow for
the tenon.
For the neck, I start from the angle for the head, measure 5mm to allow for
the nut, then out to the 12th fret location, then out further to allow for
the tenon.
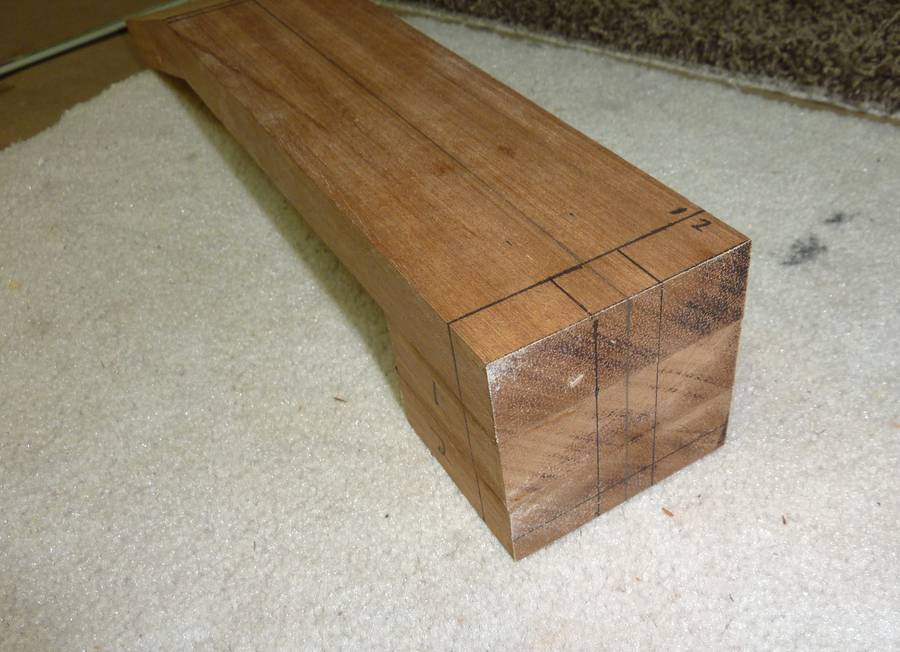
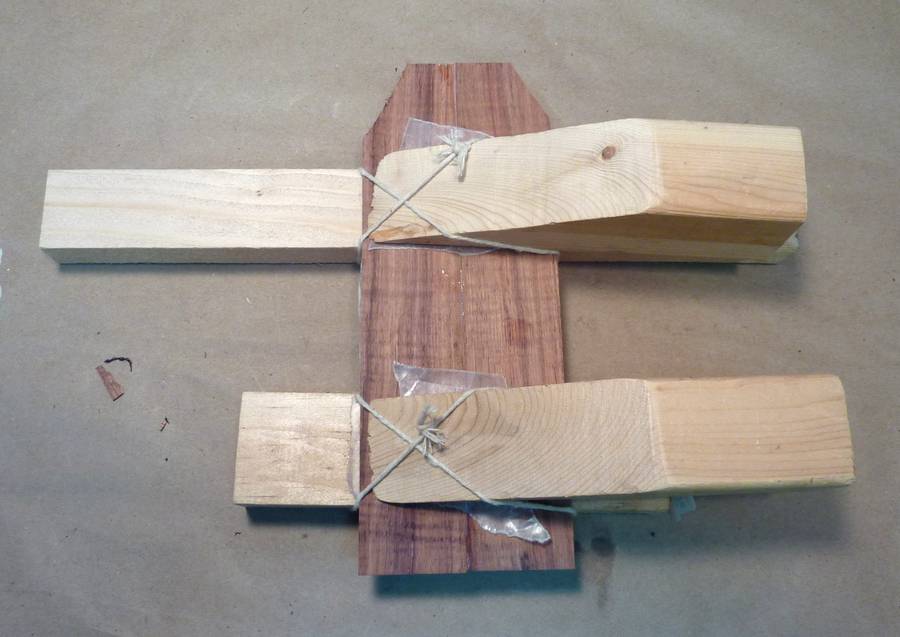
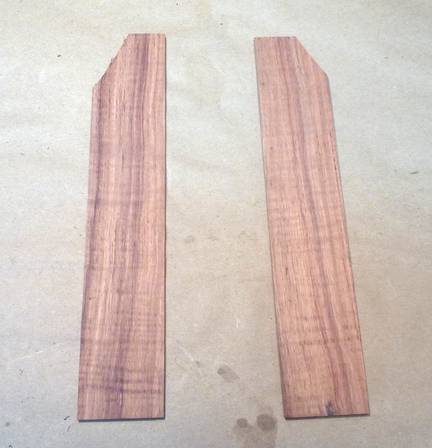
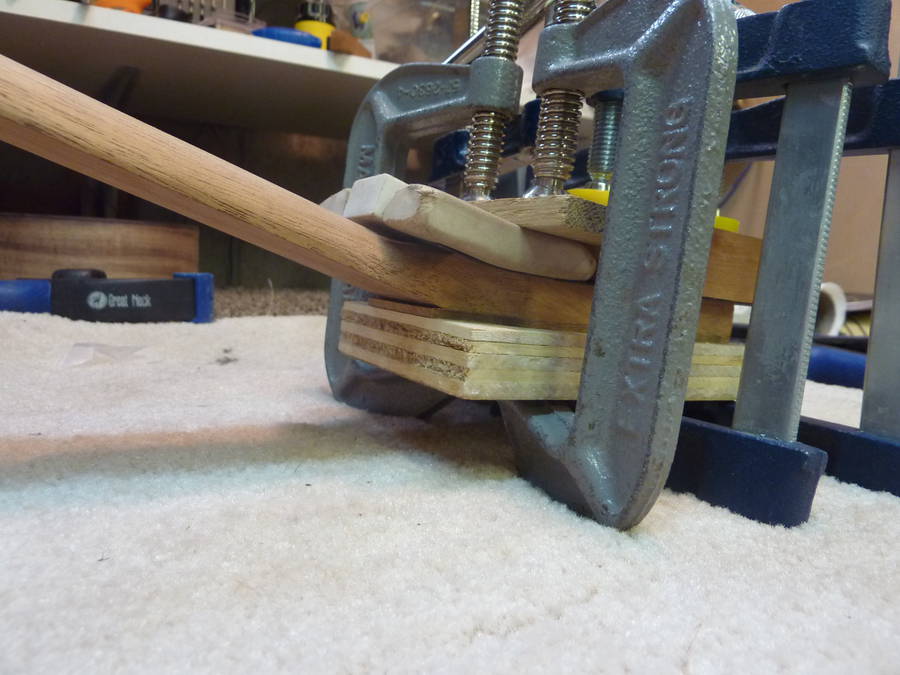
 I cut off the excess into two pieces which I use to make a stack
for the heel.
I cut off the excess into two pieces which I use to make a stack
for the heel.
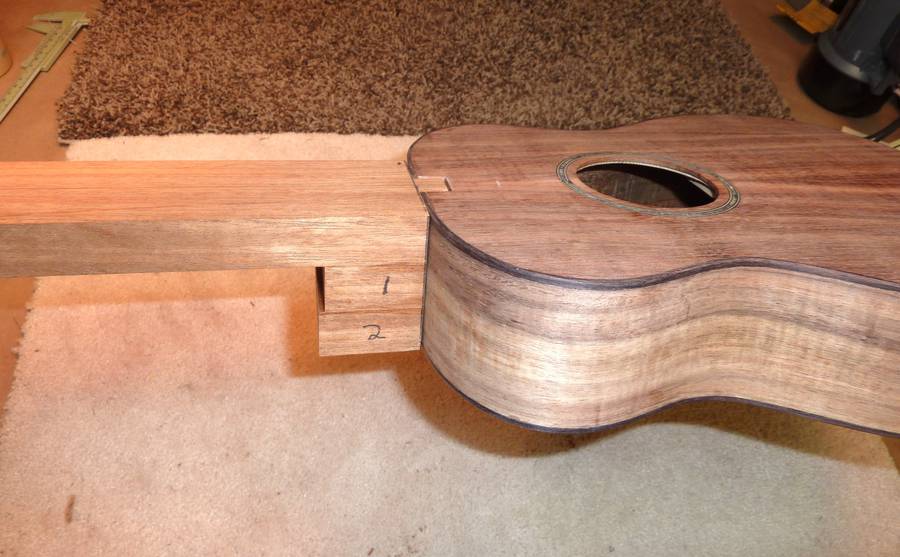
Here is gluing the neck block on (pieces marked 1 and 2). The other block of wood to the left is used to help hold the neck in place (not glued on).
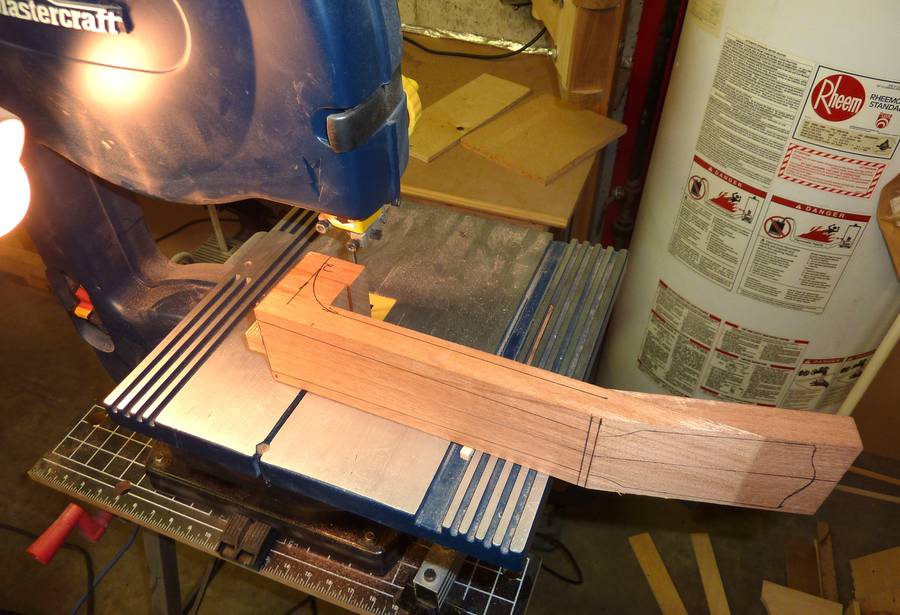
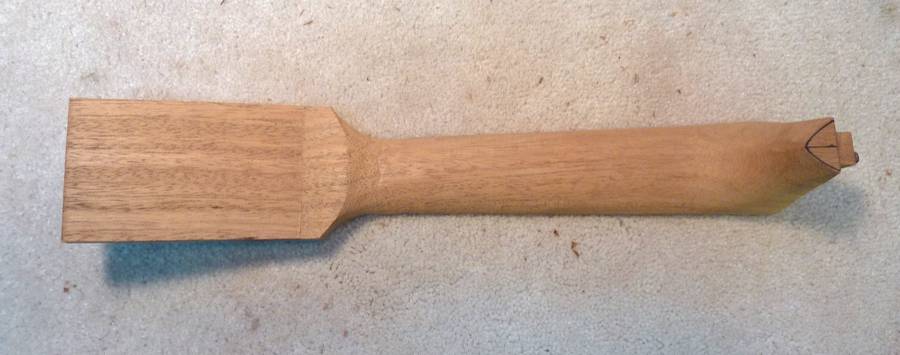
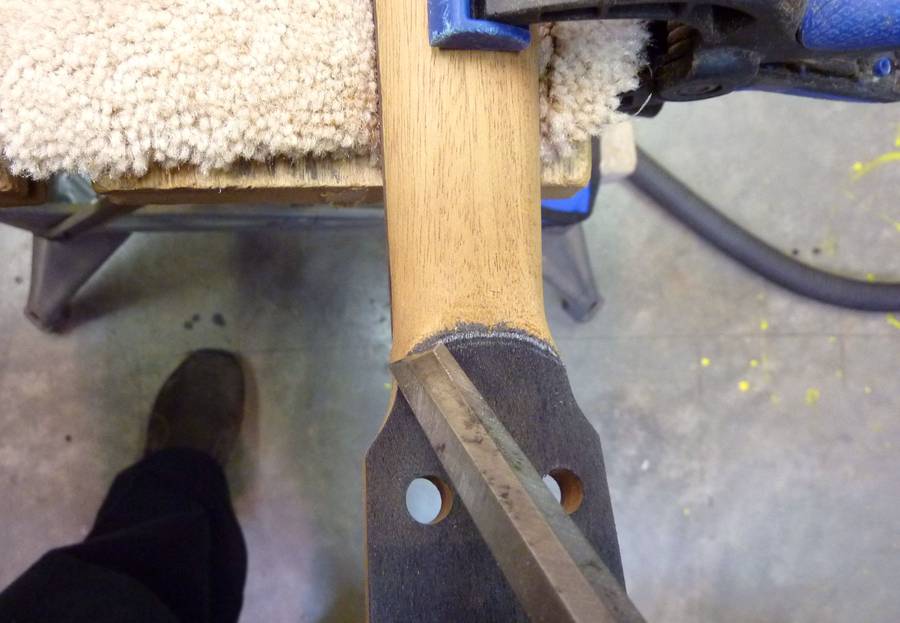
 I draw the tenon onto the heel stack and cut it out on my table saw.
 I don't go for a tight fit between the mortise and the tenon. It only makes
it difficult to align the neck properly. The alignment is determined by
the face of the heel against the uke body.
I don't go for a tight fit between the mortise and the tenon. It only makes
it difficult to align the neck properly. The alignment is determined by
the face of the heel against the uke body.
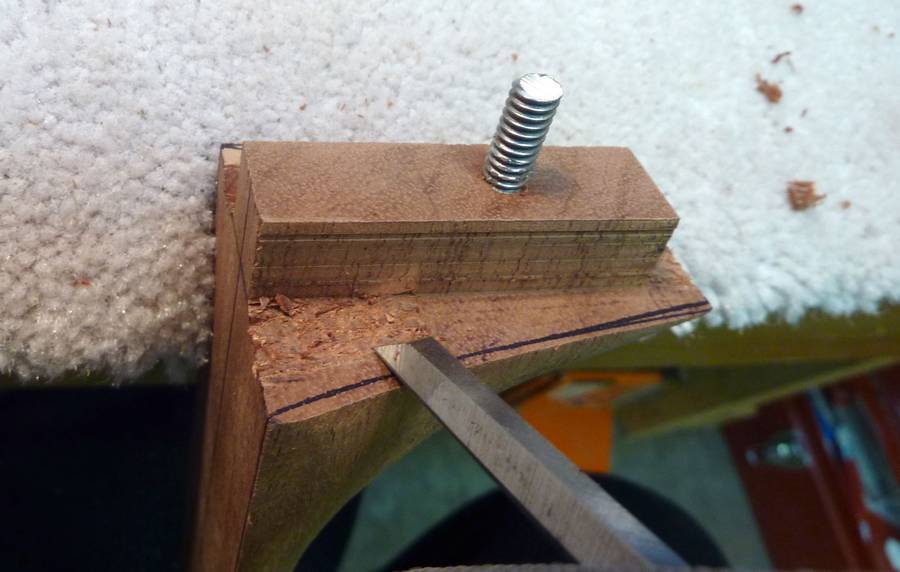
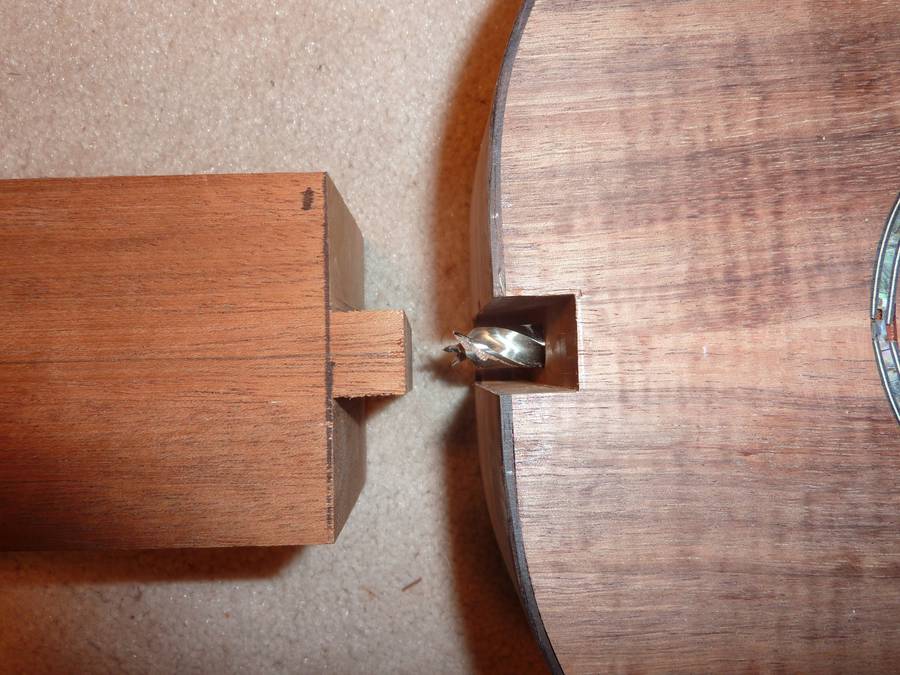 Using the point of a drill to mark the location for the hanger bolt in the neck.
 The screw keeps the heel tight
against the body and the glue between the fretboard and the body keeps
anything from moving.
The screw keeps the heel tight
against the body and the glue between the fretboard and the body keeps
anything from moving.
The "screw" is a hanger bolt - a special screw that is wood screw on one end, and a machine screw stud on the other end. A knock-down fastener style T-nut screws over the stud. The T-nut is screwed onto the stud, through the neck block, from the inside of the instrument.
 Many guitar makers don't even do a mortise and tenon.
They just use a butt joint. However I feel that on a uke you need the tenon
to provide wood for the hanger bolt. Otherwise, if you were to use a screw
into a butt joint, you would have to make the heel too big and clunky.
Many guitar makers don't even do a mortise and tenon.
They just use a butt joint. However I feel that on a uke you need the tenon
to provide wood for the hanger bolt. Otherwise, if you were to use a screw
into a butt joint, you would have to make the heel too big and clunky.
 Rough sawing the curve on the back of the heel.
 I am putting the taper on the neck. I use
two sided tape to stick on a guide board at an angle...
I am putting the taper on the neck. I use
two sided tape to stick on a guide board at an angle...
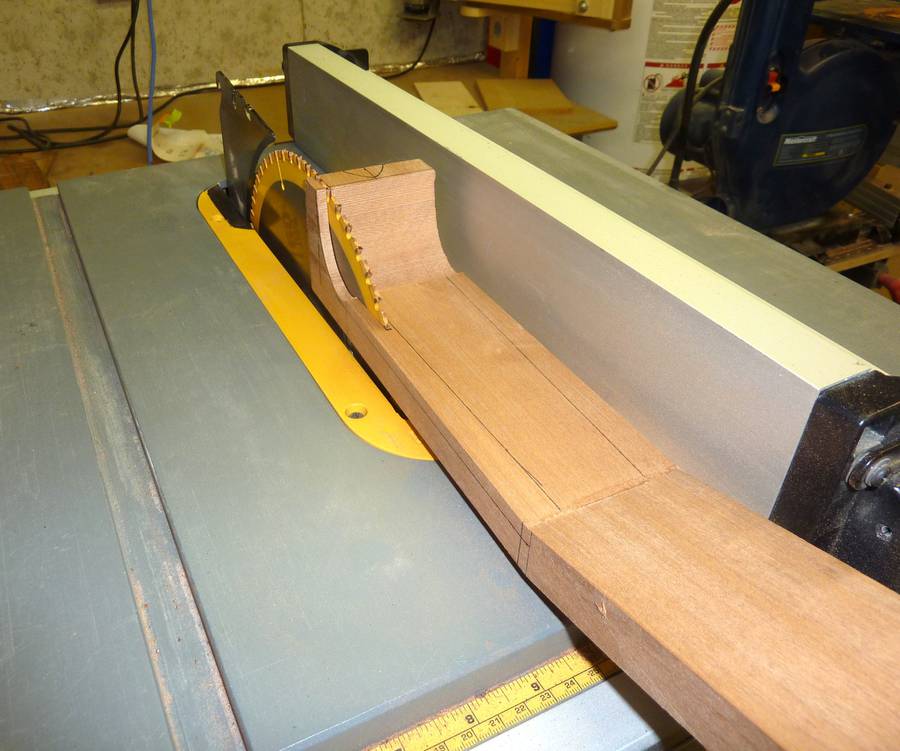 ...then run the neck on the guide board through my table saw up until
I get close to the end. The guide board is under the neck and
against the fence (not visible in this photo).
I have to finish off the cut on my band
saw so that I don't cut into the head area.
...then run the neck on the guide board through my table saw up until
I get close to the end. The guide board is under the neck and
against the fence (not visible in this photo).
I have to finish off the cut on my band
saw so that I don't cut into the head area.
 I bought one of those oscillating multi-tools, without having any particular
use for it because it was on sale. Then I found it makes a great "power
chisel". So I start the rough shaping of the heel with this tool. It goes
through the wood like a knife through butter and I can shave off most of the
wood with this but I am careful not to go too close.
I bought one of those oscillating multi-tools, without having any particular
use for it because it was on sale. Then I found it makes a great "power
chisel". So I start the rough shaping of the heel with this tool. It goes
through the wood like a knife through butter and I can shave off most of the
wood with this but I am careful not to go too close.
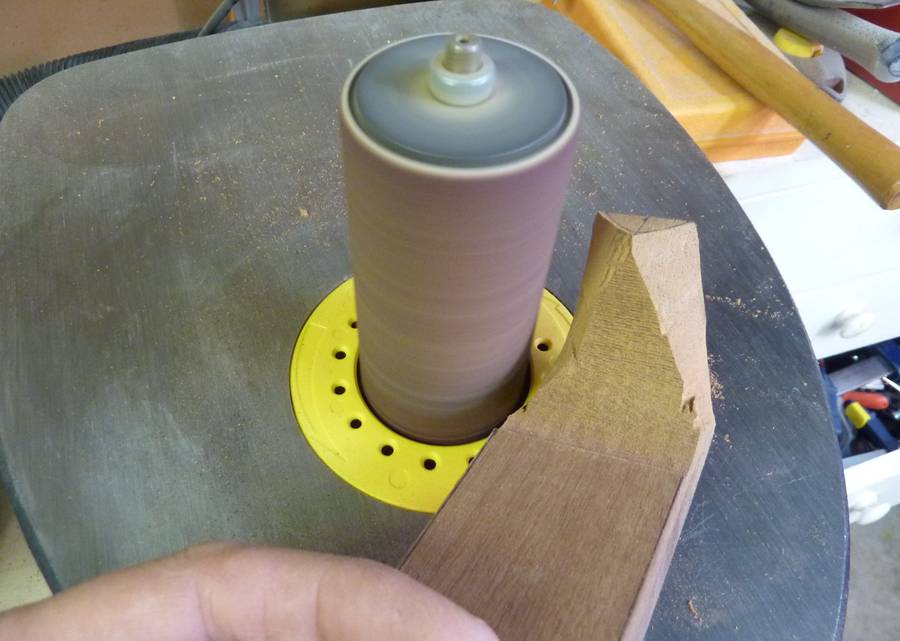 From there I go to my oscillating drum sander and get closer still.
From that point on its rasp and sandpaper.
From there I go to my oscillating drum sander and get closer still.
From that point on its rasp and sandpaper.
 I use a "Wagner Safety Plane" to plane off the excess from the back of the
neck. I stuck a 2 mm thick piece of wood under the head end of the neck
to get a slight taper along the length of the neck.
I use a "Wagner Safety Plane" to plane off the excess from the back of the
neck. I stuck a 2 mm thick piece of wood under the head end of the neck
to get a slight taper along the length of the neck.
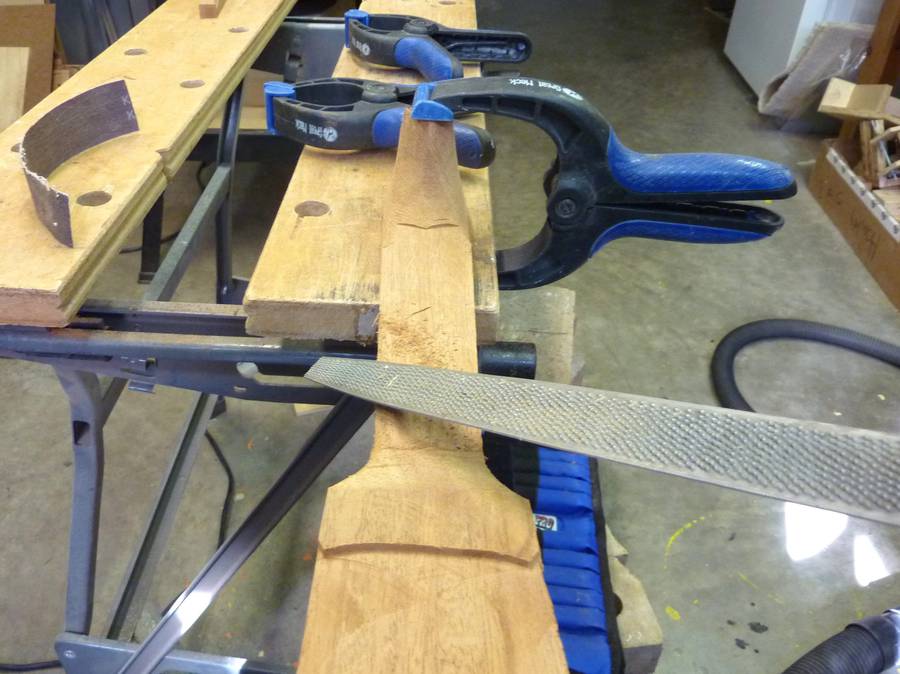 Starting to shape the neck with a rasp.
I got the head fairly close to thickness using the Wagner
safety plane but I left enough wood to make a volute.
Starting to shape the neck with a rasp.
I got the head fairly close to thickness using the Wagner
safety plane but I left enough wood to make a volute.
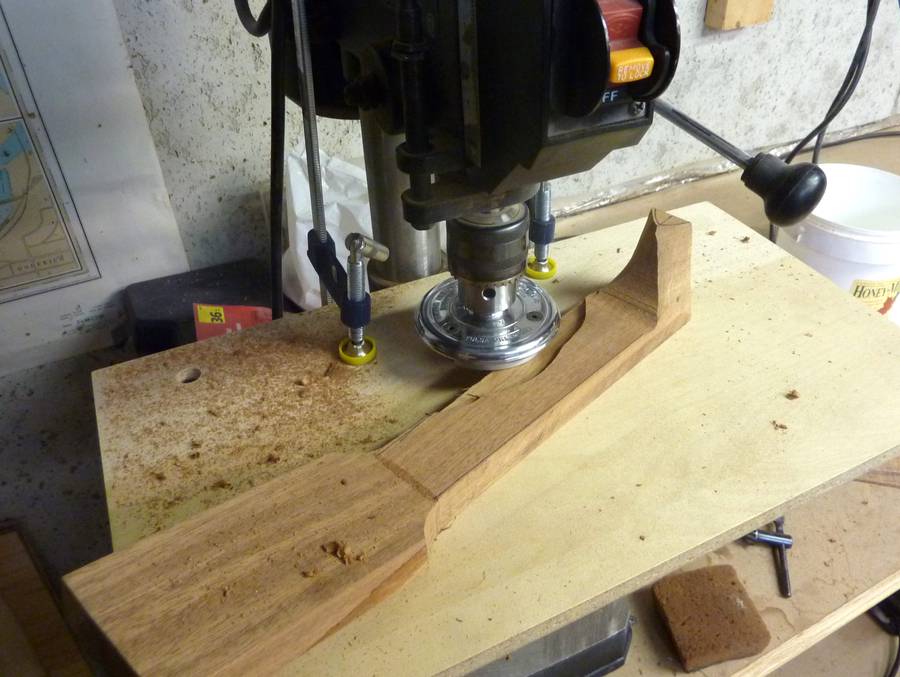
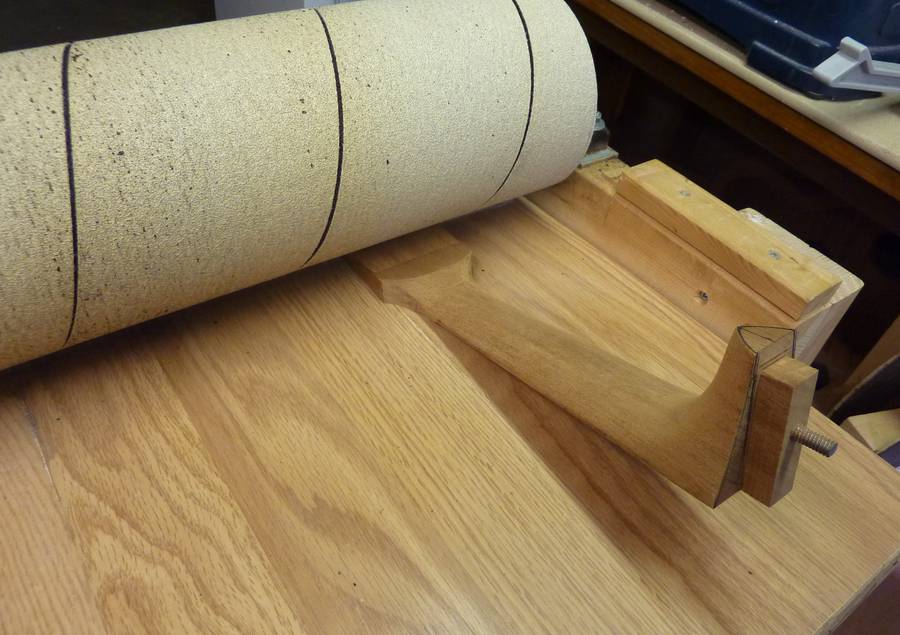 I get the curve for
the volute using my home made drum sander.
I'm not going to final thickness
at this point but getting close helps me in shaping the neck.
I get the curve for
the volute using my home made drum sander.
I'm not going to final thickness
at this point but getting close helps me in shaping the neck.
 Still a ways to go.
 I thought I was close enough to pause with the neck carving in
order to glue together the two halves of the head veneer. I may also get
started on the fretboard prior to doing more carving of the neck.
I thought I was close enough to pause with the neck carving in
order to glue together the two halves of the head veneer. I may also get
started on the fretboard prior to doing more carving of the neck.
 Time to get the neck sitting properly on the body.
The face of the heel was created on my table saw when I made the tenon.
Time to get the neck sitting properly on the body.
The face of the heel was created on my table saw when I made the tenon.
Even just off the saw, the side to side alignment is pretty good.
 The face of the heel is not yet sitting nicely on the body and this needs improvement.
 The first thing to do is to hollow out the cheeks of the heel with a chisel
I like to leave about a 1/8" ridge of heel
face that actually contacts the body of the ukulele.
The first thing to do is to hollow out the cheeks of the heel with a chisel
I like to leave about a 1/8" ridge of heel
face that actually contacts the body of the ukulele.
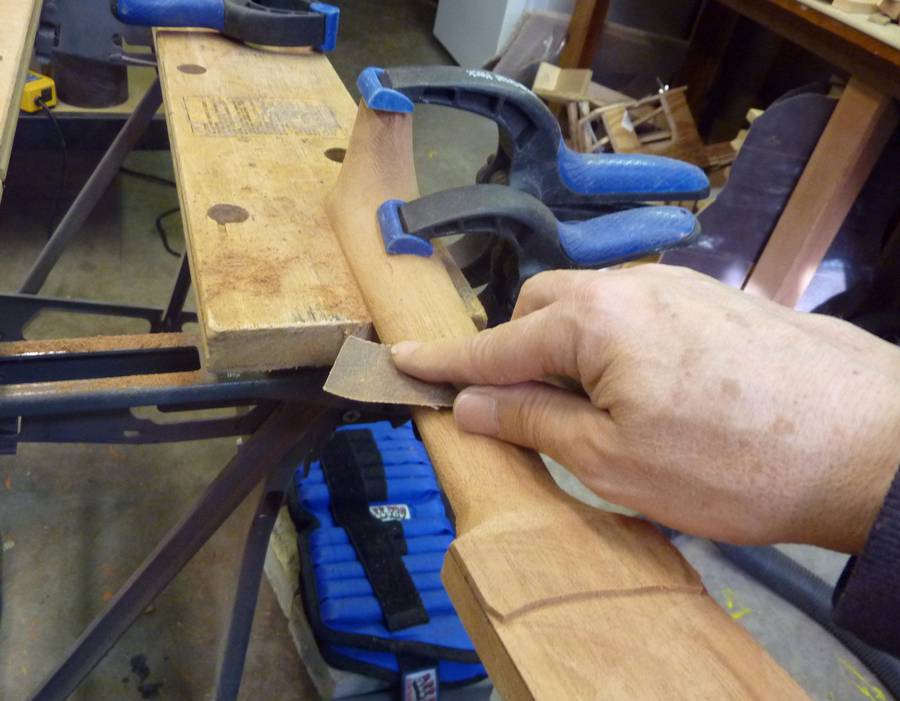
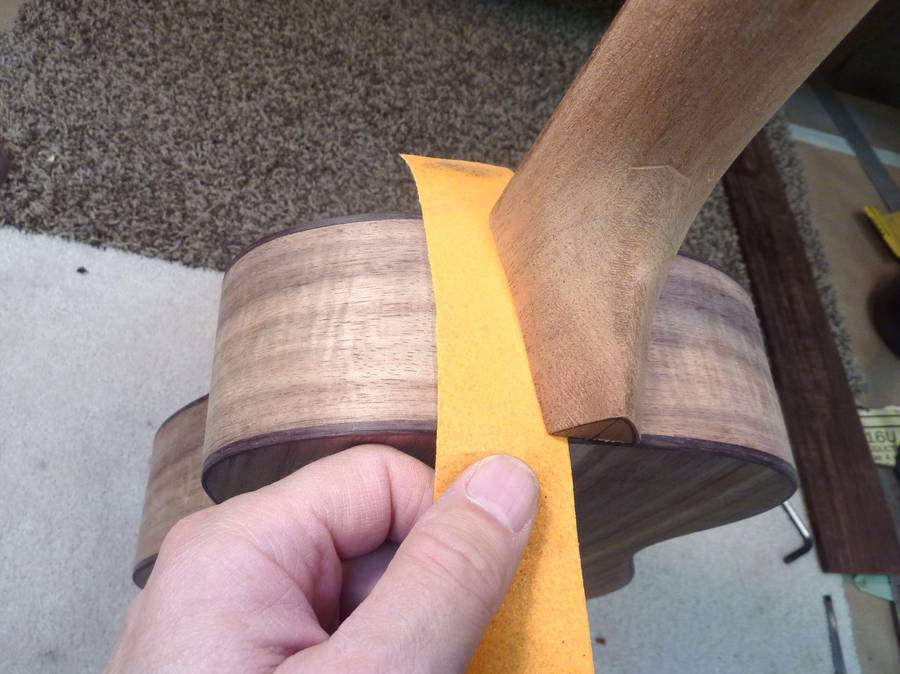 Here I am "flossing" the heel against the body with sand paper. In this manner the
heel takes on the contour of the body. Of course, when you take material
away from one side of the heel face, it impacts the alignment of the neck.
Here I am "flossing" the heel against the body with sand paper. In this manner the
heel takes on the contour of the body. Of course, when you take material
away from one side of the heel face, it impacts the alignment of the neck.
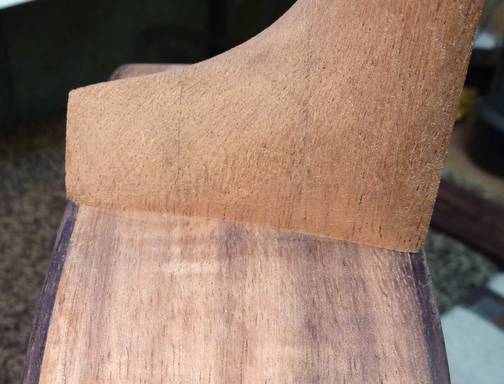 So then I have to floss the other side of the heel to bring the neck back in
alignment. The picture at right shows how the heel sits nice and tight against
the side of the uke after flossing.
So then I have to floss the other side of the heel to bring the neck back in
alignment. The picture at right shows how the heel sits nice and tight against
the side of the uke after flossing.
At this point I've got a lot of fragile sharp edges on the neck that need to be treated carefully. If I put a ding along the top edge, that will show up under the fretboard. Similarly, if I ding the edges I just created on the face of the heel, that would show when I mount the neck to the body. So I'm now extra careful in my handling of the neck.
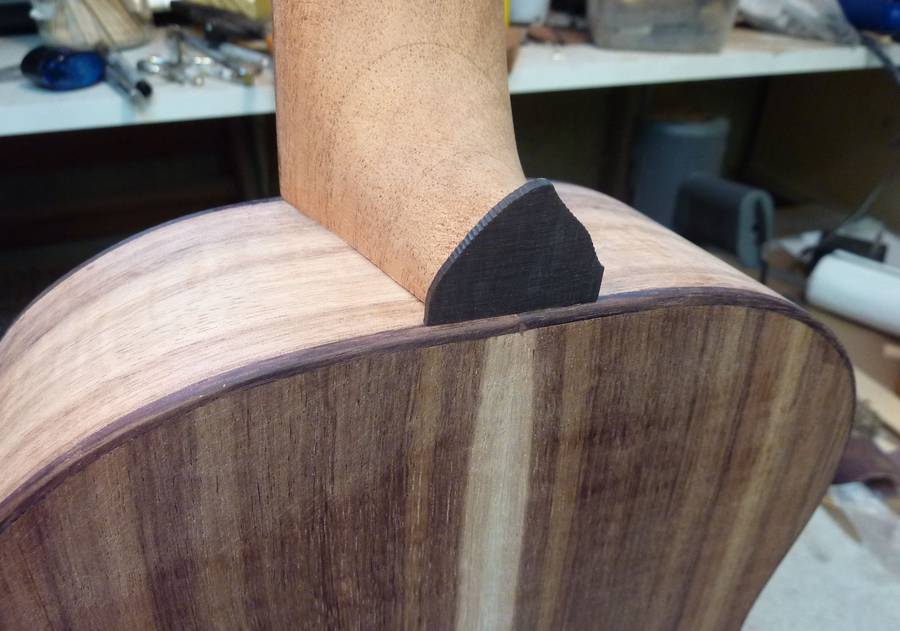 I sanded the heel down to the right height and added an ebony heel cap.
The heel cap hasn't been shaped yet.
I sanded the heel down to the right height and added an ebony heel cap.
The heel cap hasn't been shaped yet.
 One of the last things on the neck I carve is the volute on the bottom of
the back of the head. I like putting a volute for a few reasons: it looks
good, it allows for a little thicker wood in the transition region from the
head to the neck (a common place for guitar necks to break when dropped) and
it makes a nice thumb stop for the player moving his or her hand up the neck.
One of the last things on the neck I carve is the volute on the bottom of
the back of the head. I like putting a volute for a few reasons: it looks
good, it allows for a little thicker wood in the transition region from the
head to the neck (a common place for guitar necks to break when dropped) and
it makes a nice thumb stop for the player moving his or her hand up the neck.

 Gluing a koa veneer to the front of the head and
a black veneer to the back. I glue a veneer to the back to hide the line and
abrupt grain pattern change resulting from the scarf joint. Besides, the
black veneer makes the gold tuners visually pop. I use erasers as
clamping cauls for the curved volute area on the back of the head.
Gluing a koa veneer to the front of the head and
a black veneer to the back. I glue a veneer to the back to hide the line and
abrupt grain pattern change resulting from the scarf joint. Besides, the
black veneer makes the gold tuners visually pop. I use erasers as
clamping cauls for the curved volute area on the back of the head.
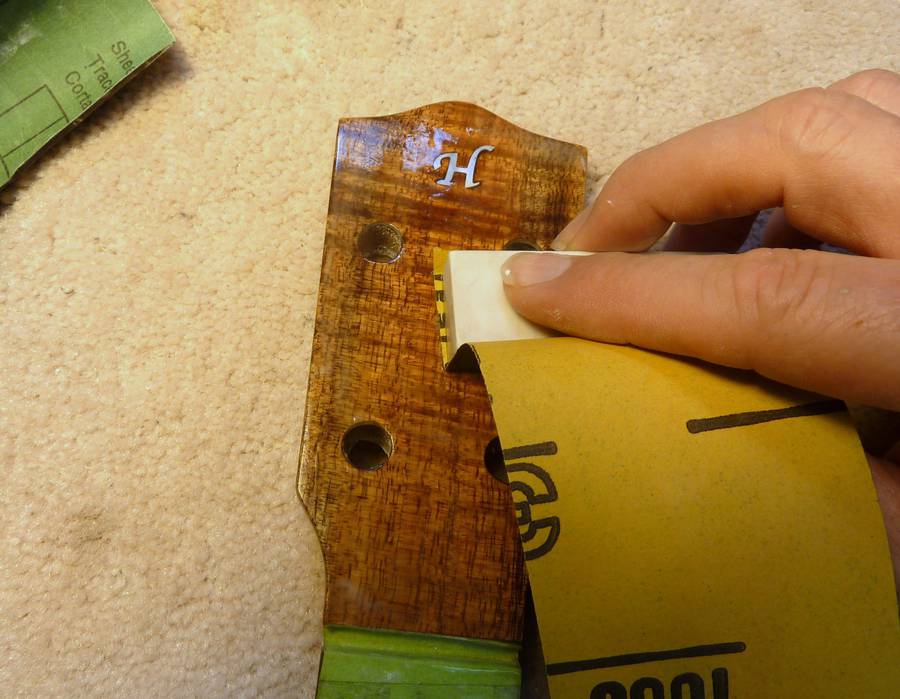
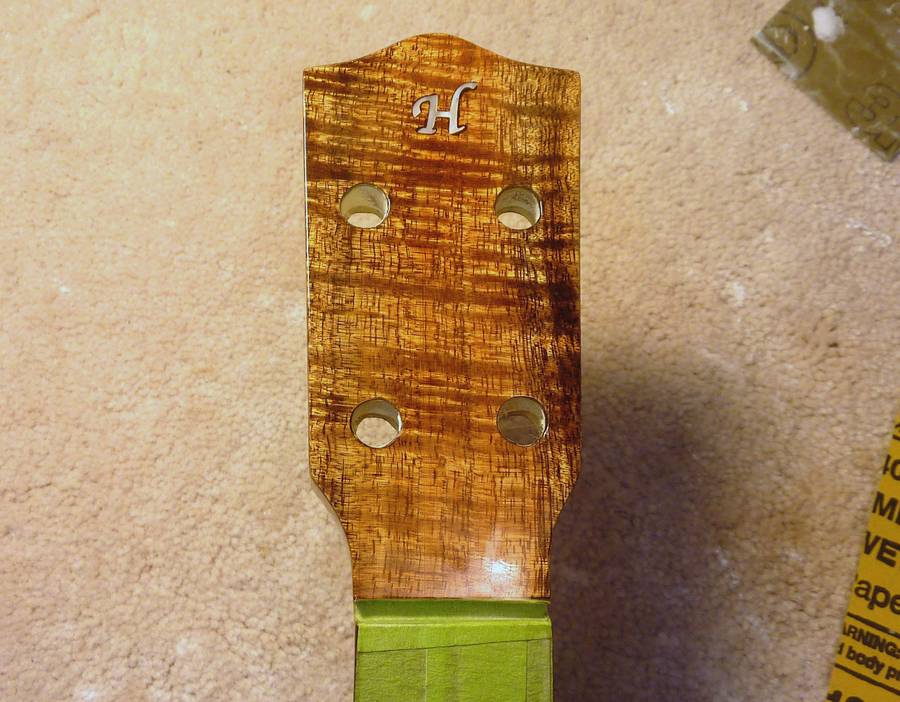
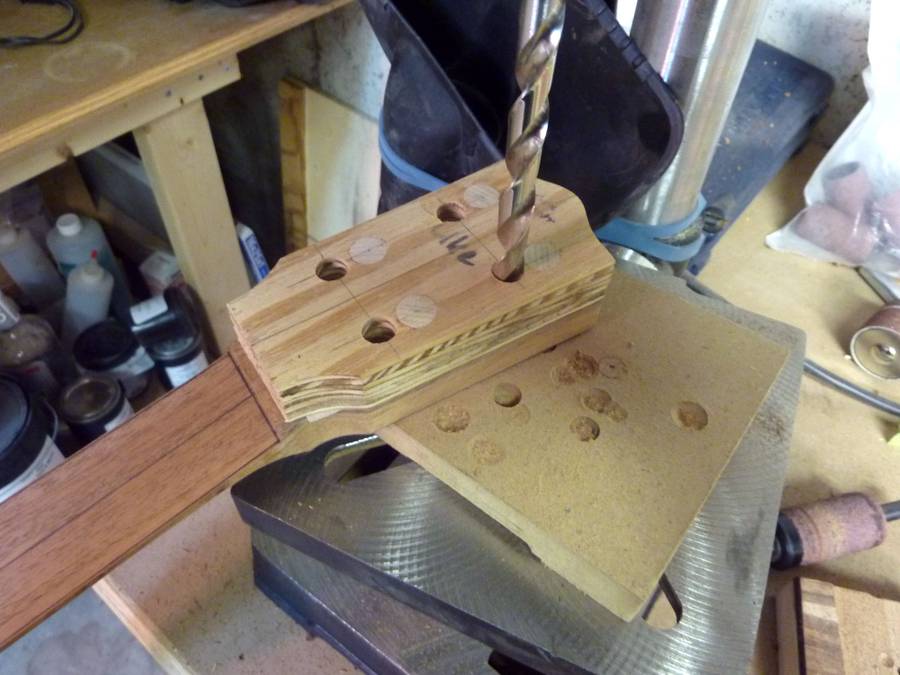 After I've trimmed the veneers to the head I attach my template with double
sided tape and drill the holes for the tuning machines.
After I've trimmed the veneers to the head I attach my template with double
sided tape and drill the holes for the tuning machines.
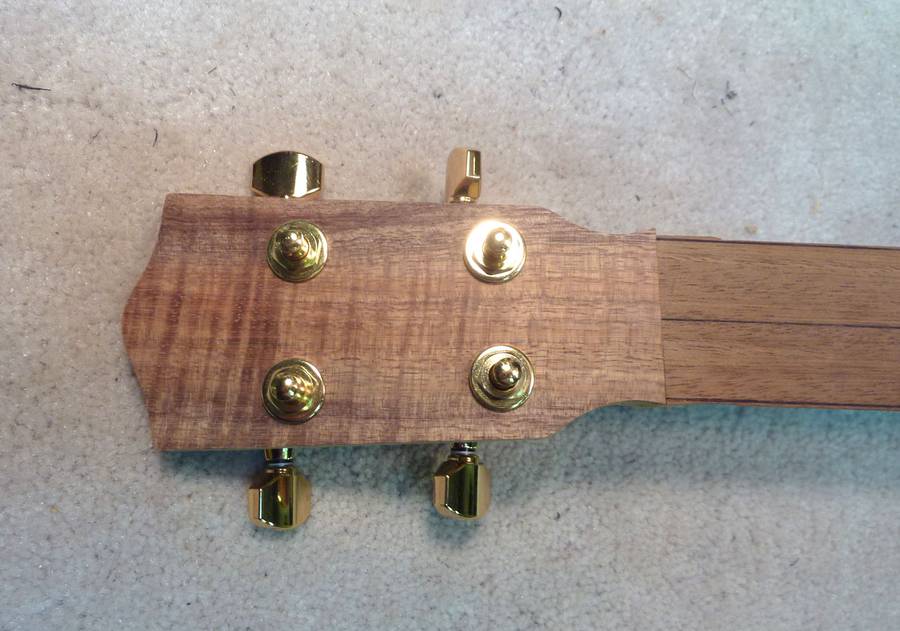 A trial fit of the tuning machines.
 The same steps used to finish the body are used to finish the neck.
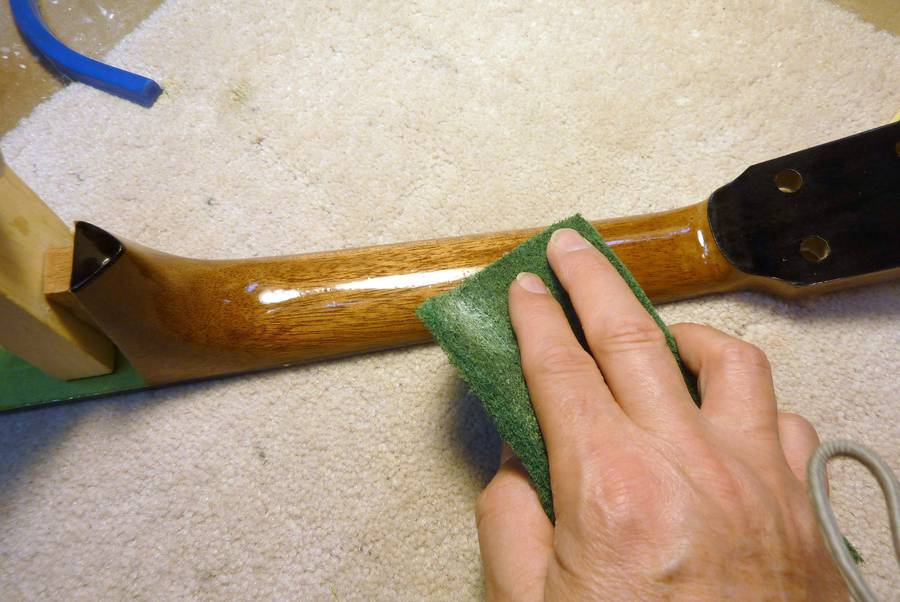
Roughing up the surface between top coats. I have found that for the finish I am using, 5 or six coats of the top coat are usually enough to give me enough build.
 When I am satisfied that I've got that, I
level with 320 grit then start wet sanding with higher grits.
When I am satisfied that I've got that, I
level with 320 grit then start wet sanding with higher grits.
 After sanding comes the buffing. The polyester finish is quite hard and it takes a lot of buffing to
get the finish up to a high gloss.
After sanding comes the buffing. The polyester finish is quite hard and it takes a lot of buffing to
get the finish up to a high gloss.

See also: Matthias making the neck
Next : Pat making the fretboard
![]()