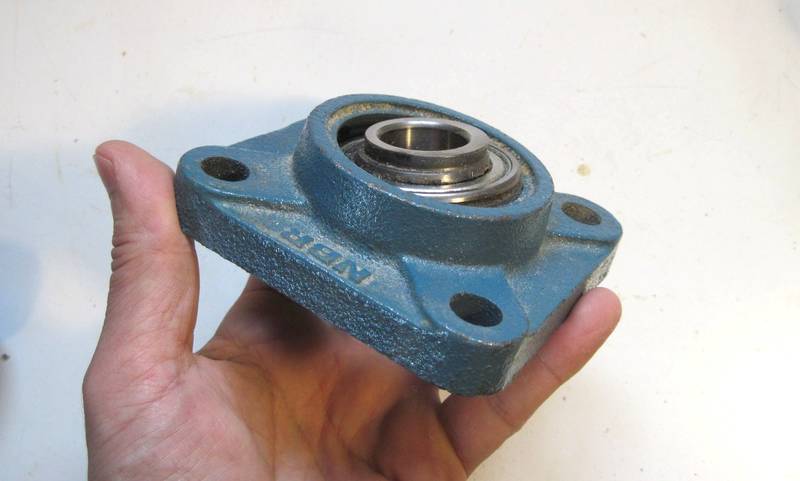
 Many people prefer to use self-aligning bearing flanges for the wheels like the one pictured here.
If you bolt two of these to the wheel, that makes for a quick and easy way to mount the bearings.
If you go that route, you should glue and bolt the bearings to the wheels very firmly.
150 pounds of tension on the blade is like 300 pounds of force
yanking the bearings rapidly back and forth as the wheel spins.
If there is any wiggle room at all, the bearings will come loose in short order.
That said, people have had success with
these bearings, such as Beri Bracun's bandsaw
Many people prefer to use self-aligning bearing flanges for the wheels like the one pictured here.
If you bolt two of these to the wheel, that makes for a quick and easy way to mount the bearings.
If you go that route, you should glue and bolt the bearings to the wheels very firmly.
150 pounds of tension on the blade is like 300 pounds of force
yanking the bearings rapidly back and forth as the wheel spins.
If there is any wiggle room at all, the bearings will come loose in short order.
That said, people have had success with
these bearings, such as Beri Bracun's bandsaw
 I used these bearing flanges for the top wheel of my first bandsaw, and
it started to creak just slightly. I switched
to glued-on wooden flanges, and these have worked flawlessly ever since.
I used these bearing flanges for the top wheel of my first bandsaw, and
it started to creak just slightly. I switched
to glued-on wooden flanges, and these have worked flawlessly ever since.
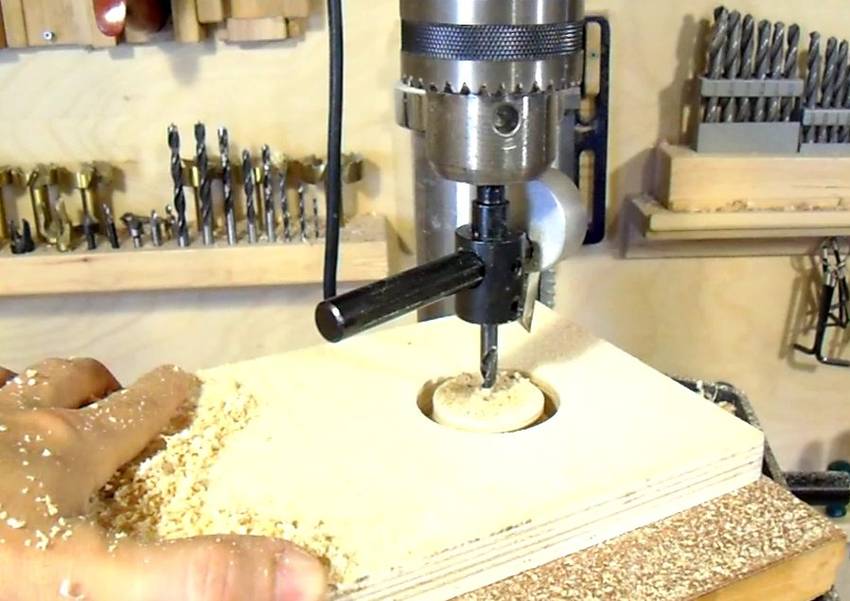
Most of the cheap ball bearings I can find have a 52 mm outer diameter. Unfortunately, I don't have a drill close to that size, especially because my drills are sized in inches.
So I used a circle cutter to cut the right size hole in the flanges. It took a few test holes to get it adjusted just right. The circle cutter didn't go deep enough to go through the 3/4" (19 mm) plywood. I drilled out the remaining wood with a slightly smaller drill from the other side. The bearing itself is only about 16mm thick, so that worked out.
 I made the holes almost half a millimeter smaller than the bearings to ensure a very tight fit.
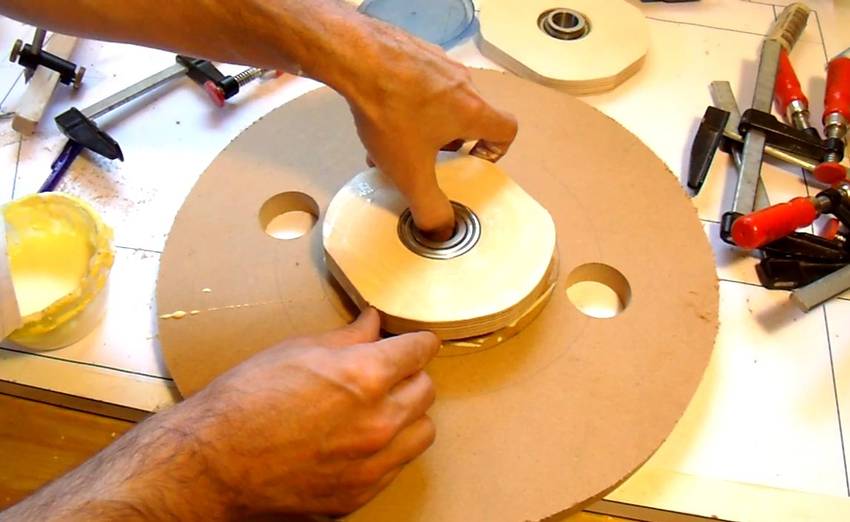
Here I'm starting to insert the bearing in the hole. I made a block of wood shaped to only
apply force to the outer ring of the bearing, to avoid damaging it as I pounded it in.
I made the holes almost half a millimeter smaller than the bearings to ensure a very tight fit.
Here I'm starting to insert the bearing in the hole. I made a block of wood shaped to only
apply force to the outer ring of the bearing, to avoid damaging it as I pounded it in.
The bearing I'm using has a spherical outside (for use in self-aligning pillow blocks and flanges). I would have preferred a cylindrical outside, but these bearings were cheap and very close to what I needed.
 I used a vise to push it all the way flush with the flange. I should have thought of
that trick earlier - I initially tried to get the bearing all flush using a wooden block
and a hammer.
I used a vise to push it all the way flush with the flange. I should have thought of
that trick earlier - I initially tried to get the bearing all flush using a wooden block
and a hammer.
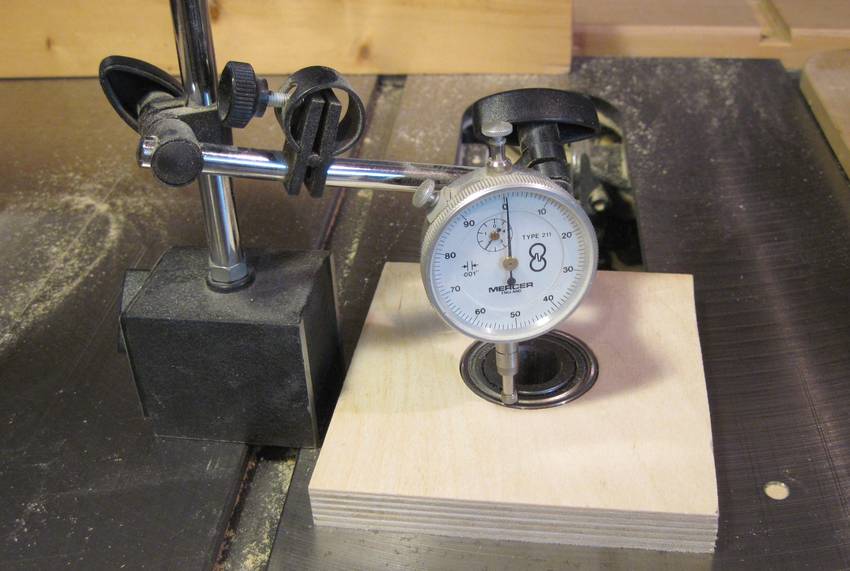 Checking how flush the baring sits. It wasn't hard to get it consistent within .002"
(.05 mm) all around. I figured that was close enough.
Checking how flush the baring sits. It wasn't hard to get it consistent within .002"
(.05 mm) all around. I figured that was close enough.
 Next I rounded the corners of the flanges and then glued them onto the wheels.
The wheels are cut from some 20 mm (25/32") thick MDF.
Next I rounded the corners of the flanges and then glued them onto the wheels.
The wheels are cut from some 20 mm (25/32") thick MDF.
I don't like using MDF, but people often ask if MDF can be used for the wheels. I had some MDF lying around, so I figured I should see if MDF will work. The worst thing that can happen is that I'll have to make new wheels.
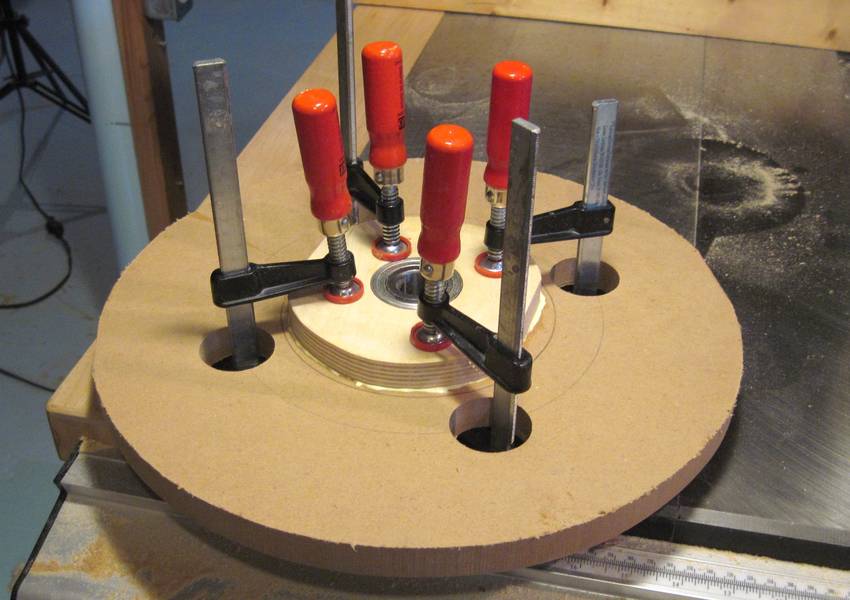 Four clamps hold the first flange in place while the glue dries.
 Most cities have some industrial suppliers, such as the
metal supermarket or some other
bearing store, where you can buy shafting material. But where to get shafting is something
people still ask me from time to time.
Most cities have some industrial suppliers, such as the
metal supermarket or some other
bearing store, where you can buy shafting material. But where to get shafting is something
people still ask me from time to time.
So I figured I'd try to use plain old plumbing pipe, 1/2" inner diameter, for the shafting.
This pipe is just a tiny bit smaller, 7/8" on the outside. The pipe is 21.8 mm and the 7/8" hole is about 22.2 mm, so it only takes a bit of shimming to get a tight fit.
![]() I initially used brass shim stock to shim the pipe up. But if you know where to get brass
shim stock, you probably know where to buy shafting material too, which kind of
defeats the idea of using plumbing pipe.
I initially used brass shim stock to shim the pipe up. But if you know where to get brass
shim stock, you probably know where to buy shafting material too, which kind of
defeats the idea of using plumbing pipe.
![]() Looking around the house for suitable shim material, I found that pop cans were too
thin. Tuna cans might have worked, but I found some plastic food containers (one of those
transparent disposable containers that fruits and nuts often come in) that had just
the right thickness.
Looking around the house for suitable shim material, I found that pop cans were too
thin. Tuna cans might have worked, but I found some plastic food containers (one of those
transparent disposable containers that fruits and nuts often come in) that had just
the right thickness.
But it's tricky getting the shim in there - easiest to put it inside the bearing and then push the shaft through.
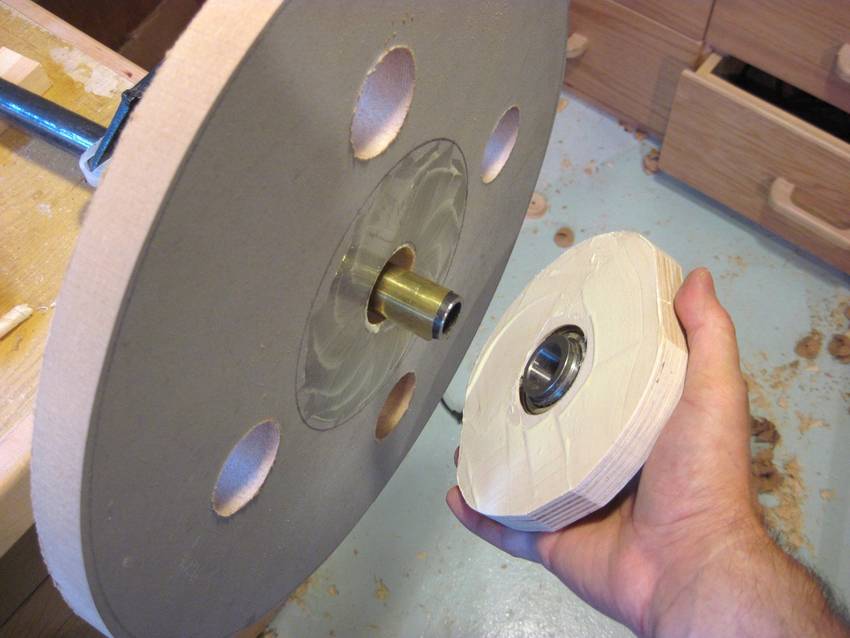 Here I'm ready to glue on the second flange. I have the wheel on a shaft already so I can
spin it up and check for wobble before the glue dries.
Here I'm ready to glue on the second flange. I have the wheel on a shaft already so I can
spin it up and check for wobble before the glue dries.
 A bit of banging things around to get rid of most of the wobble.
I found that my clamps would keep pulling the flange to the side a bit because the wet glue is quite slippery. So the trick is more how the clamps are positioned than the banging.
Next time I will try to clamp the second flange on without glue, make sure it doesn't wobble (easier without the glue making it slippery), and then put two screws in it. Then take it apart again, apply glue, and screw and clamp it on. The screws should act as alignment pins to counteract the slippery glue clamps pulling it to the side.
 I cut the wheels slightly oversized to be on the safe side. But I trimmed them again
after mounting the bearings to cut down on how much I'd have to turn off the edges.
Here I'm using a set of trammel points to mark the radius with respect
to where the bearings ended up.
I cut the wheels slightly oversized to be on the safe side. But I trimmed them again
after mounting the bearings to cut down on how much I'd have to turn off the edges.
Here I'm using a set of trammel points to mark the radius with respect
to where the bearings ended up.
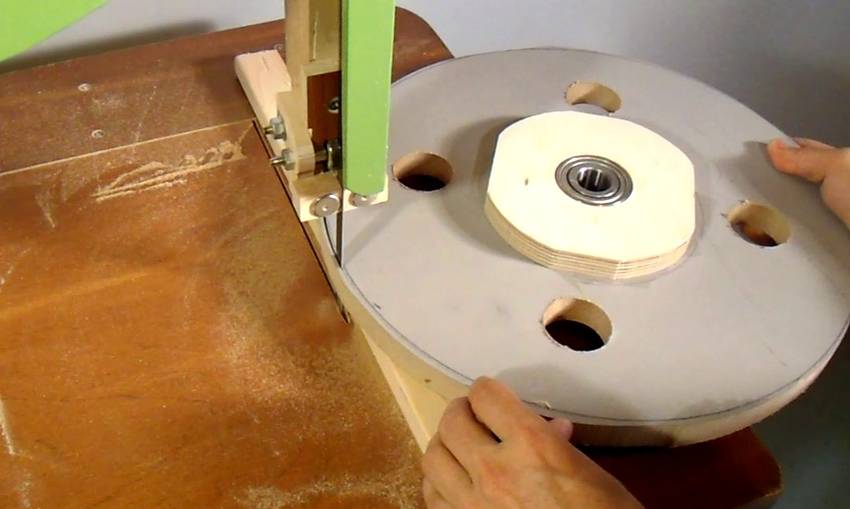 Now trimming to that line.
If you don't have a bandsaw that you can use, it's probably easier to just turn the excess off in the next step. It's too hard to trim small amounts with a jigsaw.
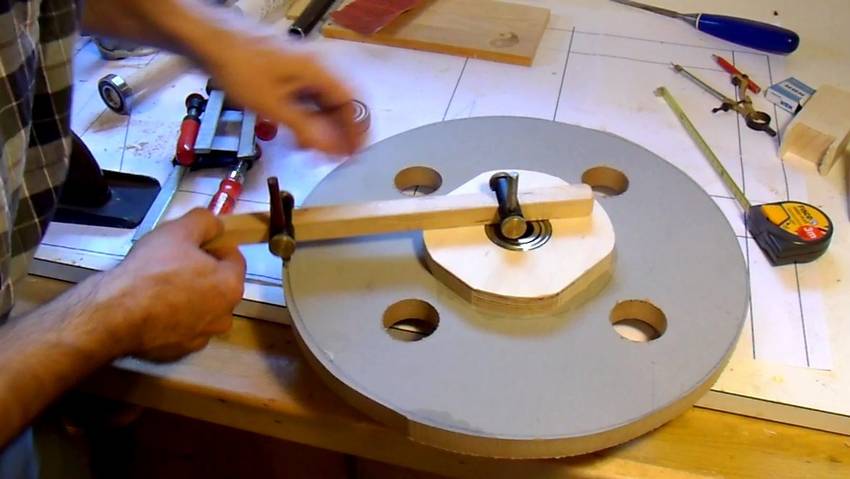
 Next I attached a temporary pulley to the wheel for spinning it up.
I came up with that temporary pulley idea out of necessity when I had to
rework the top
wheel of my first bandsaw. I have been using that
trick (and the same pulley) ever since!
Next I attached a temporary pulley to the wheel for spinning it up.
I came up with that temporary pulley idea out of necessity when I had to
rework the top
wheel of my first bandsaw. I have been using that
trick (and the same pulley) ever since!
The pulley is a piece of 3/4" thick ply with a notch cut around the edge. I cut the notch on the table saw - a slightly hair raising operation turning that wheel against the spinning saw blade. You could also cut the notch with a router. The safest method would probably be to put the wheel flat on the router table and use a slot cutter bit in the router. Or you could just make it by sandwiching three layers of plywood.
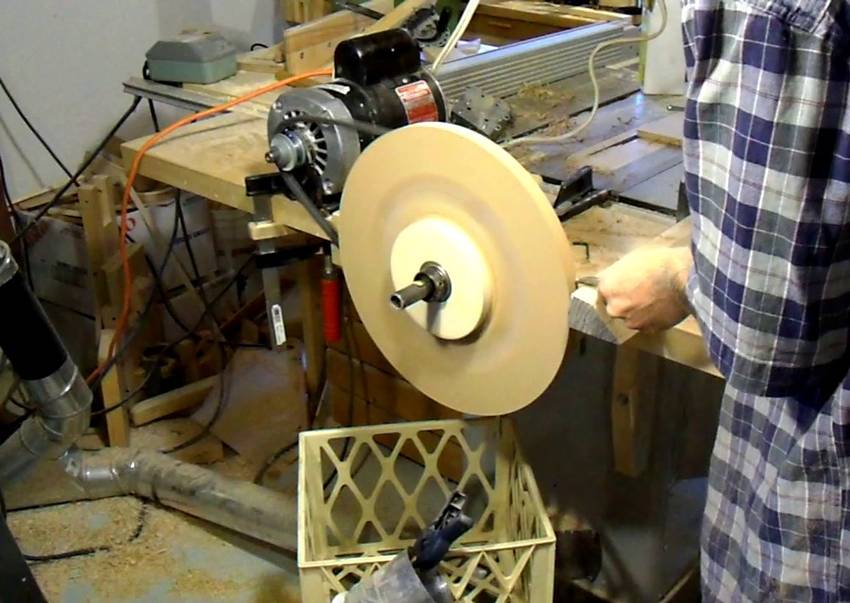 Now spinning the wheel with a motor. The V-belt is running fairly slack because
the temporary pulley doesn't run entirely true.
Now spinning the wheel with a motor. The V-belt is running fairly slack because
the temporary pulley doesn't run entirely true.
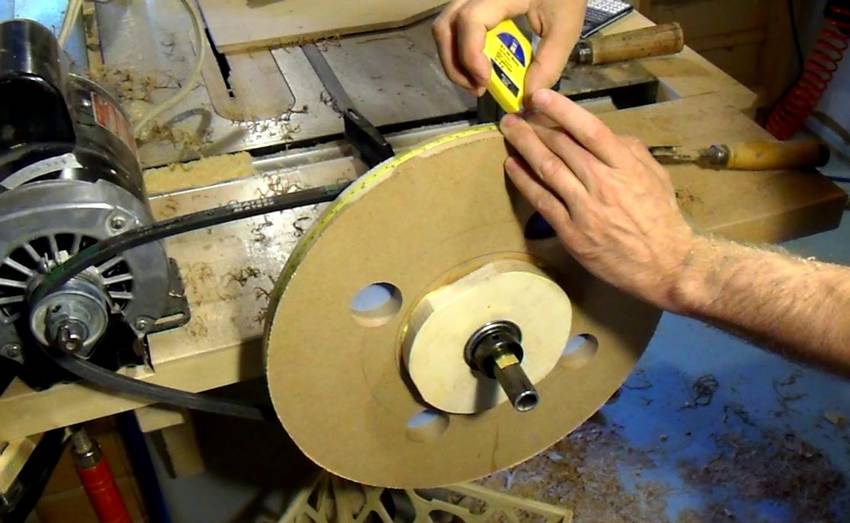 Checking the wheel size by measuring the circumference with a flexible tape measure.
The easiest way to get it around the wheel is to hold the tape measure in place, hold the end of it against the wheel, and wind it onto the wheel.
The circumference should be 3.14159 times the diameter. I want to end up with a 35 cm diameter wheel. With the tire adding about 1 mm to the radius, I want the diameter to be 34.8 cm, a circumference of 109.3 cm.
 Wheel all turned. Here I took the V-belt off the pulley and spun it by hand to give
it one more check.
Notice the "crown" on the wheel. That is, the center of the edge has a slight peak to it.
The blade will want to climb to the highest point on the wheel - a very neat
phenomenon with flat belts or blades
on crowned pulleys.
Wheel all turned. Here I took the V-belt off the pulley and spun it by hand to give
it one more check.
Notice the "crown" on the wheel. That is, the center of the edge has a slight peak to it.
The blade will want to climb to the highest point on the wheel - a very neat
phenomenon with flat belts or blades
on crowned pulleys.
The crown drops off with a 4-degree slope on either side of the peak - much more pronounced than the crown on most bandsaws, but it really helps to track the blade. I don't know why the crown on most commercial bandsaws is so relatively flat.
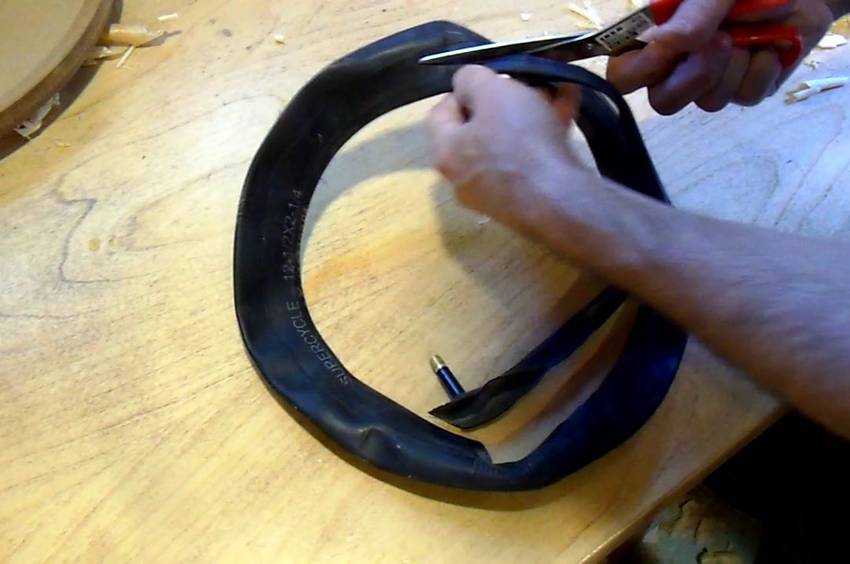 I'm using a 12" bicycle inner tube for the bandsaw tire. Here I'm cutting away the inside part
of the tube to leave me with just the outer ring to use as a tire.
I'm using a 12" bicycle inner tube for the bandsaw tire. Here I'm cutting away the inside part
of the tube to leave me with just the outer ring to use as a tire.
Inner tubes usually have a grey powdery stuff on the inside - probably to keep the rubber from sticking to itself. That needs to be washed away so that the rubber will stick to the wheel. The natural stickiness of the rubber is enough to keep it in place - no need to glue the tires on.
 And stretching the inner tube "tire" over the wheels.
The wheels are not done yet. I still need to balance and varnish them, but I'll leave that for when the rest of the saw is further along.
Next: Making the wheels mounts
Back to the 14" bandsaw build page