 The key to understanding flat belt tracking on a crowned pulley is
to look at how a belt flexes when pulled more on one edge than another.
The key to understanding flat belt tracking on a crowned pulley is
to look at how a belt flexes when pulled more on one edge than another.
 Before V-belts were invented, machinery was usually powered
through flat canvas belts running on crowned pulleys.
Before V-belts were invented, machinery was usually powered
through flat canvas belts running on crowned pulleys.
These flat belts stayed centered on pulleys without any guides or flanges. The key to keeping them tracking centered on the pulleys is the use of "crowned pulleys". A crowned pulley is a pulley that has a slight hump in the middle, tapering off ever so slightly towards either edge. How a crowned pulley keeps the belt tracking on it is a mystery to most people, so I thought I'd write a small article explaining how it actually works.
The key to understanding flat belt tracking on a crowned pulley is
to look at how a belt flexes when pulled more on one edge than another.
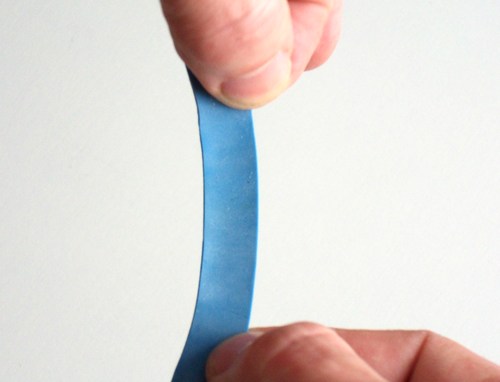
I'm pulling the rubber band in the photo on just the right edge. With more tension on the right side, that side stretches more, and the rubber band forms a slight arch. In an actual belt, this stretch is too subtle to be seen just by looking at it.
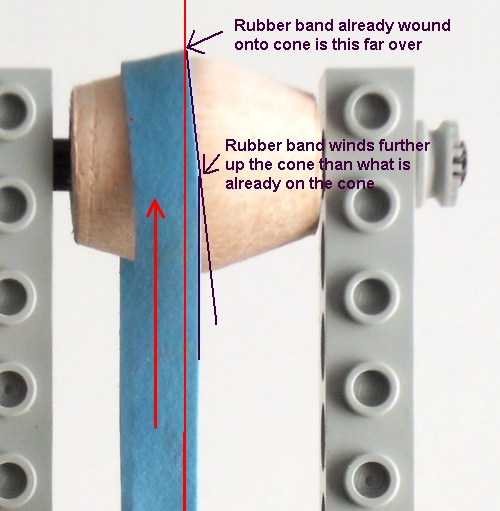 To better demonstrate the principle, I built a jig from lego, using
a rubber band and an exaggerated crowned wooden pulley.
To better demonstrate the principle, I built a jig from lego, using
a rubber band and an exaggerated crowned wooden pulley.
The higher section of the crowned pulley puts more tension on the rubber band than the narrower edges. As a result, the rubber band flexes into a slight arch towards the middle. As the rubber band winds onto the pulley, this arch causes the band to always wind further up on the conical section than what was previously wound on. The higher point on the pulley always creates more tension in the belt and causes it to arch in that direction.
With this exaggerated crowned pulley, it takes just a few turns for the rubber band to wander from the edge all the way to up the center hump. Once the rubber band is on top, the maximum tension will be in the middle of it, and it no longer has any reason to arch in either direction.
The mechanism is fairly subtle in most flat belt pulley transmissions. The crowning on a crowned pulley is typically barely noticeable when looking at it. My demonstration uses an exaggerated crown to make it easier to see what happens.
With the much more subtle crowning on a typical pulley, the self-centering of the belt happens more slowly. If the pulleys are misaligned, it may never center itself. Flat belt transmissions require much more precise alignment than V-belts.
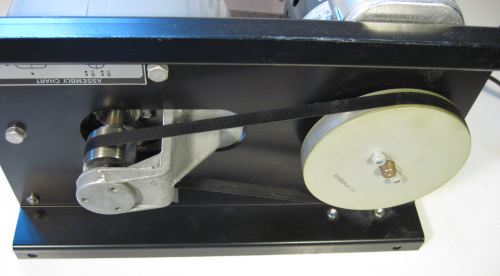 Here is an example application of a crowned pulley and flat belts in a
modern application. The pulley at right is completely cylindrical and without
flanges. The pulley is attached to a 3500 RPM motor.
The smaller pulley at is a crowned pulley attached to a blower. The belt drive
steps up the speed to about 11,000 RPM. The whole setup is very efficient,
and the flat belt can handle that sort of speed easily.
Here is an example application of a crowned pulley and flat belts in a
modern application. The pulley at right is completely cylindrical and without
flanges. The pulley is attached to a 3500 RPM motor.
The smaller pulley at is a crowned pulley attached to a blower. The belt drive
steps up the speed to about 11,000 RPM. The whole setup is very efficient,
and the flat belt can handle that sort of speed easily.
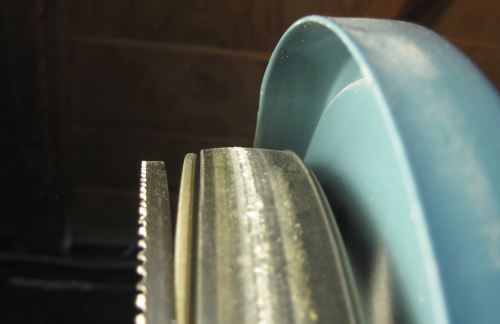
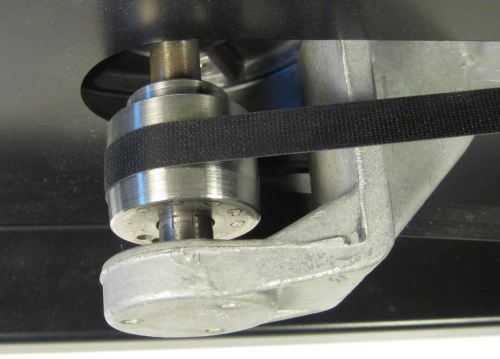 Here's a close-up of the small pulley, You can barely see how the pulley
tapers slightly towards either edge.
Here's a close-up of the small pulley, You can barely see how the pulley
tapers slightly towards either edge.
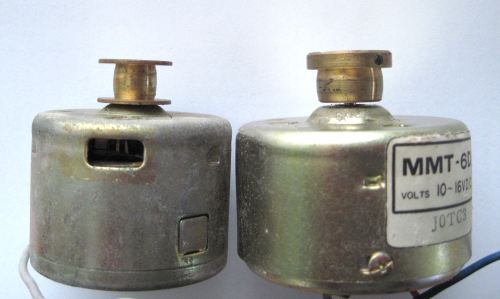 The old 8-track players, because they needed more power to move the
tape inside the clunky cartridges,
often used flat rubber belts and crowned pulleys. The two motors at
left originally came from 8-track players. Belt driven turntables also rely on
flat belts and crowned pulleys. Cassette tape players, on the other hand,
mostly use square belts that run in a V-groove. Cassette tapes don't need much
force to turn, and the players are usually fairly small, so flat belts aren't
as a good choice. CD players are always direct drive, so not much to see in those.
The old 8-track players, because they needed more power to move the
tape inside the clunky cartridges,
often used flat rubber belts and crowned pulleys. The two motors at
left originally came from 8-track players. Belt driven turntables also rely on
flat belts and crowned pulleys. Cassette tape players, on the other hand,
mostly use square belts that run in a V-groove. Cassette tapes don't need much
force to turn, and the players are usually fairly small, so flat belts aren't
as a good choice. CD players are always direct drive, so not much to see in those.

 Bandsaws also rely on crowned pulleys to help keep the blade aligned. The
thrust bearing behind the blade is there to help absorb the force of pushing the stock
into the blade. But when the saw is just running idle, blade should
ideally not touch the thrust bearing. The crown alone is enough to keep the blade lined up.
Bandsaws also rely on crowned pulleys to help keep the blade aligned. The
thrust bearing behind the blade is there to help absorb the force of pushing the stock
into the blade. But when the saw is just running idle, blade should
ideally not touch the thrust bearing. The crown alone is enough to keep the blade lined up.
Some large (not portable) bandsaw sawmills have teeth on both sides so the blade can cut in both directions. These saws rely strictly on blade tracking on crowned wheels to keep the blade from being pushed off the wheels.
It may help to see how the tracking actually happens, so I made a video to illustrate the concepts covered in this article.
Projects where I rely on flat belt tracking:
See also:
Back to my Woodworking website
![]()
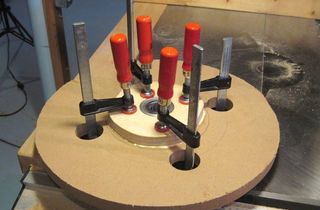 Making bandsaw wheels
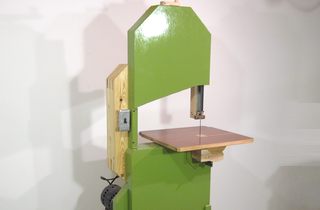 Homemade bandsaw
 1"x42" strip sander
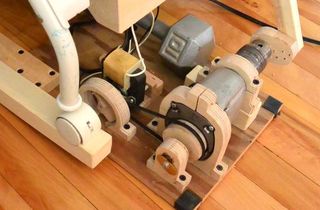 Baby rocking machine
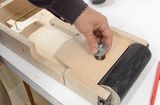 Belt sander adjustments
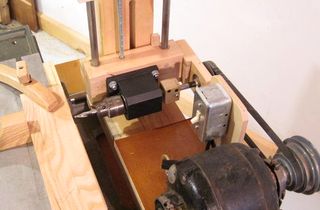 Woodworking machinery
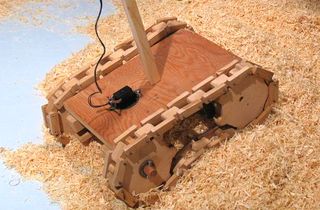 Wooden machines
 The physics of
 Are link belts worth it?