Wooden keyboard enclosure
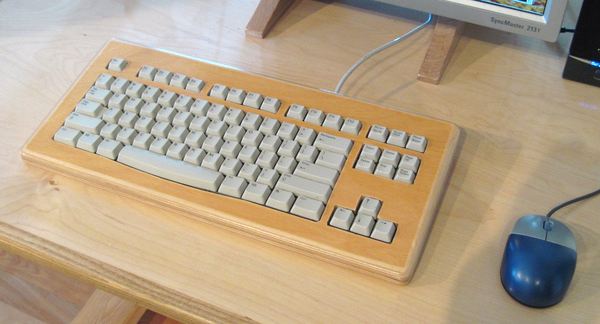
Having become proficient at typing on a Commodore 64, I just never end up using
the numeric keypad, even if I need to enter some numbers. So the numeric keypad
is just a waste of space and makes me reach further for the mouse.
Of course, there are all kinds of reduced size keyboards available, but these usually
don't feel like a real keyboard. They never have the cursor keys where they should be
and usually the key travel is also not quite right either.
So I set out to make a reduced size keyboard by cutting the numeric keypad off a
regular keyboard. And to make it look good, I needed a custom enclosure.
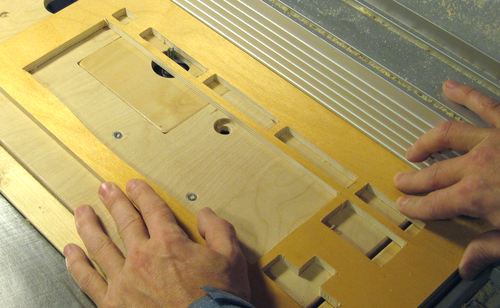
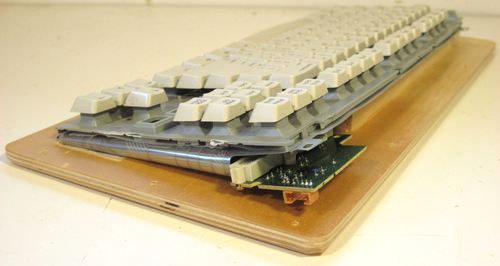
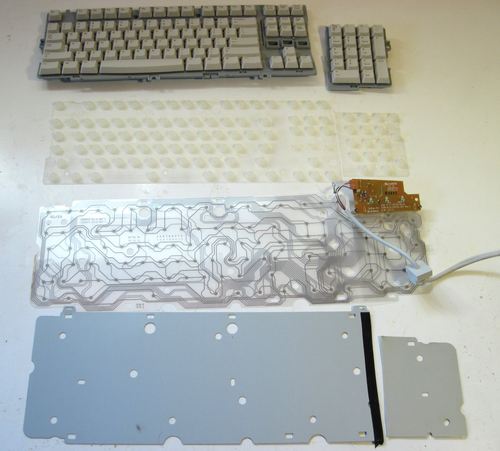 Cutting off the numeric keypad is not as trivial as it sounds. At left you can see some
various layers of the keyboard, arranged
after I cut it apart. There are vital interconnects under the keypad that the keyboard
would not function without. Also, the PCB attached to the foil with all the traces on it
also connects to the right side.
Cutting off the numeric keypad is not as trivial as it sounds. At left you can see some
various layers of the keyboard, arranged
after I cut it apart. There are vital interconnects under the keypad that the keyboard
would not function without. Also, the PCB attached to the foil with all the traces on it
also connects to the right side.
My approach is to take the circuitry from under the right side of the keyboard, and just
fold it under the page up/down and cursor keys. The foil with all the traces on it is
flexible enough that you can get away with doing that.
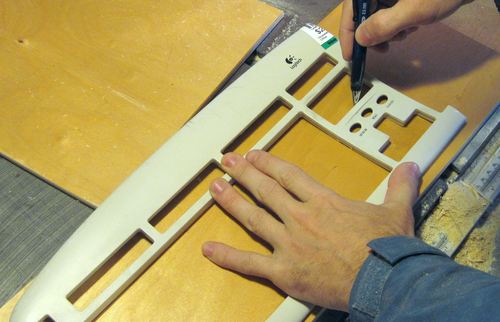 A big challenge with making a wooden case is to cut a nice bezel for the keyboard.
I traced the shape of the bezel from my donor keyboard onto a piece of plywood.
A big challenge with making a wooden case is to cut a nice bezel for the keyboard.
I traced the shape of the bezel from my donor keyboard onto a piece of plywood.
 The next step was to cut out the openings with a scrollsaw. Its one of the few things
where a scrollsaw is a vital tool. A bandsaw would not work because the blade can't be threaded
through the openings to cut the insides.
The next step was to cut out the openings with a scrollsaw. Its one of the few things
where a scrollsaw is a vital tool. A bandsaw would not work because the blade can't be threaded
through the openings to cut the insides.
 Although I was careful to try to get all my edges straight with the scroll saw, they still
had a bit of hand-sketched waviness to them. But then I had the idea of using my router
table to clean up the long edges. By sliding my plywood against the fence, the router
will cut a straight edge inside one of the cutouts.
Although I was careful to try to get all my edges straight with the scroll saw, they still
had a bit of hand-sketched waviness to them. But then I had the idea of using my router
table to clean up the long edges. By sliding my plywood against the fence, the router
will cut a straight edge inside one of the cutouts.
I should have thought of this technique before I cut the holes with the scrollsaw.
I would have cut them much less carefully, and a little undersize, knowing that I'd
get it all perfectly cleaned up with the router afterwards.
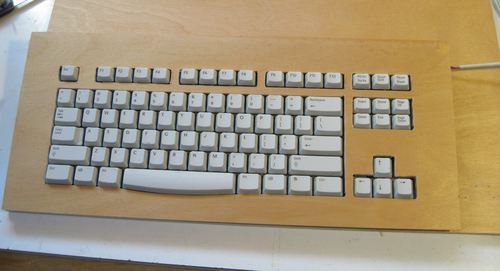 Checking the fit of the keyboard bezel. The bezel is still oversized all around the edges.
Its kind of neat how it looks with so much flat surface around the keys. If Bang & Olufsen
made a computer keyboard, it would probably look a bit like that.
Checking the fit of the keyboard bezel. The bezel is still oversized all around the edges.
Its kind of neat how it looks with so much flat surface around the keys. If Bang & Olufsen
made a computer keyboard, it would probably look a bit like that.
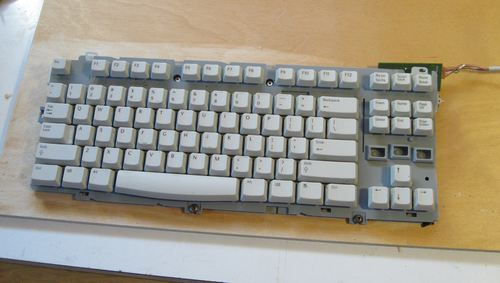 The keyboard itself is mounted on a piece of plywood. This is trickier than it looks.
 The keyboard has some spacers under it to give it support. I decided that the bottom
of my keyboard case is to lie flat on the desk surface, so that I have some interior space
to fold the contact foil and PCB under the keys on the right side.
The keyboard has some spacers under it to give it support. I decided that the bottom
of my keyboard case is to lie flat on the desk surface, so that I have some interior space
to fold the contact foil and PCB under the keys on the right side.
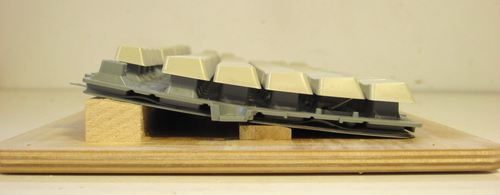
 Here's the right side, with the foil folded under. Getting the keyboard to the point where
the keys would line up, and be against the contact foil and backing sheet metal took a
lot of iteration. I found that if I didn't get it exactly right, the keys would feel like
they hit a hard bottom, because they were impacting against their plastic guide instead of
the rubber dome that pushes the pieces of foil together.
Here's the right side, with the foil folded under. Getting the keyboard to the point where
the keys would line up, and be against the contact foil and backing sheet metal took a
lot of iteration. I found that if I didn't get it exactly right, the keys would feel like
they hit a hard bottom, because they were impacting against their plastic guide instead of
the rubber dome that pushes the pieces of foil together.
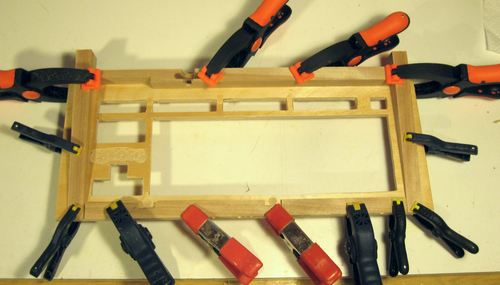 Based on how the bezel rested on the keyboard, I measured its angle, and cut wedges out of
maple for the sides, and pieces for the front and back of the keyboard. I glued these
against the bezel using some spring clamps.
Based on how the bezel rested on the keyboard, I measured its angle, and cut wedges out of
maple for the sides, and pieces for the front and back of the keyboard. I glued these
against the bezel using some spring clamps.
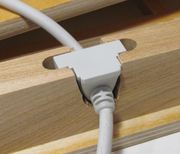 I also made a cutout for the keyboard cable's rubber strain relief to fit into.
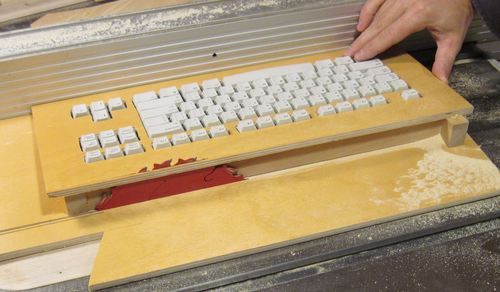 Next I screwed the top and bottom parts of my keyboard case together and trimmed off
the excess on the table saw. I trimmed it such that I also trimmed not just the plywood,
but my wood sides as well, to get all the pieces exactly flush with each other.
Next I screwed the top and bottom parts of my keyboard case together and trimmed off
the excess on the table saw. I trimmed it such that I also trimmed not just the plywood,
but my wood sides as well, to get all the pieces exactly flush with each other.
 Here's the keyboard after trimming. Its very boxy and rectangular, perhaps reminiscent of an
early 1980s Volker-Craig VC303 terminal - the kind with a housing made out of rectangular
bent sheet metal.
Here's the keyboard after trimming. Its very boxy and rectangular, perhaps reminiscent of an
early 1980s Volker-Craig VC303 terminal - the kind with a housing made out of rectangular
bent sheet metal.
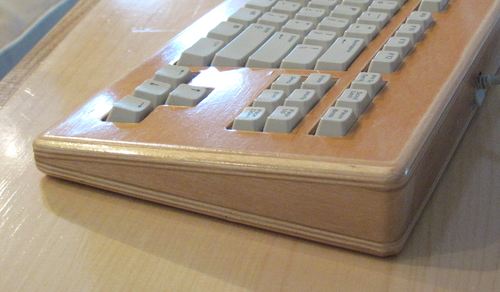
But this isn't the 1980s anymore, so the corners have to be rounded!
 I used a 1/2" quarter round bit on my router table to round all the top edges. The bottom
edges also got a bit of a rounding, but not quite as much.
I used a 1/2" quarter round bit on my router table to round all the top edges. The bottom
edges also got a bit of a rounding, but not quite as much.
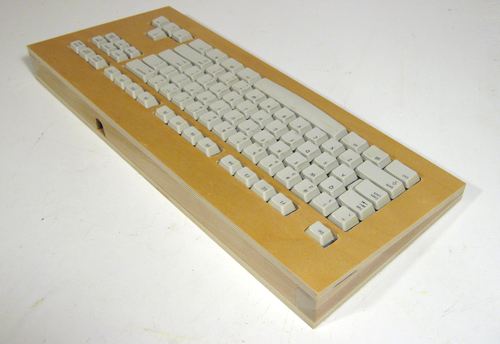
 After a bit of sanding, and five liberal coats of varnish, and the keyboard has some
nice round edges to it now.
After a bit of sanding, and five liberal coats of varnish, and the keyboard has some
nice round edges to it now.
 Keybaord IN the drawer, not a keyboard drawer
 Compact Comuter / monitor stand
 LCD monitor stand
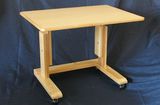 Laptop desk
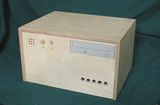 Wooden computer case
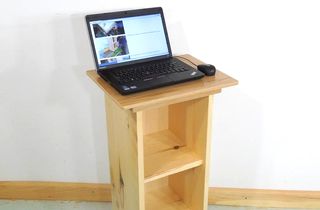 Stand-up laptop computer table