 So far I had just copied a wrench with
my copy carver, so I was looking
for a more complex object to try.
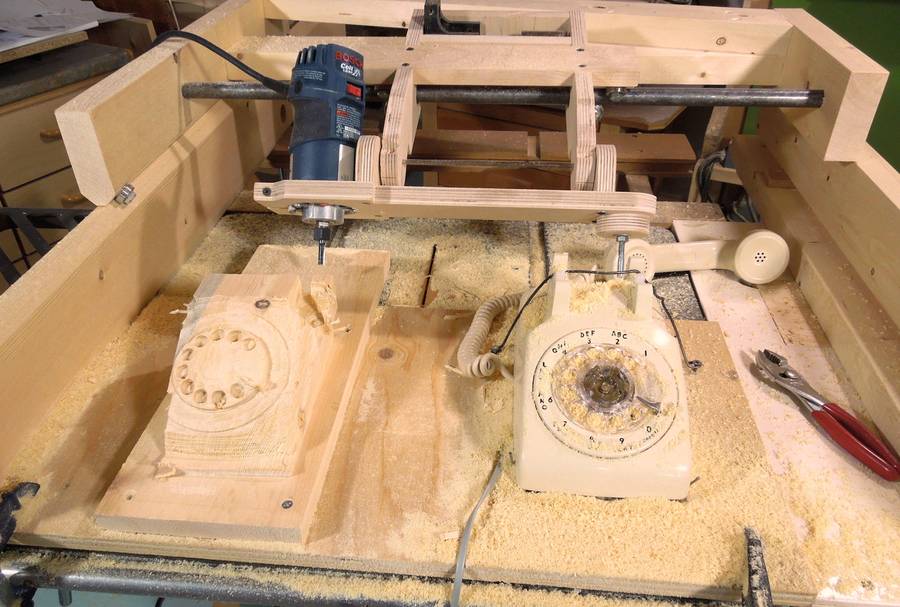
I had recently acquired a rotary dial phone, just for nostalgia's sake
at a yard sale. I figured this would be a neat shape to try.
So far I had just copied a wrench with
my copy carver, so I was looking
for a more complex object to try.
I had recently acquired a rotary dial phone, just for nostalgia's sake
at a yard sale. I figured this would be a neat shape to try.
So far I had just copied a wrench with
my copy carver, so I was looking
for a more complex object to try.
I had recently acquired a rotary dial phone, just for nostalgia's sake
at a yard sale. I figured this would be a neat shape to try.
I wasn't sure if it was practical to do a good job of it, so I made a test carving of just part of the dial. That worked out well enough, so I went ahead.
![]() I glued up a block of wood of the right size. Before carving, I traced the approximate
outline of the phone onto it with a pencil and cut that out on the bandsaw.
Removing lots of material just with a router isn't much fun.
I glued up a block of wood of the right size. Before carving, I traced the approximate
outline of the phone onto it with a pencil and cut that out on the bandsaw.
Removing lots of material just with a router isn't much fun.
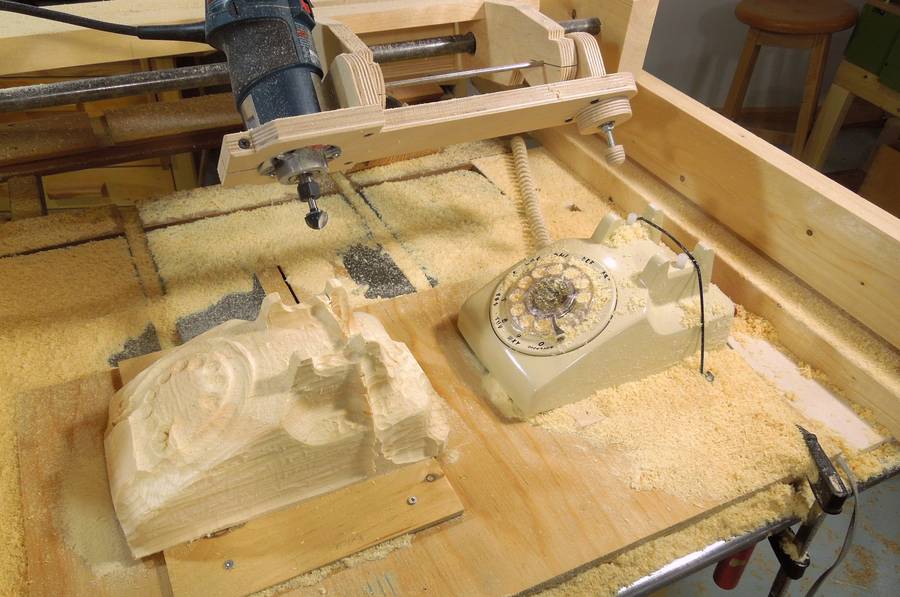
 The phone blank, along with the original mounted in my copy carver.
I attached a piece of wood to the bottom of the phone, which I screwed down in my
copy carver setup. I added a piece of coat hanger wire at the back
of the phone to further fix it in place.
The phone blank, along with the original mounted in my copy carver.
I attached a piece of wood to the bottom of the phone, which I screwed down in my
copy carver setup. I added a piece of coat hanger wire at the back
of the phone to further fix it in place.
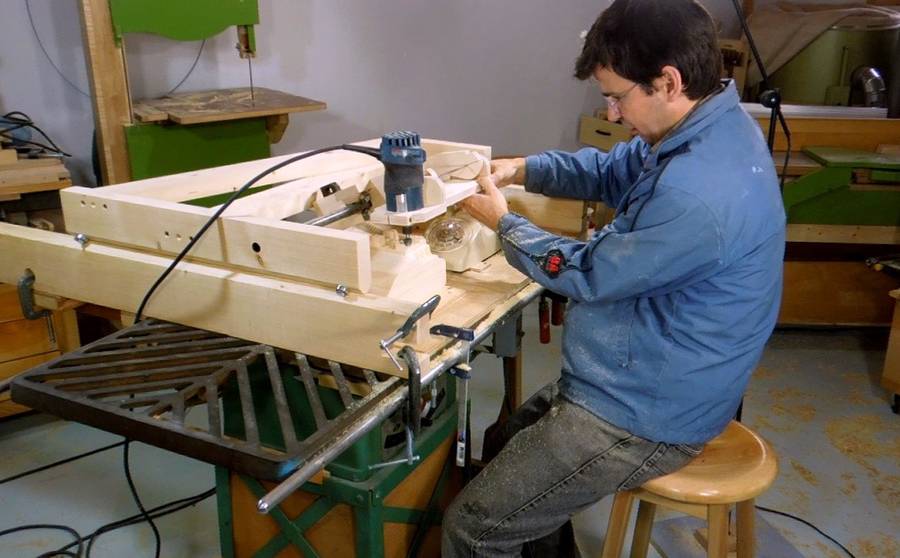 Starting carving. It's time consuming, so it's good to be able to sit down.
 This time I'm using a ball nose router bit with
a similarly shaped follower.
It can't get into the corners very well,
but it leaves a nicer surface.
This time I'm using a ball nose router bit with
a similarly shaped follower.
It can't get into the corners very well,
but it leaves a nicer surface.
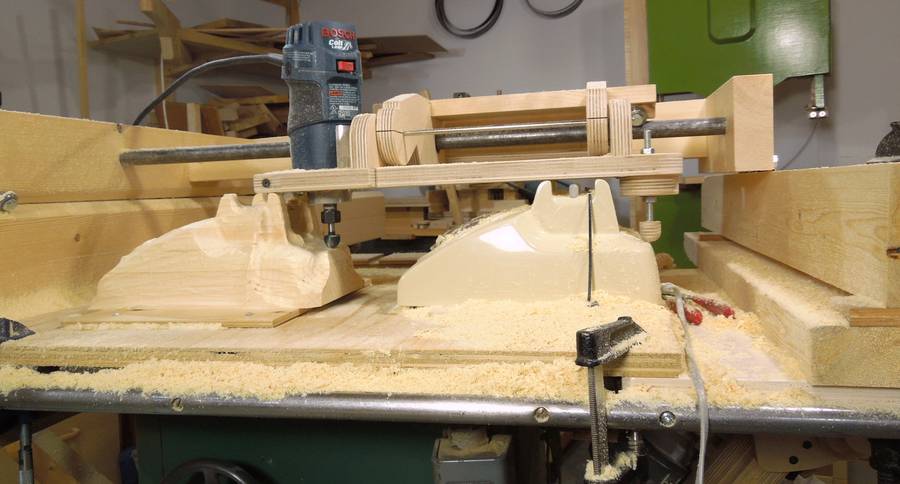
 I mounted the phone in sideways. With the forward and back tilt capability of my copy
carver, this gave me really good access to the sides of the phone.
I mounted the phone in sideways. With the forward and back tilt capability of my copy
carver, this gave me really good access to the sides of the phone.
 I was limited by the length of the bit and the reach of the copy carver, so this is
as far as I could get in this orientation.
Also notice the ridge along the side of the copy. That ridge
is a copy of the coat hanger wire holding down the original.
I was limited by the length of the bit and the reach of the copy carver, so this is
as far as I could get in this orientation.
Also notice the ridge along the side of the copy. That ridge
is a copy of the coat hanger wire holding down the original.
 The reach of my copy carver, at least the way I have it set up, is a bit limited.
I could only get so far down the front and back of the phone before hitting the
top of the phone.
The reach of my copy carver, at least the way I have it set up, is a bit limited.
I could only get so far down the front and back of the phone before hitting the
top of the phone.
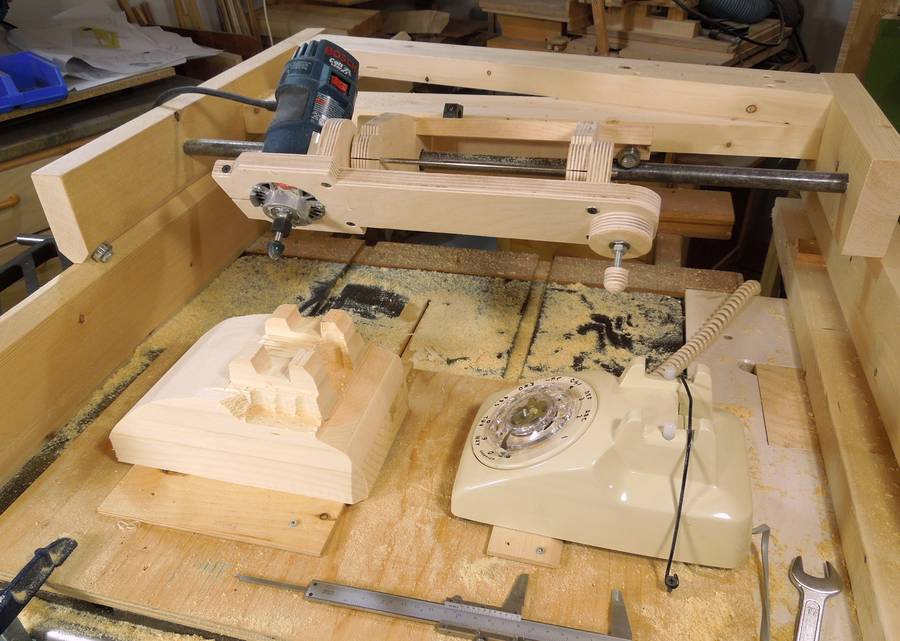
I could have increased the reach by 2-3 cm by clamping the router further down and using a longer follower bit, but that still wouldn't be enough to reach all the way down the front and back.
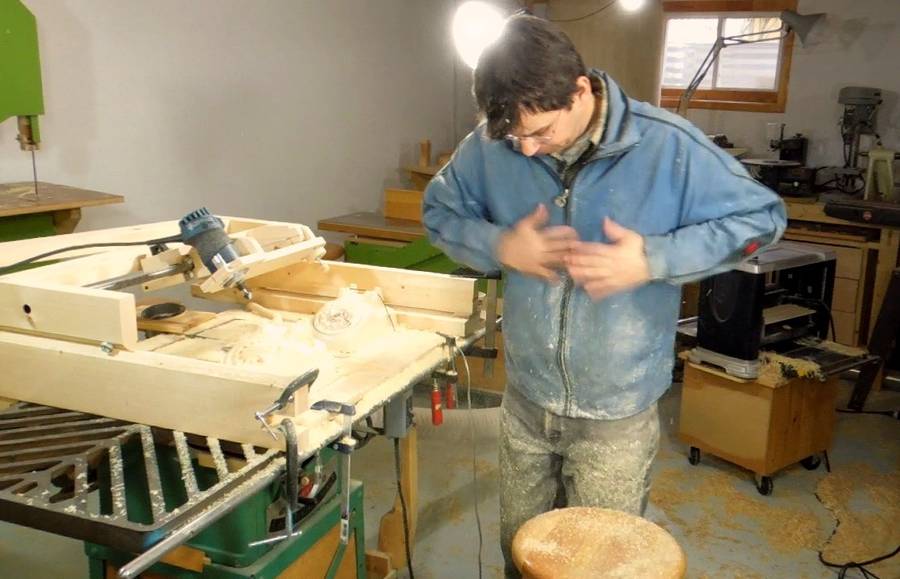 I sure got a lot of dust on myself, sitting in front of the router and working away.
After that, I moved the dust collection hose and mounted it to the frame of the router copier
so that the hose was always within about 20 cm of the router bit. That still wasn't enough
to pull in all the dust, but it captured most of the finer airborne dust.
I sure got a lot of dust on myself, sitting in front of the router and working away.
After that, I moved the dust collection hose and mounted it to the frame of the router copier
so that the hose was always within about 20 cm of the router bit. That still wasn't enough
to pull in all the dust, but it captured most of the finer airborne dust.
 With the phone and copy rotated 90 degrees, I was now able to work on the
front and back. I also moved the coat hanger wire on the phone, so I could carve those areas
that were previously obstructed.
With the phone and copy rotated 90 degrees, I was now able to work on the
front and back. I also moved the coat hanger wire on the phone, so I could carve those areas
that were previously obstructed.
Re-aligning the workpiece and original after rotating is a bit tricky. But it's easy enough to check by ensuring the stylus and the router touch the workpiece and original at the same time from all sides.
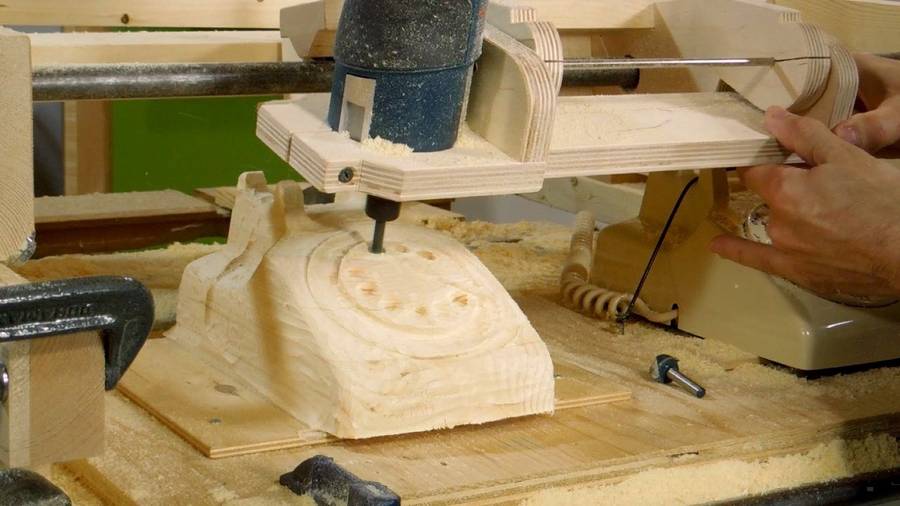 I switched to a 1/4" (6mm) router bit to do the holes and other details around the dial.
With the tilting ability of the copier, I was able to get right into thed
finger holes on the dial.
I switched to a 1/4" (6mm) router bit to do the holes and other details around the dial.
With the tilting ability of the copier, I was able to get right into thed
finger holes on the dial.
Synchronized turntables?
I certainly thought of it using synchronized turntables, but decided not to.
But it's something readers suggest so often, I figure I should at least mention it.
Synchronized turntables would have to be very precise, with no backlash,
and would add several more factors that would need to be aligned
carefully. It wasn't worth it for me. But you are welcome to try it yourself
and tell me how it goes. Before I'd make a turntable, I'd mount both objects on a
square bases that could be oriented in four directions.
This would solve most of the problems with only a fraction of the difficulty.
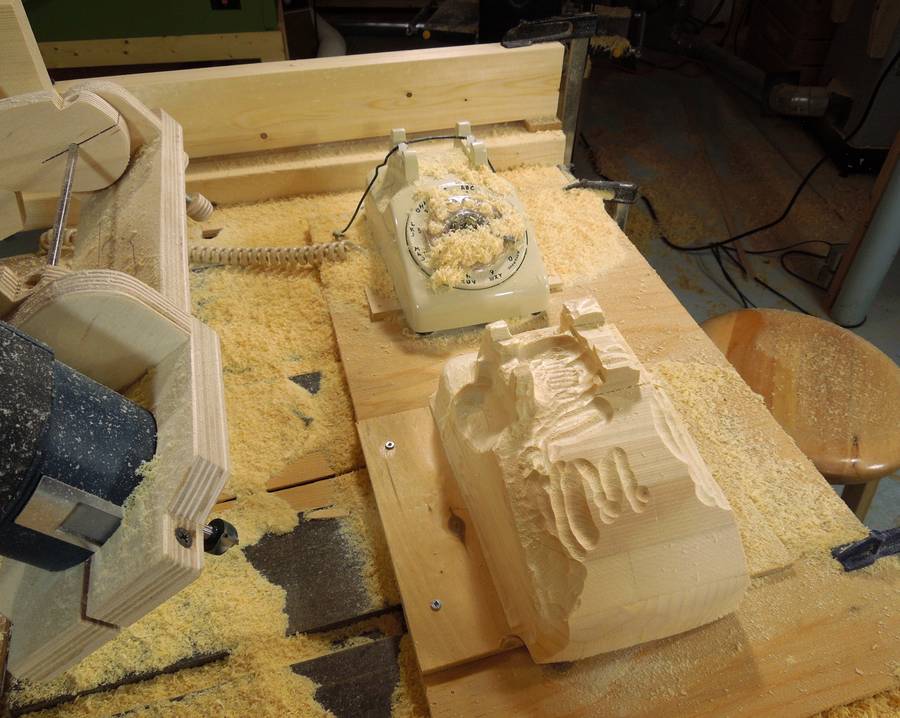
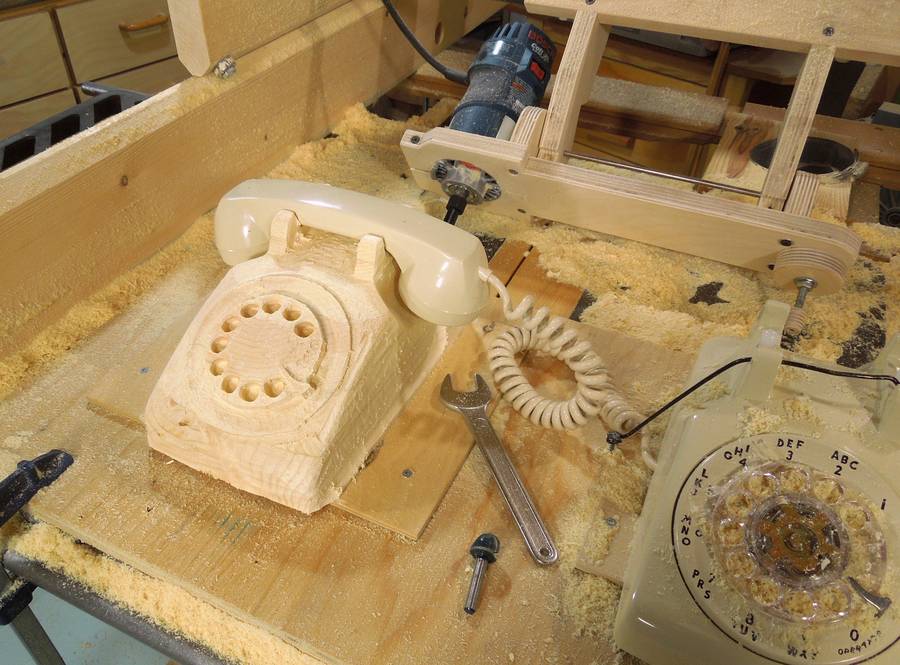 With the original handset placed on the copy's hooks, the copy is already
looking very phone-like!
With the original handset placed on the copy's hooks, the copy is already
looking very phone-like!
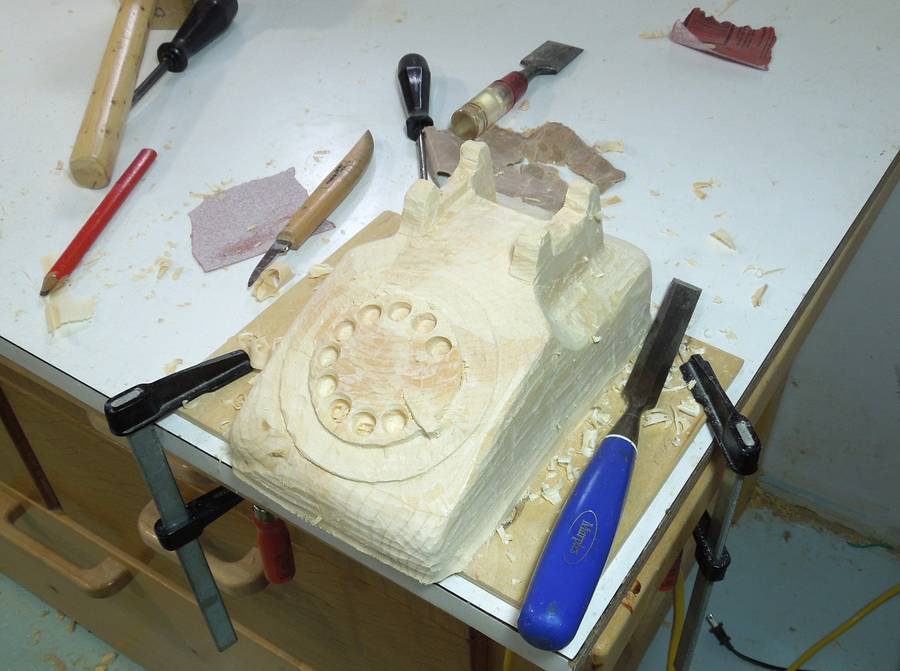 Copy carving doesn't leave the best surface, so I used a chisel, carving knife
and sand paper to finish up a lot of the details.
Copy carving doesn't leave the best surface, so I used a chisel, carving knife
and sand paper to finish up a lot of the details.
I don't have the patience of a wood carver though, so I didn't go so far as to give the copy a nice smooth surface like the original.
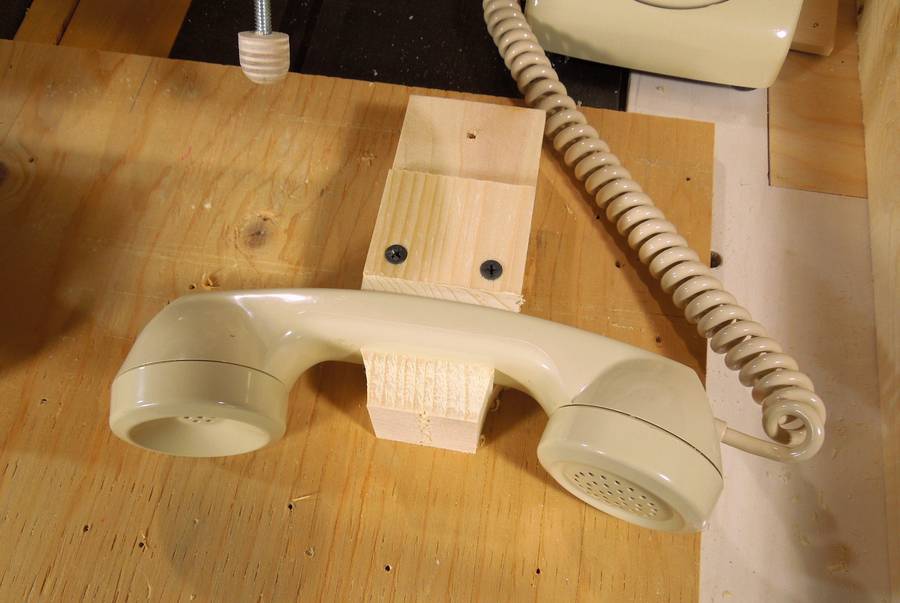 Copying the phone's handset presented an interesting challenge. It doesn't have a
flat bottom to mount it by. So I made this block of wood that it fit tightly into.
It needs to be mounted quite rigidly, so that it doesn't get bumped out of
place from tracing all the surfaces with the follower.
Copying the phone's handset presented an interesting challenge. It doesn't have a
flat bottom to mount it by. So I made this block of wood that it fit tightly into.
It needs to be mounted quite rigidly, so that it doesn't get bumped out of
place from tracing all the surfaces with the follower.
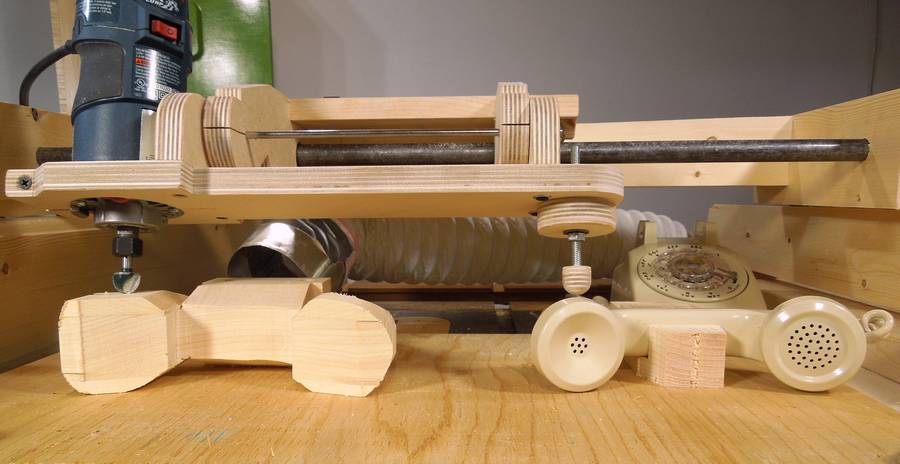
![]() I pre-shaped the blank for the phone handset quite a lot on the bandsaw.
I pre-shaped the blank for the phone handset quite a lot on the bandsaw.
 Checking the blank - I have to make sure the router always hits the blank before the follower
hits the original. As it turned out, I had cut away a bit too much from my blank and had to glue
a few bits of wood back on. Oops!
Checking the blank - I have to make sure the router always hits the blank before the follower
hits the original. As it turned out, I had cut away a bit too much from my blank and had to glue
a few bits of wood back on. Oops!
 Carving away at it. Note the dust hose just behind the router.
Moving that hose closer to the router really helped to cut down on airborne dust.
The bigger chips still accumulated all over the place, but there was less dust in the air.
Carving away at it. Note the dust hose just behind the router.
Moving that hose closer to the router really helped to cut down on airborne dust.
The bigger chips still accumulated all over the place, but there was less dust in the air.
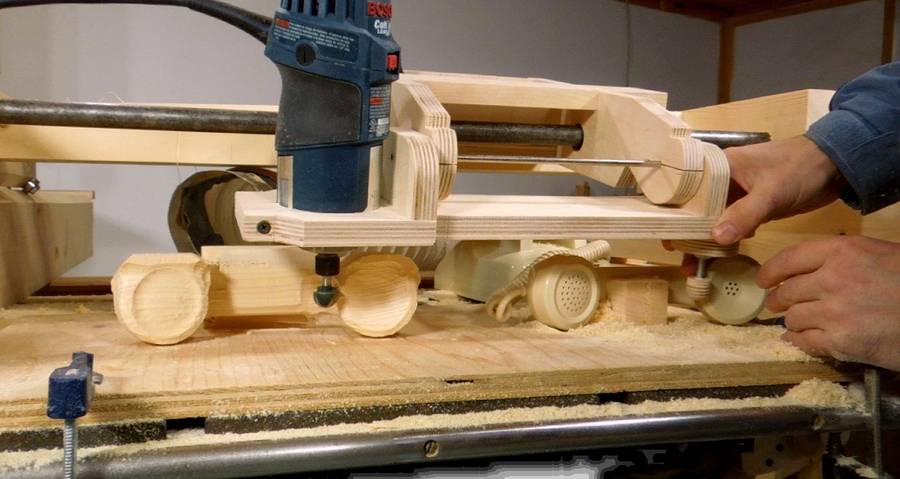
 Using the tilting capability to carve the concave areas of the ear
and mouth piece of the handset.
Using the tilting capability to carve the concave areas of the ear
and mouth piece of the handset.
 After carving it as much as I could from the top, I flipped the workpiece and original so I could
carve the other side. Here's aligning the workpiece with the original. That procedure takes a few
minutes to get it just right.
After carving it as much as I could from the top, I flipped the workpiece and original so I could
carve the other side. Here's aligning the workpiece with the original. That procedure takes a few
minutes to get it just right.
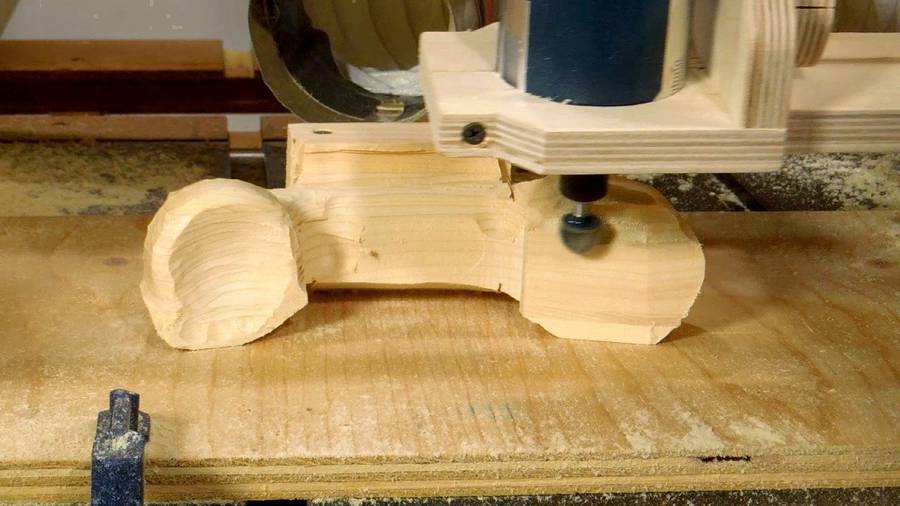
 I couldn't carve the front and back of the handset grip, because that's where I had clamped
the original. But those parts are relatively straight, so I just cut those off with
a bandsaw afterwards.
I couldn't carve the front and back of the handset grip, because that's where I had clamped
the original. But those parts are relatively straight, so I just cut those off with
a bandsaw afterwards.
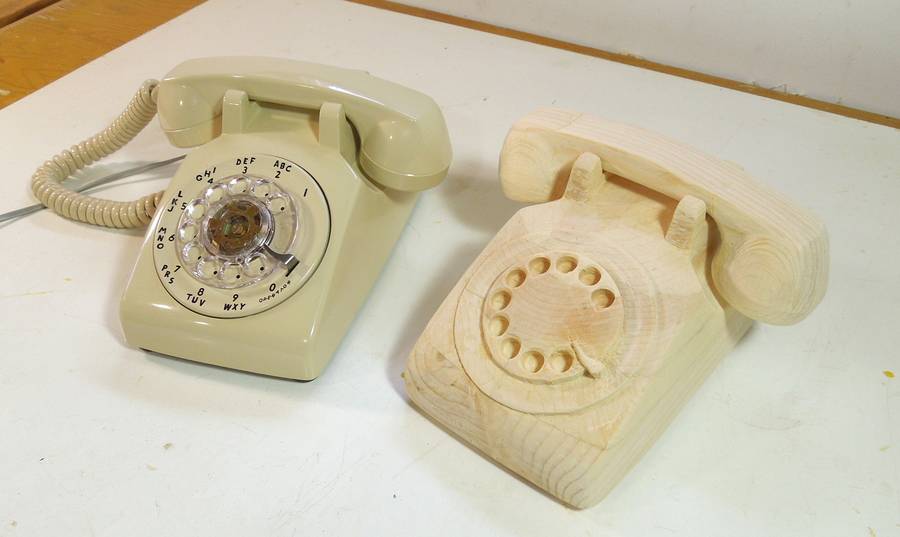 And here's the finished copy of the phone.
And you may ask "why would you copy a phone?" - well, I figured it was a neat and unusual yet familiar shape to try to carve out of wood. And really, most "carvings" aren't actually useful. Although I suppose I could copy useful items with the machine - like violin backs, guitar necks, or gun stocks. But I'm not building any of those things. I could always make some spoons, but I think carving a phone is way cooler!
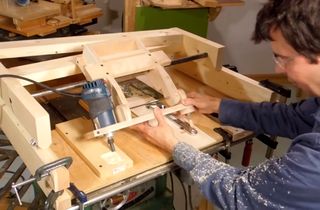 3D copy carver
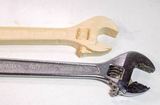 Copy carving a wrench
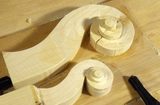 Carving a violin scroll
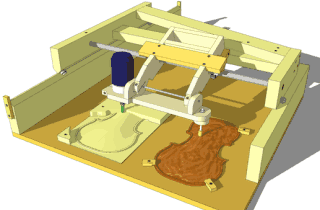 Buy plans for the