 We have this part of the kitchen where the floor extends outward, with three windows
and an ugly curtain rod above each window.
We have this part of the kitchen where the floor extends outward, with three windows
and an ugly curtain rod above each window.
We have this part of the kitchen where the floor extends outward, with three windows
and an ugly curtain rod above each window.
Rachel wanted a new curtain rod, one that goes around the corners. No problem, I said, but not really that useful because the curtain wouldn't slide around the corners because of the mounts for the curtain rod. But what Rachel had in mind was that the curtain could slide around the corners.
 This was a design challenge!
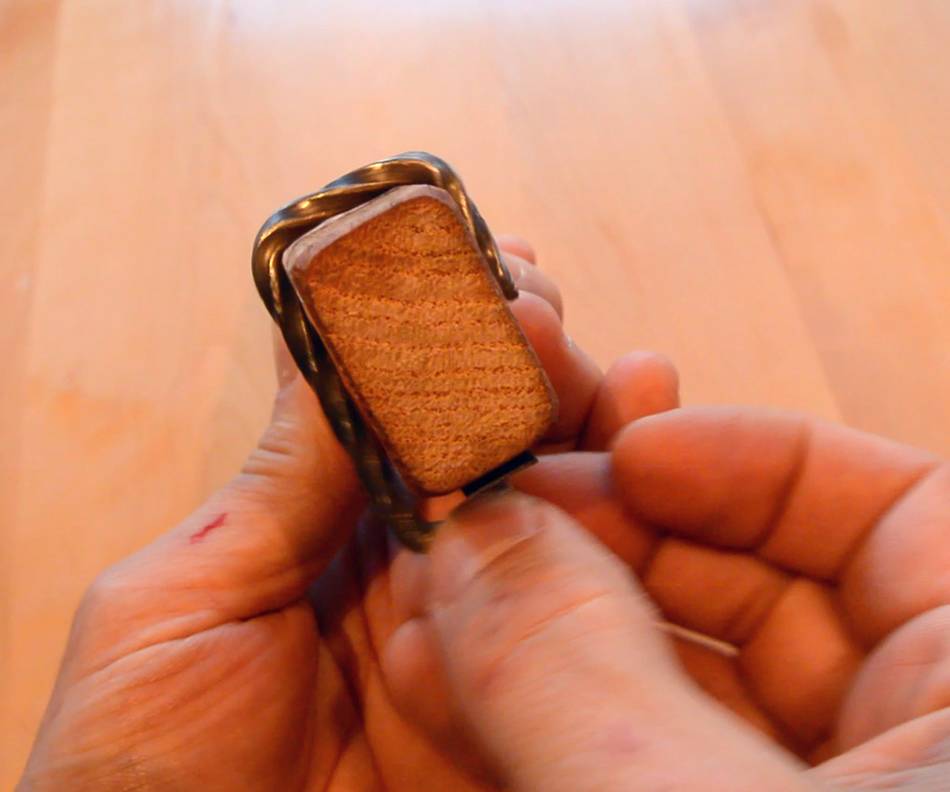
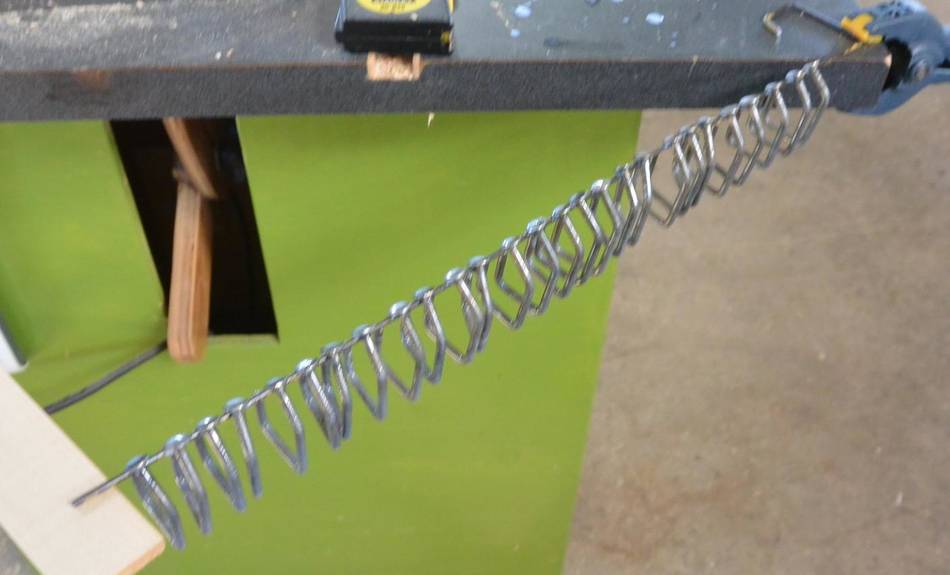
Normally, curtain rings go all the way around the curtain rod, which means it can only be mounted at the ends and sometimes in the middle where the curtain doesn't slide past.
If I were to put a gap in the ring (as shown at right), it could slide past some mounts, but how to keep the gap in the ring aligned with the mount?
So my idea a was to have a rectangular rod with rectangular rings, shown at left. This ring is made out of a twisted nail (the only nails I had kicking around that were long enough were twisted ones)
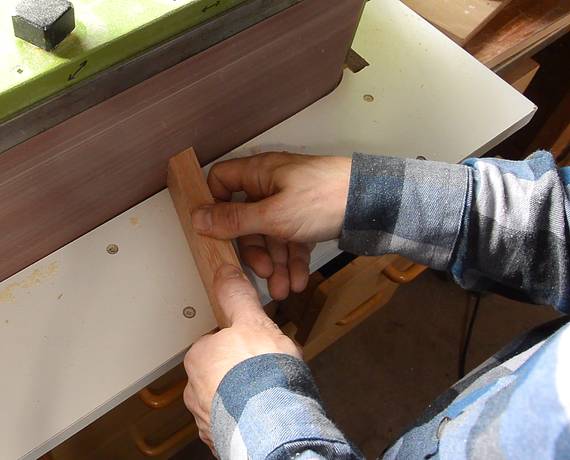
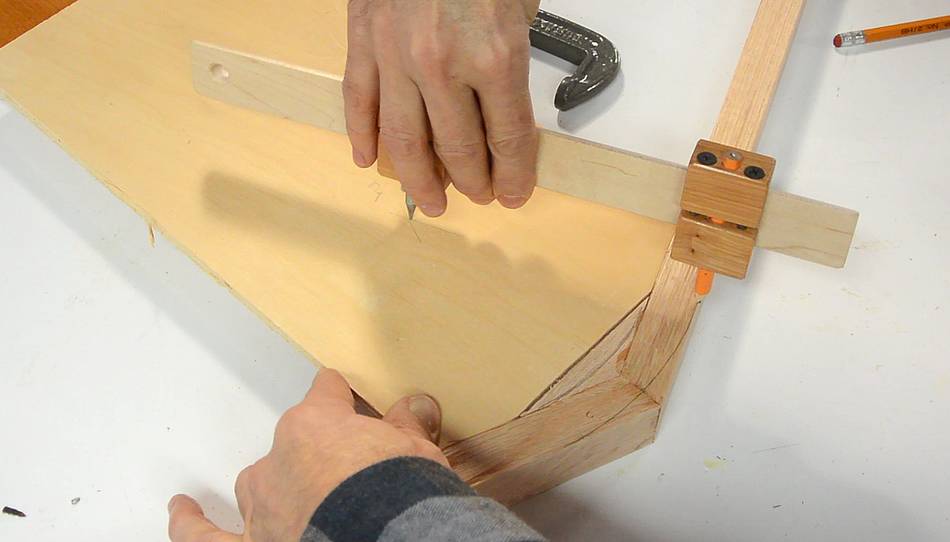
 I needed to get good measurements of the wall. So I cut some thin strips of pine
and fitted them to the wall, clamping and gluing them at the corners in place.
I needed to get good measurements of the wall. So I cut some thin strips of pine
and fitted them to the wall, clamping and gluing them at the corners in place.
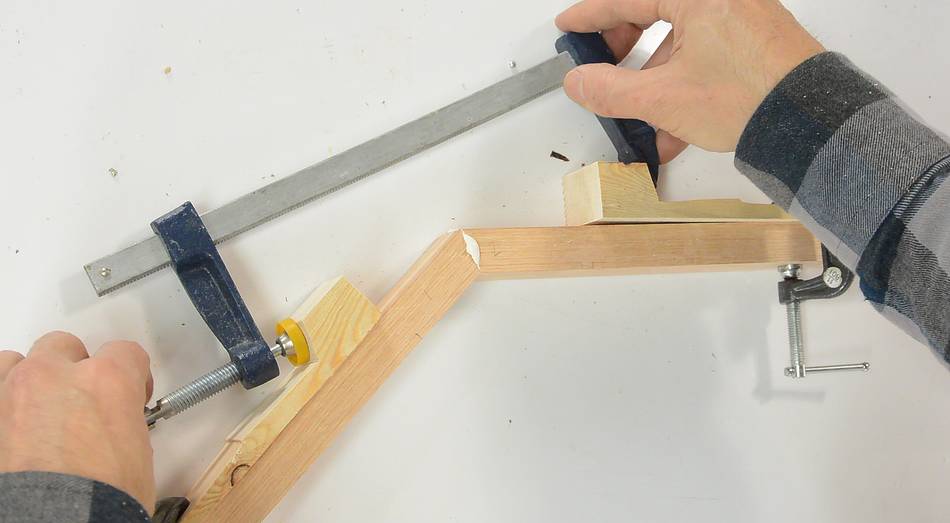
 Once the glue was dry I took the clamps off and took the glued-together shape down.
This is my 1:1 template to work with.
Once the glue was dry I took the clamps off and took the glued-together shape down.
This is my 1:1 template to work with.
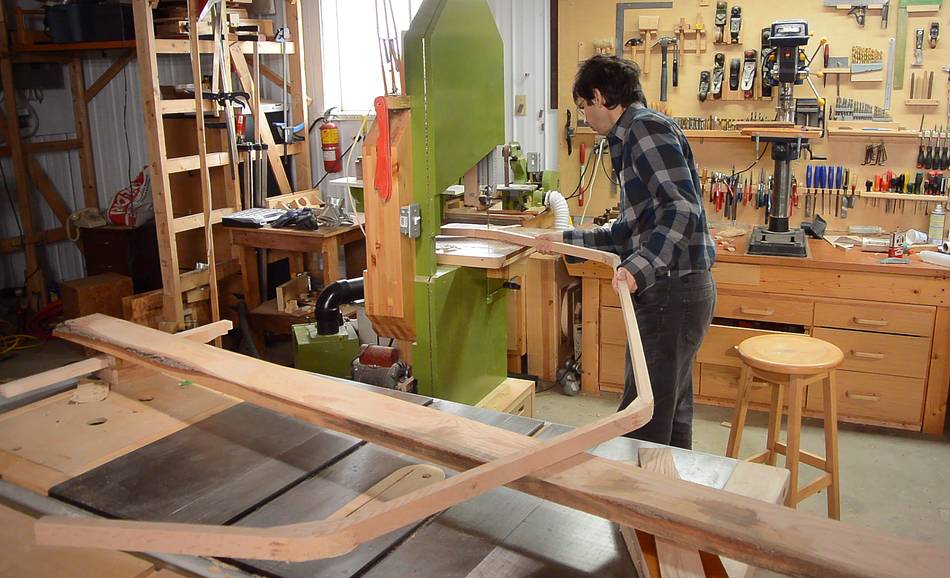
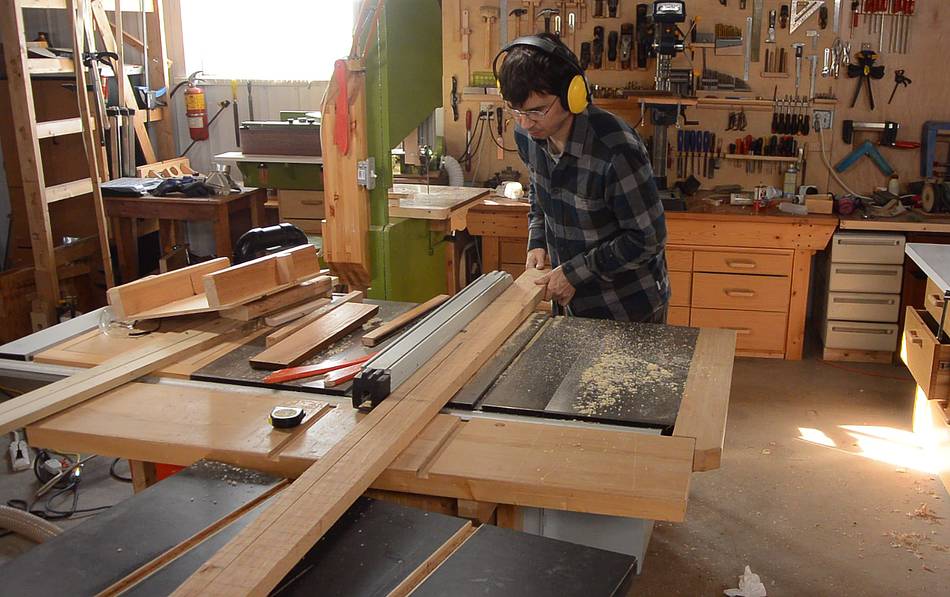 I cut the curtain rod from red oak left over from making the
baseboards for the house.
I cut the curtain rod from red oak left over from making the
baseboards for the house.
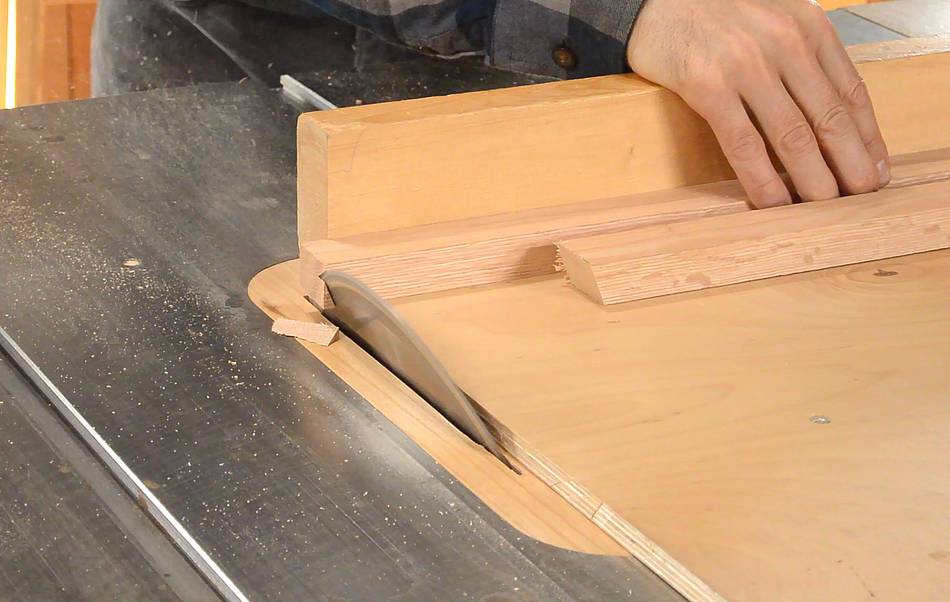 The corners were not all 45° or even the same angle. With each angle slightly
different, I just cut all the ends to 22.5° to make 45° joints.
The corners were not all 45° or even the same angle. With each angle slightly
different, I just cut all the ends to 22.5° to make 45° joints.
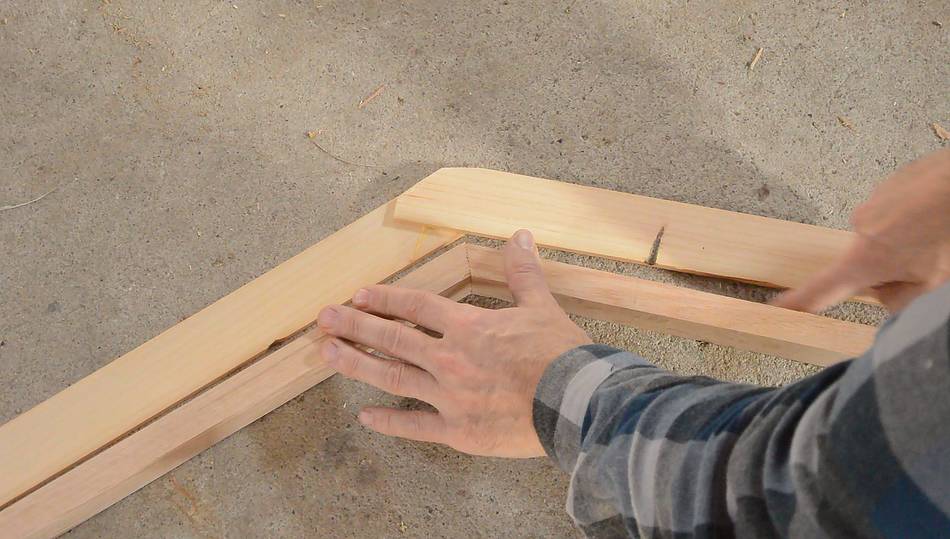
 Then fitting the joints to my template and sanding them to adjust the angle
to fit.
Then fitting the joints to my template and sanding them to adjust the angle
to fit.
 I made some simple clamping jigs to clamp the butt joint for the corners.

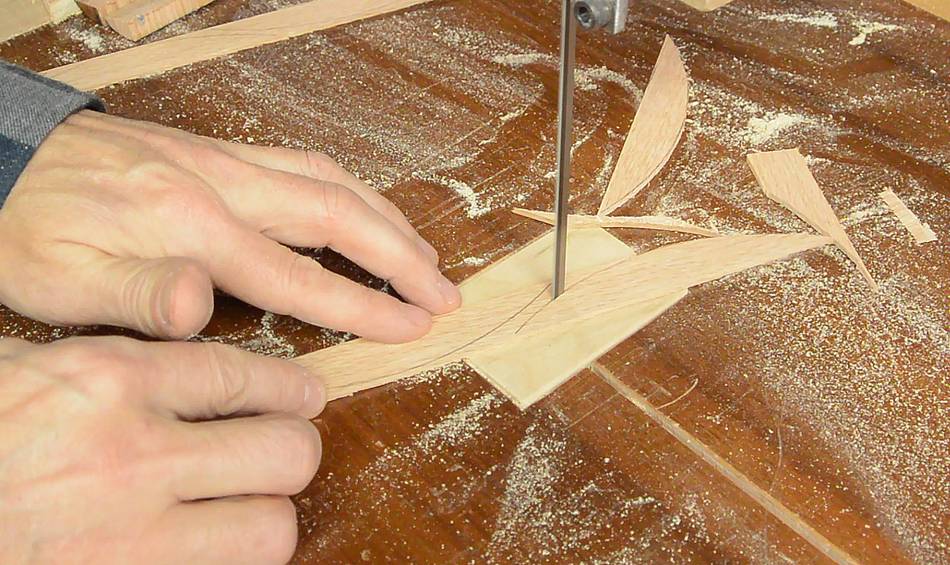
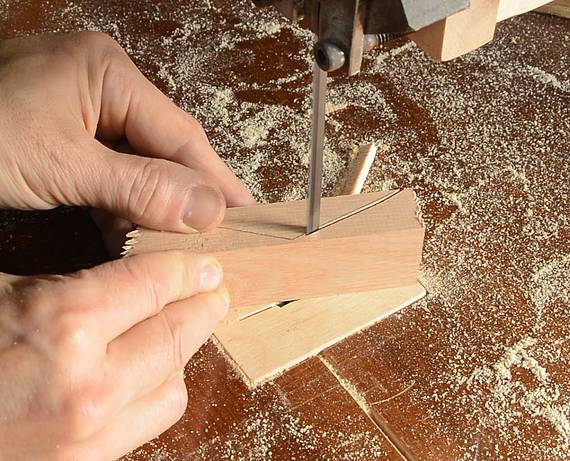 I used my bevel gauge to mark the
angles for an infill piece for the inside of the joint,
then roughly cut that out on the bandsaw....
I used my bevel gauge to mark the
angles for an infill piece for the inside of the joint,
then roughly cut that out on the bandsaw....
 ...and sanded it for an exact fit.
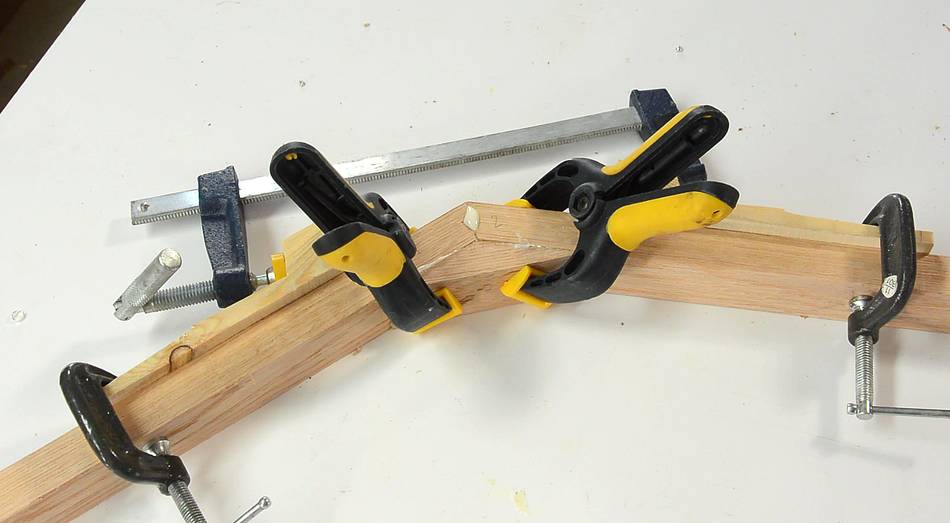
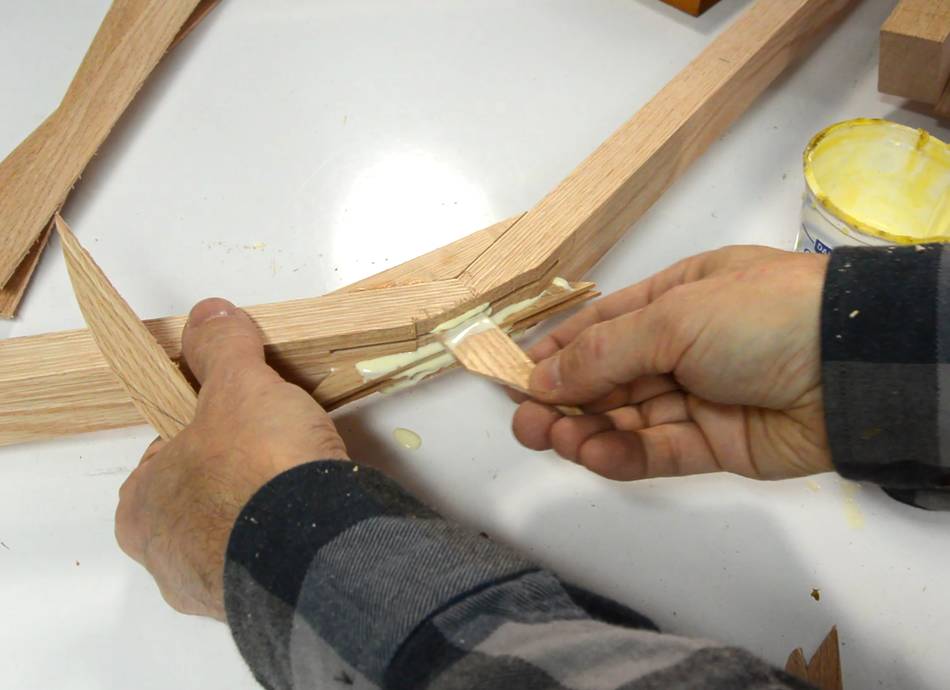
For the other three joints I made the infill piece but fit it to the angle I had set on the bevel gauge before gluing the butt joint. That way I could glue three pieces at the same time, with the infill piece helping to fix the exact angle.
 I used a scrap of plywood as a place to put the compass to mark
a smooth arc around the corner. I want the corners rounded so the
curtain rings are less likely to get caught up on them.
I used a scrap of plywood as a place to put the compass to mark
a smooth arc around the corner. I want the corners rounded so the
curtain rings are less likely to get caught up on them.
After that I cut the tip of the corner off to make the next steps easier.
 I set the blade height and a stop on the table saw to cut a spline
into the miter.
I set the blade height and a stop on the table saw to cut a spline
into the miter.
The stop is behind the blade and allows me to push the workpiece only so far into the blade.
 Then cutting out some splines to go in the slots. The splines have a
rounded edge to match the slot's profile from the saw blade.
Then cutting out some splines to go in the slots. The splines have a
rounded edge to match the slot's profile from the saw blade.
 Gluing in the splines.
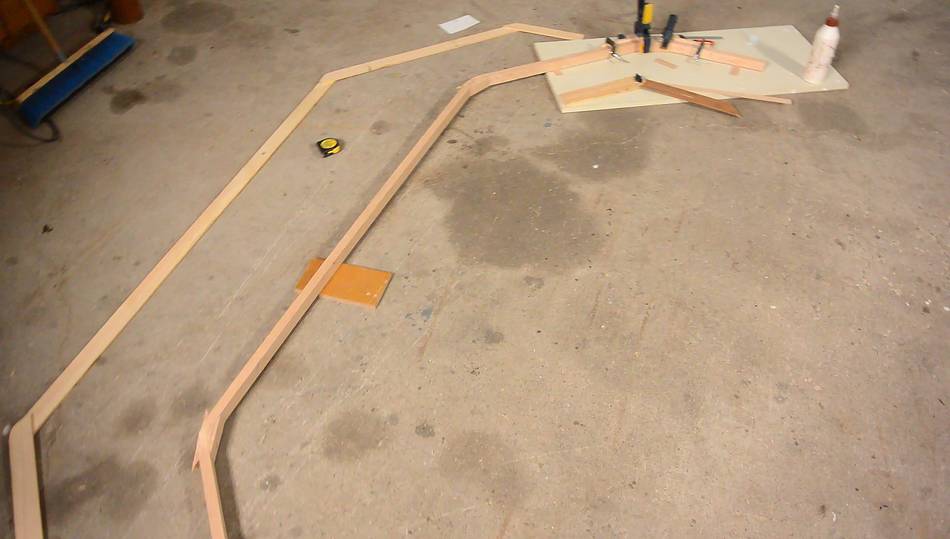 I had to glue the last two corners on the floor because the workpiece
was much too big for my workbench.
I had to glue the last two corners on the floor because the workpiece
was much too big for my workbench.
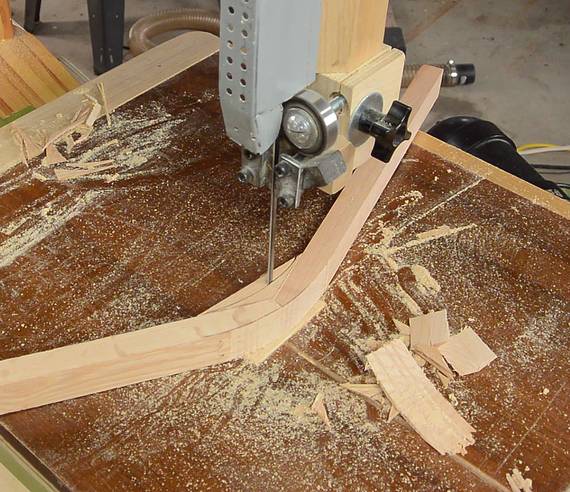 Then cutting the corners round on the bandsaw. The board on the table
saw (in foreground) is at the same height as the bandsaw table and
helps me keep the workpiece level as I swing it around to follow the
curve of the cut.
Then cutting the corners round on the bandsaw. The board on the table
saw (in foreground) is at the same height as the bandsaw table and
helps me keep the workpiece level as I swing it around to follow the
curve of the cut.

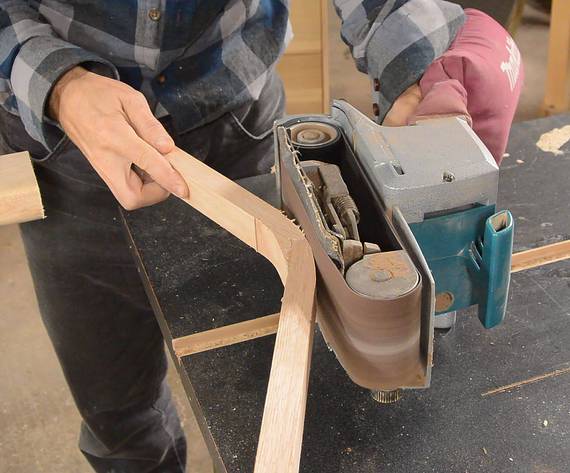 Then sanding it smooth with the belt sander. The guard for the
drive belt of this sander just happens to be flat and square to the
sanding belt, so I supported the rod the right height above the table,
then slid the sander along to follow the curves.
Then sanding it smooth with the belt sander. The guard for the
drive belt of this sander just happens to be flat and square to the
sanding belt, so I supported the rod the right height above the table,
then slid the sander along to follow the curves.
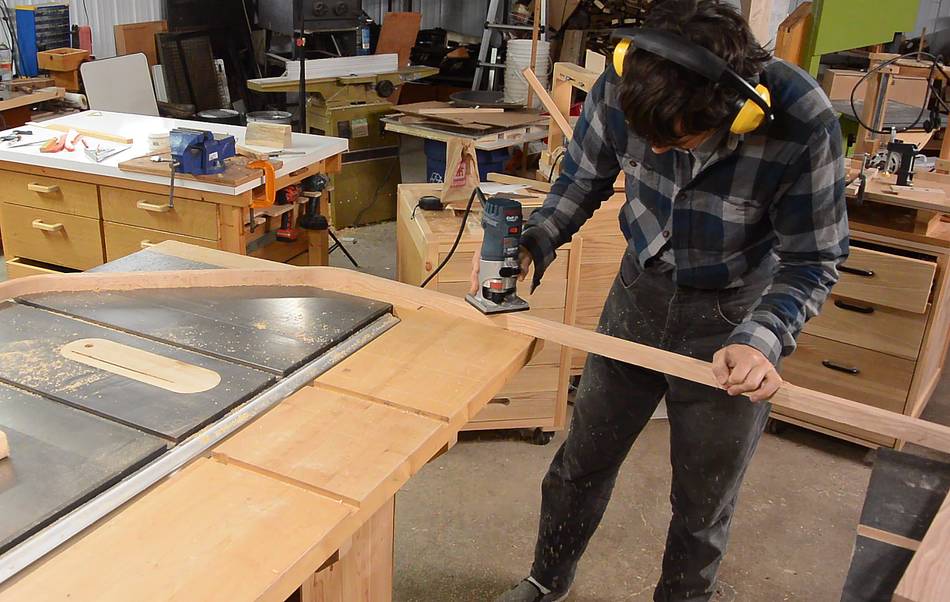 Adding a slight round over with a palm router.
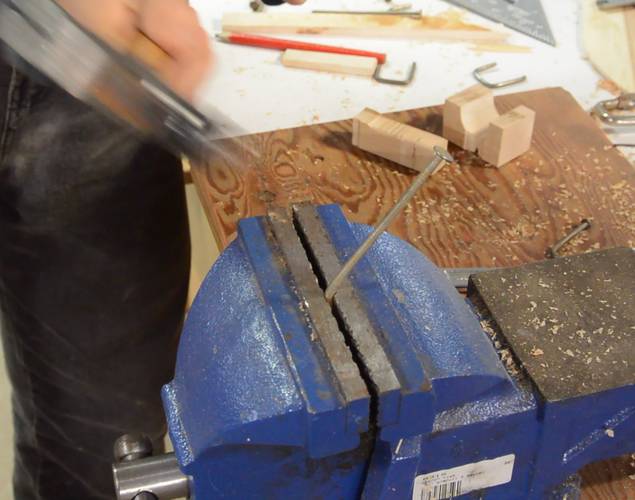
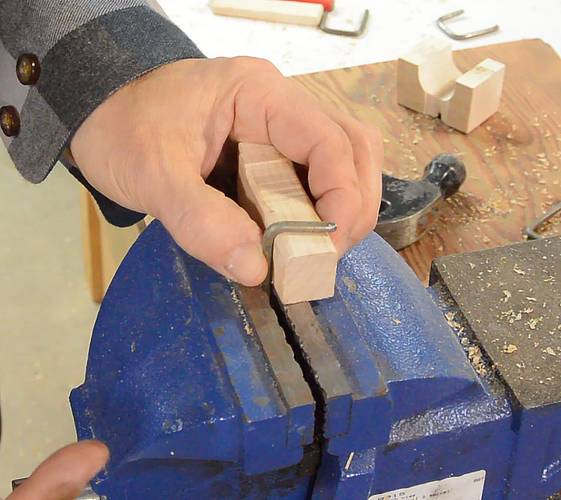
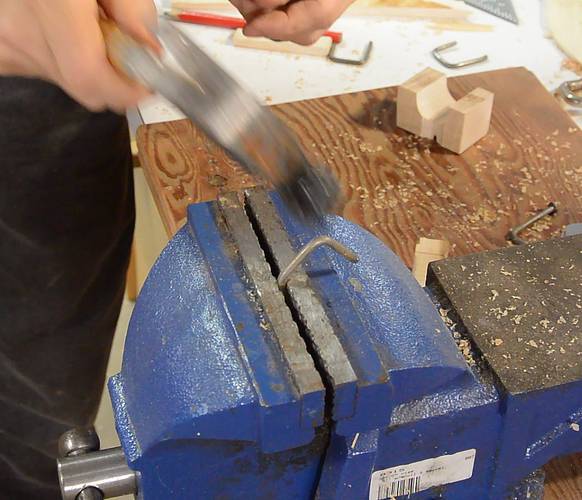
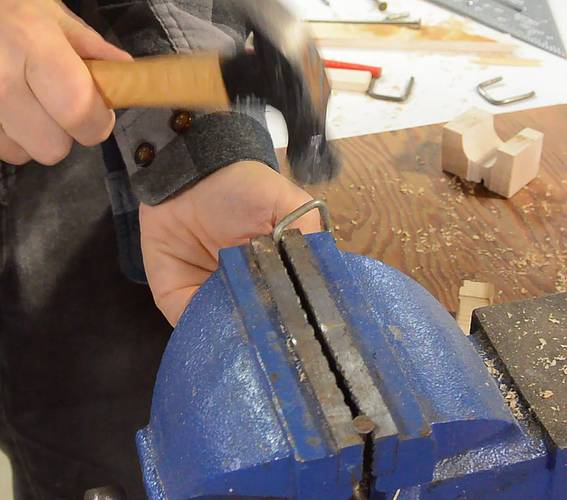
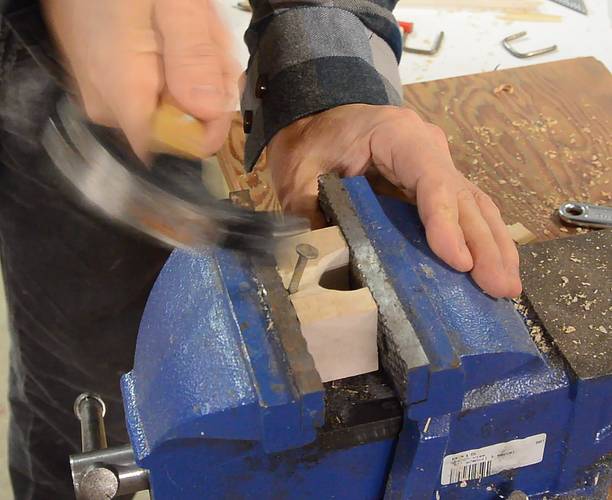 I then made the "rings" out of some 4" long nails. I made a few jigs
to help me line up the nail at just the right points in the vise and
used a hammer to pound it down to bend it to right angles.
I then made the "rings" out of some 4" long nails. I made a few jigs
to help me line up the nail at just the right points in the vise and
used a hammer to pound it down to bend it to right angles.
Ironically, the last 45° bend was the most difficult bend and I broke about a quarter of the nails with that bend, but the 90° bends were no problem.
The nail's shank near the head is work hardened from how it's grabbed by the machine that forms the head during manufacturing. So the last 2 cm of the nail's shank is kind of brittle.
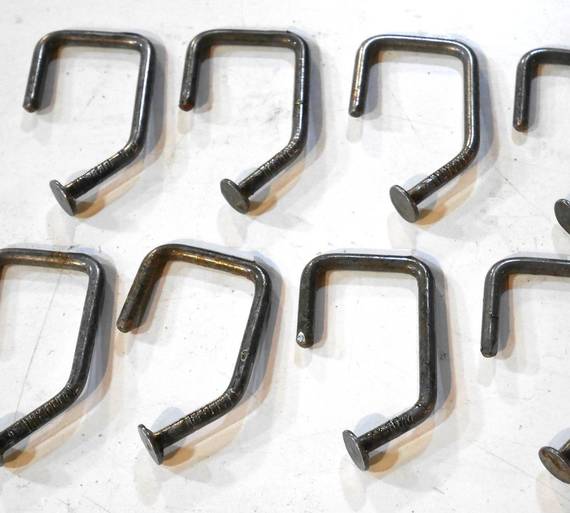 After that I immersed the nails in vinegar for 20 minutes to remove surface rust,
then applied water based Varathane diamond floor varnish. This is a wood
varnish but seems to help against rust a bit. I used it because that's what
I had at hand, I know that it's slippery, and I didn't want to go shopping.
After that I immersed the nails in vinegar for 20 minutes to remove surface rust,
then applied water based Varathane diamond floor varnish. This is a wood
varnish but seems to help against rust a bit. I used it because that's what
I had at hand, I know that it's slippery, and I didn't want to go shopping.
 I cut four pieces of stainless steel for the mounts. That stuff is difficult
to cut, and cutting the strips out of a sheet, of stainless steel used
up most of a thin angle grinder cut-off disk.
I cut four pieces of stainless steel for the mounts. That stuff is difficult
to cut, and cutting the strips out of a sheet, of stainless steel used
up most of a thin angle grinder cut-off disk.
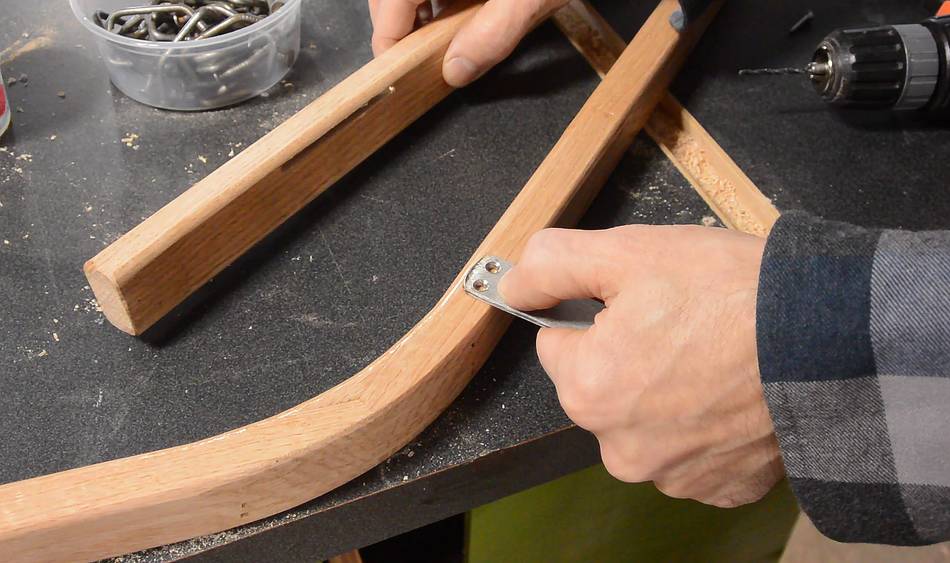 The mount goes right here, but I want to actually put it in the wood to make it show
less from the bottom and make fewer places for things to catch on.
The mount goes right here, but I want to actually put it in the wood to make it show
less from the bottom and make fewer places for things to catch on.
 So I cut a slot for the mount with a biscuit jointer
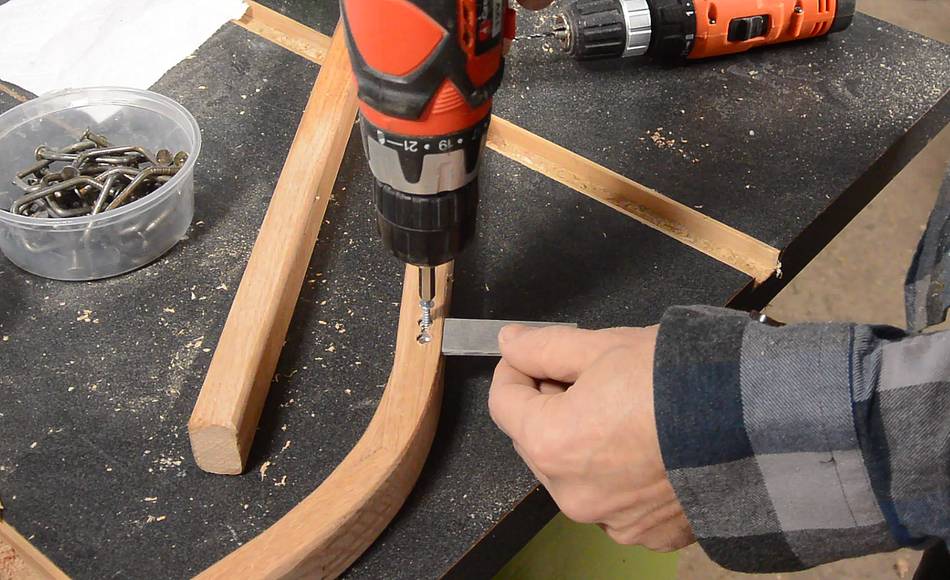 Then screwed it in, with two holes big enough for the screw heads. I drilled
these holes before cutting out the slots, so I didn't have to deal with the
drill making a mess as it breaks through the thin layer of wood.
Then screwed it in, with two holes big enough for the screw heads. I drilled
these holes before cutting out the slots, so I didn't have to deal with the
drill making a mess as it breaks through the thin layer of wood.
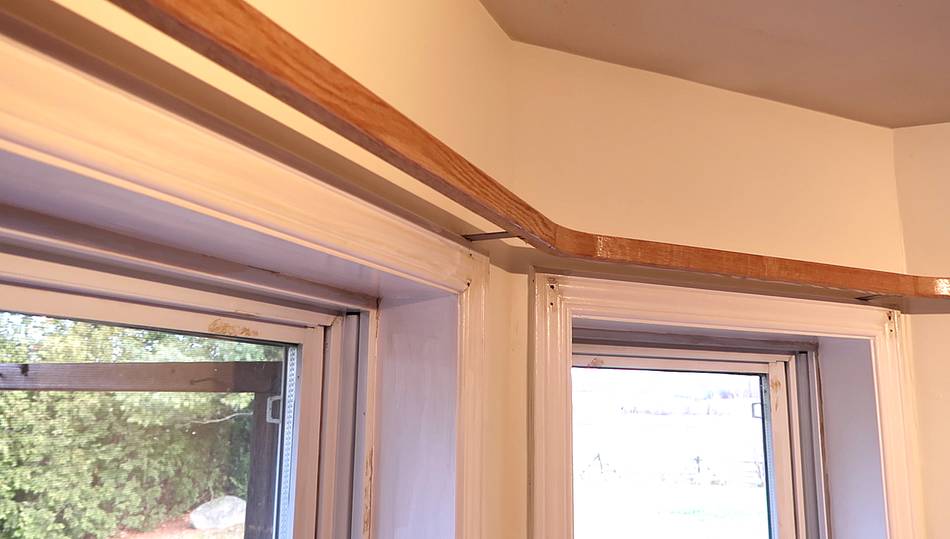 The mounts screw to the top of the window trim.
The way it goes around a corner, the four mounts were enough
to hold it, but the ends, extending further out, ended up sagging if
pulled down, so I made separate mounting brackets for those.
The mounts screw to the top of the window trim.
The way it goes around a corner, the four mounts were enough
to hold it, but the ends, extending further out, ended up sagging if
pulled down, so I made separate mounting brackets for those.
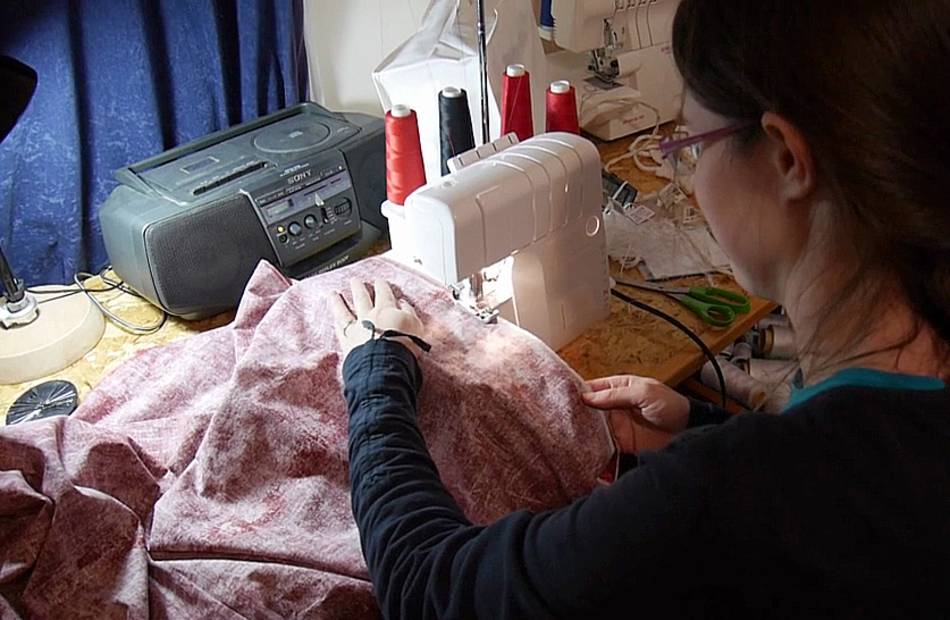
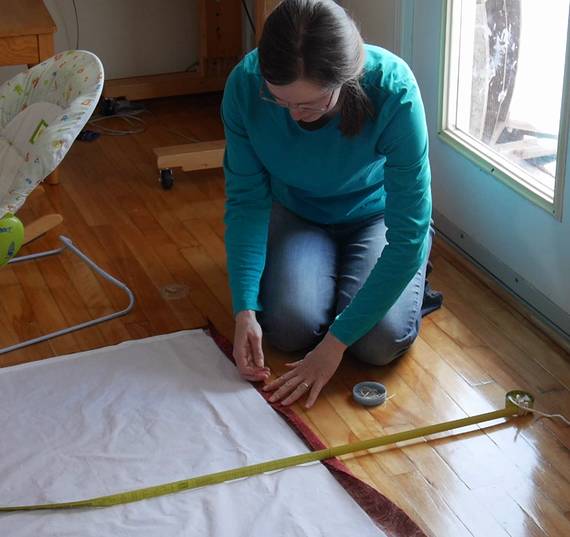 Now it was Rachel's turn to make the curtains. The curtains have
a white liner on the back to help protect the red fabric from fading.
It should also help reflect some of the heat in the summer.
Now it was Rachel's turn to make the curtains. The curtains have
a white liner on the back to help protect the red fabric from fading.
It should also help reflect some of the heat in the summer.
 The nails slide into button holes along the top edge of the fabric.
The nail head keeps the nail from sliding off the end.
The nails slide into button holes along the top edge of the fabric.
The nail head keeps the nail from sliding off the end.
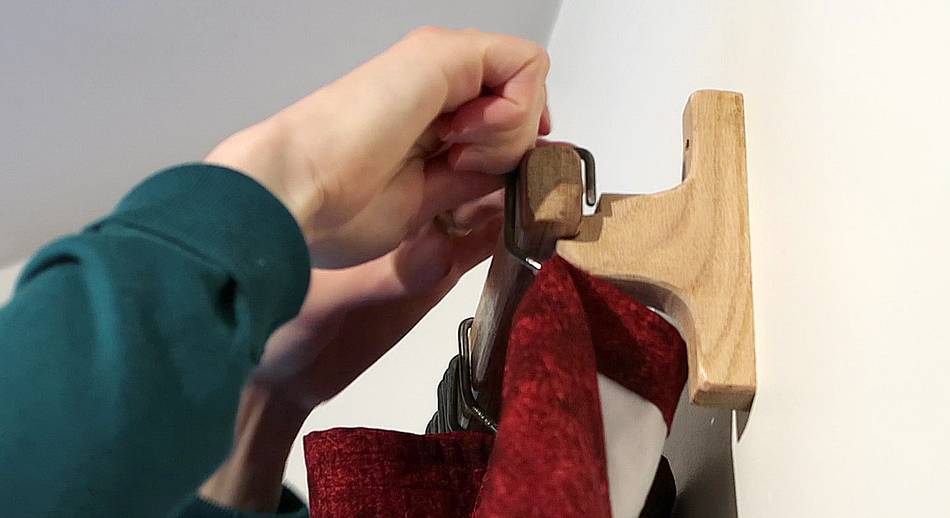 Hooking the curtain onto the end of the rod. The mounting bracket on
the end allows the hooks to run past it.
Hooking the curtain onto the end of the rod. The mounting bracket on
the end allows the hooks to run past it.
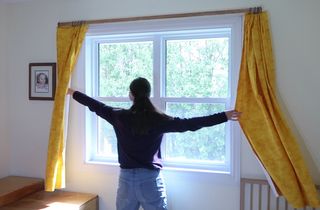
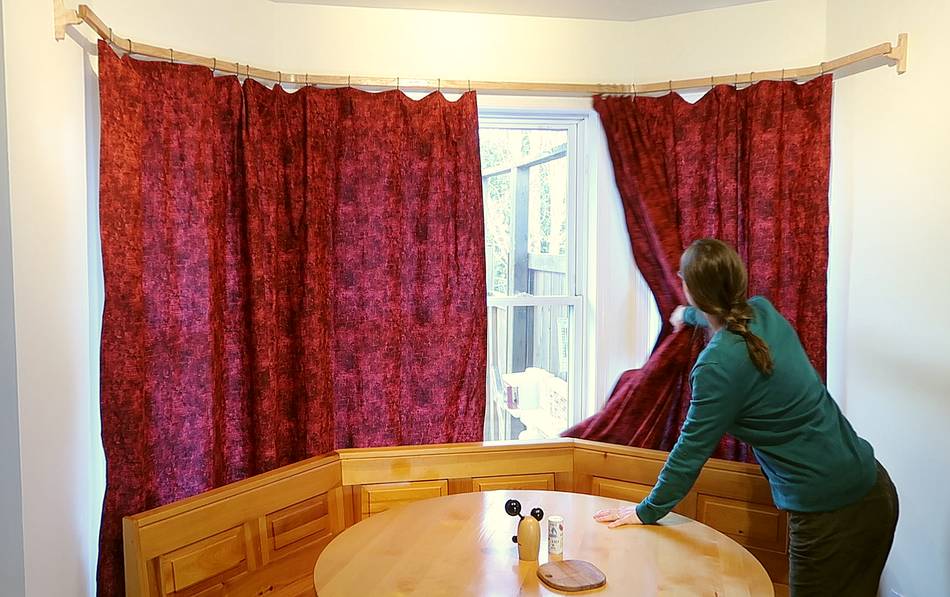 Curtains done. The extra extension on either side, going along the
wall segment that doesn't have a window allows the curtains to
completely clear the windows.
Curtains done. The extra extension on either side, going along the
wall segment that doesn't have a window allows the curtains to
completely clear the windows.
Back to my woodworking website
 More curtain rods
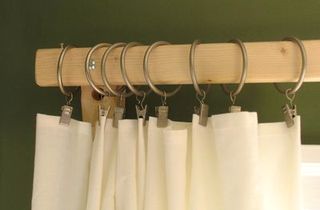 Making simple cheap curtain rods
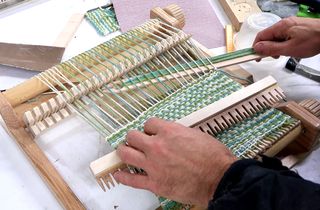 Frame for weaving
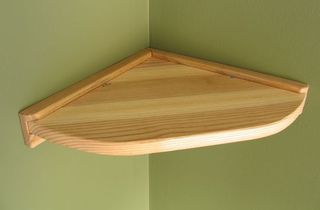 Making a corner shelf
 Hooks for hanging coat
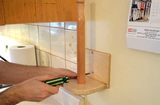 Paper towel roll holder
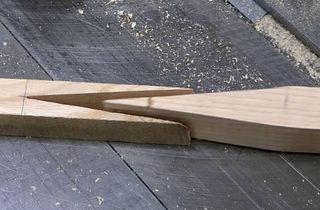 Splicing wood end to make long curtain rods