 The design I came up with was one that allowed me to maximize the use of the
Mortising machine
which I built earlier that year.
The design I came up with was one that allowed me to maximize the use of the
Mortising machine
which I built earlier that year.
After I built the sunroom on my house in 1997, watching he sun come in the side window one afternoon I figured under that window would be a perfect spot to be taking a nap. So in 1998 I set out to build a suitable piece of napping furniture for that spot.
A couch would have worked just as well, but I really didn't know how to make a couch, or at least not the cushions part of it. So I decided to build a daybed. I wanted this daybed to be suitable as a couch as well. To make it usable as a couch, I wanted the mattress to be narrower than a regular twin size bed, but where to find a narrow mattress? Asking at mattress stores proved fruitless.
But eventually I found 'Waterloo bedding', which is sort of a factory outlet. They make mattresses for other companies. When I asked them what sizes they had, the responded with 'what size do you want us to make'. Puzzled, I asked further. The surcharge for nonstandard sizes was only 10%. Even with the surcharge, the price was still much less than from a mattress store! So I ordered a custom mattress for my daybed project. Lesson learned: Avoid mattress stores if you can!
Another alternative, that I hadn't thought of at the time would have been to buy a foam mattress, and cut it to size.
The design I came up with was one that allowed me to maximize the use of the
Mortising machine
which I built earlier that year.
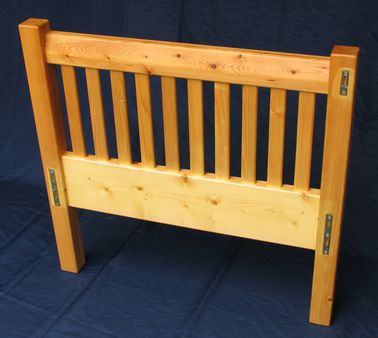
So I decided that the ends and sides would consist of lots of vertical slats, each of which would be mortised into the rails above and below. The edges of the 1/2" thick slats I rounded with a 1/4" router bit, so that the profile of the slat would fit exactly into the elongated holes my mortising machine would cut with a 1/2" router bit.
While I'm really happy with the result, I wouldn't build it this way again. The problem with this approach is that when gluing the pieces together, especially for the back rail, all the slats have to be put into the holes with glue, and the frame pressed together all at once. There's only so much time before the glue starts to set, and with 26 slats in the back rail, it was very difficult getting them all to line up and into their respective holes. I did work up quite a sweat and pounding it pretty hard to get it together with the glue already starting to set.
A much better approach to doing slats like this is to just cut a dado in the edge of the wood, notch the slats so the ends of the slats are square, and put them in the slot,,with blocks of wood in between to fill the spaces - see illustrations below. My daybed plans also use this approach.
| 
|
the frame consists of two end pieces, with bed rail clips screwed into them, that the back rail and front rail simply hook into. This makes the whole thing really easy to disassemble. I used mortise ant tenon joints to join the end pieces together. But strength is really not that critical for this part, so doweling would work just as well.
I used bed rail clips to put the whole thing together, so the piece of furniture would be easy to disassemble and move.
The best place I know of to get these bed rail clips is the Home Depot. For the clip at the top, I needed a relatively short clip because the rail was not very wide. While clips of different sizes are available, I wanted one that very much matched the clips I was using for the rails at the bottom, just shorter. The solution I ended up going for was to just buy the same size clips for the top, and then cutting them off with a hacksaw, so that the clip with two hooks turned into a clip with just one hook. I had to throw away the other half of each clip, because I wanted two screw holes in the part that I kept.
In a later bed project I just used screws at an angle to hold the frame together, very similar to pocket holes.
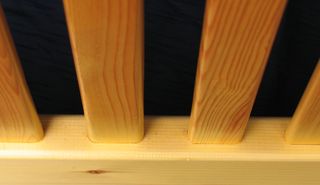
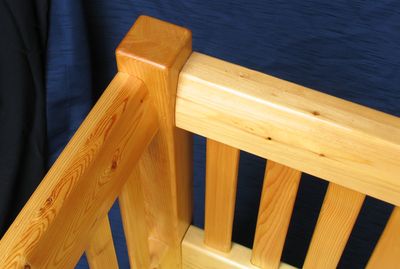 To make the daybed more suitable as a couch, I beveled the top rails outward slightly, as shown at left.
This makes it more comfortable to lean against the top rail. Even with pillows piled against the back
and sides of the bed, one still ends up leaning against the top rail quite often.
I had to laminate two pieces of spruce lumber together to make the top rail thick enough that I could
bevel it and still have enough left over for strength. I wanted the top rail to be a bit wider anyway,
To make the daybed more suitable as a couch, I beveled the top rails outward slightly, as shown at left.
This makes it more comfortable to lean against the top rail. Even with pillows piled against the back
and sides of the bed, one still ends up leaning against the top rail quite often.
I had to laminate two pieces of spruce lumber together to make the top rail thick enough that I could
bevel it and still have enough left over for strength. I wanted the top rail to be a bit wider anyway,
 because the one on the back its fairly long, and I didn't want it to bow too much from being leaned against.
Note that I didn't do anything about beveling the post in any way. Its actually quite difficult
to lean into the corner to actually have the post touch your back, so its not an issue.
because the one on the back its fairly long, and I didn't want it to bow too much from being leaned against.
Note that I didn't do anything about beveling the post in any way. Its actually quite difficult
to lean into the corner to actually have the post touch your back, so its not an issue.
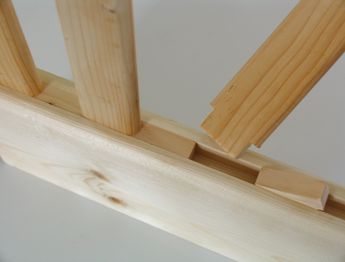
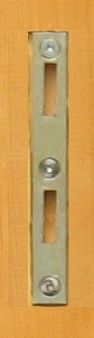
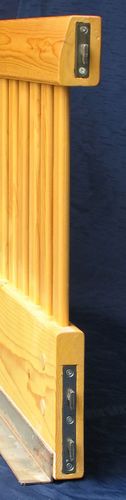
Note that because the top back rail is thicker, and has a bevel on it, the bed rail clip is mounted
at a slight offset from center with respect to the bottom rail - see image at right.

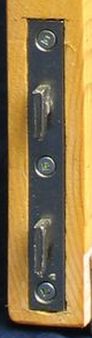
I put some pieces of oak doweling through the rails for the screws holding the bed rail clips to
get a better hold (see image at left). I did this with the front and back rails, although, in retrospect, for the
back rails this was completely unnecessary, as the wide spacing between the top bed rail clip and
the bottom one prevents any sort of substantial leverage that might occur to pull on the bed rail clips.
For the rail along the front though, I feel that this is quite important. If one leans against the
side of the daybed (and I do quite often) there's quite a bit of leverage on the bed rail clip,
so having the screws thread through the cross grain of the oak dowel really helps.
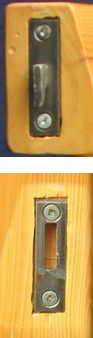
I used angle iron from an old steel bed frame to support the slats that support the mattress.
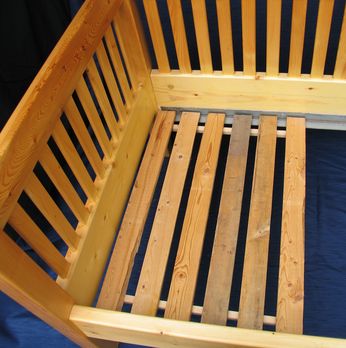 This was not part of my original plan. Originally, I just had a 1.5"x1.5" piece of spruce screwed to
the side of the rails near the bottom to support the slats. But once I put the mattress in the frame, I found that the
top of the mattress came out higher than I wanted it - I had underestimated the thickness of the mattress with
mattress pad on it. Really I should have made the rails wider, but it was too late on this frame. So I replaced
the wooden rails with pieces of angle iron, which allowed me to rest the slats about 3 cm lower than
before.
In the daybed plans I drew afterwards, I made the rails a little wider, so
this kludge would not be necessary.
This was not part of my original plan. Originally, I just had a 1.5"x1.5" piece of spruce screwed to
the side of the rails near the bottom to support the slats. But once I put the mattress in the frame, I found that the
top of the mattress came out higher than I wanted it - I had underestimated the thickness of the mattress with
mattress pad on it. Really I should have made the rails wider, but it was too late on this frame. So I replaced
the wooden rails with pieces of angle iron, which allowed me to rest the slats about 3 cm lower than
before.
In the daybed plans I drew afterwards, I made the rails a little wider, so
this kludge would not be necessary.
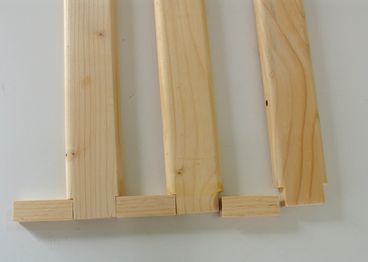
To space the slats evenly, I nailed them onto some thin pieces of wood. As such, the slats come out
in three sections. The image above shows one of the sections in place.
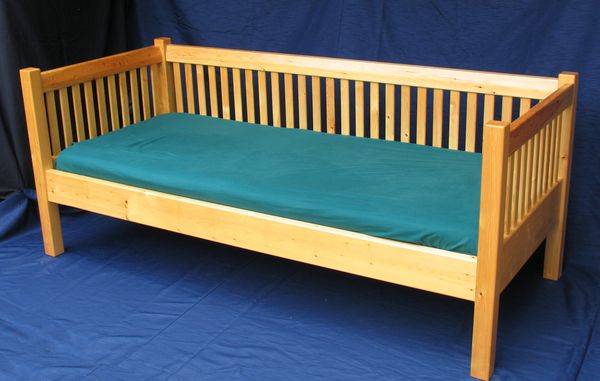
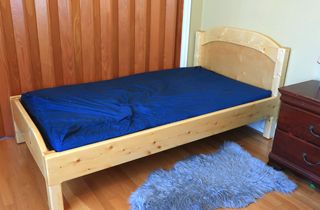
 I built this daybed back in 1998, before digital cameras, and just before I had a website. Hence no original
photos of the actual construction. But I have been using this daybed for years now, and it has withstood
the test of time. I stack pillows against the sides and back of it, so it makes a nice couch.
I built this daybed back in 1998, before digital cameras, and just before I had a website. Hence no original
photos of the actual construction. But I have been using this daybed for years now, and it has withstood
the test of time. I stack pillows against the sides and back of it, so it makes a nice couch.
I usually use it with my Wheely desk It makes for a very comfortable combination for using the computer.
 Building a bed from 2x4 lumber
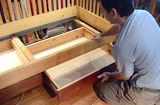 Drawers for the daybed
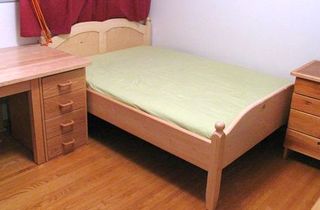 Building a bed frame
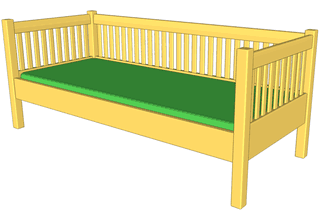 Daybed plans
 Paitio bench
 Dresser from junk from the garbage
 Seven drawer dresser
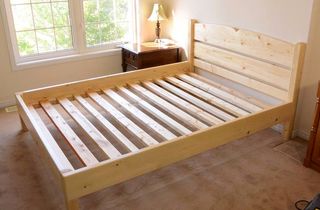 Another queen size bed from 2x4 lumber