|
|
Although it was labour intensive, I was reasonably satisfied with the results. I wouldn't do a whole kitchen this way, but I figured it might be good for a project.
 I figured this approach would be nice for a headboard for a bed, and I wanted to build a new
bed frame anyway. So I bought the lumber and started working away at it.
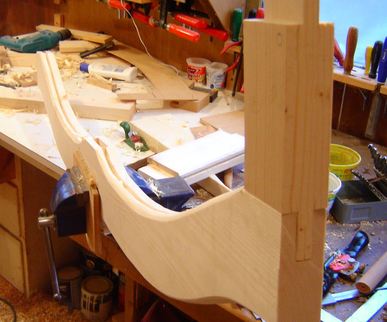
I decided to go with a non-square shape for the panels. I first cut out the basic shape
with a bandsaw, and then put it together with square mortise and tenon joints.
I figured this approach would be nice for a headboard for a bed, and I wanted to build a new
bed frame anyway. So I bought the lumber and started working away at it.
I decided to go with a non-square shape for the panels. I first cut out the basic shape
with a bandsaw, and then put it together with square mortise and tenon joints.
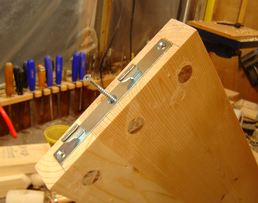
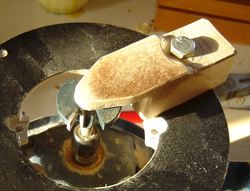 For the panel, I decided to use some very nice 5-ply 5/16 inch birch plywood that came from a discarded
shipping crate. My cheap router bit set came with a T slot cutter of the same thickness, but
that bit had no guide roller.
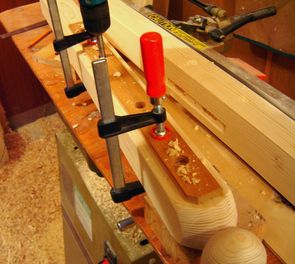
So I made a fixed guide, and bolted that to the router base - see image above right.
That worked surprisingly well.
For the panel, I decided to use some very nice 5-ply 5/16 inch birch plywood that came from a discarded
shipping crate. My cheap router bit set came with a T slot cutter of the same thickness, but
that bit had no guide roller.
So I made a fixed guide, and bolted that to the router base - see image above right.
That worked surprisingly well.
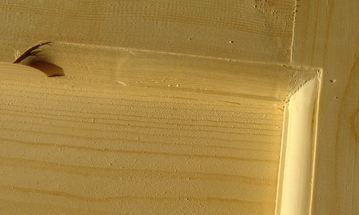
After I cut the groove into the frame for the panel, I realized that I could no longer use the
guide roller on my quarter round bit, because I had cut a grove right where the guide roller
would press against the wood. Oops! I could have made another wooden guide, like I did with
the other router bit. But I had been thinking of giving the whole bed a bit more of a hand-carved
look, so I just carved an approximation of
the quarter round profile with a draw knife and a spoke shave.
 I used the same approach to carve the outside edge of the headboard, especially because I didn't
have quite the right shape of router bit for the profile I wanted.
I used the same approach to carve the outside edge of the headboard, especially because I didn't
have quite the right shape of router bit for the profile I wanted.
The next step was to make the posts for the bed. These I glued together out of two pieces of construction lumber to get the right thickness. Two 2x4's would do the trick, but I have found that I can get much better quality lumber by buying 2x10x8 pieces. These, by necessity, have to come from larger trees, and tend to be higher quality. The price per unit of lumber is of course more for these, but using construction lumber for furniture is in general quite cheap, so it doesn't add much to the cost.
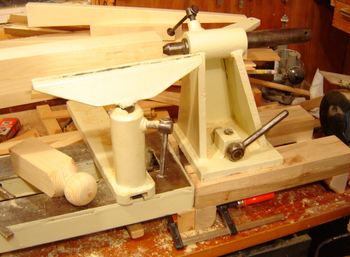
For the tops of the posts, I decided on a ball shaped top. I wanted this to be an integral part of the posts, so this required turning the whole posts on my lathe. Now, my lathe is quite big and heavy, but the lathe was not quite long enough to mount the posts for the headboard side of the bed. It is however very low tech, so it was relatively easy to build an extension for the tail stock of it out of wood.
 I left a little bit of wood past the knob, which I cut off afterwards. That way, the hole I had
to drill for the dead center to turn in, and the oil I had to put on it to let it run smooth, were
cut away.
I left a little bit of wood past the knob, which I cut off afterwards. That way, the hole I had
to drill for the dead center to turn in, and the oil I had to put on it to let it run smooth, were
cut away.
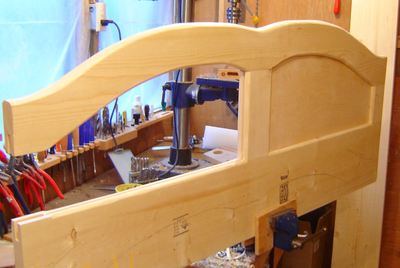
The next step was to attach the headboard to the posts. Normally, for this type of joint, I
would use a mortise and tenon joint. But, I found myself unable to cut the
tenons at the ends of the headboard, because I didn't have enough ceiling height to put the
headboard pieces vertically into my tenon jig on the table saw.
Strength for this joint wasn't that critical anyway, so I just decided to join it with dowels.
To get the dowel holes aligned precisely, I had the idea of making a drill guilde out of a piece of hardwood, and just drilling through that to get repeatable hole alignment.
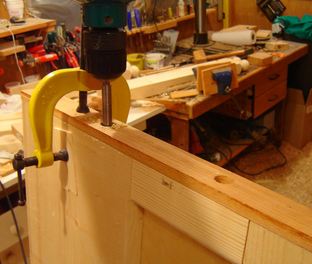
This worked well in terms of getting the holes aligned precisely, but with a catch. I couldn't fit the headboard in my drill press, so I just drilled the holes with a hand drill. I'm usually pretty good at judging right angles, but its hard to do while also pushing down really hard on a hand drill. For two of the holes, I was about five degrees off in one axis. I compensated for this by sanding a taper on one side of the dowels for those holes, and just pounding it with a rubber mallet when I attached the headboard to the posts. I have since then built a horizontal boring jig to avoid this problem.
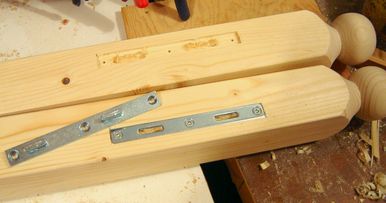
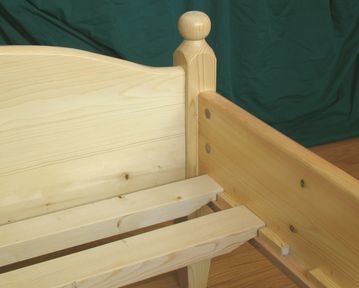
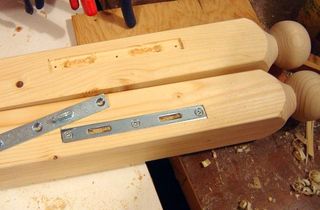
This being a "proper" wooden bed, it has bed rails on the sides of the mattress. I attached these using bed rail hooks, so the whole bed can be taken apart easily. I bought these at The Home Depot. The Home Depot calls them "bed rail clips", but you will have more success on the internet searching for "bed rail hooks". Last time I checked, The Home Depot only carried the 4" bed rail hooks, which would be too small for this bed. You can however get these from Rockler.com. To help hold the screws in the end grain, I put some dowels through the bed rail so that the screws holding the bed rail clips actually have some cross-grain hardwood to thread into for a better grip. These are blind holes, so they can only be seen from the mattress side when the bed is assembled - see image at right.
The side rails also have a ledge on the inside to hold the slats (not yet mounted in the picture at right). The slats essentially are supported by the bed rails.
The foot board for the most part is the same as the head board, but shorter, less curved, and without any panels in it.
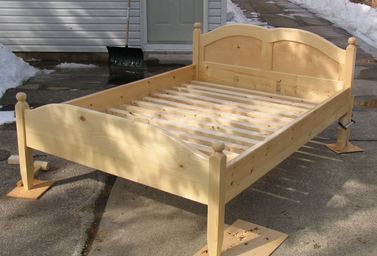 The bed was too large for me to be able to assemble it in
my workshop, so I didn't actually
assemble it completely until after it was all done and varnished. The first time I put it together
was in my driveway. After I took this photo, I shortened the legs a little bit.
The bed was too large for me to be able to assemble it in
my workshop, so I didn't actually
assemble it completely until after it was all done and varnished. The first time I put it together
was in my driveway. After I took this photo, I shortened the legs a little bit.
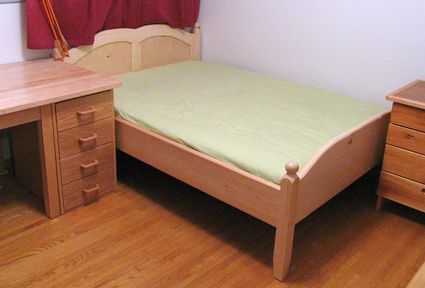
The next test assembly was in my living room with the mattress in it. At that point I
decided to taper the ends of the slats so they would sit a bit further down in the bed
frame. This lowered the mattress down by about a centimeter. And then finally, I set it up
in my bedroom.
 More on making this bed
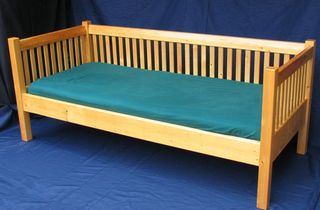 Daybed
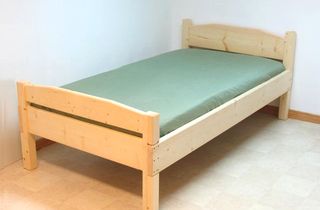 Bed from 2x4's
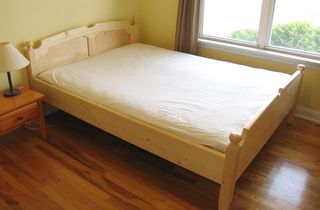 Queen size bed
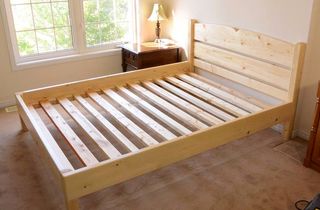 Simpler queen size bed