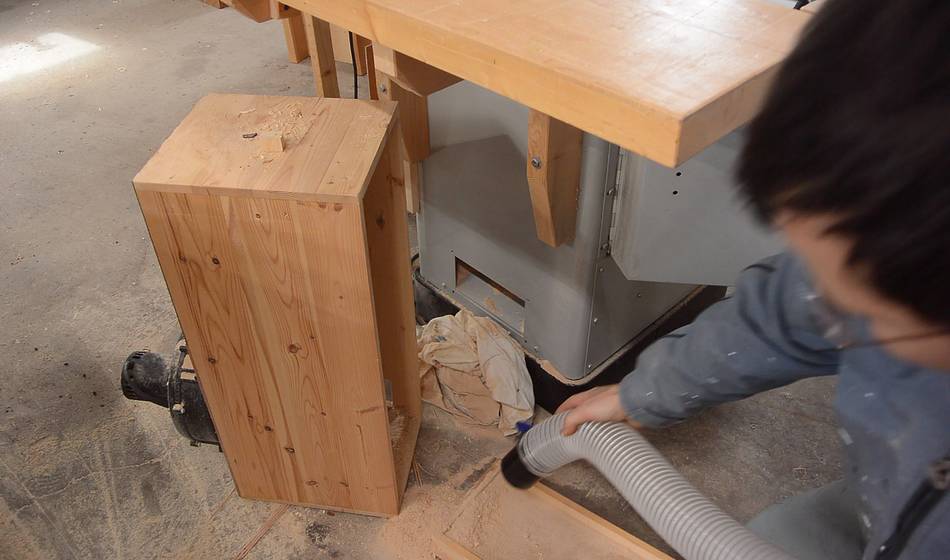
I made a mini dust collector
for my table saw in 2016. It was one of two with
a folded filter, which saves a lot of space. But I kept getting
problems with dust getting sucked through it, presumably past the filter.
It was just impossible to get a decent
seal all around a filter that's folded. You can see all the dust on the
blower (on the outlet side), so clearly dust made it through.
I already replaced the other folded filter dust collector in
this video.
So my idea was to build something more like
this dust collector which I'm using on my jointer. It works well and
has a decent amount of dust capacity.
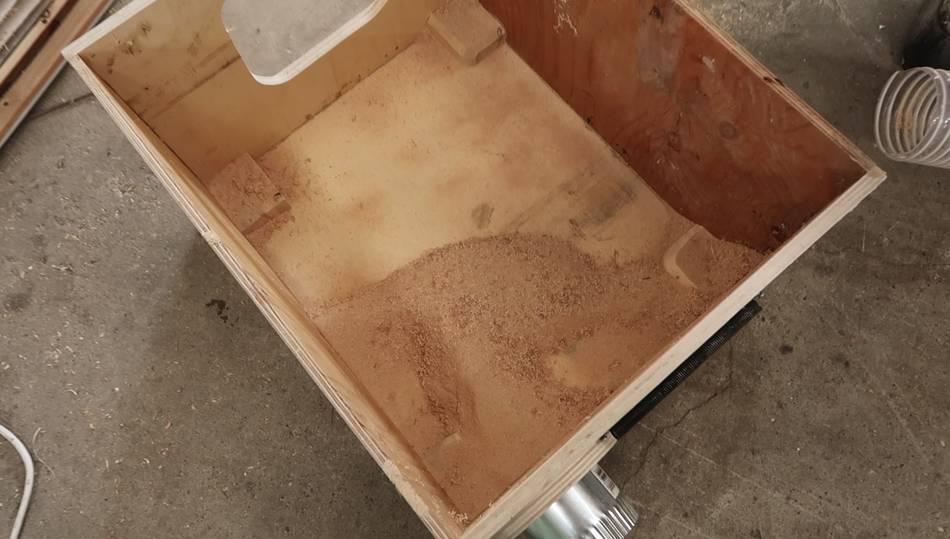
The way the mini dust collector worked was that the coarse dust accumulated
in the table saw, and I had to vacuum that out periodically with
another dust collector.
But with a bigger more powerful dust collector on the table saw,
I could just suck all the dust into the dust collector.
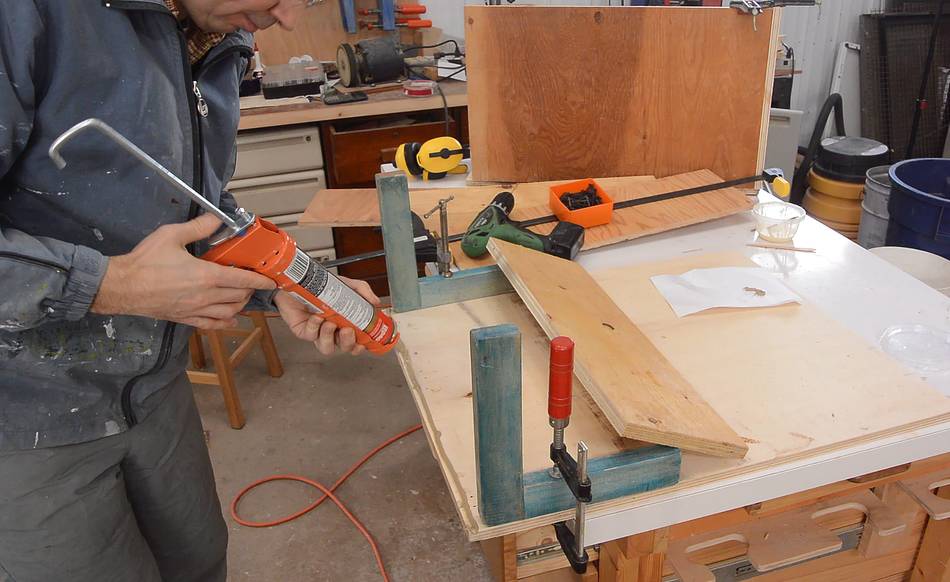
I used some really rough plywood scraps as material. I glued them together
with construction adhesive because it's thick and gooey and much
better at filling gaps. But it's very messy to work with. I don't understand
how John Heisz can stand to
work with the stuff
on all his projects.
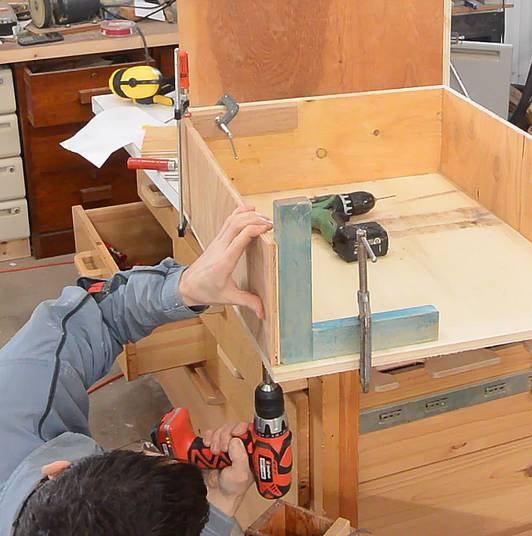
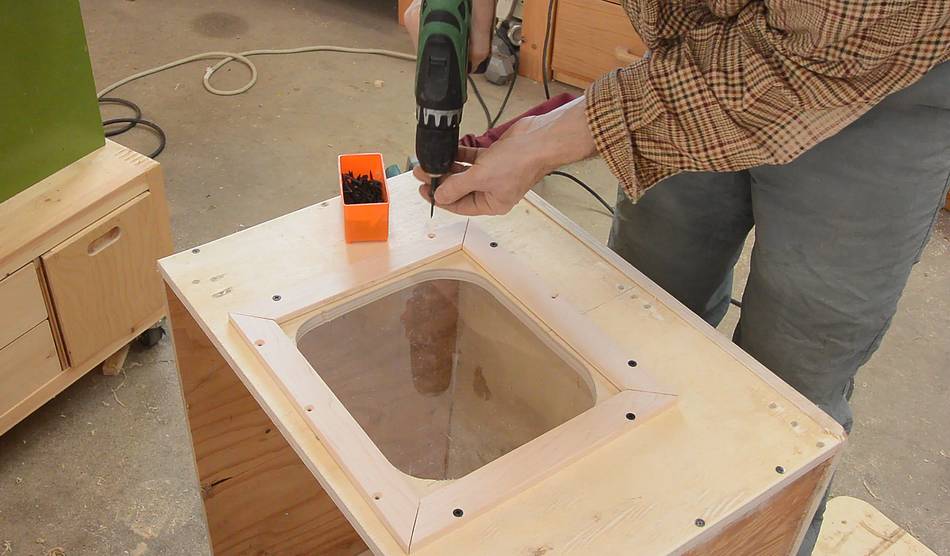
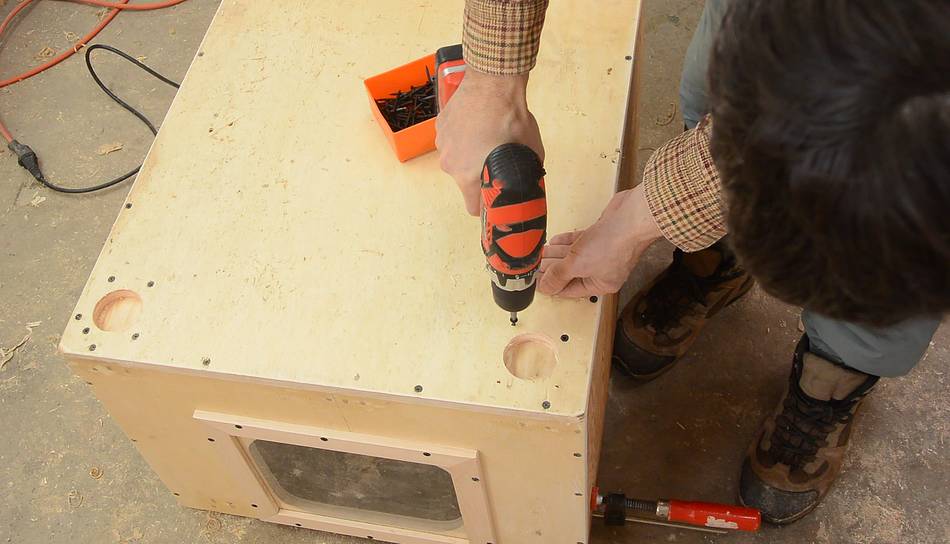
I also screwed it together along the corners, drilling pilot holes for each
screw to avoid splitting the plywood.
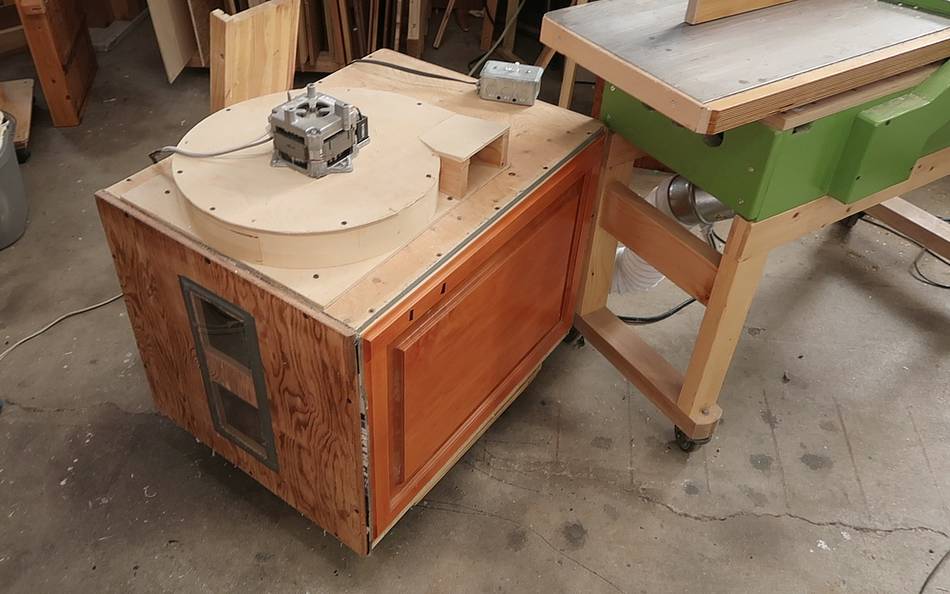
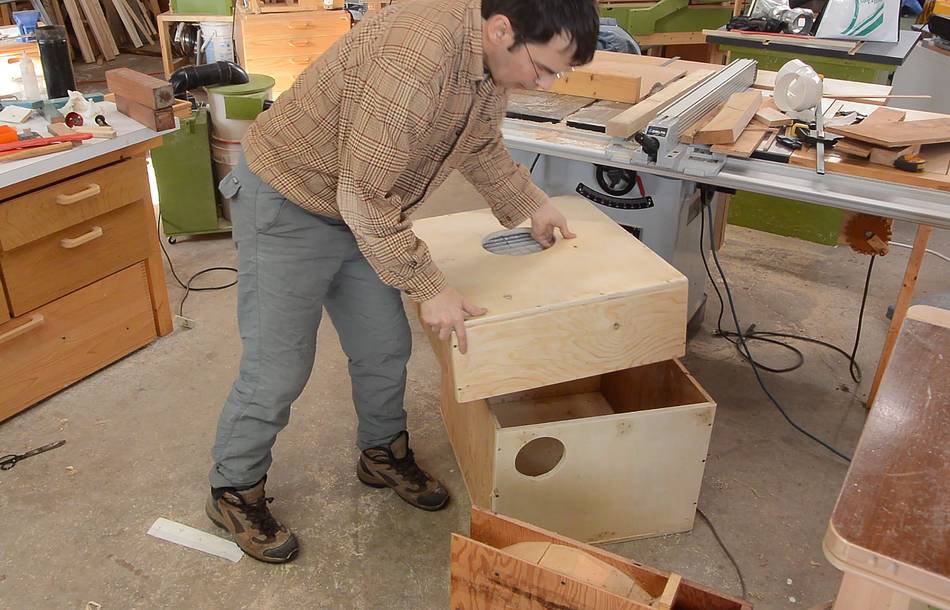
This one consists of two boxes that fit together at the edges like this.
It would have made more sense to build one box and then cut it in half,
but I was better able to make use of the smaller scraps of plywood by
building it as two halves.
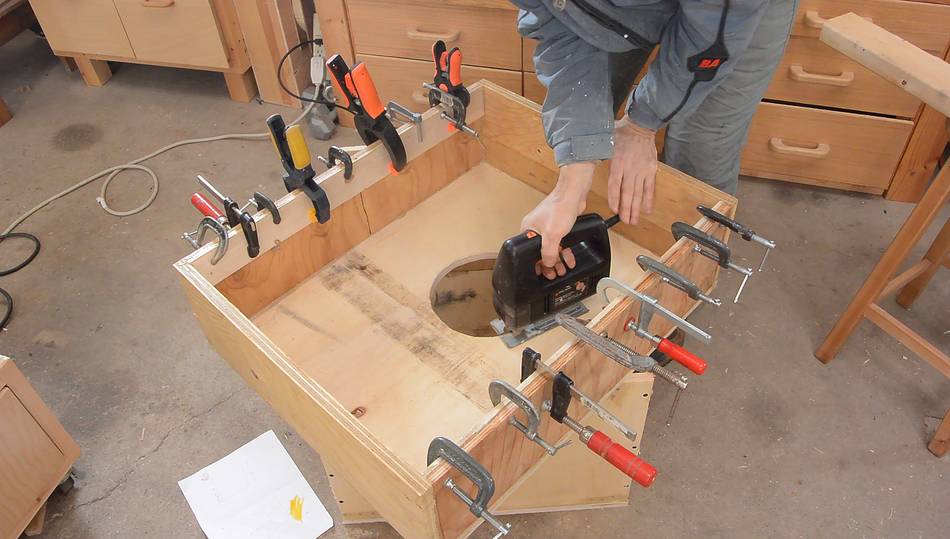
I glued some strips of wood to the inside edge of the top part to get a wider
edge, then cut the hole for the air outlet.
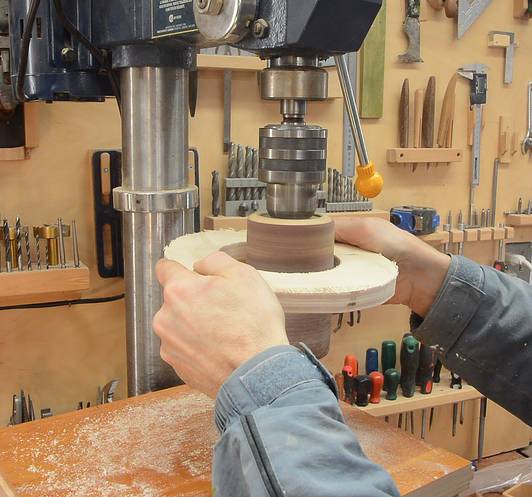
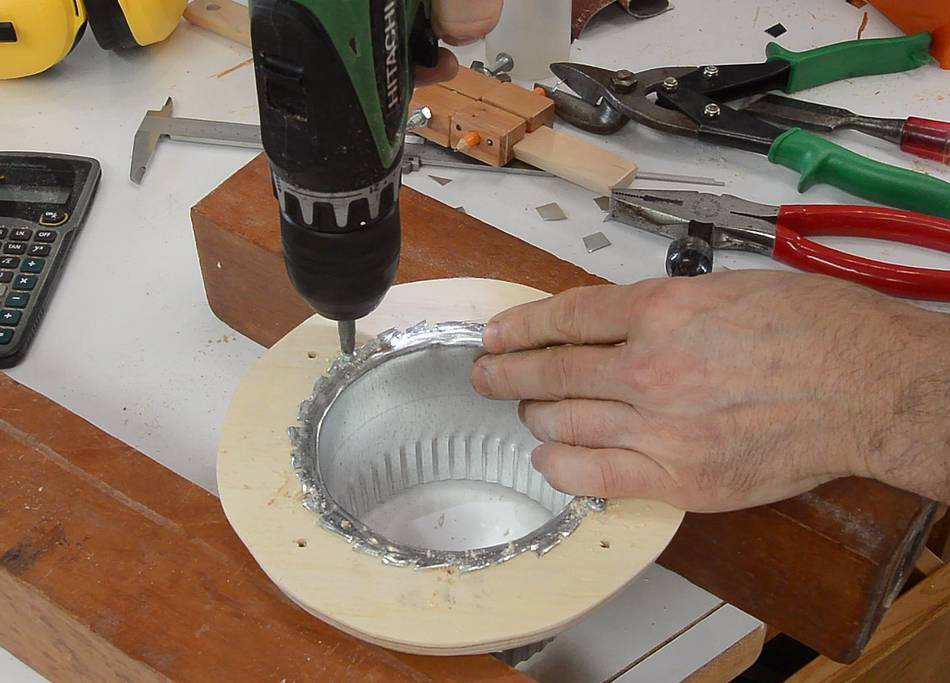
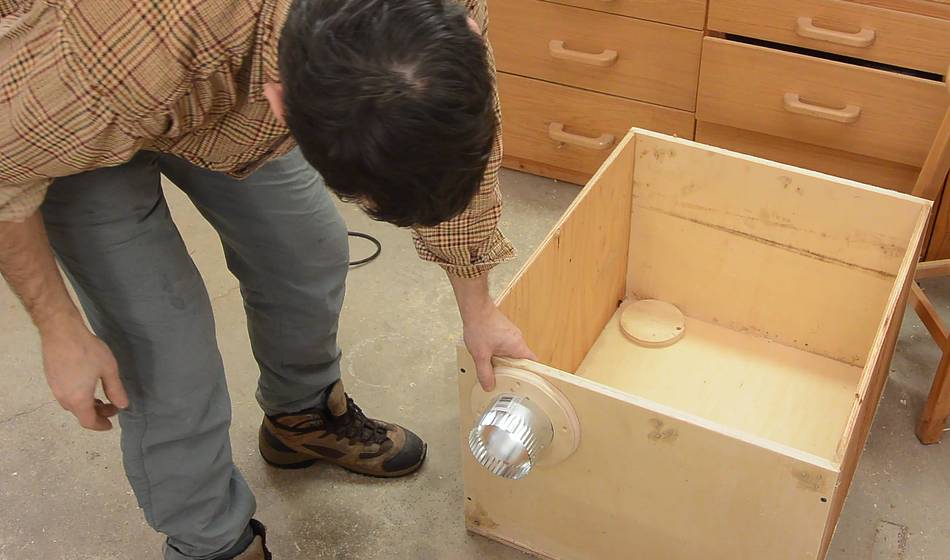
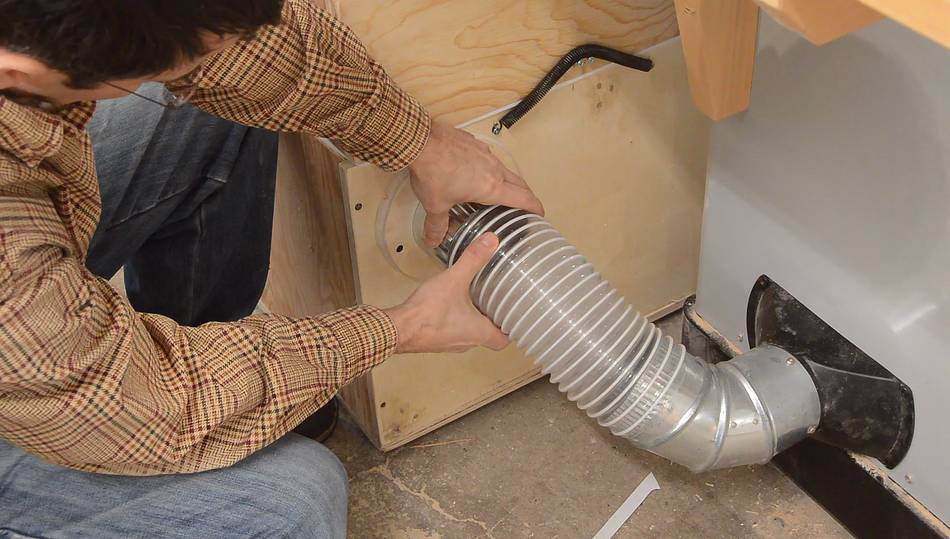
I used the circular scrap of wood I cut out of the top to make the flange for the
inlet hose connection. I cut the hole with a drill press circle cutter.
I cut the hole a fraction of a millimeter too small, so I sanded the inside
edges with a drill press spindle sander attachment.
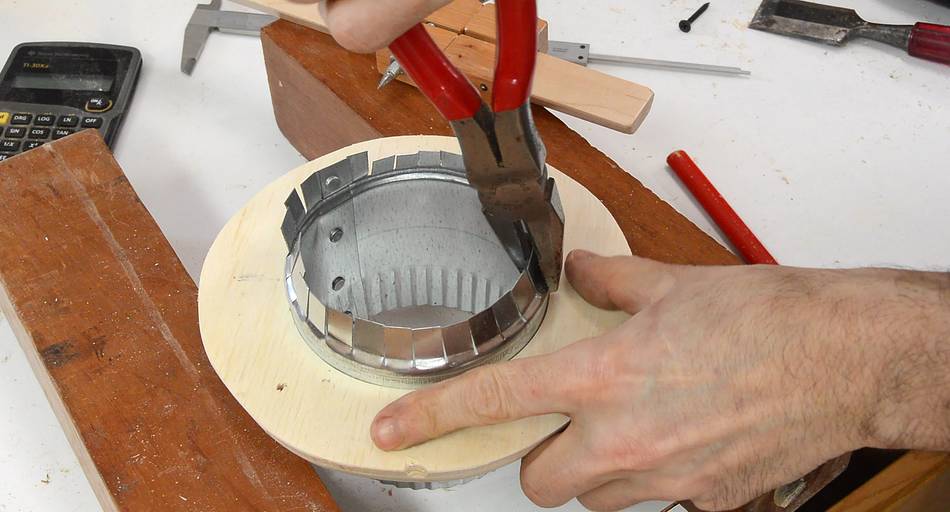
I then pressed a piece of ductwork into the hole...
... then bent over the edges, shortened them, and screwed it on.
There are plastic flanges for this purpose that can be bought,
but I didn't have one handy, and I didn't want to spend an hour of my
time driving to get one or waiting for it to be shipped to me.
Checking the fit. But I left mounting this flange until later so
it wouldn't get in the way while I worked on the rest of this box.
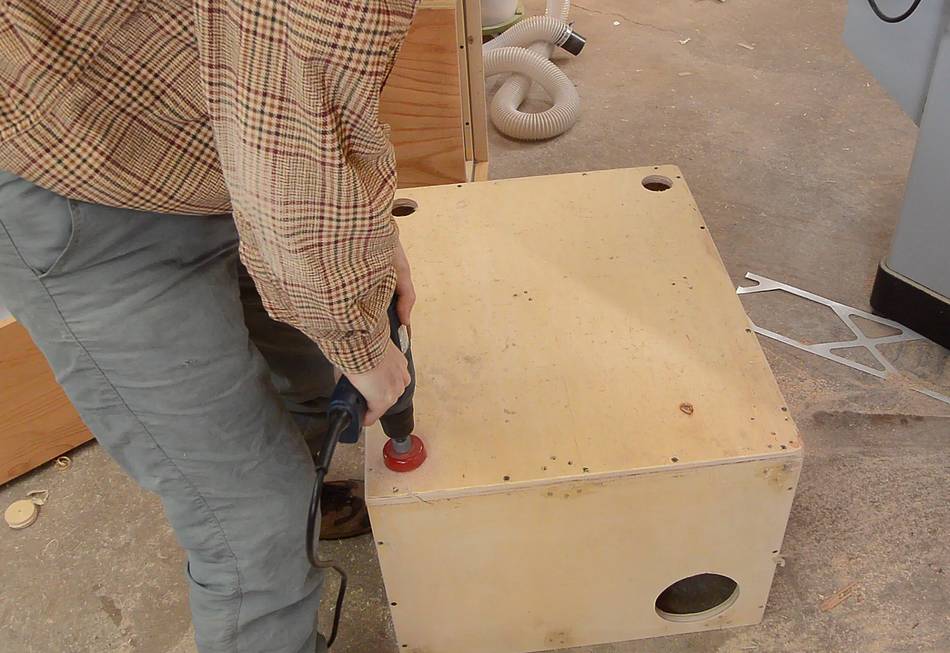
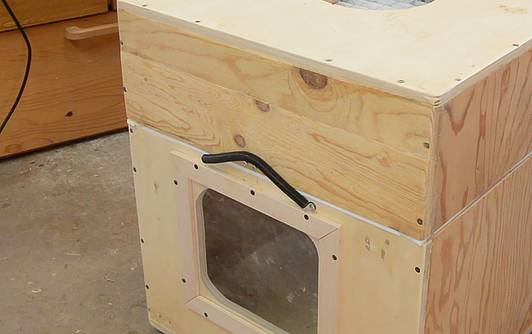
I used a scrap of plexiglass to make a window for the opposite side of the
box so I will be able to see how much dust is in there.
The piece of plexiglass is held in place with four pieces of wood, which
are screwed to the box. They have a shallow rabbet cut into
them to accommodate the plexiglass.
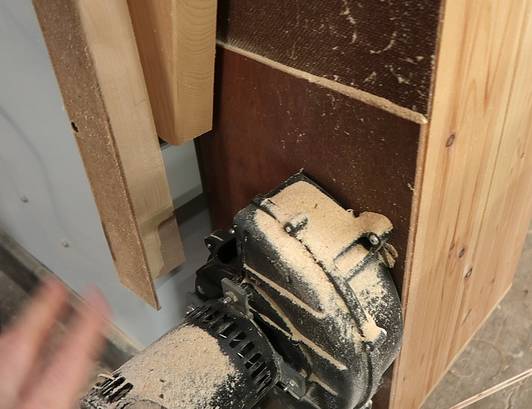
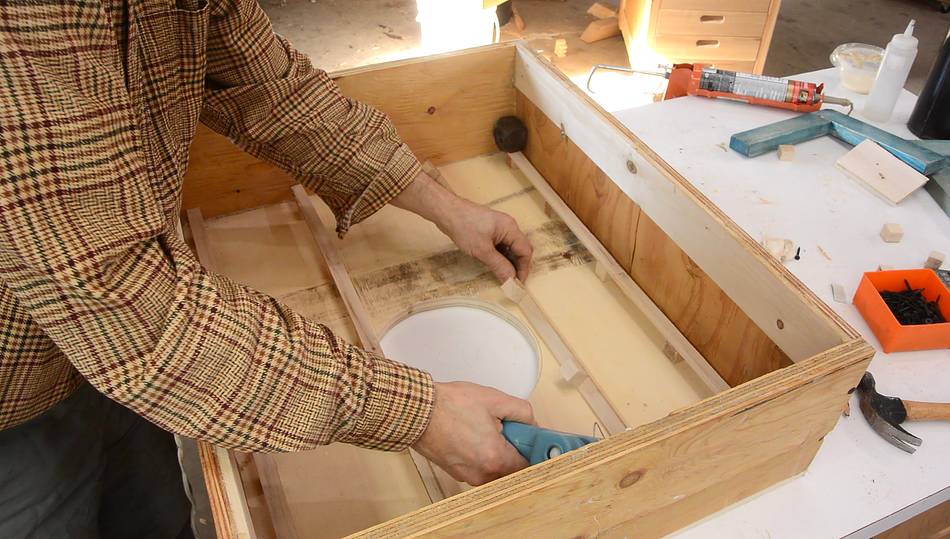
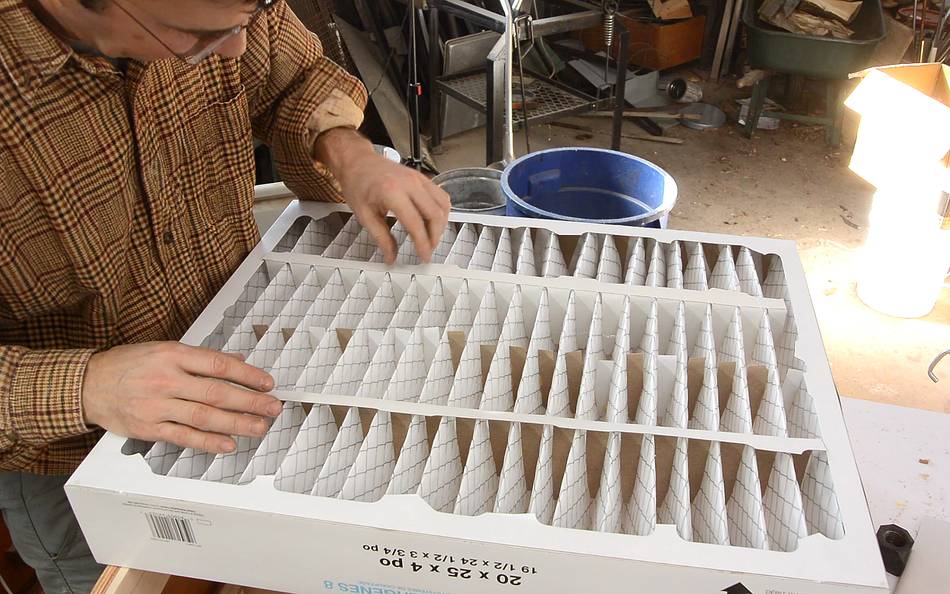
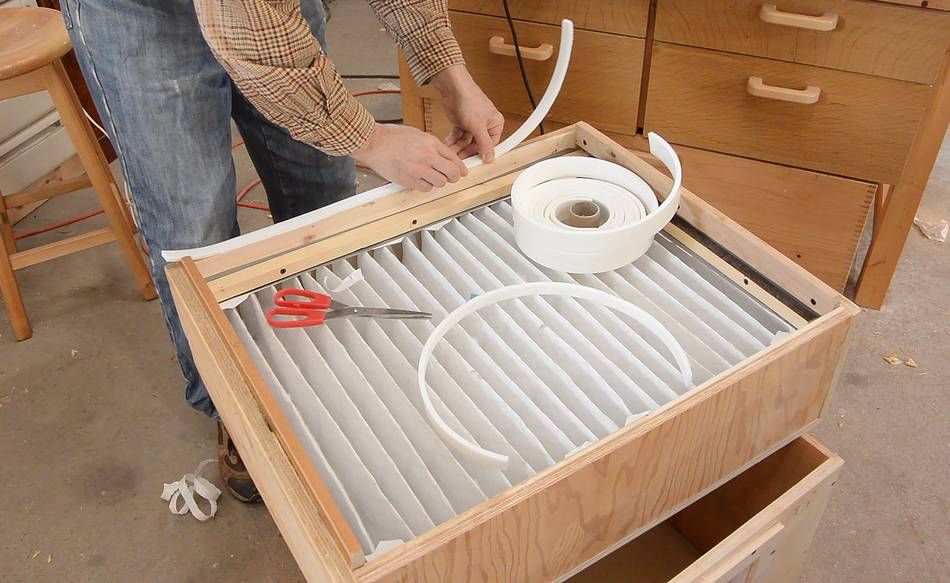
I added some offset supports for the filter. I'm using a furnace filter
which is not designed for the sort of suction that my blower will produce.
The supports hold the filter about 2 cm from the back to allow
for airflow.
I also added a lot of spacers between the pleats on the outlet side to
prevent the filter pleats from collapsing from the suction.
I also discovered that the pleats weren't fully attached to the side
in one corner, so I used some hot glue to glue those on.
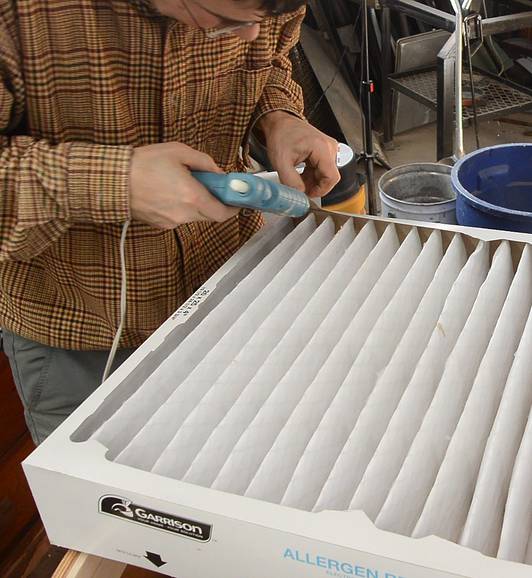
The filter is sealed in with duct tape to prevent blow-by.
But from experience, I know that duct tape is not sufficient for holding
the filter in place, so I added four pieces of wood against the duct
tape to hold the filter in.
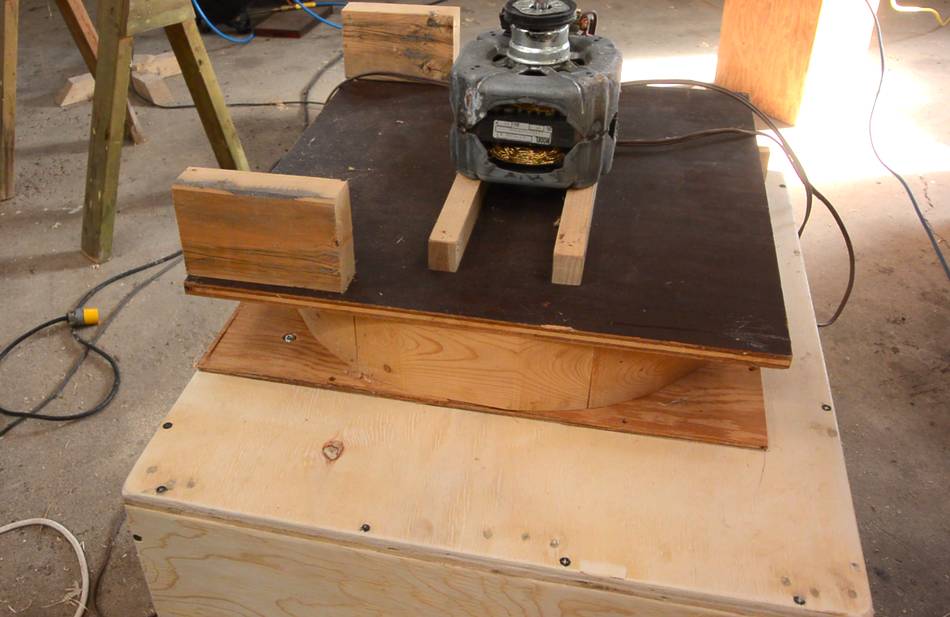
It only uses a 1750 RPM clothes dryer motor, so it
doesn't have that much suction for its size. A 3500 RPM motor
would produce four times as much suction for the same size
blower.
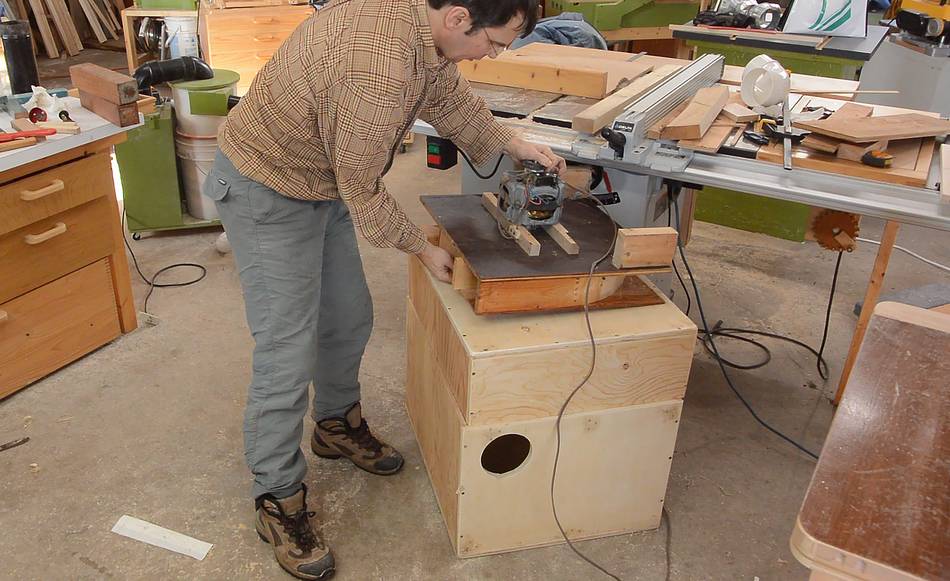
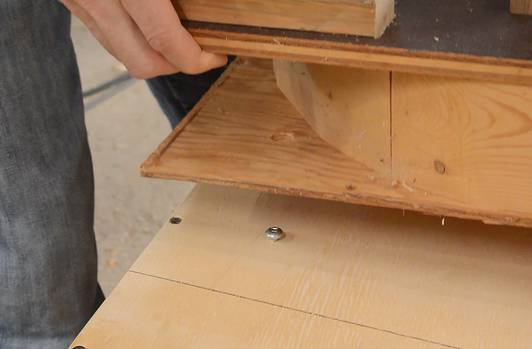
Making sure the dust collector doesn't come up any higher than the
table saw. I have about 3 cm to spare. But I wanted to add wheels
to the bottom of it.
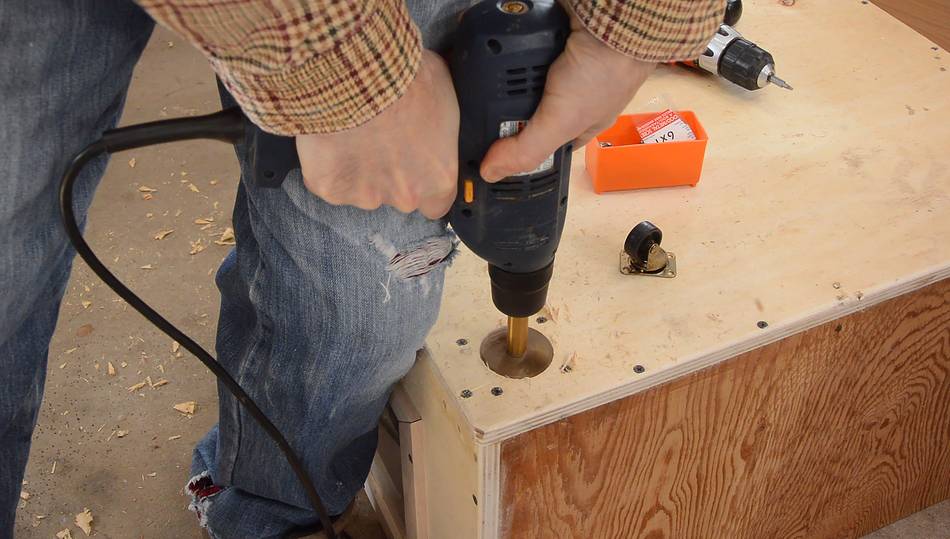
So I had to recess the casters into the bottom. First I cut some 2 1/4"
holes in the bottom with a hole saw.
Then glued some blocks in the bottom where the holes are.
I clamped a piece of wood on at an angle to awkwardly hold the
block in place...
... while I screwed them on from the outside (bottom side).
Then drilling the holes a bit deeper to recess the wheels
further.
And screwing the casters into the holes. The holes are just big enough
to allow these small casters to swivel without hitting the wood.
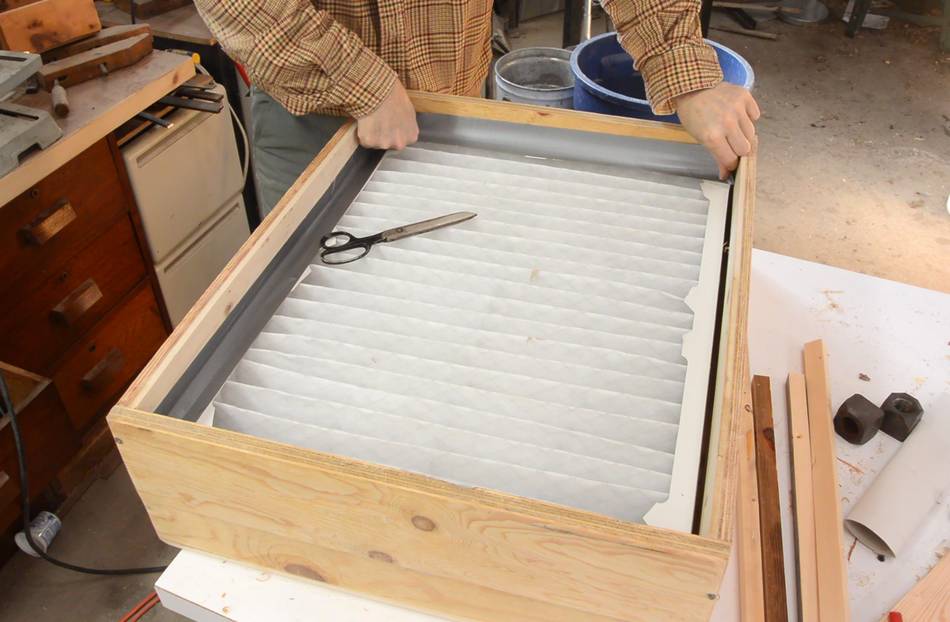
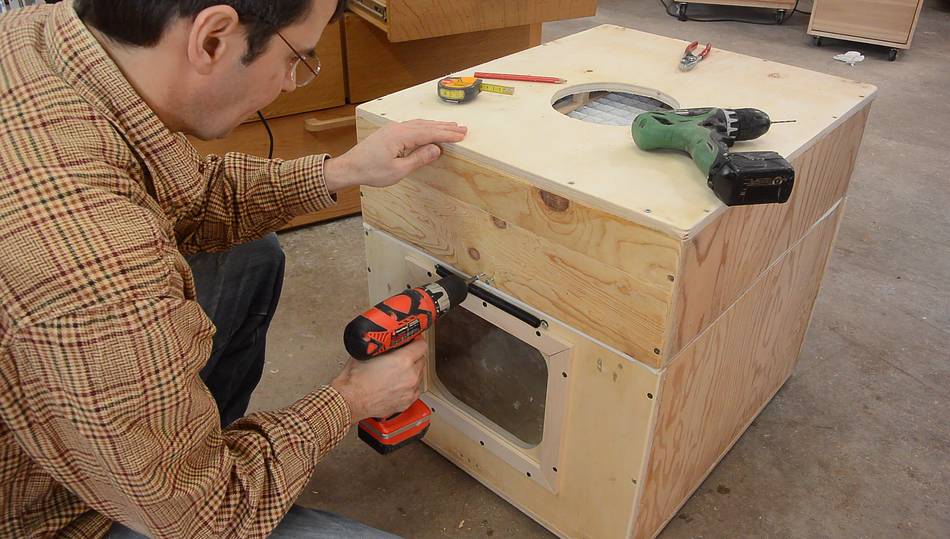
Back to working on the top, I added a piece of wood to protrude into
the bottom to help keep the top aligned with the bottom.
Then adding some weather stripping to the edge to help seal it against
the bottom.
The weather stripping didn't stick very well to the rough wood surface.
It might have helped to sand and varnish the wood first.
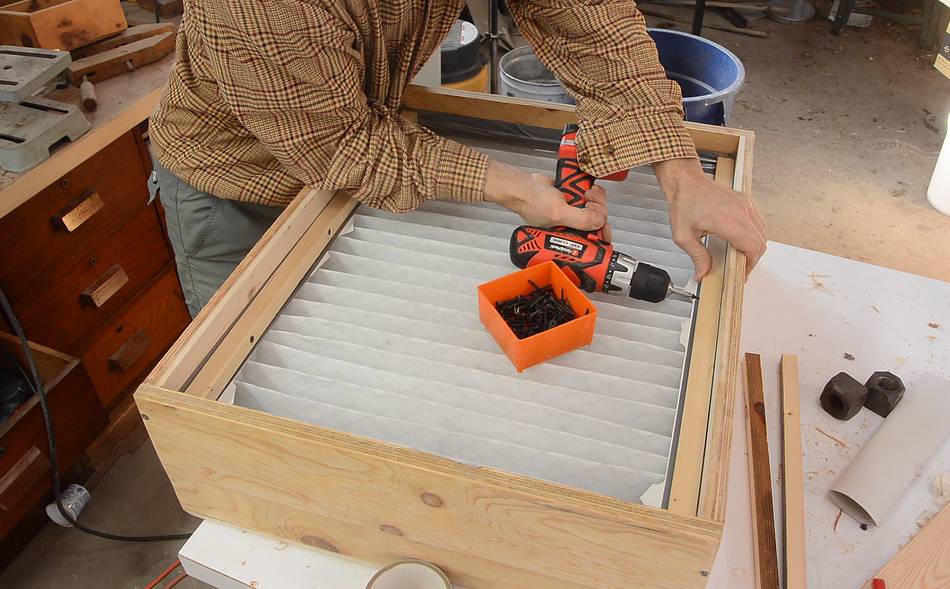
I was hoping gravity would be enough to seal the box closed, but it wasn't.
So I screwed a long spring to the bottom side, and two screws side-by-side
to the top part, so the spring can be pulled up and over the
screws to help press the top on.
The way this one opens up, once I take the top off, I can just dump
out the box. This will be more convenient than how I open up
this one. That said, I go months
between emptying the other one, and I expect the interval to be even
longer with this one.
Connecting it to the table saw. I was going to use a second elbow,
but then figured it was better without. I should have cut a longer
piece of hose.
Then running it while pushing some of the sawdust that was in the saw towards
the outlet. So far so good.
I assumed that dust from the table saw would be all very short chips
like most table saw dust is, but for some shallow rip cuts, the saw
does make longer shavings, which are liable to get caught and stuck
between the filter pleats.
So I added some mosquito netting in front of the filter. I'm not sure if this
is a good idea or not, but worth a try. The risk is that the screen itself
will plug up.
The blower just rests on the box by gravity. I added two pan-head screws
to the top, with corresponding holes in the blower to keep it aligned.
When I need to empty it, I'll just lift off the blower first.
It was tempting to add weather stripping to help seal the blower against the
case, but that would have added another 4 mm to the height of the dust
collector, and the height was already within a few millimeters of the
table saw table.
You can see two blocks of wood attached to the top of the dust collector.
These are to allow the blower to stand vertically on the floor without tipping
over for when I experimeted with using it as a
welding smoke extractor.
I figured I might as well leave these on. I might make temporary use of that
blower for other purposes from time to time.
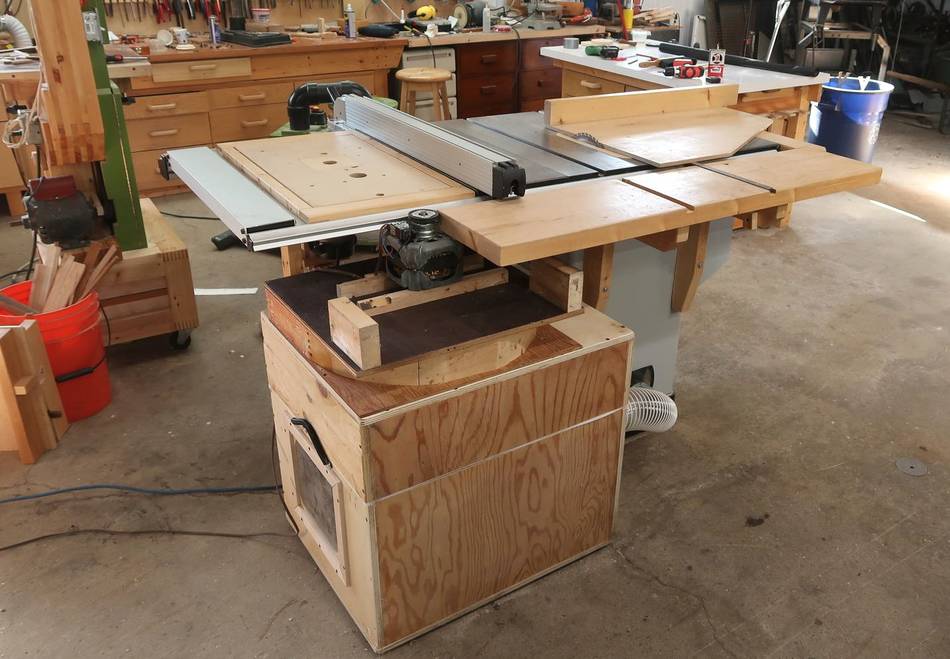
And here it is behind the table saw. I usually use my
homemade tablesaw as
an outfeed table.
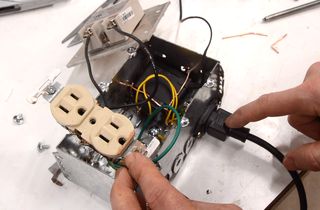
I also made a relay box to
automatically start this dust collector when
I turned on the table saw. I couldn't just wire it directly into the main
switch of the saw because the blower runs on 120 volts but the saw runs
on 240 volts.
I will get the usual many suggestions that I should use a cyclone, but
cyclones take up a lot of space, have a lot of pressure drop, and are
a lot of work to make. With the relatively low suction of this blower,
and height restrictions I'm facing here, a cyclone wouldn't make much
sense.
Update January 2020
We moved in 2018, less than six months after I built the dust collector.
In the new basement workshop,
I ended up putting this dust collector
on the jointer. Partly becauase the dust collector I previously had on the
jointer fit best for my old rockwell/beaver table saw, and I put my
cheap dust collector
on my Delta hybrid saw instead. This dust collector works out well
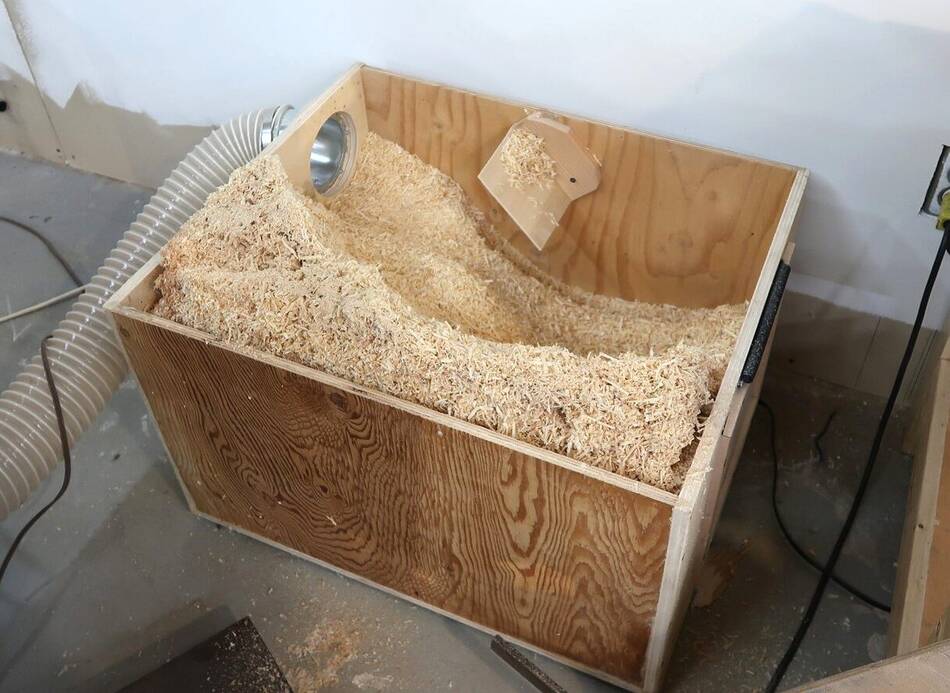
for the jointer because it can hold a lot of chips and is easy to empty.
Also, the jointer makes a lot of coarse chips, and the bug screen keeps
those from clogging up the filter. But the jointer also makes quite a lot of
very fine dust, which the filter catches.
At left is as full as I let it get. At that point, the window was all
covered in shavings, so I figured it was time to empty it out.
 I made a mini dust collector
for my table saw in 2016. It was one of two with
a folded filter, which saves a lot of space. But I kept getting
problems with dust getting sucked through it, presumably past the filter.
It was just impossible to get a decent
seal all around a filter that's folded. You can see all the dust on the
blower (on the outlet side), so clearly dust made it through.
I made a mini dust collector
for my table saw in 2016. It was one of two with
a folded filter, which saves a lot of space. But I kept getting
problems with dust getting sucked through it, presumably past the filter.
It was just impossible to get a decent
seal all around a filter that's folded. You can see all the dust on the
blower (on the outlet side), so clearly dust made it through.


 A relay box to turn on this dust collector
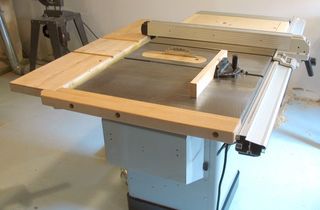 More about this table saw
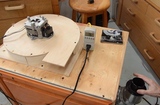 Previous box dust collector
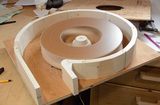 Building the blower for this dust collector
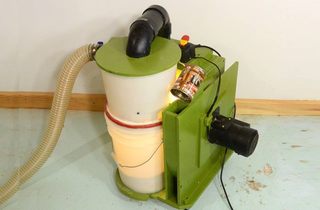 Homemade dust collector
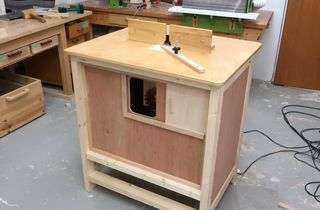 A router table that's its own dust collector
 Effect of hoses on shopvacs and dust collector air flow