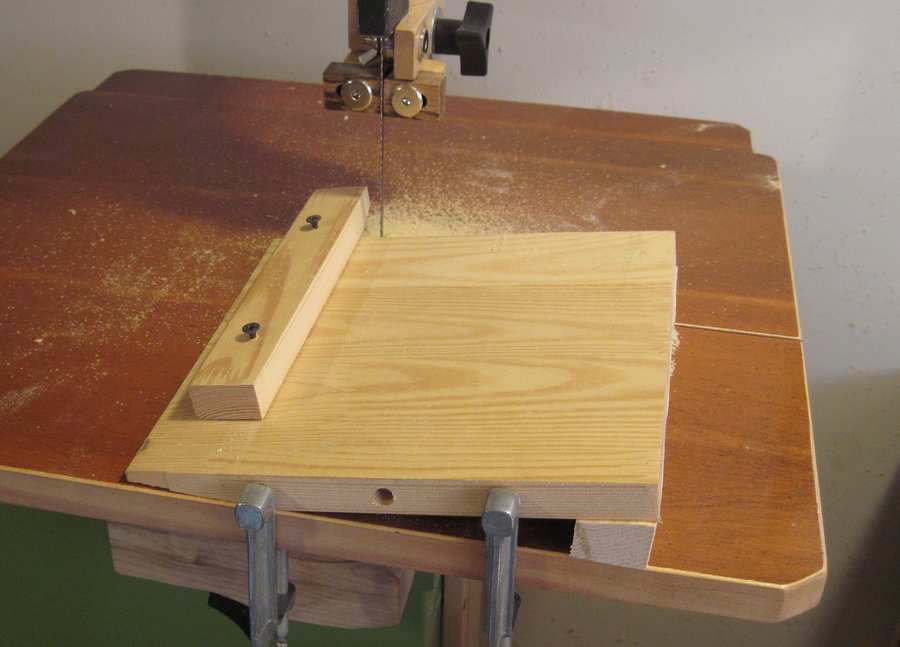
 Dovetail joints require angle cuts. Some bandsaws can tilt the table right and left, although that does require
removing the 90 degree stop. My homemade bandsaw table doesn't tilt left. So I made a jig to hold
the stock at an angle. But as you'll see later, this jig also comes in handy
later on for cleaning up the joints.
Dovetail joints require angle cuts. Some bandsaws can tilt the table right and left, although that does require
removing the 90 degree stop. My homemade bandsaw table doesn't tilt left. So I made a jig to hold
the stock at an angle. But as you'll see later, this jig also comes in handy
later on for cleaning up the joints.
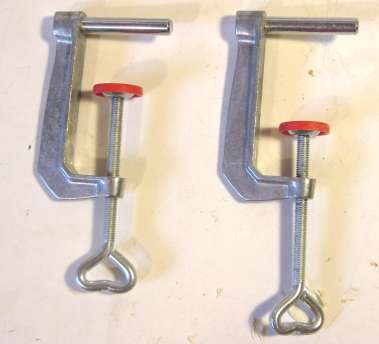 The jig is clamped onto my table using two of these funny "fence clamps" shown at right. They are good for
holding sacrificial fences and such. I originally bought them to use on my table saw, only to discover
that they don't open up far enough to reach over the saw's fence.
The jig is clamped onto my table using two of these funny "fence clamps" shown at right. They are good for
holding sacrificial fences and such. I originally bought them to use on my table saw, only to discover
that they don't open up far enough to reach over the saw's fence.
 My jig also conveniently serves as a fence. I set it up once for each cut, and then make the same cut
on each of my joints without having to mark them.
My jig also conveniently serves as a fence. I set it up once for each cut, and then make the same cut
on each of my joints without having to mark them.
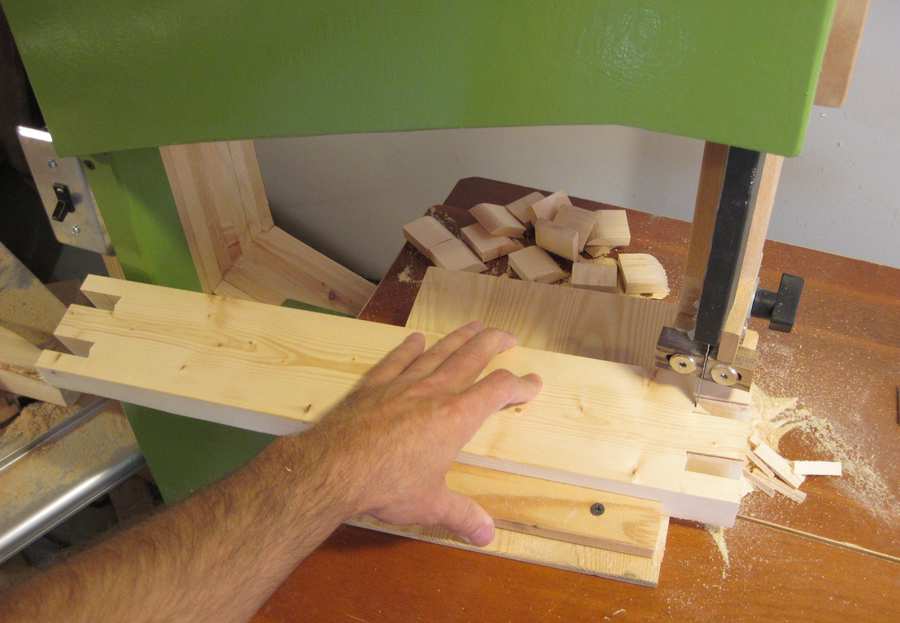 I have to work from both sides. The pieces for my bandsaw stand are a bit longer than my bandsaw is wide, although
it was still workable. The blade guard on the left side is only a little bit forward of the blade on my
bandsaw, so I can swivel the piece to nearly a right angle. Note how my workpiece is on the jig. For the clean up
cuts, I always slide the jig with the work piece.
I have to work from both sides. The pieces for my bandsaw stand are a bit longer than my bandsaw is wide, although
it was still workable. The blade guard on the left side is only a little bit forward of the blade on my
bandsaw, so I can swivel the piece to nearly a right angle. Note how my workpiece is on the jig. For the clean up
cuts, I always slide the jig with the work piece.
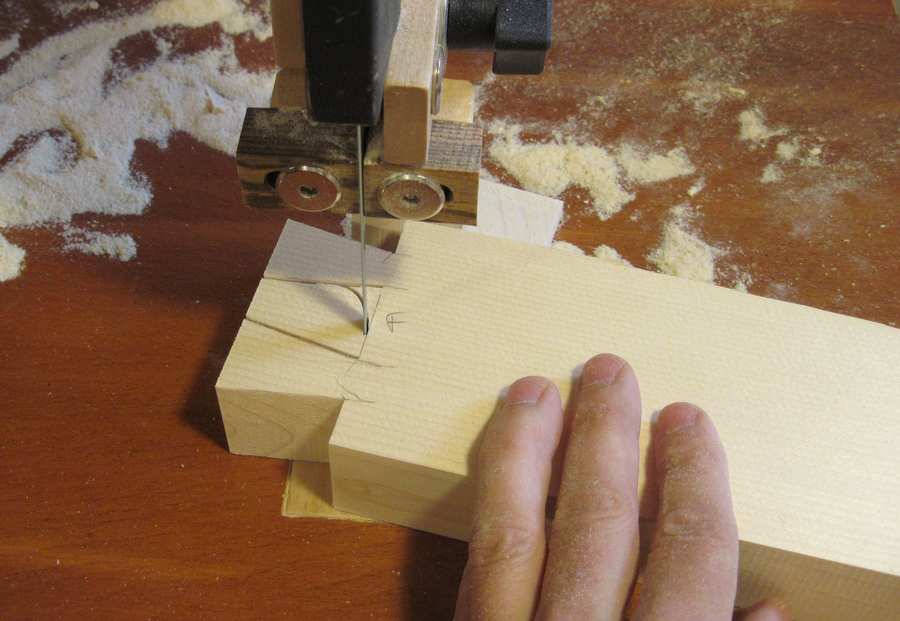
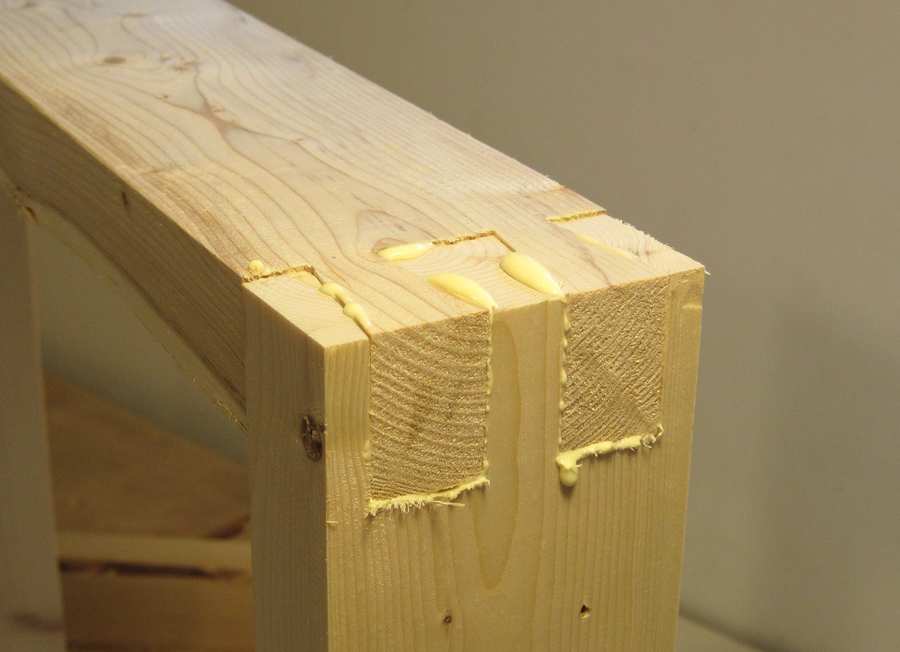
 Here's my pins cut. I cleaned up the bottom of the space between by just grazing it with the front
edge of the sawblade.
Here's my pins cut. I cleaned up the bottom of the space between by just grazing it with the front
edge of the sawblade.
 Cutting the tails is easy compared to the pins. No jig required.
 Checking the fit
 I used lots of glue when I put the joints together. I figure that way, the glue can fill any gaps that I
might have in the joint.
I used lots of glue when I put the joints together. I figure that way, the glue can fill any gaps that I
might have in the joint.
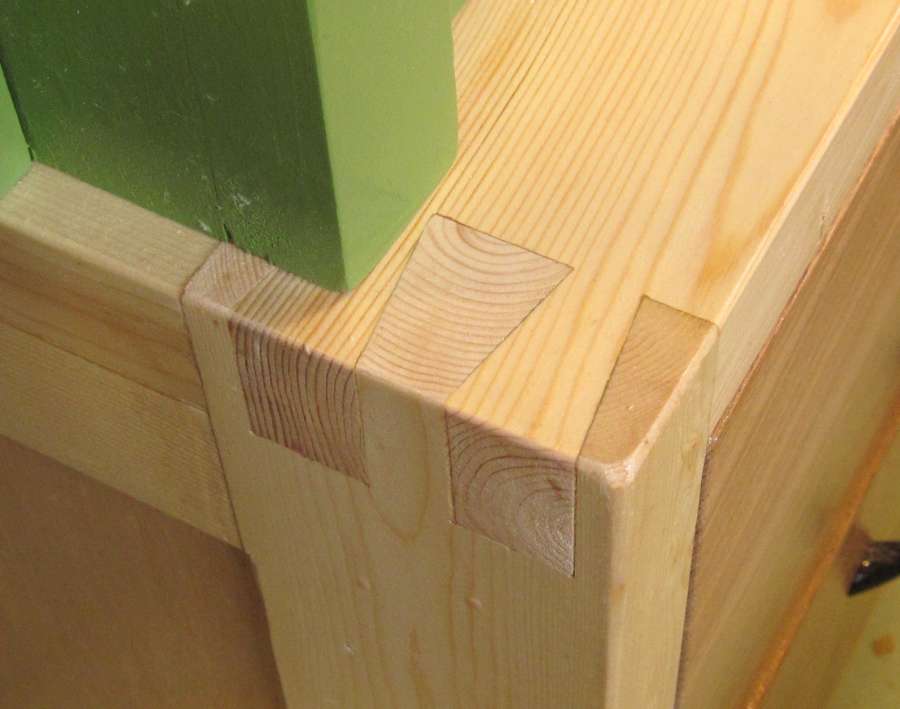 And here's one of the finished joints, which is part of my mobile bandsaw stand.
The glue and sawdust nicely filled any remaining gaps that I had in my joints.
And here's one of the finished joints, which is part of my mobile bandsaw stand.
The glue and sawdust nicely filled any remaining gaps that I had in my joints.
I also shot a video of making dovetail joints on the bandsaw. But it seems I just can't take still pictures
and video at the same time, so I cut another, slightly different dovetail joint just for the video.
Back to main Woodworking index
 More about my bandsaw
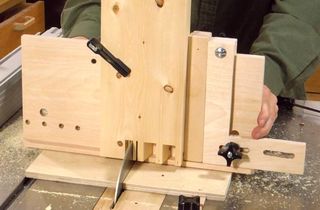 Table saw dovetail jig
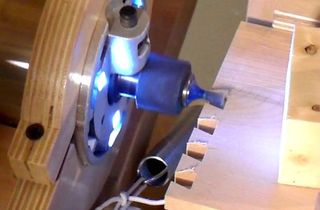 Dovetail joints on the pantorouter
 Impossible looking
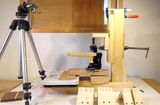 Dovetail vs. box joint
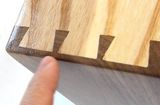 Cheating at hand cut dovetail joints