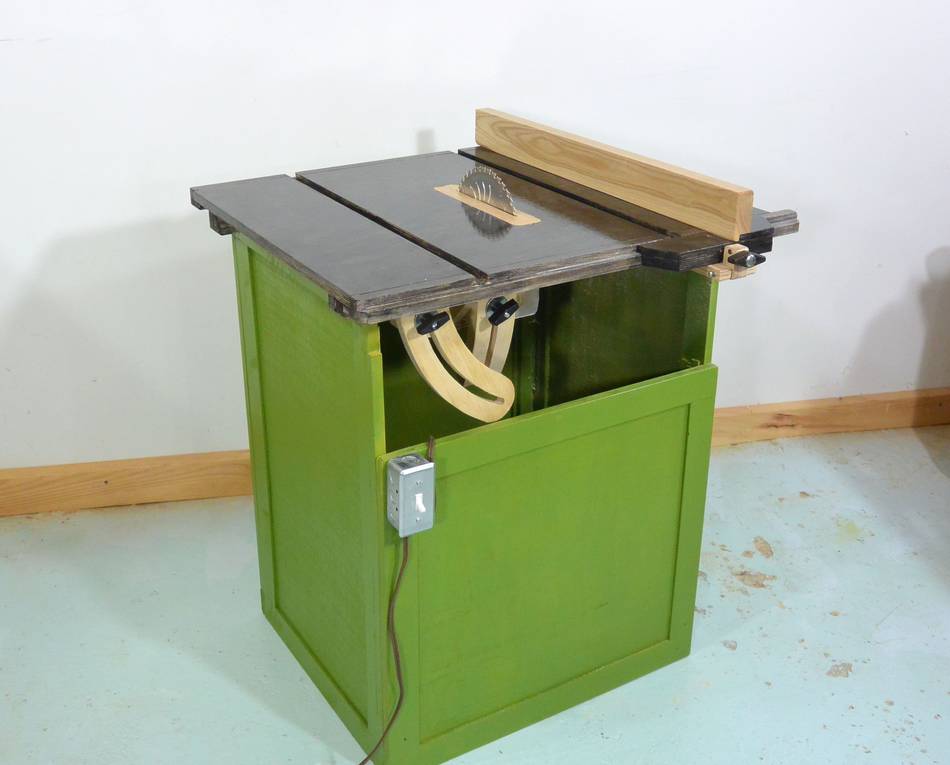
Table saw build - things learned and what I'd do differently
 This homemade table saw project started out as an experiment,
partially motivated by so many people asking when I was going to build a
homemade table saw.
This homemade table saw project started out as an experiment,
partially motivated by so many people asking when I was going to build a
homemade table saw.
A major problem with building a table saw is getting a good arbour / blade mount. The first thing that came to mind is a mandrel with bearings on it. I have two of these, but neither is anywhere close to accurate enough.
A hand held circular saw is not ideal, but no worse than other options I could think of, and most certainly the most convenient to use. So I set out to see how good a table saw I could build from one of those. It has worked out better than I anticipated.
 One of my favourite aspects of this saw is the fence. I think for a fence
that only attaches to the front rail, hooking under the front rail is the way to go.
Most commercial T-square fences end up having a slot on the top, which will inevitably fill
with sawdust. Hooking under instead avoids this, and also avoids adding a bulky
rail to the front.
One of my favourite aspects of this saw is the fence. I think for a fence
that only attaches to the front rail, hooking under the front rail is the way to go.
Most commercial T-square fences end up having a slot on the top, which will inevitably fill
with sawdust. Hooking under instead avoids this, and also avoids adding a bulky
rail to the front.
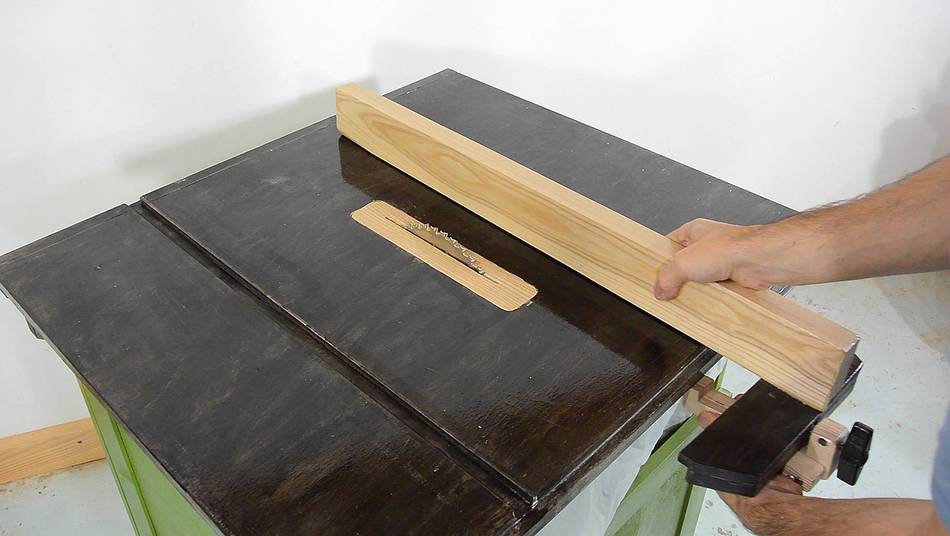
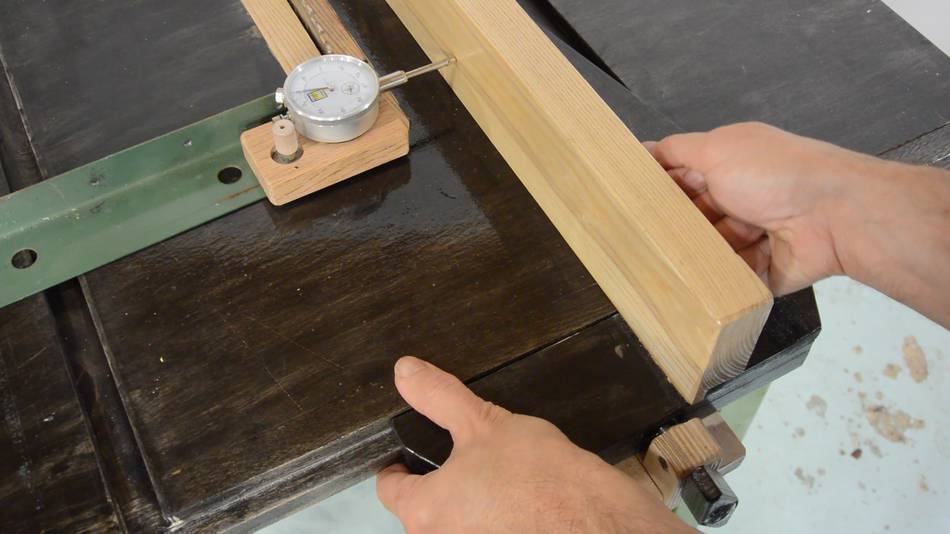 The fence doesn't operate as smoothly as the one on my
Delta table saw,
but I can still set it to within 0.001" (or about 0.025 mm) with
a bit of tapping. It does, however,
consistently move by about 0.002" (0.05 mm) when the knob is tightened.
This may have something to do with the fact that I shimmed the t-square on one side a
bit to better line it up with the T-slot. But worrying about increments this
small is really splitting hairs for a saw of this nature.
The fence doesn't operate as smoothly as the one on my
Delta table saw,
but I can still set it to within 0.001" (or about 0.025 mm) with
a bit of tapping. It does, however,
consistently move by about 0.002" (0.05 mm) when the knob is tightened.
This may have something to do with the fact that I shimmed the t-square on one side a
bit to better line it up with the T-slot. But worrying about increments this
small is really splitting hairs for a saw of this nature.
I goofed when I initially cut the slots, so they were not parallel.
I only realized this after I painted the top.
Had the slots been non-square to the table but parallel, I would have just aligned the
saw to them, but I use both slots for varying applications, so I had to
fix one of them.
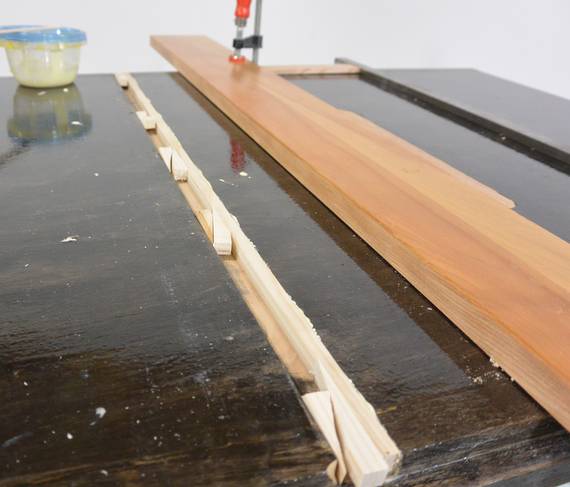 I first re-routed one edge of the slot parallel, then glued a strip of wood in to
narrow the slot on that side, then re-routed the whole slot. I referenced
my guide with spacers to the other slot to make sure both ended up parallel.
I first re-routed one edge of the slot parallel, then glued a strip of wood in to
narrow the slot on that side, then re-routed the whole slot. I referenced
my guide with spacers to the other slot to make sure both ended up parallel.
I used very hard ash wood for the strip I glued in. In retrospect, this might be a good method for reinforcing or repairing a slot in a wood topped table saw, especially if the top is not made from Baltic birch plywood.
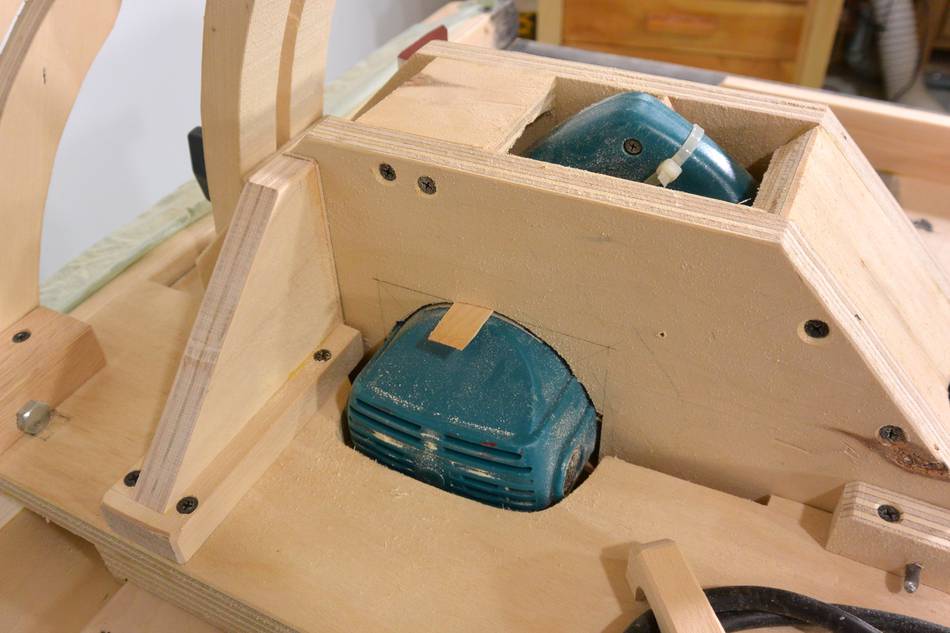
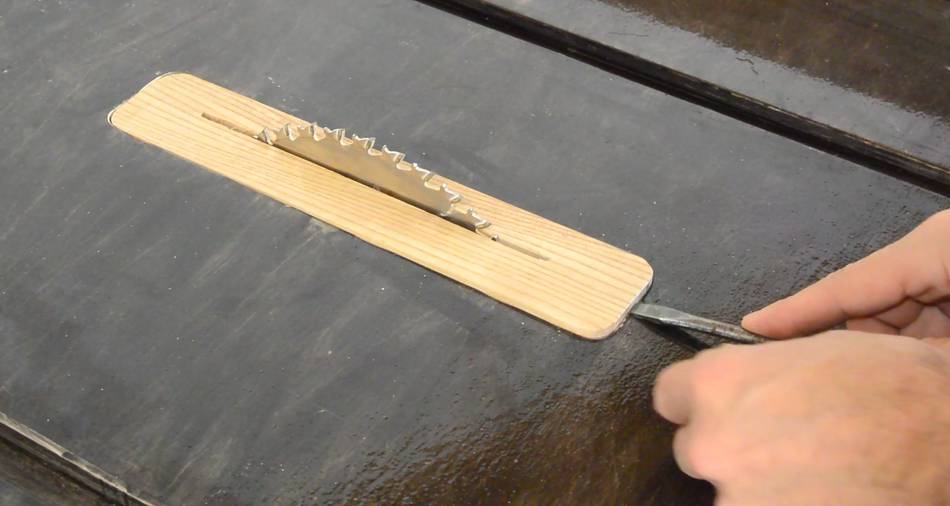 Initially, I popped out the inserts by reaching under the saw and pushing it up
with my fingers. But I don't have much room around the blade, so this always
involved touching the blade. I was never comfortable doing that.
Initially, I popped out the inserts by reaching under the saw and pushing it up
with my fingers. But I don't have much room around the blade, so this always
involved touching the blade. I was never comfortable doing that.
I thought about drilling a hole in the insert so I could pull it out with my fingers, but again, the opening under the insert is not that big. I didn't want to cut that hole any larger for fear of weakening the table. So I carved a small notch at the front of the slot, which allows me to pop it out with a screwdriver.
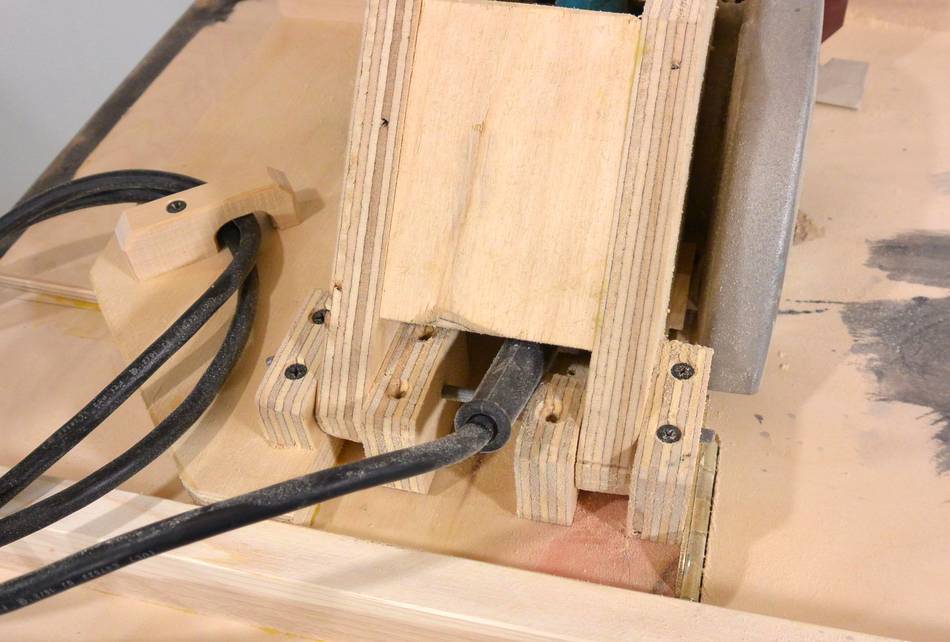
 I added a small piece of wood to hold the saw's cord. That way, when I pick up the saw
and move it, I'm not dragging the cord and sawdust along the floor. And when I
put it back down, I don't have to push the cable under it.
I added a small piece of wood to hold the saw's cord. That way, when I pick up the saw
and move it, I'm not dragging the cord and sawdust along the floor. And when I
put it back down, I don't have to push the cable under it.

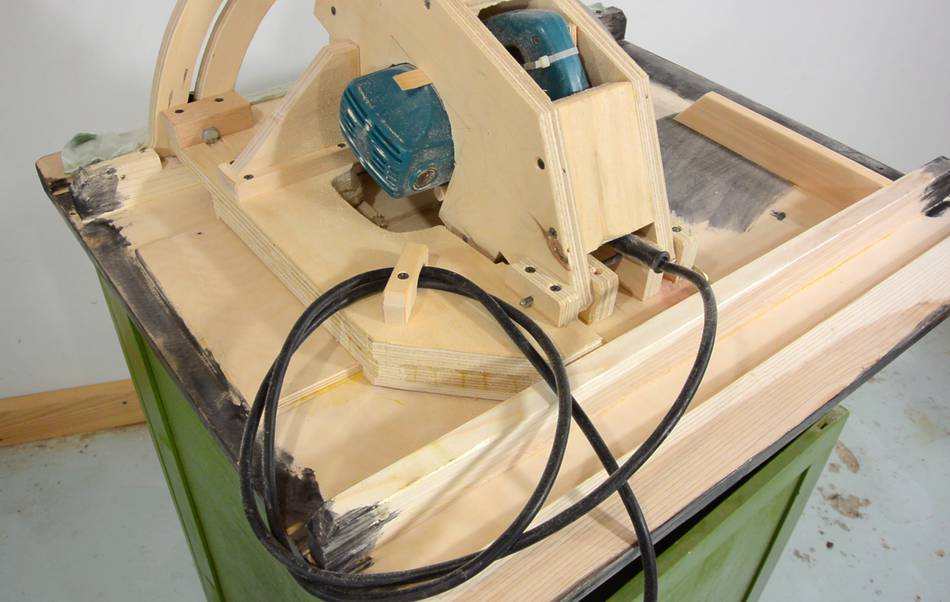
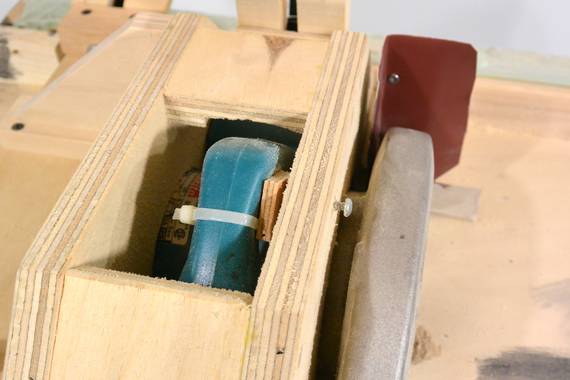
 I changed the design of the dust deflector. With the whole saw in a box, I'm more
concerned with deflecting the sawdust so that it's relatively away from the motor
and not towards the front.
I changed the design of the dust deflector. With the whole saw in a box, I'm more
concerned with deflecting the sawdust so that it's relatively away from the motor
and not towards the front.
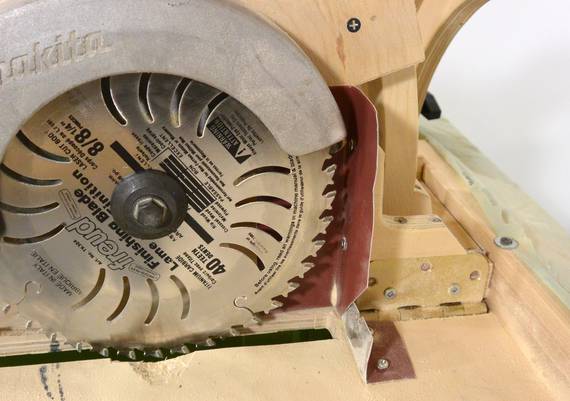
The dust deflector is two pieces of aluminium flashing. It's two pieces to accommodate tilting of the saw.
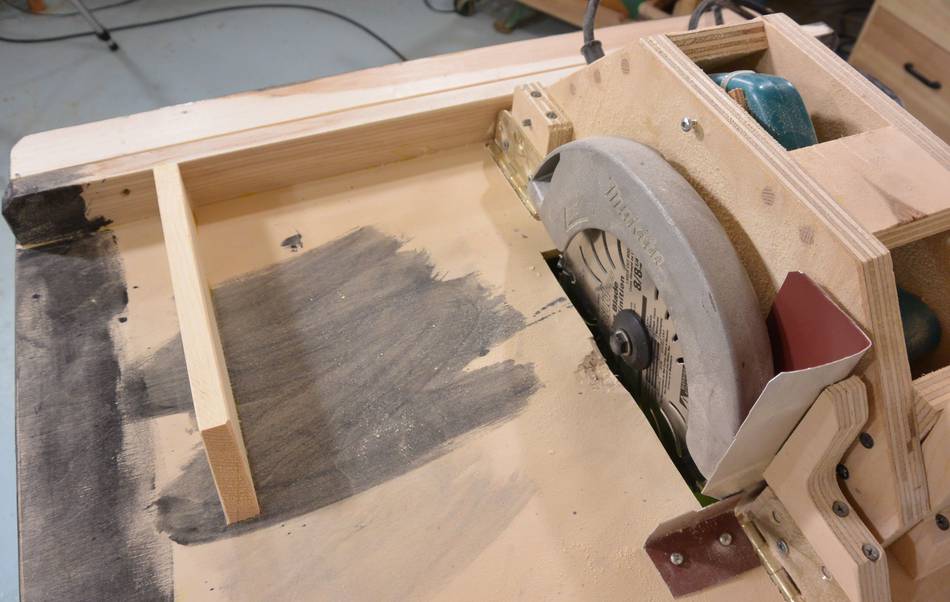 There is also quite a lot of sawdust shooting out the triangular opening on the
back of the blade guard. This dust ends up getting shot into the corner of the
cabinet. I found some dust made it in the millimeter wide gap between the stand
and the table. So I added another piece of wood to the bottom of the table in
that corner, so that the sawdust would have to make it around several corners
to make it out of the cabinet.
There is also quite a lot of sawdust shooting out the triangular opening on the
back of the blade guard. This dust ends up getting shot into the corner of the
cabinet. I found some dust made it in the millimeter wide gap between the stand
and the table. So I added another piece of wood to the bottom of the table in
that corner, so that the sawdust would have to make it around several corners
to make it out of the cabinet.
Luckily, the more complicated raised hinge mount of the folding cabinet is also in that corner, so it's harder for the dust to make it out through the vertical edge of the cabinet.
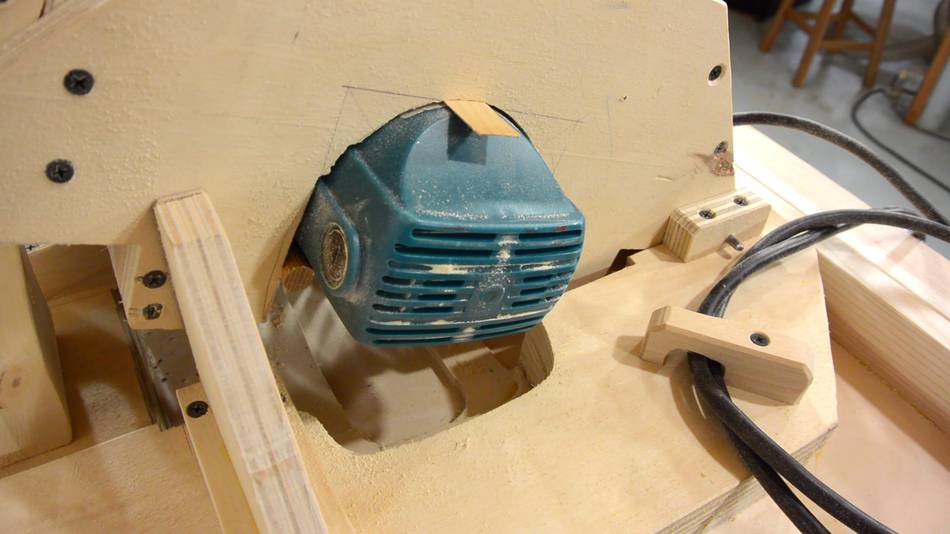 I am concerned about sucking too much sawdust through the motor. That cabinet
gets very dusty inside when the saw is running. I'm glad I made the cabinet
as large as I did, so there's hopefully more settling before the air gets
pulled through the motor.
I am concerned about sucking too much sawdust through the motor. That cabinet
gets very dusty inside when the saw is running. I'm glad I made the cabinet
as large as I did, so there's hopefully more settling before the air gets
pulled through the motor.
When I just had a bed sheet wrapped around the bottom of the saw while I used it to build the stand, there was quite a bit of dust deposited at the motor inlet, so the smaller volume inside the draped bed sheet was definitely worse.
It can also get quite warm inside the cabinet from heat from the motor. More volume below the saw would help in both regards. If I was building it again, I'd make the base even larger, and also a larger top.
That said, I'd rather have the dust sucked through the motor than into my lungs, so keeping the dust inside the cabinet is still a priority.
 I should have made the pivot for the depth adjustment wider. I'm also questioning
whether hinging on a pin was the best idea. A pin in tight holes makes for
no play, but it's also very difficult to tweak the alignment. Though if I
had made the bracket wider, getting the alignment right would have been easier,
even with a pin.
I should have made the pivot for the depth adjustment wider. I'm also questioning
whether hinging on a pin was the best idea. A pin in tight holes makes for
no play, but it's also very difficult to tweak the alignment. Though if I
had made the bracket wider, getting the alignment right would have been easier,
even with a pin.
 Adjusting the alignment has been one of the most difficult aspects of this build,
and I think the design could be improved in this regard. I shimmed around the
motor a bit, and added a screw to push the handle to the side a bit, among other
things to tweak the alignment.
Adjusting the alignment has been one of the most difficult aspects of this build,
and I think the design could be improved in this regard. I shimmed around the
motor a bit, and added a screw to push the handle to the side a bit, among other
things to tweak the alignment.
I didn't want to destroy the saw when I started out because I wasn't sure how well this would work. But taking the saw in and out is so difficult, and with all the time invested, it doesn't make sense to take that saw out anymore. I should have just drilled some holes in the aluminium blade guard and mounted it primarily that way. And then, I could have aligned it by adding shims behind the screws.
 If I was mounting the saw mostly by the guard, I would not have needed
as bulky a bracket around the body of the saw, which in turn, would have
required less of a cut-out in the bottom of the table. I don't want the top
to be weakened to the point where it might sag.
If I was mounting the saw mostly by the guard, I would not have needed
as bulky a bracket around the body of the saw, which in turn, would have
required less of a cut-out in the bottom of the table. I don't want the top
to be weakened to the point where it might sag.
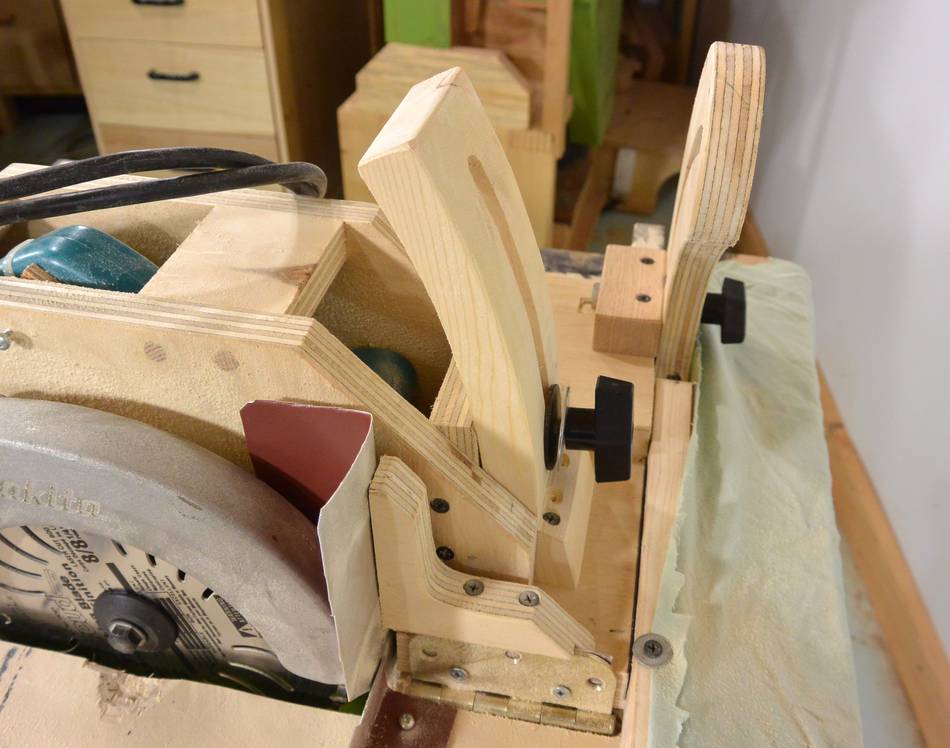 The curved depth adjustment slot was neat to make, but it does require
one to have a bandsaw, so it's not something that can be made with basic tools.
It's also a bit rough operating, so if I built
it again, I'd probably make the depth adjustment lock work a bit more
like the angle adjustment. That would, however, put the depth adjustment
lock knob in a less convenient place.
I also put some rubber washers behind the large washers behind the knobs, just
to make sure the adjustments don't start sliding unexpectedly.
The curved depth adjustment slot was neat to make, but it does require
one to have a bandsaw, so it's not something that can be made with basic tools.
It's also a bit rough operating, so if I built
it again, I'd probably make the depth adjustment lock work a bit more
like the angle adjustment. That would, however, put the depth adjustment
lock knob in a less convenient place.
I also put some rubber washers behind the large washers behind the knobs, just
to make sure the adjustments don't start sliding unexpectedly.
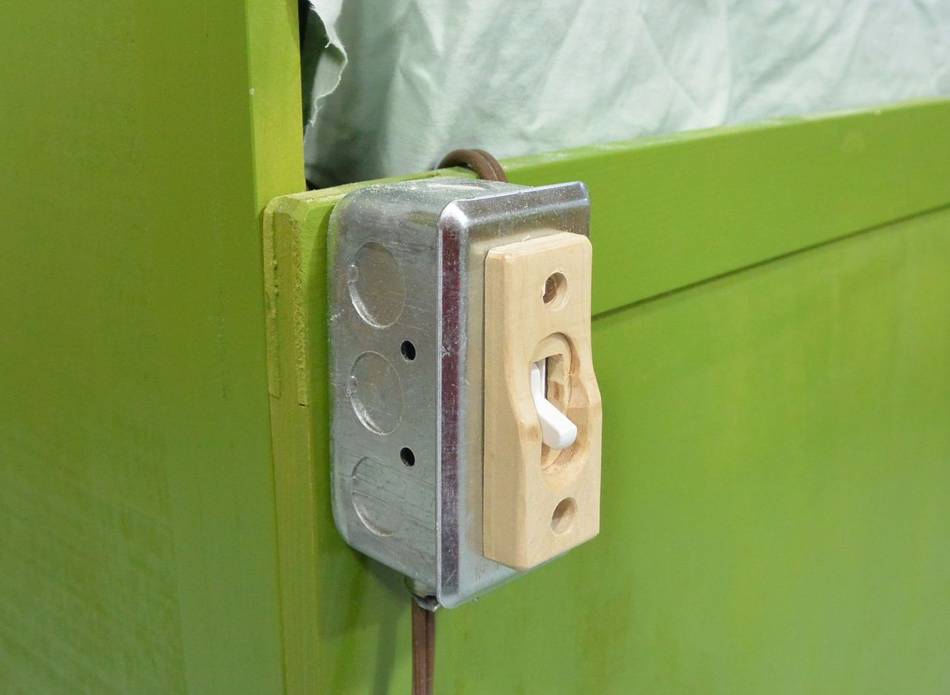 With the toggle switch at knee height, it was all too easy to bump
it "on" with my knee, so I later made this guard to make that much less
likely. I never felt a need for such a guard on my bandsaw, because
I have the switch further up and out of the way, and bandsaws
are generally less dangerous.
With the toggle switch at knee height, it was all too easy to bump
it "on" with my knee, so I later made this guard to make that much less
likely. I never felt a need for such a guard on my bandsaw, because
I have the switch further up and out of the way, and bandsaws
are generally less dangerous.
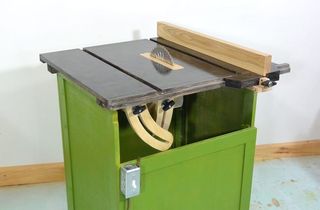
Overall, most of the things I'd change would make the saw easier to build and align. In terms of usage, this one is ok. I'll probably end up using it for various projects in the future, because it's the only portable table saw that I have. And for a portable table saw, it's pretty decent. It feels more solid than the sub-$200 dollar table saws. I also like the way it keeps dust inside without the need to hook up a ShopVac.
But if you are looking to acquire a table saw and are wondering whether to buy or
build one, I advise caution:
If you can afford to buy a saw in the $400 or up range, or have the
opportunity to buy a used contractor style table saw with a cast iron top,
you should buy one, because those options will generally be a better saw
than what you can build.
Homemade table saw version 2 with plans
See also:
 Homemade table saw
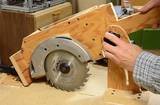 Homemade table saw version 2
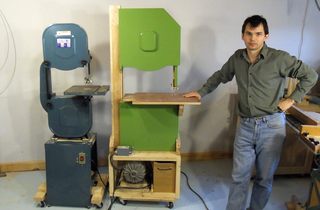 My first homemade bandsaw
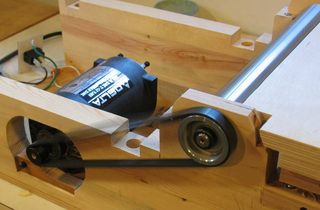 Homemade jointer
Back to the homemade table saw
To my Woodworking website.