Miter slots for the table saw
 So far I made a rip fence for the table saw. For cross cuts,
it's best to use a miter gauge, or a crosscut sled like the one shown at left.
These ride in a slot in the table, called a "miter slot".
So far I made a rip fence for the table saw. For cross cuts,
it's best to use a miter gauge, or a crosscut sled like the one shown at left.
These ride in a slot in the table, called a "miter slot".
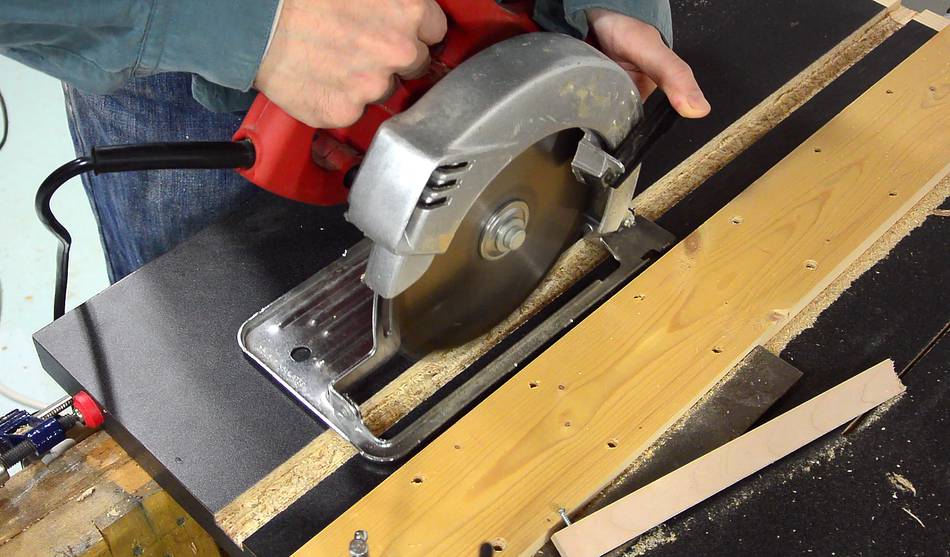
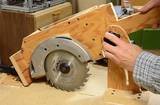
In my previous table saw build I cut these with a router. If you have a router, I'd recommend you use it for the slots. But I wanted to build this saw with minimal tools, so I cut them with a circular saw.
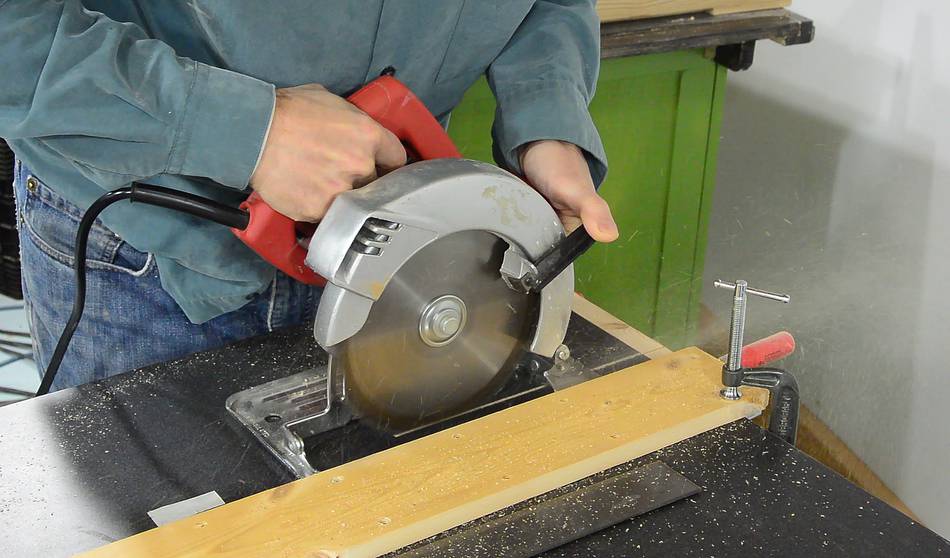 I clamped a straight piece of wood to the top of the saw with a C-clamp
on either end, and used a framing square to make sure it was square to the front
edge of the saw. I also clamped a piece of wood to the far edge of the
saw to prevent chip-out there.
I clamped a straight piece of wood to the top of the saw with a C-clamp
on either end, and used a framing square to make sure it was square to the front
edge of the saw. I also clamped a piece of wood to the far edge of the
saw to prevent chip-out there.
Chip-out is always a problem with melamine. To prevent it, I cut the slot backwards (that is, pulling the saw instead of pushing it). That way, the saw's teeth are cutting into the wood, as opposed to pulling out of the wood. This is a risky thing to do. If you don't have a firm grip on the saw, or cut too fast, it can start to pull itself along and get out of hand. So it's important to hold the saw very firmly, cut slowly, and be alert.
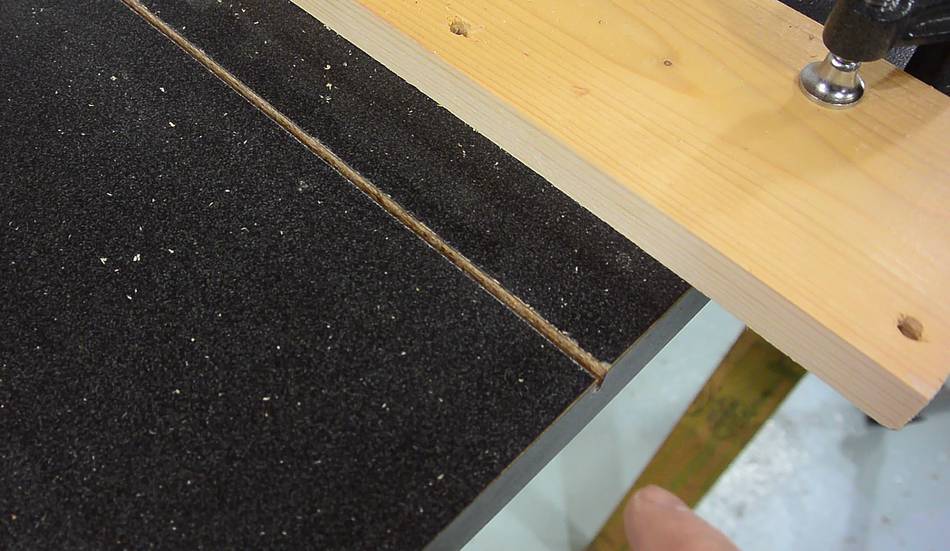 The first cut came out quite nice. No chipout!
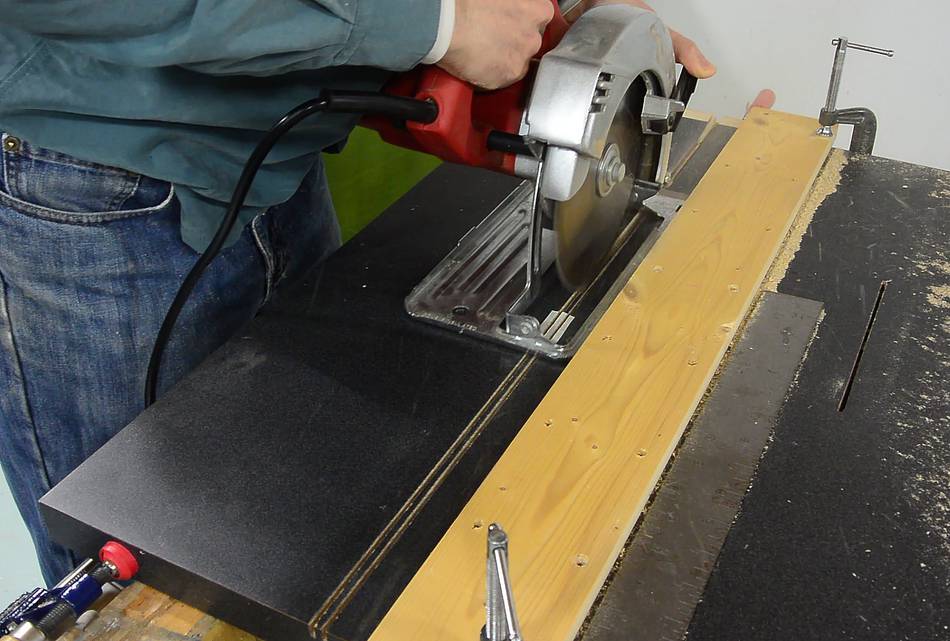 I moved the board and made another cut, then more cuts to hog out
most of the slot.
I moved the board and made another cut, then more cuts to hog out
most of the slot.
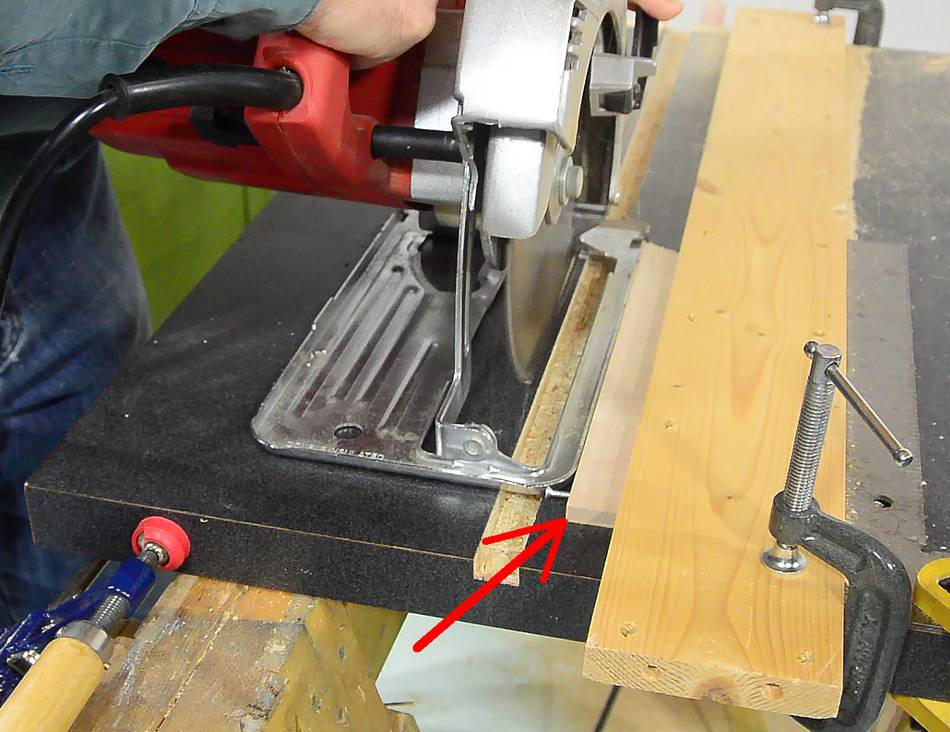 After making the right-most cut of the slot, I made a spacer (see red arrow)
to put between the fence and the saw, and using that, made the left-most cut.
This way, I could be sure that the left-most cut is parallel to the
right-most one.
After making the right-most cut of the slot, I made a spacer (see red arrow)
to put between the fence and the saw, and using that, made the left-most cut.
This way, I could be sure that the left-most cut is parallel to the
right-most one.
Note the spacer has a small screw sticking out on the left side. This helps the base of my circular saw pull it along (as before, I'm cutting backwards).
 I flattened the bottom of the slot by moving the saw side to side as I pulled
it along the slot. On one side, I still had my guide clamped to the table, but
I had to be careful not to nick the edge of the slot on the other side.
I finished cleaning up the slot with a chisel.
I flattened the bottom of the slot by moving the saw side to side as I pulled
it along the slot. On one side, I still had my guide clamped to the table, but
I had to be careful not to nick the edge of the slot on the other side.
I finished cleaning up the slot with a chisel.
At this point, I could have called the slot done. But I'm not sure how practical it is to have things sliding along particleboard. I cut this slot slightly oversized so I could line it with hardwood.
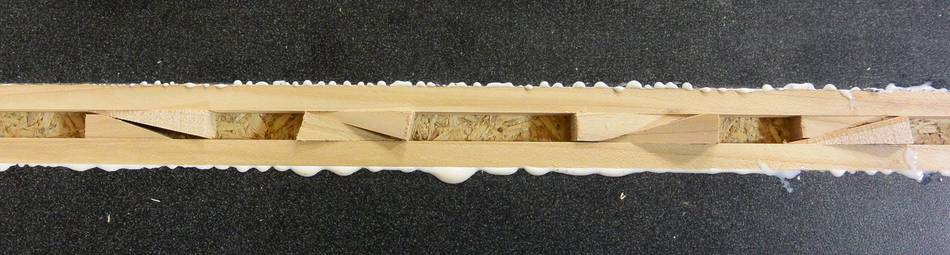 I glued two square sections of maple into the slot, clamping them
in place by pushing opposing wedges against each other.
I glued two square sections of maple into the slot, clamping them
in place by pushing opposing wedges against each other.
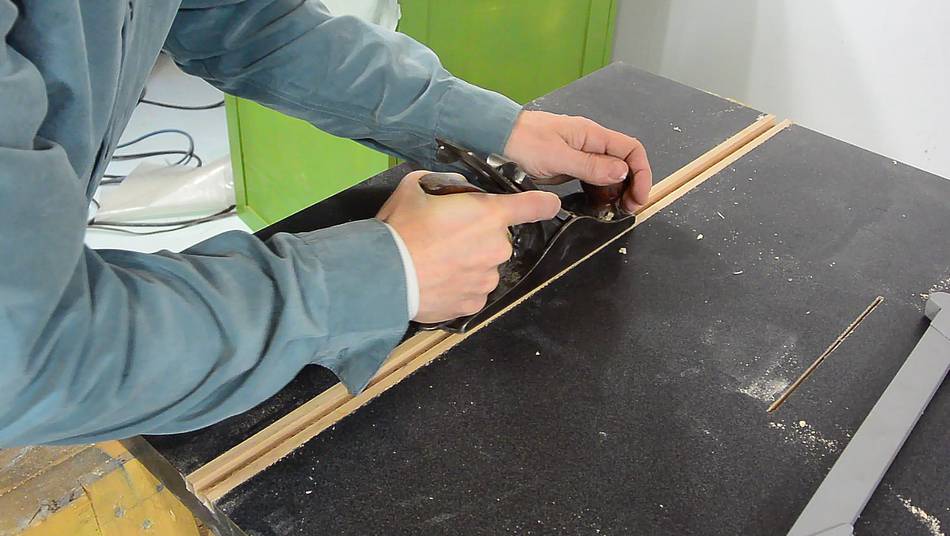 The rails protruded above the table by a fraction of a millimeter, so
I used a hand plane to level them. The plane doesn't engage the melamine very well,
so it was easy to trim these exactly flush without damaging the table top.
The rails protruded above the table by a fraction of a millimeter, so
I used a hand plane to level them. The plane doesn't engage the melamine very well,
so it was easy to trim these exactly flush without damaging the table top.
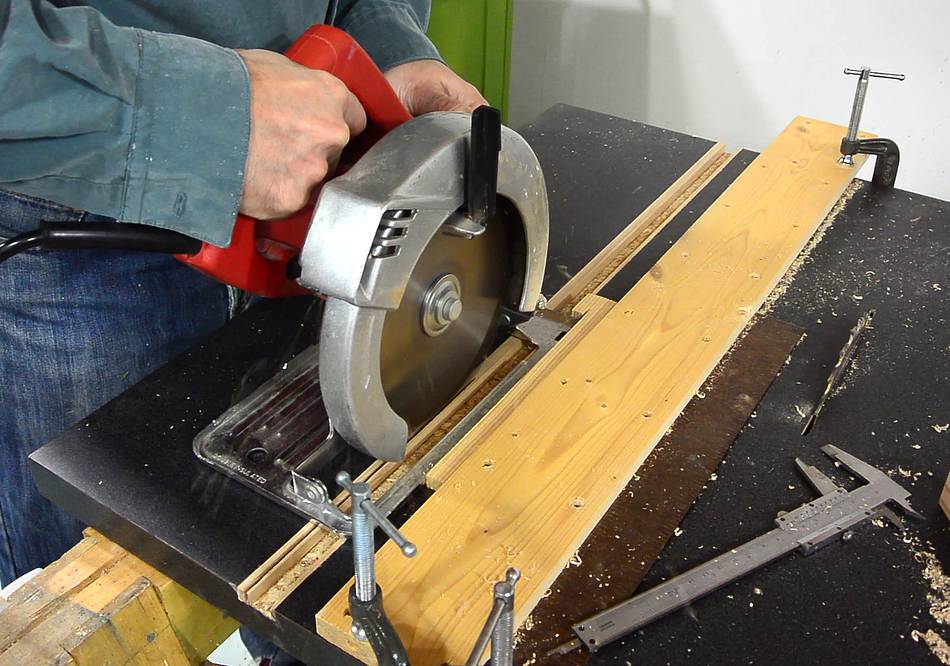 Then cutting away half of each strip of hardwood. I made another guide,
which was 3/4" minus the thickness of the blade wide. That way, between the two
cuts, I should have 3/4" of space. And now cutting hardwood, I didn't have to
worry about chipout, so I could cut these forward instead of backwards.
Then cutting away half of each strip of hardwood. I made another guide,
which was 3/4" minus the thickness of the blade wide. That way, between the two
cuts, I should have 3/4" of space. And now cutting hardwood, I didn't have to
worry about chipout, so I could cut these forward instead of backwards.
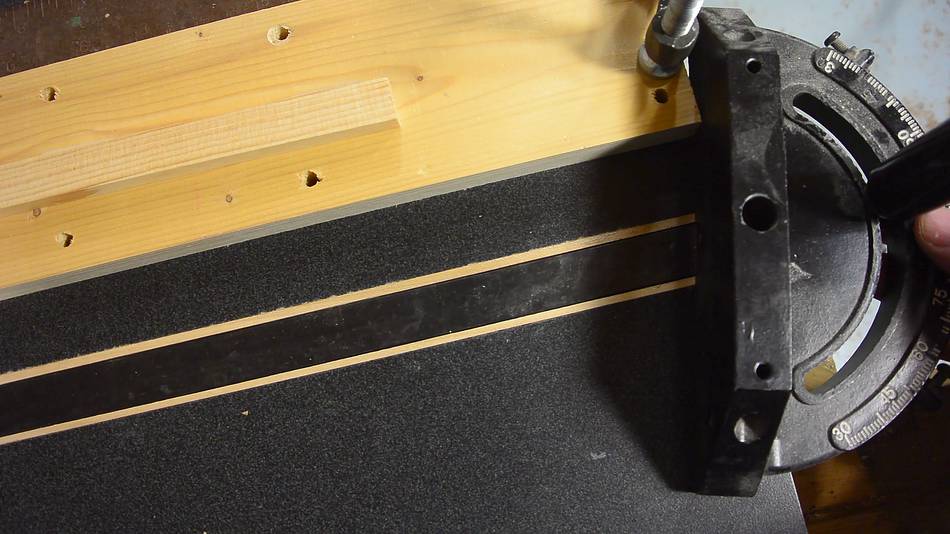 Having cut the slot, a standard 3/4" miter gauge fit, but very tight.
I needed to widen it by a fraction of a millimeter.
Having cut the slot, a standard 3/4" miter gauge fit, but very tight.
I needed to widen it by a fraction of a millimeter.
I put some pieces of tape on my spacer and made another cut. This didn't do much, so I added more tape and cut again, then more tape, and more tape.
It turns out, the blade of the saw can deflect to the side a little. And not having the sharpest blade in that saw, I needed to move the saw to the side by a good half a millimeter to shave anything off at all. I was able to widen the slot eventually, but it was not ideal.
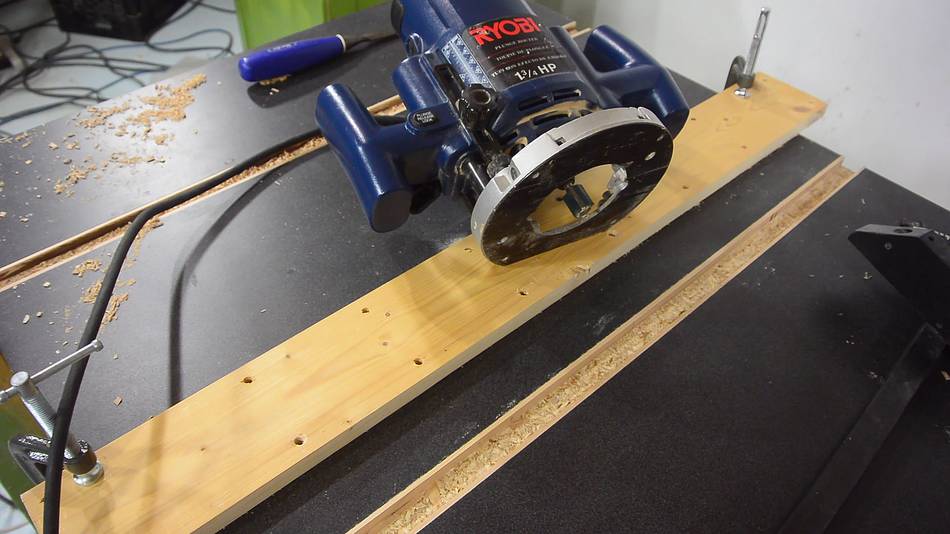 I used a router to trim the other slot to its final size, and that worked much better!
So if you have a router, use it. If not, a circular saw can also be used, but
it takes more skill.
I used a router to trim the other slot to its final size, and that worked much better!
So if you have a router, use it. If not, a circular saw can also be used, but
it takes more skill.
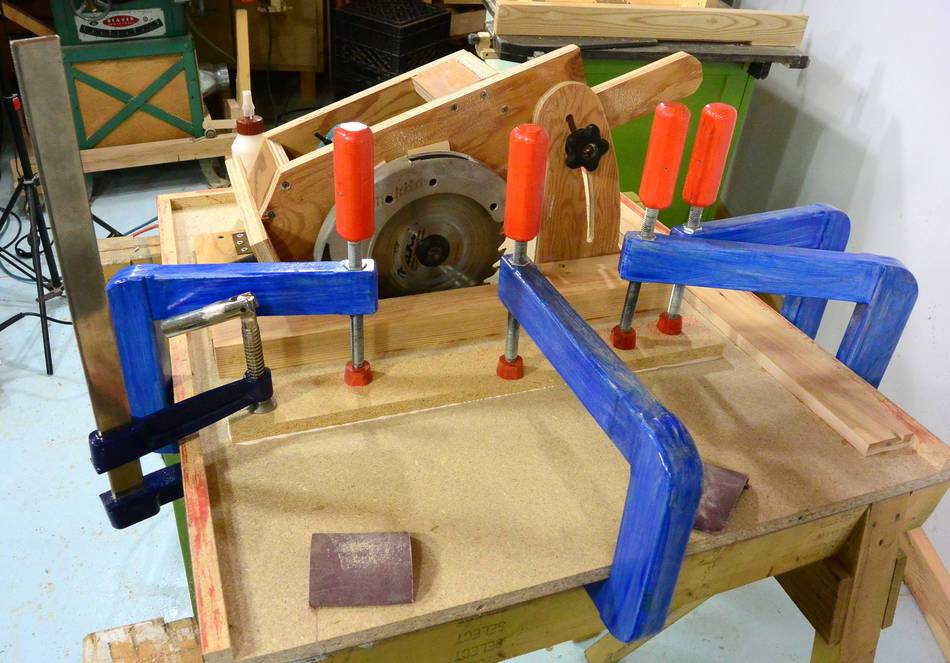 The particleboard I used was only 16 mm (5/8") thick, and with 10 mm (3/8") slots cut
into the top, I needed to reinforce it on the bottom. So I glued some extra strips of
particleboard on the back. I used my
long-reach C-clamps
for this. You probably don't have such clamps, so another alternative is to put
the saw top on a flat surface and use weights to clamp it, or screw the piece
on while the glue dries.
The particleboard I used was only 16 mm (5/8") thick, and with 10 mm (3/8") slots cut
into the top, I needed to reinforce it on the bottom. So I glued some extra strips of
particleboard on the back. I used my
long-reach C-clamps
for this. You probably don't have such clamps, so another alternative is to put
the saw top on a flat surface and use weights to clamp it, or screw the piece
on while the glue dries.
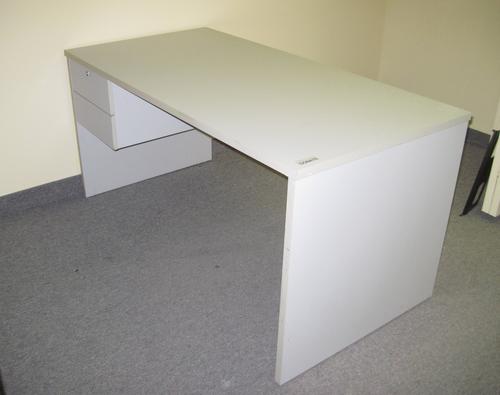 If you use thicker particleboard (1", 25 mm or more), like
from an old desk, you don't need to reinforce it.
An ideal source of material would be an old desk, in fact they were just getting rid
of such desks in the office. To avoid losing depth of cut when using thicker material,
you just need to cut a deeper cavity for the saw to protrude into (the cut-out I made
by dragging the saw sideways earlier). Then mount the saw so it protrudes further
out of the mount, and then you won't need to make any other changes to the saw's mount.
If you use thicker particleboard (1", 25 mm or more), like
from an old desk, you don't need to reinforce it.
An ideal source of material would be an old desk, in fact they were just getting rid
of such desks in the office. To avoid losing depth of cut when using thicker material,
you just need to cut a deeper cavity for the saw to protrude into (the cut-out I made
by dragging the saw sideways earlier). Then mount the saw so it protrudes further
out of the mount, and then you won't need to make any other changes to the saw's mount.
Next: Table saw stand
See also:
 Homemade tablesaw
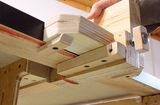 Rip fence
 Buy plans for
Back to my Woodworking website.