Brazed aluminium joint strength test
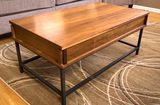
 Two months ago David Picchiuto
did a video and article about
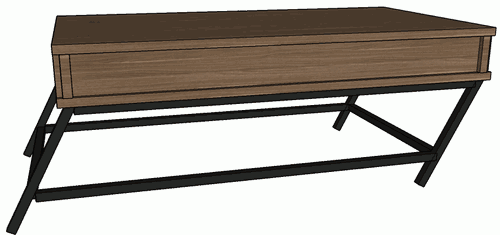
making a coffee table with lift top and aluminium legs.
The legs were brazed together using a special aluminium brazing
material (pretty neat - I didn't know aluminium could be brazed).
Two months ago David Picchiuto
did a video and article about
making a coffee table with lift top and aluminium legs.
The legs were brazed together using a special aluminium brazing
material (pretty neat - I didn't know aluminium could be brazed).
 A number of people expressed scepticism about the strength of the brazed joints,
so David made a
follow-up video demonstrating the strength of the joints.
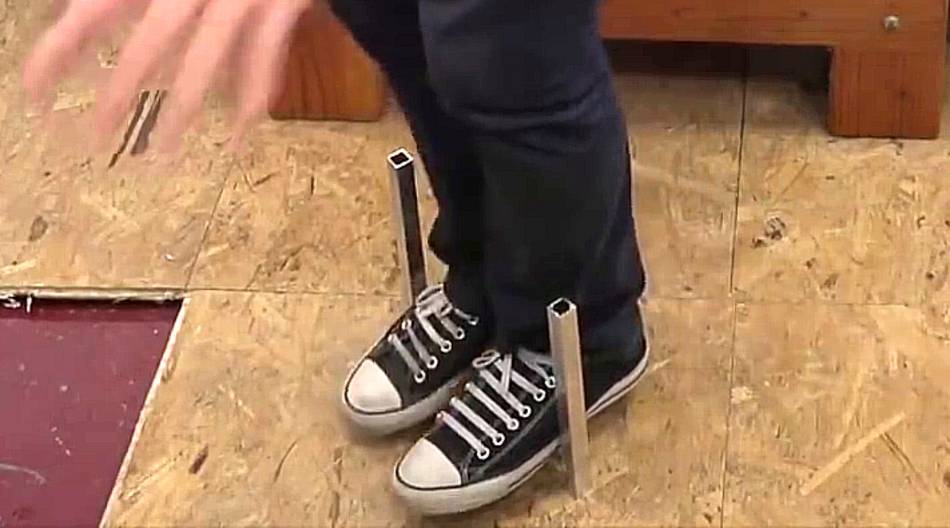
He tested the joints by making an H-arrangement and stepping on the cross member of
it (the picture at left is from his video).
The joints even survived him jumping on it. The cross member bent,
but the joints held.
A number of people expressed scepticism about the strength of the brazed joints,
so David made a
follow-up video demonstrating the strength of the joints.
He tested the joints by making an H-arrangement and stepping on the cross member of
it (the picture at left is from his video).
The joints even survived him jumping on it. The cross member bent,
but the joints held.
 But this test actually only subjected the joint to shear, as opposed to trying to
break it off by bending it. David next pushed the H arrangement against the floor
with his hands, at which point one of the joints broke.
But this test actually only subjected the joint to shear, as opposed to trying to
break it off by bending it. David next pushed the H arrangement against the floor
with his hands, at which point one of the joints broke.
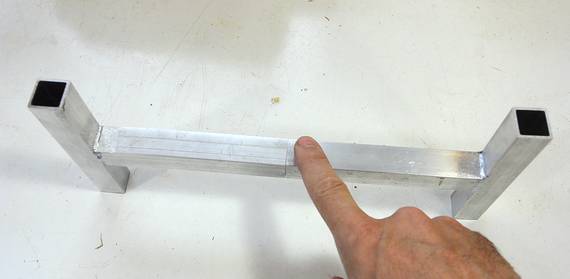
I commented on the video that this wasn't a very good way to test the joint and offered to run a test if he sent me some samples. So David sent me three T-joints from 12 cm long pieces.
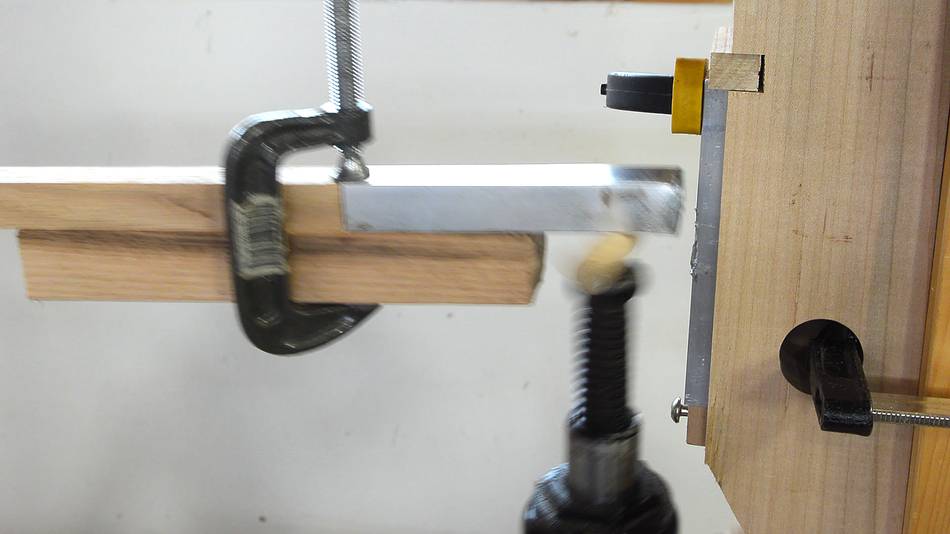
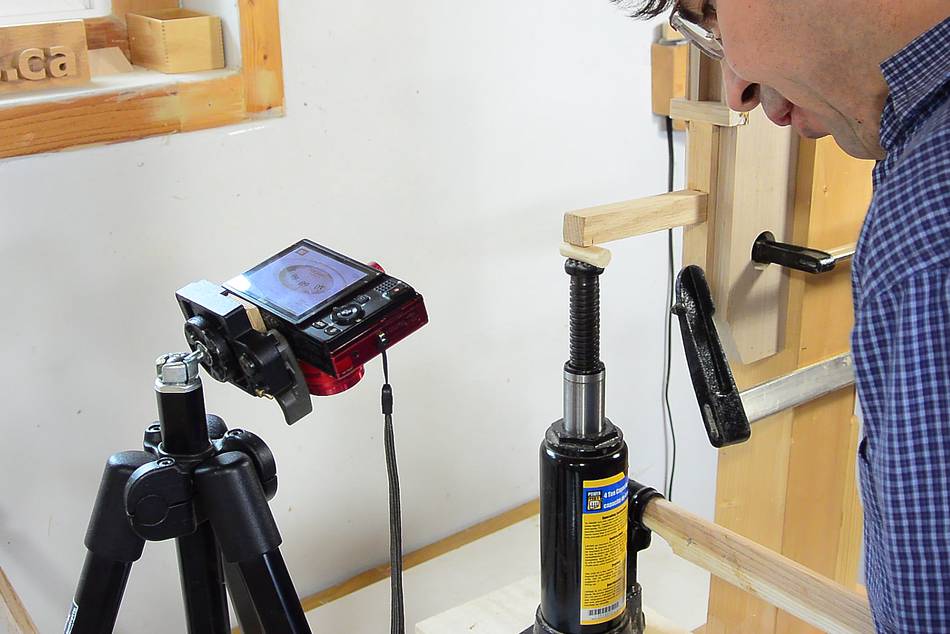
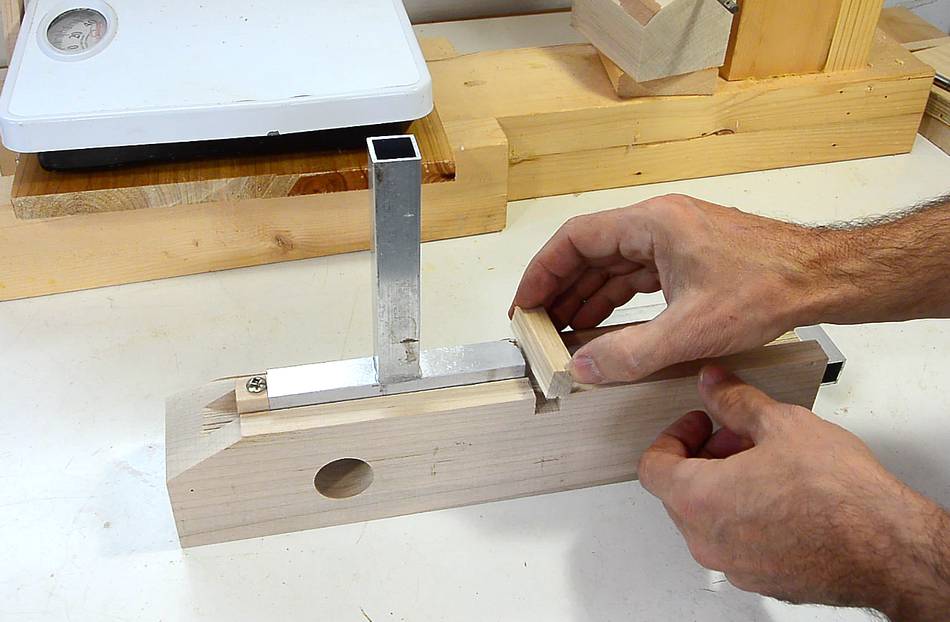 I wanted to test the joints under shear and under bending moment. For the shear
test I needed a good way to hold the test piece. I used a big piece
of hardwood and cut a groove in it. The left side of the aluminium
test joint is held with a piece inserted into the end and held down with
a screw. A block in a slot on the right keeps the T-joint from
sliding out.
I wanted to test the joints under shear and under bending moment. For the shear
test I needed a good way to hold the test piece. I used a big piece
of hardwood and cut a groove in it. The left side of the aluminium
test joint is held with a piece inserted into the end and held down with
a screw. A block in a slot on the right keeps the T-joint from
sliding out.

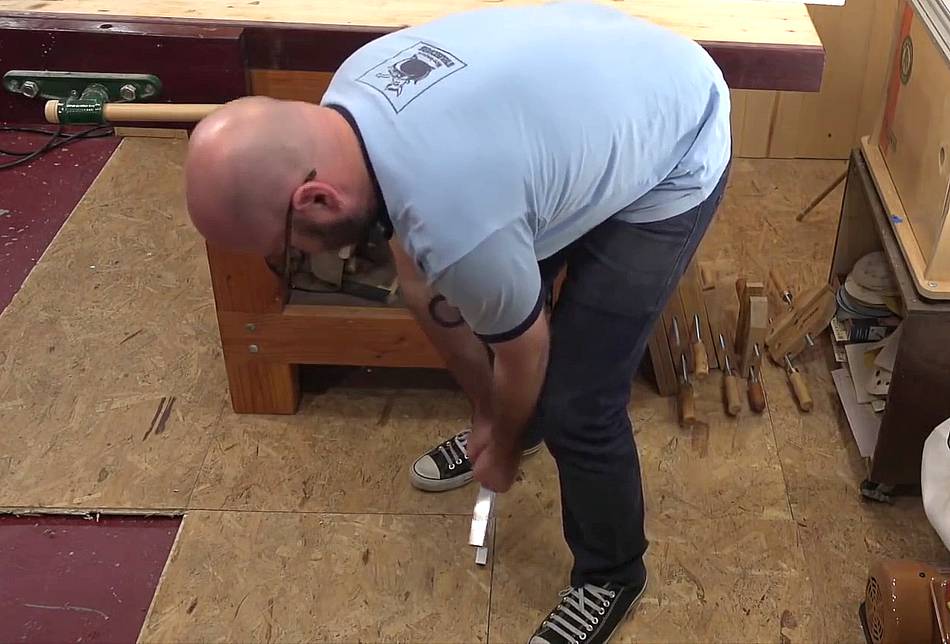
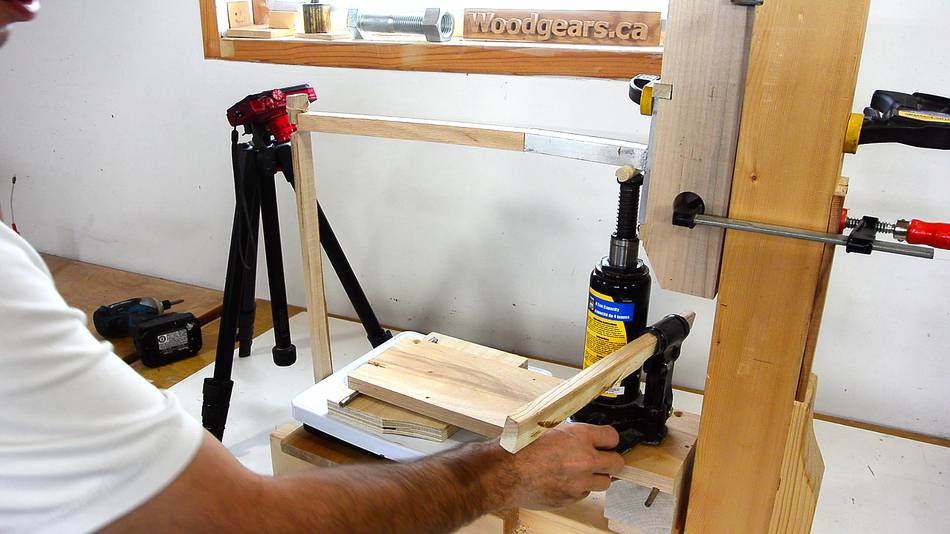
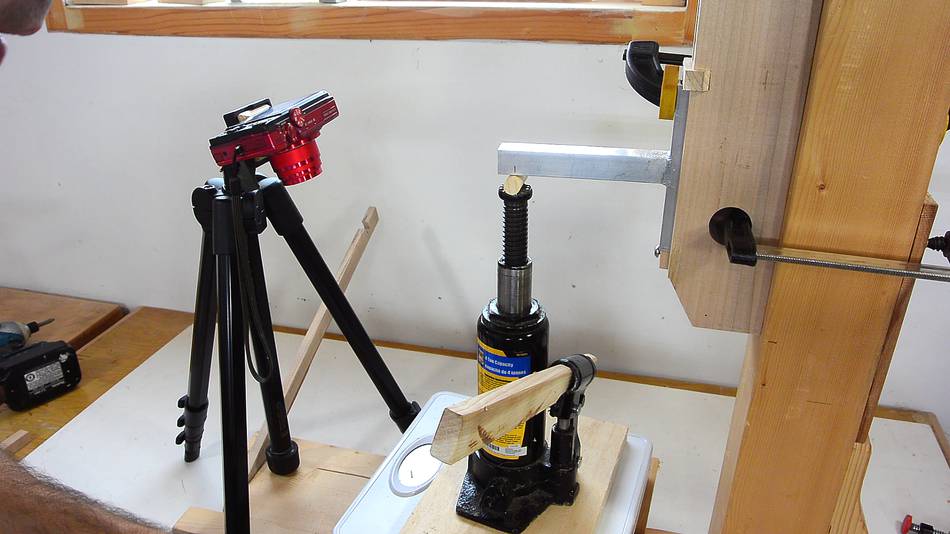
 The jig is mounted on my joint test apparatus. I'm using a hydraulic jack
instead of the screw jack because I'm pretty sure
the forces needed will exceed the capacity of the screw jack.
The jig is mounted on my joint test apparatus. I'm using a hydraulic jack
instead of the screw jack because I'm pretty sure
the forces needed will exceed the capacity of the screw jack.
The jack sits on a lever arrangement which will put one fifth of the weight onto my bathroom scale. I expect the breaking force to be more than the 300 pound capacity of my scale.
The jack itself sits on piece of dowel cut in half to make sure the force is applied at the right point on the lever to divide the forces correctly.
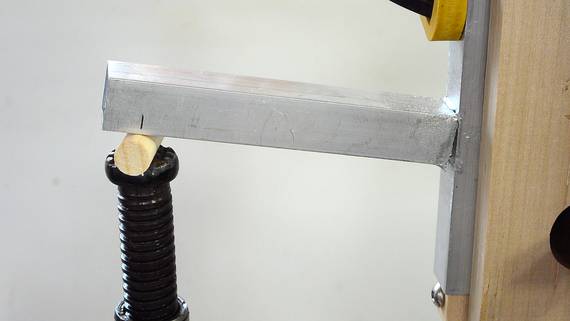
 For the shear test, I want to apply the force as close to the joint as possible.
To counteract the tendency of the piece to tilt up, I'm extending it with a piece of hardwood, which is held down on the far left side.
 I also loosened the screw that holds the bottom end in place so the piece is
free to tilt away from the mount, which should further reduce bending load on it.
I also loosened the screw that holds the bottom end in place so the piece is
free to tilt away from the mount, which should further reduce bending load on it.
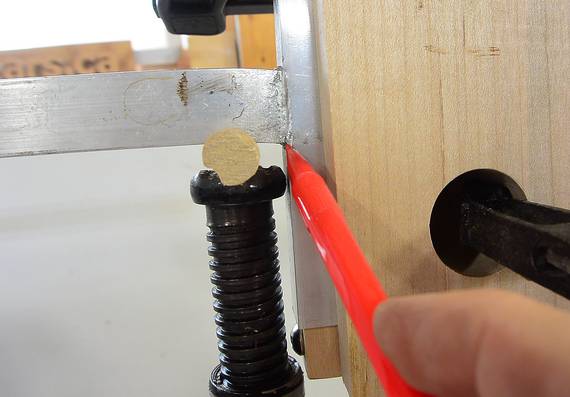
Jacking it up, I was able to get to about 130 pounds on the scale, which would be about 650 pounds at the jack. Perhaps as much as 5% of the force went to my anchor on the far side, but that would still be well over 600 pounds (270 kg) on the joint.
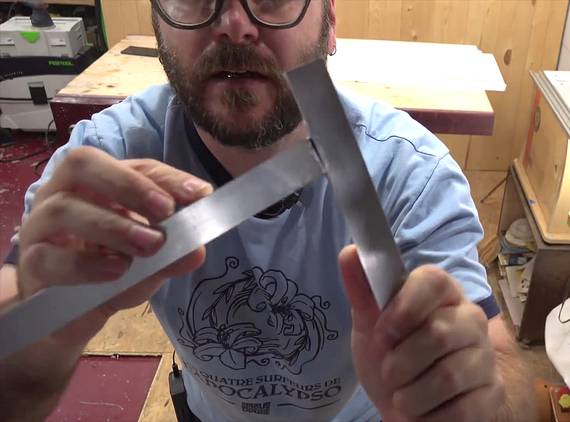
But I noticed the aluminium near the joint starting to bend and the joint opening a crack (where I'm pointing with the red pen).
 I removed the load, stiffened up my reinforcing, and tried again,
but it failed at a lesser force.
I removed the load, stiffened up my reinforcing, and tried again,
but it failed at a lesser force.
So I'd say my test wasn't a 100% shear test. A pure shear force is difficult to apply with my setup.
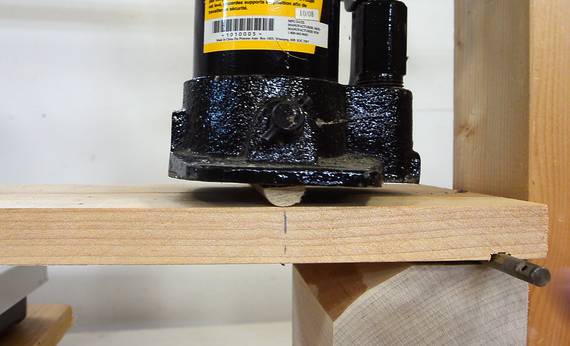
 The next test was to test with bending moment applied. I applied the jack 11 cm from
the joint. This time the jack is directly on the scale because I expected the
forces to be much smaller.
The next test was to test with bending moment applied. I applied the jack 11 cm from
the joint. This time the jack is directly on the scale because I expected the
forces to be much smaller.
The joint broke at 45 pounds (20 kg) applied. I zeroed out the scale with the jack on it, so that 45 pounds doesn't include the weight of the jack.
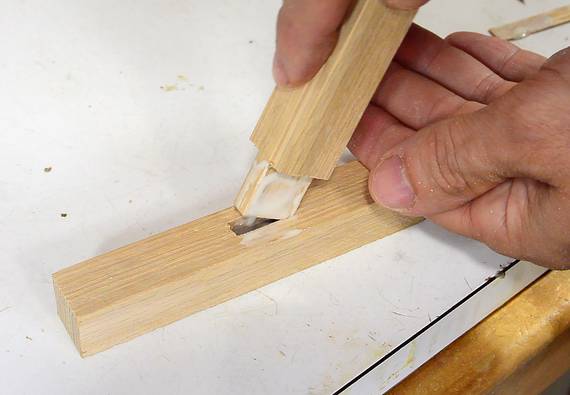
 Out of curiosity, I made some mortise and tenon test joints of the same
geometry out of oak and tested those. The bending one broke at 70 pounds,
and shear at 130 pounds on the scale, same as the aluminium. So a similar
geometry could be made as strong in wood - though wood joints don't allow
for pieces from three directions to meet in one corner like they do in
Dave's design.
Out of curiosity, I made some mortise and tenon test joints of the same
geometry out of oak and tested those. The bending one broke at 70 pounds,
and shear at 130 pounds on the scale, same as the aluminium. So a similar
geometry could be made as strong in wood - though wood joints don't allow
for pieces from three directions to meet in one corner like they do in
Dave's design.
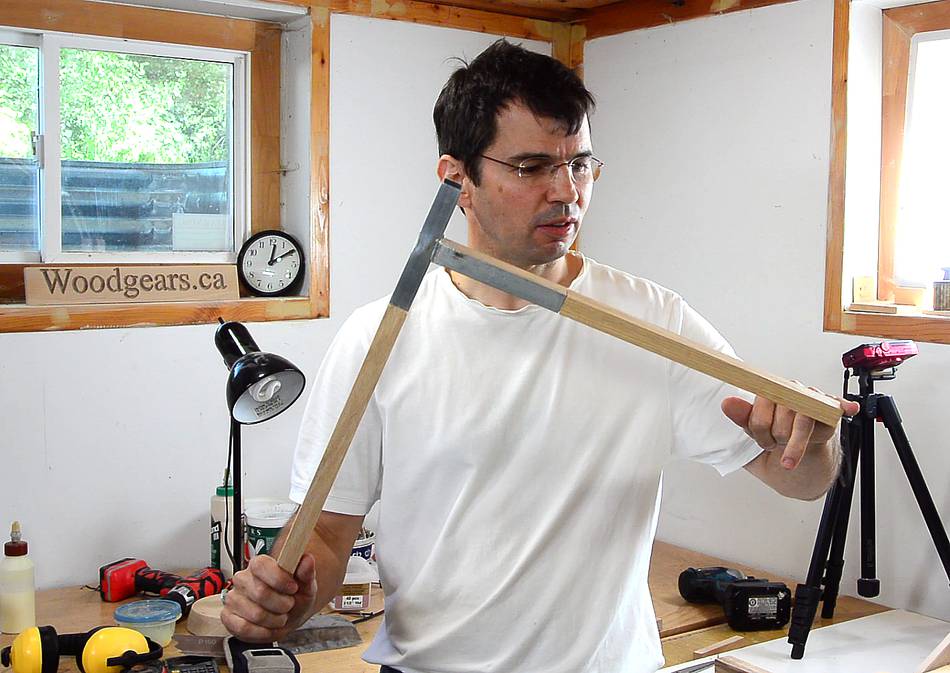 To demonstrate the power of leverage, I extended the last of Dave's test
joints with pieces of wood and broke it by pulling on one end with my little finger.
To demonstrate the power of leverage, I extended the last of Dave's test
joints with pieces of wood and broke it by pulling on one end with my little finger.
This joint didn't break quite as easily as I expected, so I suspect this sample was slightly stronger than the one that failed at 45 pounds with my bend test.
 I wanted to re-test some of these, so I bought some aluminium brazing rod
and tried to re-braze some of the broken joints. I first tried heating it
with propane, but it wasn't hot enough. Then tried it with MPS gas (Map gas,
as everyone calls it - in the yellow cylinders), but still didn't have much
luck. The picture on the package shows a welding torch (the oxy-acetylene
variety). I gave up on the whole thing. It gave me a whole lot of
respect for David Picchiuto for getting this to work. But when I had a close
look at some of the pictures of his coffee table, I could see some of his
joints were also less than perfect.
I wanted to re-test some of these, so I bought some aluminium brazing rod
and tried to re-braze some of the broken joints. I first tried heating it
with propane, but it wasn't hot enough. Then tried it with MPS gas (Map gas,
as everyone calls it - in the yellow cylinders), but still didn't have much
luck. The picture on the package shows a welding torch (the oxy-acetylene
variety). I gave up on the whole thing. It gave me a whole lot of
respect for David Picchiuto for getting this to work. But when I had a close
look at some of the pictures of his coffee table, I could see some of his
joints were also less than perfect.
The instructions on the package of brazing rods suggest they are for patching holes and cracks in stuff like aluminium boats and other aluminium parts. I think for structural joints, MIG or TIG welding aluminium would be easier, faster, and stronger -- provided you have a MIG or TIG welder. I don't have one. If I was building this coffee table I'd probably make the legs out of steel so I could weld it with my cheap wire feed welder.
 But the way
David's coffee table is built, eight joints would have to break
simultaneously for the legs to bend over from being pushed sideways.
Unless I were to take a flying leap
onto his table, it will stand up just fine. In fact, it might even take
more than one flying leap to break it!
But the way
David's coffee table is built, eight joints would have to break
simultaneously for the legs to bend over from being pushed sideways.
Unless I were to take a flying leap
onto his table, it will stand up just fine. In fact, it might even take
more than one flying leap to break it!
See also:
 David's coffee table build
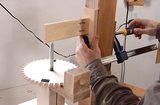 Pocket hole vs mortise
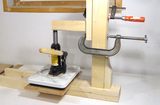 Testing different
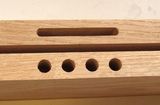 Dowel vs. mortise and
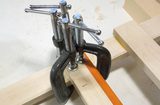 Can you squeeze all
 Office chair to welding cart
 Chip carving knife
To my woodworking website