<Building a lumber rack
I always keep a selection of lumber near the workshop. Because hardwood is expensive to buy,
I salvage hardwood whenever I can. And it's also good to always have a few 2x4s and such handy,
seeing that I keep using them up for various projects. So logically enough, I need a place
to keep the lumber.
There is a hallway leading to my workshop in my basement, and the wall of that hallway seemed
like an ideal place to put a lumber rack.
 The lumber rack had to be fairly shallow, so as not to obstruct too much of the hallway.
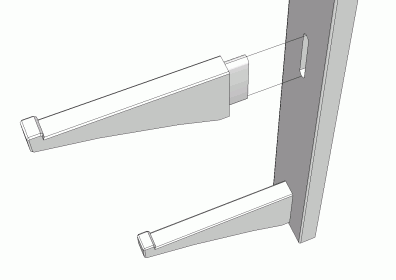
I decided to use a simple mortise and tenon design, with relatively short arms
sticking out from the wall. The arms have a bump on the end of them, to keep stuff
from slipping off by accident.
The lumber rack had to be fairly shallow, so as not to obstruct too much of the hallway.
I decided to use a simple mortise and tenon design, with relatively short arms
sticking out from the wall. The arms have a bump on the end of them, to keep stuff
from slipping off by accident.
The rack has no shelves on it. Rather, there are five uprights, with four supports on them
each, for a total of 20 supports.
I generated the illustration with the Sketchup.
You can download my lumber rack plans I drew to generate
that illustration.
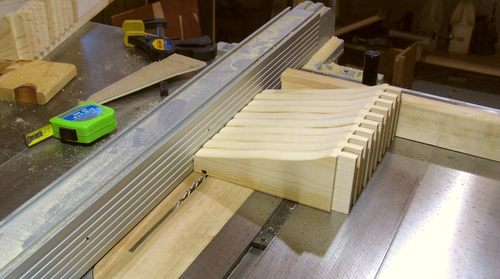
 For material, I used 22mm thick wood that used to be a futon frame. Because there are so
many supports, I made a plywood template of a support to layout for the maximum number
of supports to cut from the bits of lumber I used.
For material, I used 22mm thick wood that used to be a futon frame. Because there are so
many supports, I made a plywood template of a support to layout for the maximum number
of supports to cut from the bits of lumber I used.
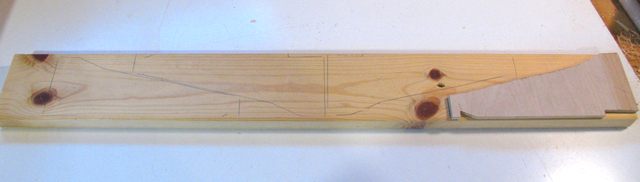
 I cut the pieces out with a bandsaw, and then used my tenon jig to cut the tenons on the parts.
The knob thing at the tip of the supports is part of the piece of wood, so I needed to cut
away about 6 mm from the top to leave the knob.
I cut the pieces out with a bandsaw, and then used my tenon jig to cut the tenons on the parts.
The knob thing at the tip of the supports is part of the piece of wood, so I needed to cut
away about 6 mm from the top to leave the knob.
With so many pieces to cut, it was worth jigging up every cut on the table saw. In fact,
some of the cuts, like the one at the one above, I could cut several parts at once.
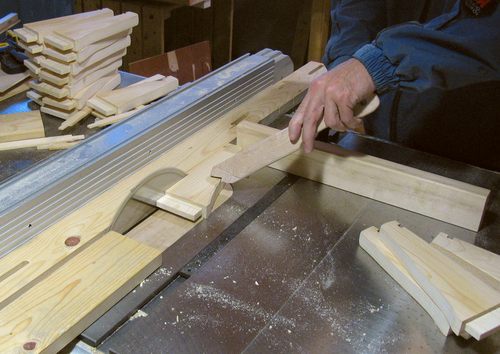 Another jigged up cut to cut away everything but the knob or hook at the end of the supports.
It's a rip cut, but only so far. A board serves as an end stop so I don't cut too far, and another
board next to the fence gives me a bit more room (rather than cutting straight against the fence).
Another jigged up cut to cut away everything but the knob or hook at the end of the supports.
It's a rip cut, but only so far. A board serves as an end stop so I don't cut too far, and another
board next to the fence gives me a bit more room (rather than cutting straight against the fence).
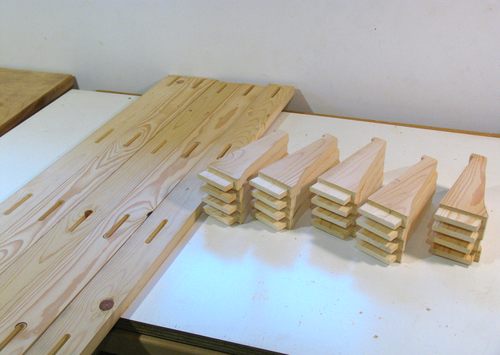 I cut four mortises into each upright for the shelf supports. Actually, I always cut the mortise
first, so that I can check the fit of the first tenon I cut, and adjust if its too tight or too loose.
I cut four mortises into each upright for the shelf supports. Actually, I always cut the mortise
first, so that I can check the fit of the first tenon I cut, and adjust if its too tight or too loose.
The shot at left shows all the parts, ready for assembly.
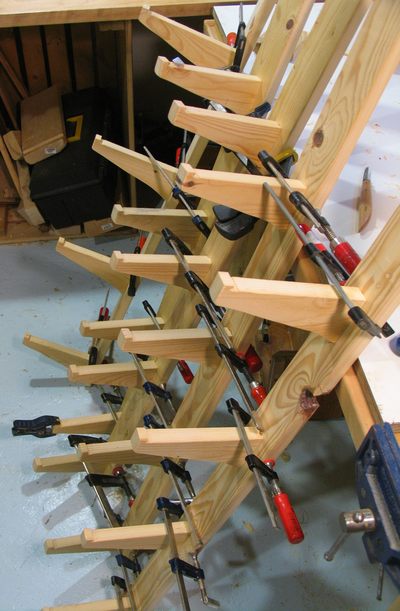 I like to put a clamp around a mortise and tenon joint to squeeze it. Just for good measure. I'm not
sure if it makes a difference for stock this wide at all. The shot at left shows all the uprights
waiting for the glue to dry.
I like to put a clamp around a mortise and tenon joint to squeeze it. Just for good measure. I'm not
sure if it makes a difference for stock this wide at all. The shot at left shows all the uprights
waiting for the glue to dry.
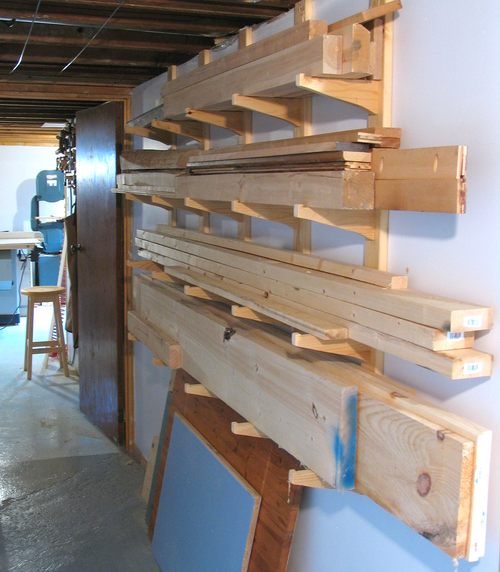
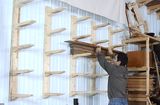
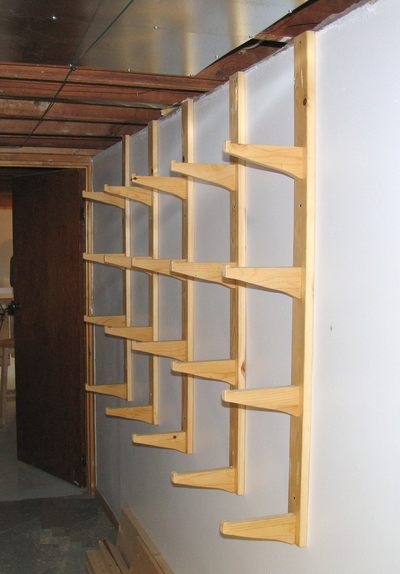 And finally, the uprights are screwed to the all. Each is placed where there is a stud in the wall.
And the next step, logically enough, was to pile it up with lumber!
If you build your own, you probably want to customize the dimensions to your application.
But if you want to see the actual dimensions I used, you can install the free SketchUp and
then open my Lumber rack plans
I have since ran out of space on the lumber rack and built some
shelving brackets to hold more lumber near the ceiling of the opposite wall.
 Big lumber rack
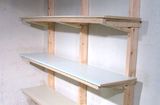 Basement shelving
 Wooden shelf brackets
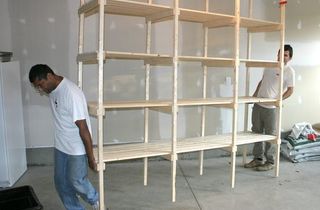 Storage shelves
 Why wood moisture matters
 Mortised shelves