Guitar making is an art form I know little about, so I found some of Pat's creations to be very neat.
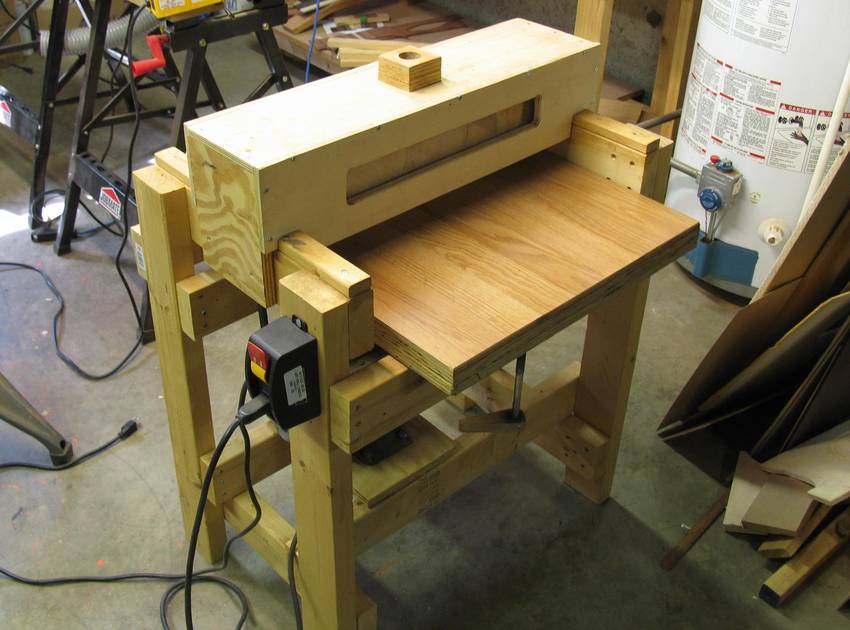
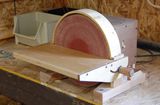
I liked the design of Pat's thickness sander. It's such a basic machine, just screwed together out of 2x4's, but it does the job. People have asked me from time to time to write about building a thickness sander. But I have no need for a thickness sander, so I'm unlikely to ever build one of my own. So I figured it would make sense to write about Pat's machine.
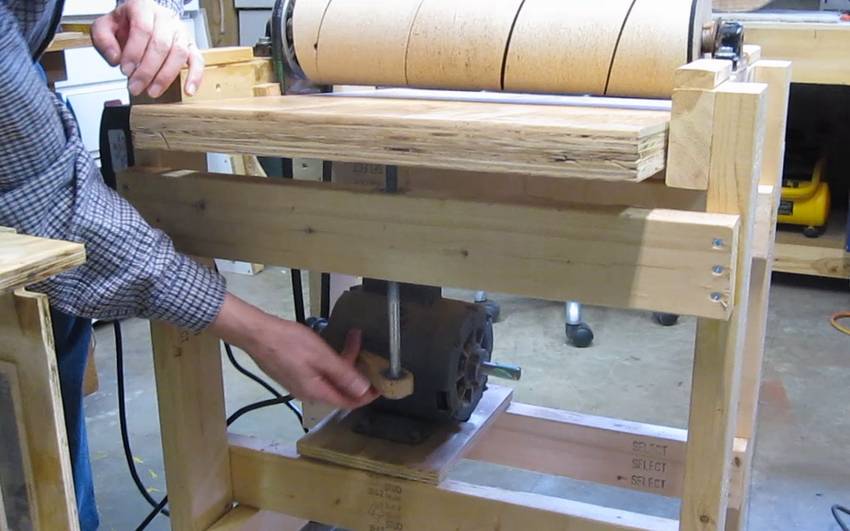
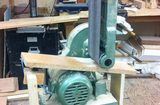
 The machine is powered by a 1750 RPM 1/2 HP motor. The motor has a 2" pulley on it, driving
a 5" pulley on the sanding drum.
The machine is powered by a 1750 RPM 1/2 HP motor. The motor has a 2" pulley on it, driving
a 5" pulley on the sanding drum.
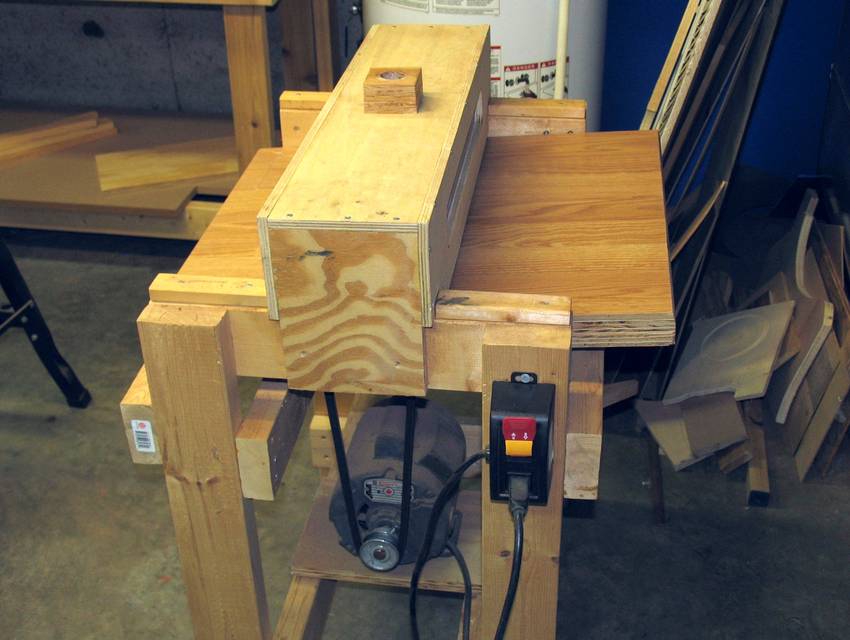
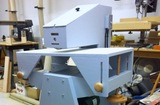
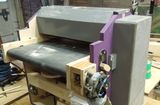
 The sanding drum is fixed in place. The table can be tilted to bring it closer
and further from the drum with a 1/2" bolt on the infeed side.
The sanding drum is fixed in place. The table can be tilted to bring it closer
and further from the drum with a 1/2" bolt on the infeed side.
 The outfeed side of the table is hinged to the frame of the sander.
The table itself is made of two pieces of 3/4" (19 mm) plywood glued together (for more torsional stiffness), and then some laminate flooring attached to the top. The laminate flooring makes for a smooth surface that slides easily.
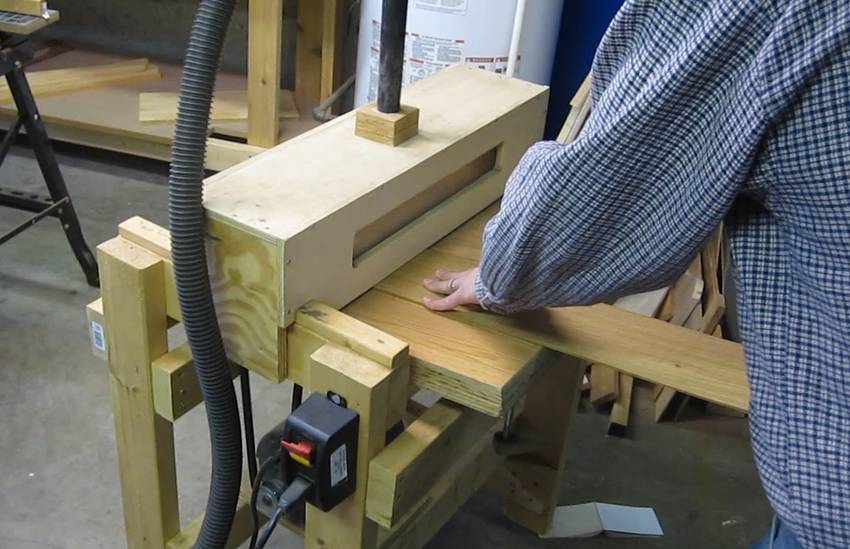 Stock is pushed through the sander manually.
An advantage of this is that it's easy to back off a bit if you can hear the
sander starting to stall.
Stock is pushed through the sander manually.
An advantage of this is that it's easy to back off a bit if you can hear the
sander starting to stall.
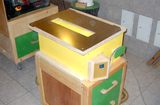
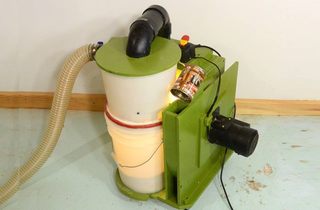
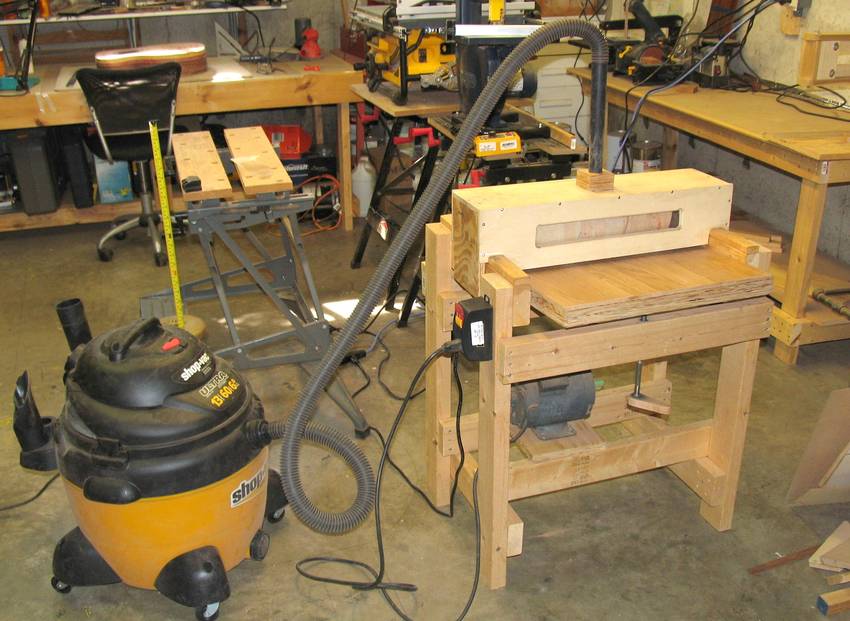 A vacuum cleaner attached to the dust cover is surprisingly effective at catching the
dust from the sander.
A vacuum cleaner attached to the dust cover is surprisingly effective at catching the
dust from the sander.
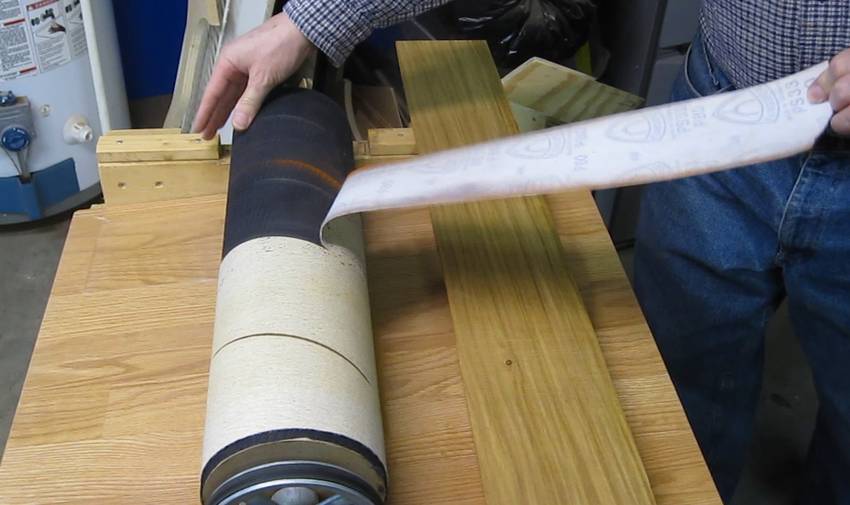 The sanding drum has a 12.5 cm (5") diameter. It's made of many disks of MDF stacked on a
5/8" hollow shaft. The outside of this drum is covered in Velcro (hook side). The sandpaper
has the loop side of the Velcro. Changing paper is as simple as pulling one paper off
and rolling the new paper on.
The sanding drum has a 12.5 cm (5") diameter. It's made of many disks of MDF stacked on a
5/8" hollow shaft. The outside of this drum is covered in Velcro (hook side). The sandpaper
has the loop side of the Velcro. Changing paper is as simple as pulling one paper off
and rolling the new paper on.
The Velcro also makes for a little bit of padding. Pat says he initially had the paper attached with double sided tape, but the softness of the Velcro is much better.
To true up the drum initially, Pat ran it without any sandpaper on the drum, and slid a piece of plywood with rough sandpaper facing up under the drum. This sanded the drum perfectly round to match the table. A very clever solution. Pat says he's had to use this method to re-true it from time to time.
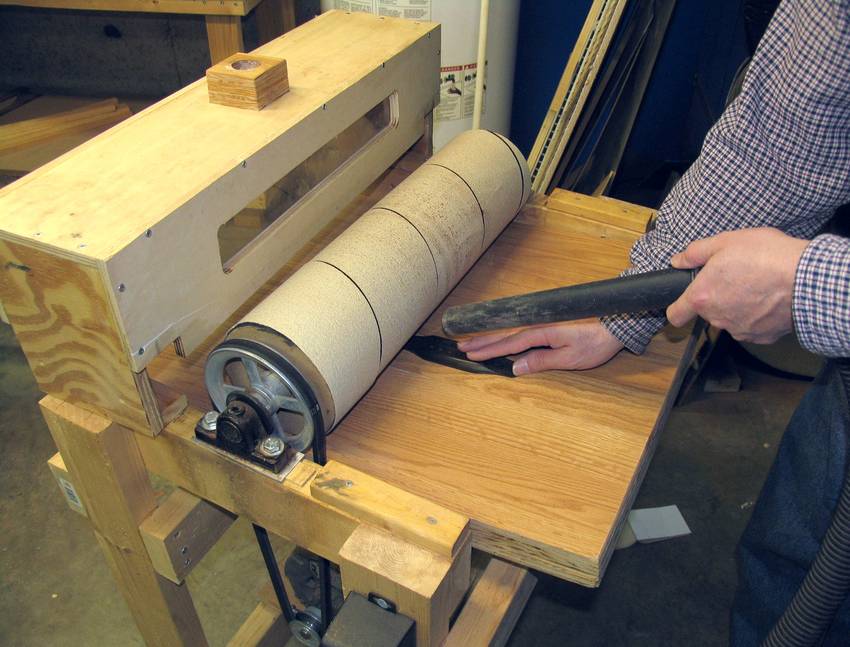
 Pat also uses the sander for some non-thickness sanding applications. For example,
he shapes the sides of his guitar bridges by pushing them part way under the drum. This has
to be done without the dust cover in place, so he captures the dust with the vacuum hose
held up to the drum.
Pat also uses the sander for some non-thickness sanding applications. For example,
he shapes the sides of his guitar bridges by pushing them part way under the drum. This has
to be done without the dust cover in place, so he captures the dust with the vacuum hose
held up to the drum.

Pat has a few other jigs that I found interesting. Here's his shelf of guitar bending
jigs. To somebody who makes stringed instruments (a luthier), these would be a
familiar sight, but personally, I find them novel.
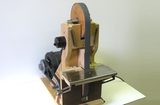
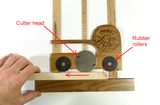
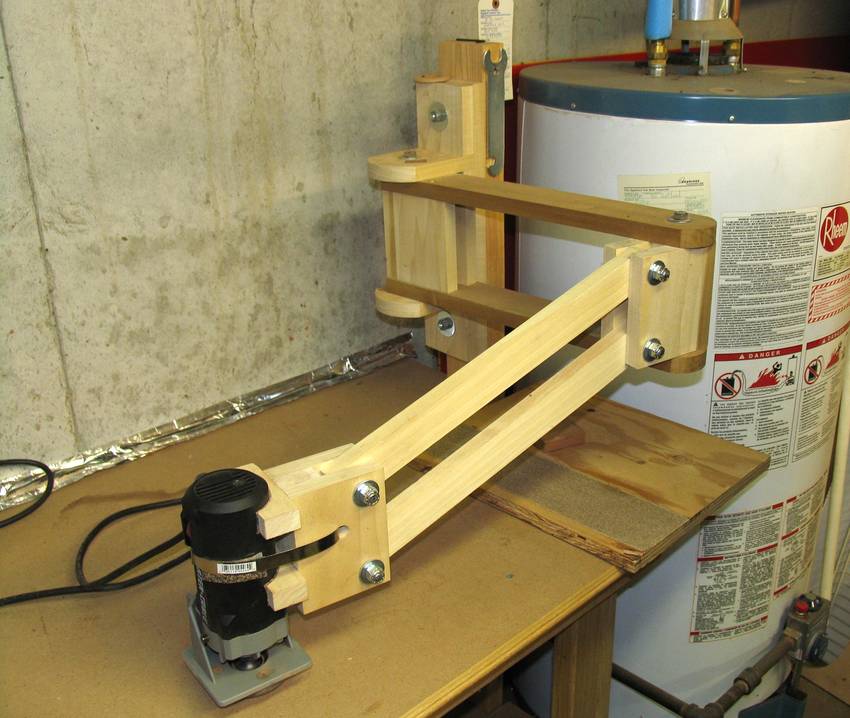 Here's one of Pat's jig that I found particularly neat.
One needs to cut a rabbet around the edge of the partially assembled guitar body to apply the "binding". If the guitar's top and bottom were flat, this would be as simple as running a router with a rabbeting bit around the guitar. But the front and back of a guitar actually have a light curvature to them, so running the router along the top surface would make for an imprecise cut.
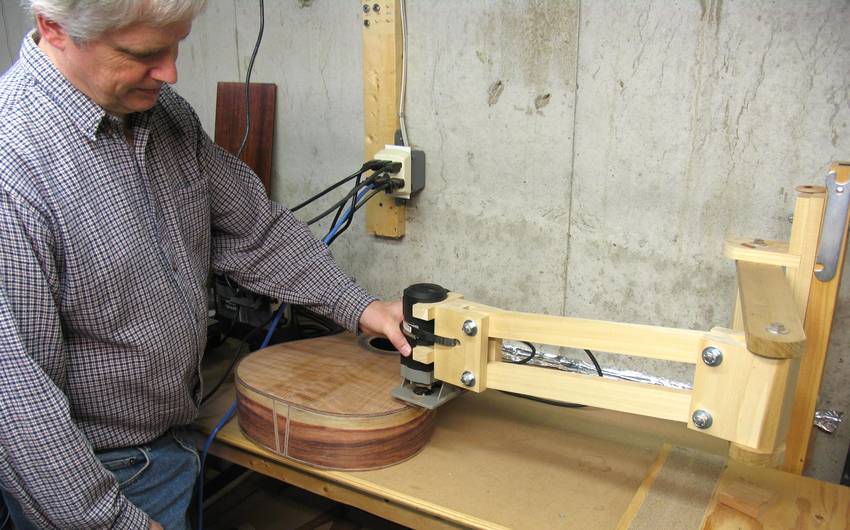 This jig gives the router freedom of movement in three dimensions while always
keeping it's axis vertical.
This jig gives the router freedom of movement in three dimensions while always
keeping it's axis vertical.
Here Pat is showing how the jig would be used. It would be used on a guitar body in an earlier phase of completion than this one. The guitar body would still be clamped in the form, but this nearly complete guitar body illustrates where the guitar would be.
 Pat makes custom guitars.
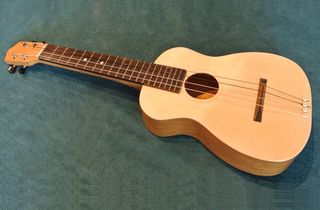
He also makes the occasional ukulele. This one is a tenor ukulele, quite a nice sound
to it. The catch is that people don't take ukulele as seriously as guitars, yet
it's almost as much work to produce as a full guitar.
So there isn't much of a market for custom ukuleles.
Pat makes custom guitars.
He also makes the occasional ukulele. This one is a tenor ukulele, quite a nice sound
to it. The catch is that people don't take ukulele as seriously as guitars, yet
it's almost as much work to produce as a full guitar.
So there isn't much of a market for custom ukuleles.
I really liked this ukulele, makes it very tempting to try to build one myself. So many projects, so little time!
I drew up some free plans for a thickness sander based on Pat's thickness sander:
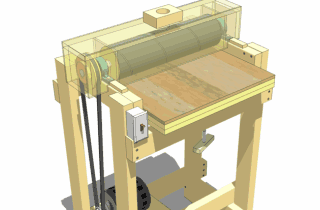 Plans for this thickness sander
Update October 2012: Pat bought a Used thickness sander
 Building a ukulele