Measuring seasonal wood shrinkage
A challenging property of wood is that, like many organic substances,
it expands and shrinks with changes in humidity.
The largest amount of shrinkage happens after a tree is cut down
and is initially dried. Drying out lumber can take a long time. For thick stock,
the process can take years. According to my dad, a rule of thumb for
air drying white oak in Germany was one year for each centimeter
of thickness, so 5 cm thick stock would take five years.
But drying time is also a function of wood type and climate.
Getting the moisture that's locked in the cells out takes a long
time. But if the wood gets wet again after it's been dried, that moisture dries
out faster.
Even fully dried wood will grow and shrink in size a little with seasonal
changes in
relative humidity of the air. Changes in ambient humidity are all it takes,
the wood doesn't actually need to get wet. A layer of
varnish can slow down how fast humidity gets in and out of the wood, but
all varnishes, even oil based ones, allow moisture to migrate in and out slowly.
Even plastics are slightly moisture permeable. That's why potato chip bags
are always shiny on the inside - they have a thin coating of
aluminium to lock out moisture.
 Wood shrinks by different amounts in different directions. There is almost
no shrinkage in the direction of the wood's grain (lengthwise).
There is some shrinkage radially (perpendicular to the growth rings),
and a greater amount of shrinkage tangentially (along the curvature
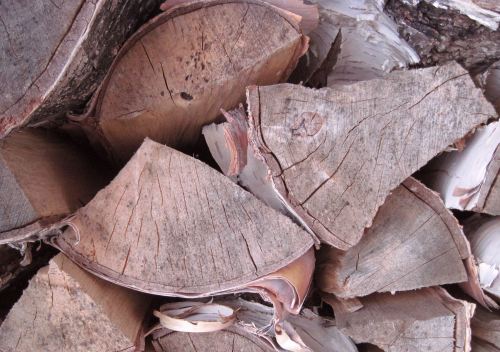
of the growth rings). The cracks in the end grain of this partially
dried firewood at left illustrate this concept. The firewood
had only dried at the ends when the photo was taken.
Shrinkage is thus only at the ends, while the middle of the wood has not
shrunk as much. Cracks have opened up at the ends to make up the
difference. The cracks are mostly perpendicular to the growth rings,
because there is more shrinkage along the direction of the rings
(tangential shrinkage) than there is perpendicular to them (radial shrinkage)
Wood shrinks by different amounts in different directions. There is almost
no shrinkage in the direction of the wood's grain (lengthwise).
There is some shrinkage radially (perpendicular to the growth rings),
and a greater amount of shrinkage tangentially (along the curvature
of the growth rings). The cracks in the end grain of this partially
dried firewood at left illustrate this concept. The firewood
had only dried at the ends when the photo was taken.
Shrinkage is thus only at the ends, while the middle of the wood has not
shrunk as much. Cracks have opened up at the ends to make up the
difference. The cracks are mostly perpendicular to the growth rings,
because there is more shrinkage along the direction of the rings
(tangential shrinkage) than there is perpendicular to them (radial shrinkage)
Once the wood has fully dried throughout, the whole piece will have
shrunk by the same amount. With the center of the wood as shrunken as the wood
near the ends, the cracks will mostly close up again.
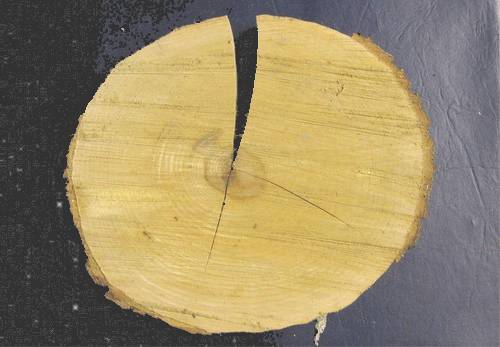 The different rates of radial and tangential shrinkage can cause
distortion in wood, such as cupping of boards. It can also cause
radial cracks from the center of the wood to the edge, as shown in
the photo at left. This is because the circumference of the circumference
of the wood shrinks more than it's radius, and the big radial crack
essentially allows the remaining circumference to shorten.
The different rates of radial and tangential shrinkage can cause
distortion in wood, such as cupping of boards. It can also cause
radial cracks from the center of the wood to the edge, as shown in
the photo at left. This is because the circumference of the circumference
of the wood shrinks more than it's radius, and the big radial crack
essentially allows the remaining circumference to shorten.
It's generally best not to have the center of
the tree trunk as part of the board because of this. Beams used
in timber frame construction usually include the center of the tree,
and usually have cracks along the flat sides because of this. However,
that is considered an acceptable defect.
 Seeing that one normally works with wood that has already been dried,
the initial shrinkage from green to dried is not that important
for furniture making. So the focus of my investigation was
the shrinkage and expansion of wood
as a function of normal seasonal changes in humidity. Living in Canada,
indoor ambient humidity in the winter can be quite low.
The cold outside air can't hold much water vapour. But once the air is heated up
inside the house, its moisture holding capacity increases. Unless moisture
is added with a humidifier or other means, the relative humidity of the
warmed up outside air becomes quite low. And it's relative humidity that
affects the moisture content in materials such as wood.
Seeing that one normally works with wood that has already been dried,
the initial shrinkage from green to dried is not that important
for furniture making. So the focus of my investigation was
the shrinkage and expansion of wood
as a function of normal seasonal changes in humidity. Living in Canada,
indoor ambient humidity in the winter can be quite low.
The cold outside air can't hold much water vapour. But once the air is heated up
inside the house, its moisture holding capacity increases. Unless moisture
is added with a humidifier or other means, the relative humidity of the
warmed up outside air becomes quite low. And it's relative humidity that
affects the moisture content in materials such as wood.
I cut samples from numerous species of wood. I cut slices off the end of
the pieces of wood, so that my sample pieces were only about 5 mm long
in the direction of the grain. Moisture travels best along the direction
of the grain. With my slices this thin, and with some experimenting, I figured
that about three days was enough for the wood to reach equilibrium with
a new level of ambient humidity.
Shrinkage and expansion mostly happens across the grain, but I also wanted
to see if there was much change in length. So I also made some samples
that were just a few millimeters thick, and about 10 cm long.
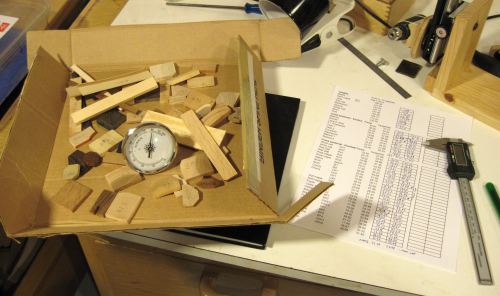
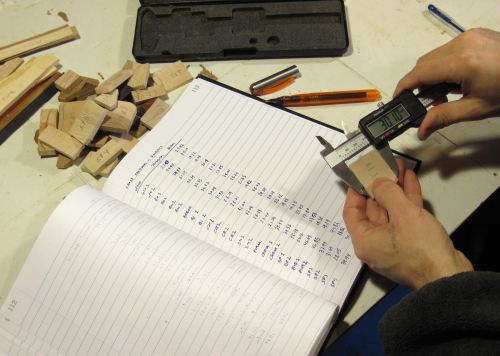 The next step was to measure all my samples. For the most part, I cut my
samples so that the growth rings were parallel to two of the edges
of my pieces. That way,
I could measure expansion across the grain (radial) and along the grain
(tangential) separately. My experiments consisted of subjecting all my
samples to certain humidity conditions for a few days and measuring them.
Then trying different conditions, and measuring again. I tried a few
different conditions. It was good to use digital calipers for this job.
It sped up the work and cut down on transcription errors.
The next step was to measure all my samples. For the most part, I cut my
samples so that the growth rings were parallel to two of the edges
of my pieces. That way,
I could measure expansion across the grain (radial) and along the grain
(tangential) separately. My experiments consisted of subjecting all my
samples to certain humidity conditions for a few days and measuring them.
Then trying different conditions, and measuring again. I tried a few
different conditions. It was good to use digital calipers for this job.
It sped up the work and cut down on transcription errors.
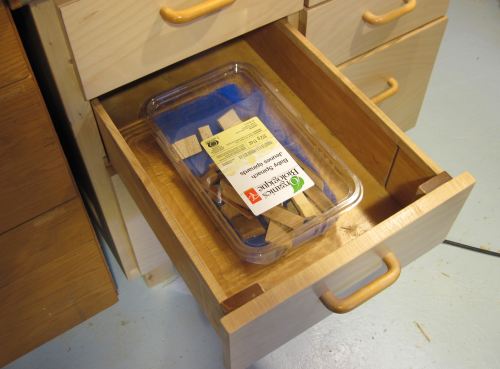 For my first "humid" test I put some water in the bottom of a plastic container,
then put a piece of furnace filter on top of that to keep the samples from
touching the water, and then loosely put the samples on top. I put this
all in a drawer in the middle of my workshop, so that my samples would not
be subject to temperature changes or temperature differential.
If I had put this setup near a window, I would probably have gotten
condensation on the window side, which would have gotten some of the
wood wet directly.
For my first "humid" test I put some water in the bottom of a plastic container,
then put a piece of furnace filter on top of that to keep the samples from
touching the water, and then loosely put the samples on top. I put this
all in a drawer in the middle of my workshop, so that my samples would not
be subject to temperature changes or temperature differential.
If I had put this setup near a window, I would probably have gotten
condensation on the window side, which would have gotten some of the
wood wet directly.
 The previous setup made for a relative humidity of around 100%, and some of
my samples, though not noticeably wet, felt moist to the touch.
So I figured that might be
a bit extreme. It would be like keeping furniture in a moldy wet basement in the
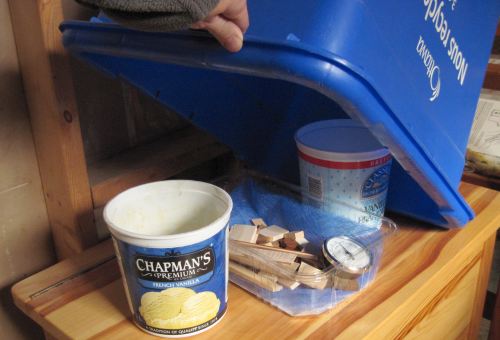
summer - not all that realistic. So after I let everything dry, I put
the container of samples under a recycling box, with two ice cream containers
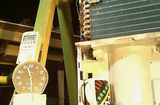
with a little bit of water on either side. My hygrometer settled
in at around 75% humidity, although me lifting the box to check a couple of
times a day also affected the humidity. If my seal around the box had been
tight, and I left it alone at constant temperature, the humidity in that setup
should have eventually settled at 100% as well.
The previous setup made for a relative humidity of around 100%, and some of
my samples, though not noticeably wet, felt moist to the touch.
So I figured that might be
a bit extreme. It would be like keeping furniture in a moldy wet basement in the
summer - not all that realistic. So after I let everything dry, I put
the container of samples under a recycling box, with two ice cream containers
with a little bit of water on either side. My hygrometer settled
in at around 75% humidity, although me lifting the box to check a couple of
times a day also affected the humidity. If my seal around the box had been
tight, and I left it alone at constant temperature, the humidity in that setup
should have eventually settled at 100% as well.
For the "dry" reading, I left the samples in my living room. My hygrometer
indicated "40%" there, which was higher than I expected it to be, considering
I don't use a humidifier. I do however air dry my clothing in the house, and
I dry out my shower by leaving the bathroom door open.
The humidity reading in my basement workshop
was around 55%, which I also found surprisingly
high for the winter. But then again, the temperature in my shop averages around
15 degrees in the winter, so it's understandable that it wouldn't be as dry
as my living room.
 The whole investigation ended up being less consistent and repeatable than I was hoping
it would be. Having to wait a few days before I could take readings also
slowed down the experiments. Worse yet, if, on analyzing, I found that a reading
was out of line, I couldn't just take another reading off a humid sample, because
by then several hours had passed with my samples now in whatever environment
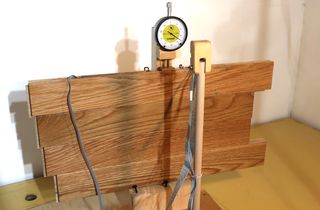
I left them in. Also, with many samples only about 1.8 cm in size, and with typical
shrinkage less than 1%, I had to measure my not-necessarily square pieces
very precisely.
The whole investigation ended up being less consistent and repeatable than I was hoping
it would be. Having to wait a few days before I could take readings also
slowed down the experiments. Worse yet, if, on analyzing, I found that a reading
was out of line, I couldn't just take another reading off a humid sample, because
by then several hours had passed with my samples now in whatever environment
I left them in. Also, with many samples only about 1.8 cm in size, and with typical
shrinkage less than 1%, I had to measure my not-necessarily square pieces
very precisely.
Also, similar to my hardness tests,
I found considerable variations between samples of the same species of wood.
But unlike my hardness tests, I couldn't just spontaneously do a few more tests
to double check a suspicious result.
I'm not entirely happy with how these experiments went, and I had to discard some
of my readings because I realized after the fact that I had been measuring it
inconsistently. For example, if a rectangular piece actually turns out to be
slightly trapezoidal, measuring the width of the rectangle on one side or the other
will give different results. The change in dimensions was so small that if one
of my readings was off by just 0.1 mm, it would really throw off the result.
My calipers are much more accurate than that, but if my samples were off-rectanglular
by 0.1 mm, it's not something that pops out by looking at them.
I marked where I should apply place calipers on the least rectangular samples,
but for some of the samples, I only realized they were off-rectangular afterwards;
So I had to discard some of my readings.
The table below is compiled from those readings that I had the most faith in.
Results
Shrinkage and expansion as a function of
wood species between seasonal
40% and 75% relative humidity
|
|---|
| Type of wood | Seasonal size change
|
|---|
| Radial | Tangential
|
|---|
| Pine | 0.44% | 0.84%
|
| Cedar | 0.45% | 0.90%
|
| Spruce | 0.51% | 0.90%
|
| Birch | 0.81% | 1.07%
|
| Oak | 0.85% | 1.07%
|
| Ash | 0.68% | 0.77%
|
| Cherry | 0.68% | 0.69%
|
| Crab apple | 0.81% | 1.17%
|
| Maple | 0.77% | 1.13%
|
Typical tangential shrinkage was around 1% for seasonal changes, while radial shrinkage
was around 0.65%.
I figure these figures should be a reasonable representation for larger seasonal variations in
northern indoor environments, although under extreme conditions, you might get more shrinkage.
As expected, tangential shrinkage (along the lines of the growth rings) was a little bigger
than shrinkage across the growth rings.
I was surprised that the softwoods showed the least shrinkage. But softwoods
are evergreens, have drier needles, use less water, and don't have as wet a sap, so
I guess I should have expected that.
Lengthwise shrinkage was typically on the order of 0.05%, less than a tenth as much as
the radial and tangential shrinkage. I didn't make a table of these (too few measurements
and too little variation for my data to be reliable). I figure lengthwise
shrinkage is small enough to not worry about.
I also tested various oily exotic African hardwoods. I expected these to hardly show any
shrinkage at all. They did show some shrinkage, but less than the softwoods. Even
the insanely dense and oily "Lignum Vitae" had shrinkage on the order of 0.3%.
Related articles about wood shrinkage around the web
 How long for floor boards to acclimatize -- experiments
 Measuring wood moisture
with a multimeter
Measuring wood moisture
with a multimeter Which wood is strongest, hardest, stiffest
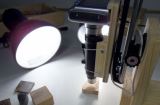 Wood grain macro photography
 More on wood moisture
 The mysterious leaking dehumidifier
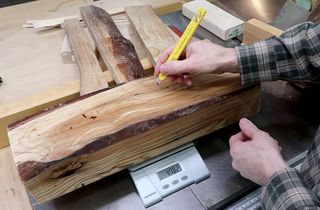 How long does wood take to dry