 The stand for my bandsaw stand consists of two frames, linked together with
four rails, to form a sort of outlined box.
The stand for my bandsaw stand consists of two frames, linked together with
four rails, to form a sort of outlined box.
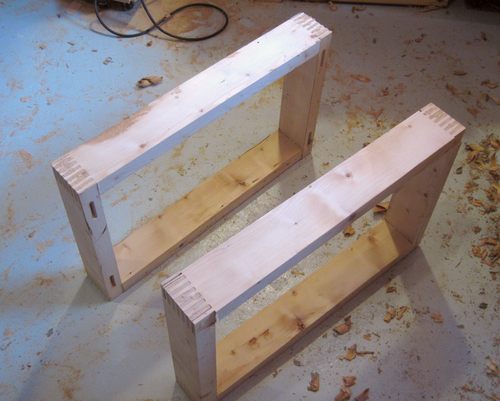 I used my screw advance box joint jig
to finger joint the corners of the two rectangular frames with 1/4"
wide fingers. This makes for very strong corner joints, and I don't have to
worry about bracing the box against diagonal loads in any way.
I used my screw advance box joint jig
to finger joint the corners of the two rectangular frames with 1/4"
wide fingers. This makes for very strong corner joints, and I don't have to
worry about bracing the box against diagonal loads in any way.
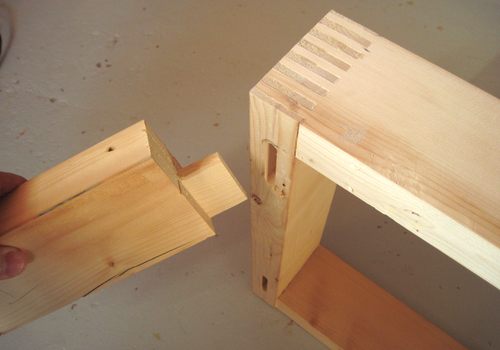 The four rails that join the two frames are mortised into the end frames.
The mortises don't extend all the way into the corners, so that my
mortises wouldn't cut away part of the finger joints in the corners.
The four rails that join the two frames are mortised into the end frames.
The mortises don't extend all the way into the corners, so that my
mortises wouldn't cut away part of the finger joints in the corners.
Overall, the way that frame goes together is nearly identical to what
I used for my mobile tool stand,
but without the panels in the side or the rabbet in the front. It's also
much lower and wider.
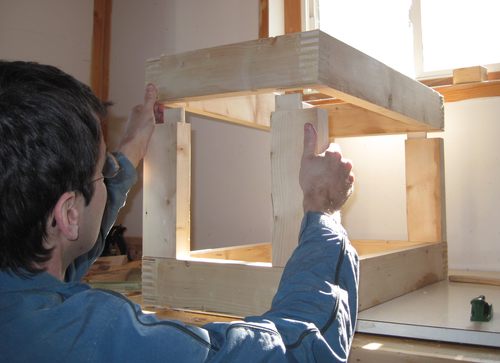
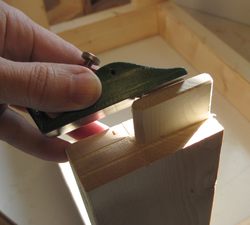 When joining the two frames, it's necessary to make sure that all the tenons
will line up. I'm doing a dry fit to check that it all fits. It helps
to chamfer the ends of the tenons a little bit to make it easier to get
them into the mortises. With glue on all four joints, there isn't much
time to fiddle with the joints before it sets.
This is especially true for joints that were
precisely made.
When joining the two frames, it's necessary to make sure that all the tenons
will line up. I'm doing a dry fit to check that it all fits. It helps
to chamfer the ends of the tenons a little bit to make it easier to get
them into the mortises. With glue on all four joints, there isn't much
time to fiddle with the joints before it sets.
This is especially true for joints that were
precisely made.
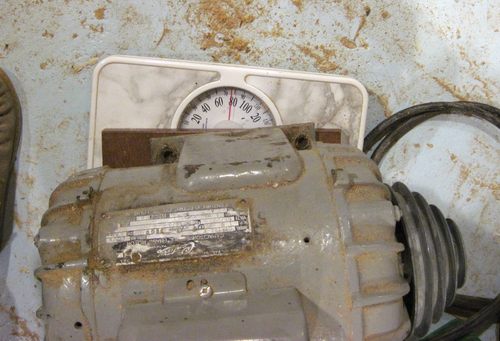 The motor is a 1.5 HP motor, 240 volts. It must be "old school" 1.5 HP, I would guess.
It sure is heavy to lift, but I was still surprised to see it register
at 76 pounds (34 kg) on my bathroom scale. That motor is more than half my weight.
No wonder I have such a hard time lifting it.
The motor is a 1.5 HP motor, 240 volts. It must be "old school" 1.5 HP, I would guess.
It sure is heavy to lift, but I was still surprised to see it register
at 76 pounds (34 kg) on my bathroom scale. That motor is more than half my weight.
No wonder I have such a hard time lifting it.
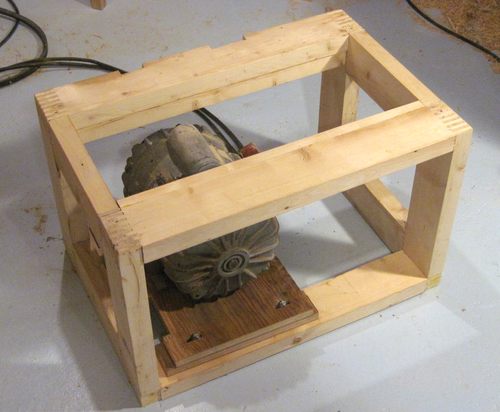
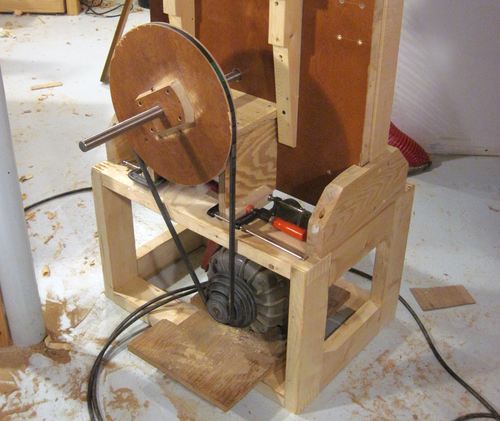 Here's how the bandsaw attaches to the stand. The little shelf thing
that holds the main shaft's rear pillow block also attaches to the back rail
of the stand. Also on the left and right of the saw are wooden brackets to hold
the post and bottom plywood to the stand. This makes for a very secure connection, so that if need
be, I can tip the whole saw and stand down onto the floor by grabbing the top of it
and lowering it slowly.
Here's how the bandsaw attaches to the stand. The little shelf thing
that holds the main shaft's rear pillow block also attaches to the back rail
of the stand. Also on the left and right of the saw are wooden brackets to hold
the post and bottom plywood to the stand. This makes for a very secure connection, so that if need
be, I can tip the whole saw and stand down onto the floor by grabbing the top of it
and lowering it slowly.
 My initial bandsaw frame used a post that
was only about 7x7 cm. This is more than sufficient
strength for even 300 pounds of blade tension. But it was still easy
to twist the frame a little just by pushing back on the upper blade guide.
My initial bandsaw frame used a post that
was only about 7x7 cm. This is more than sufficient
strength for even 300 pounds of blade tension. But it was still easy
to twist the frame a little just by pushing back on the upper blade guide.
So it was for stiffness, not strength, that I reinforced my vertical post.
I started by gluing a 3/4" (18 mm) wide board
to the left of it along its whole length. I also made the left-side blade guard
out of a thick piece of hardwood that was glued to the post, so that the addition of
that guard would add stiffness to the post. I glued another thick
piece of maple to the back of it to go between the top and bottom pieces
of plywood.
 I also reinforced my pieces of plywood at the top and bottom. My main concern
was that the wood isn't that strong against twisting. The tension of the blade
is actually offset from the wood, so it imparts a bit of a twisting
force on the plywood pieces.
I also reinforced my pieces of plywood at the top and bottom. My main concern
was that the wood isn't that strong against twisting. The tension of the blade
is actually offset from the wood, so it imparts a bit of a twisting
force on the plywood pieces.
My solution was to glue a few more pieces of wood onto the plywood. Stiffness against twisting goes up with thickness raised to the power of three, so adding just a bit of thickness in places will increase resistance to twisting considerably.
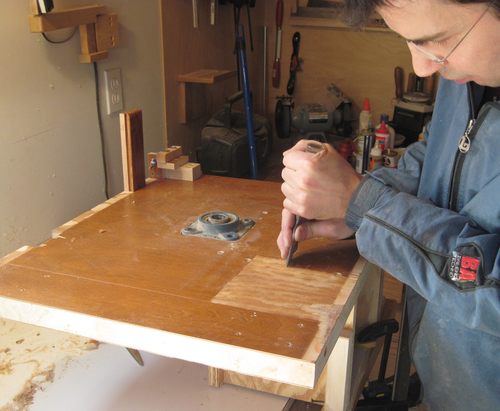
My pieces of plywood started out with varnish on both sides, so before gluing
anything onto it, I had to scrape the varnish off with a chisel.
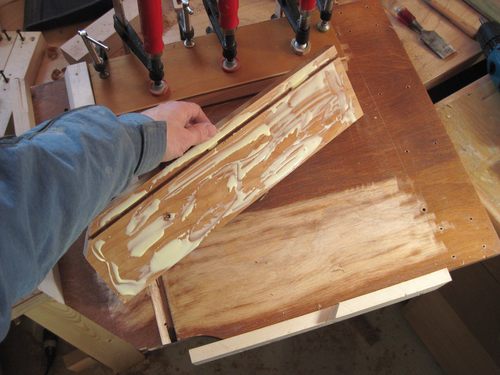 Here's a piece of scrap hardwood ready for gluing onto the top plywood.
Its some recycled wood from a piece of furniture, hence the groove in it.
Its the same sort of sandwich of hardwood with a few extra plys on either
side that I used for the rest of the bandsaw frame.
Here's a piece of scrap hardwood ready for gluing onto the top plywood.
Its some recycled wood from a piece of furniture, hence the groove in it.
Its the same sort of sandwich of hardwood with a few extra plys on either
side that I used for the rest of the bandsaw frame.