 I started with the top wheel mount. The top wheel mount needs to move
up and down for tensioning and tilt for tracking adjustment so it's
more complicated.
I started with the top wheel mount. The top wheel mount needs to move
up and down for tensioning and tilt for tracking adjustment so it's
more complicated.
I started with the top wheel mount. The top wheel mount needs to move
up and down for tensioning and tilt for tracking adjustment so it's
more complicated.
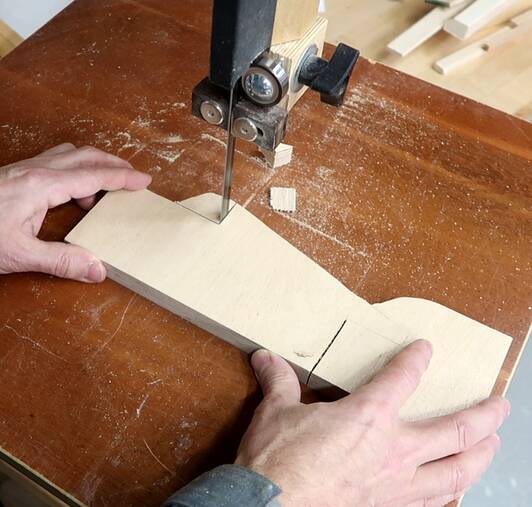
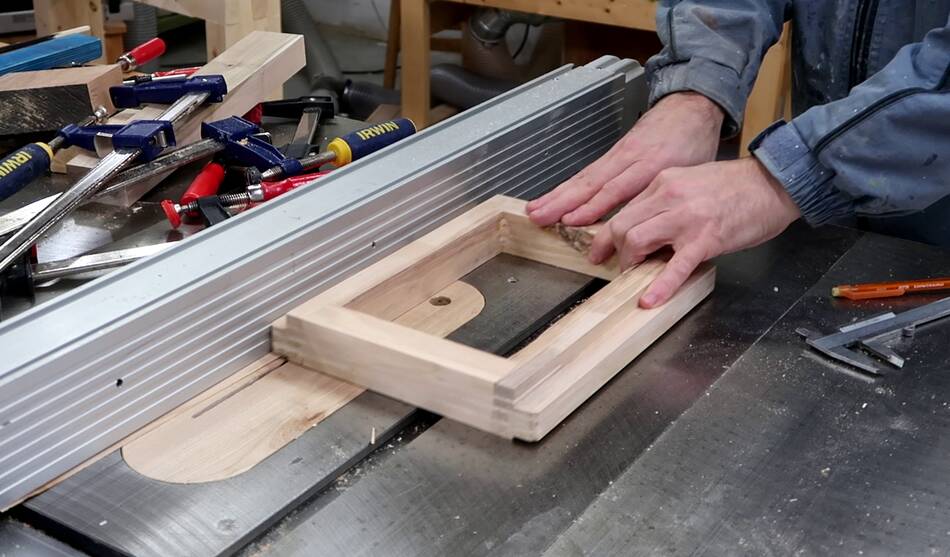
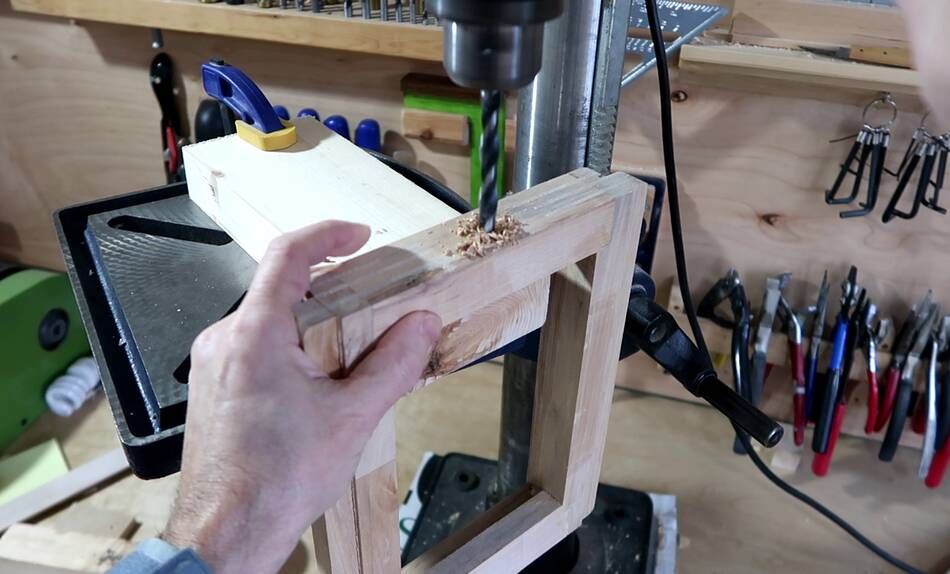
I cut four pieces to make the frame for the top from a piece of firewood.
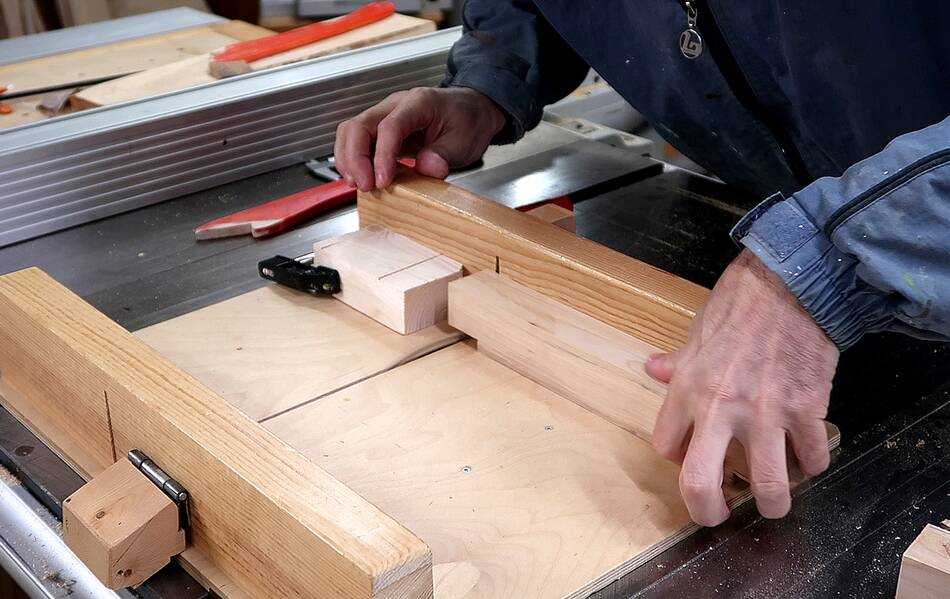 Then I cut a rabbet into the ends of the longer pieces for joining them
together. I cut a slot, removed most of the material with a bandsaw,
then moved the workpiece side-to-side to smooth the bottom of the rabbet
I cut. This ensures that surface is parallel to the long edge.
Then I cut a rabbet into the ends of the longer pieces for joining them
together. I cut a slot, removed most of the material with a bandsaw,
then moved the workpiece side-to-side to smooth the bottom of the rabbet
I cut. This ensures that surface is parallel to the long edge.
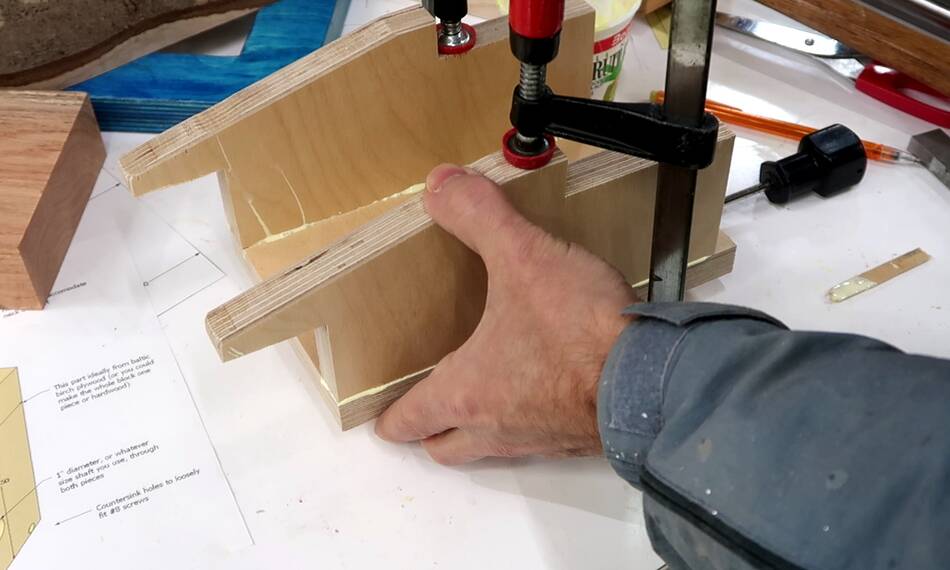
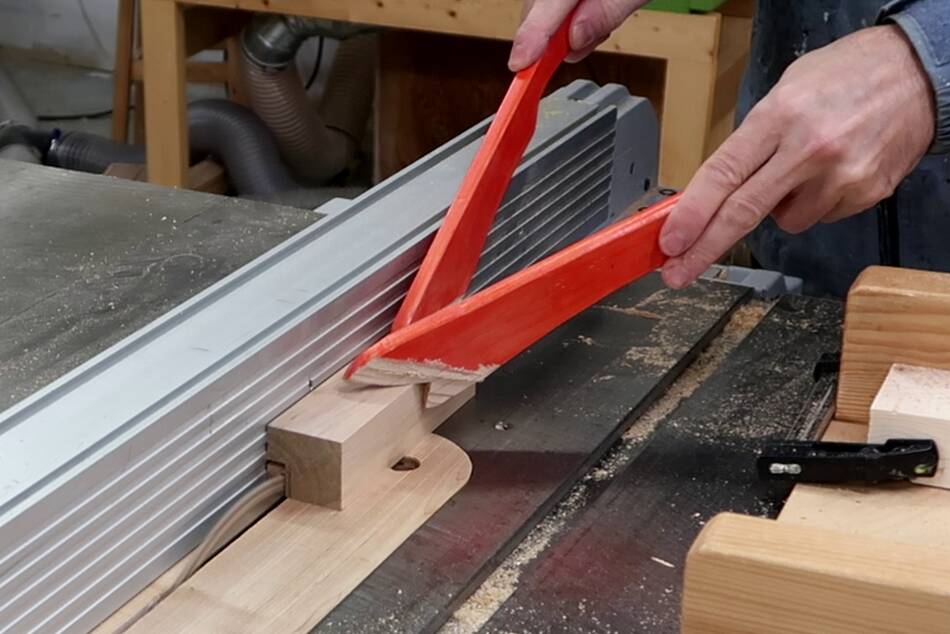 The bottom piece of this bracket also has a rabbet cut out of it,
which I made by making two cuts with the table saw. That rabbet provides
a ledge that the bottom of the tilting bracket is screwed to.
The bottom piece of this bracket also has a rabbet cut out of it,
which I made by making two cuts with the table saw. That rabbet provides
a ledge that the bottom of the tilting bracket is screwed to.
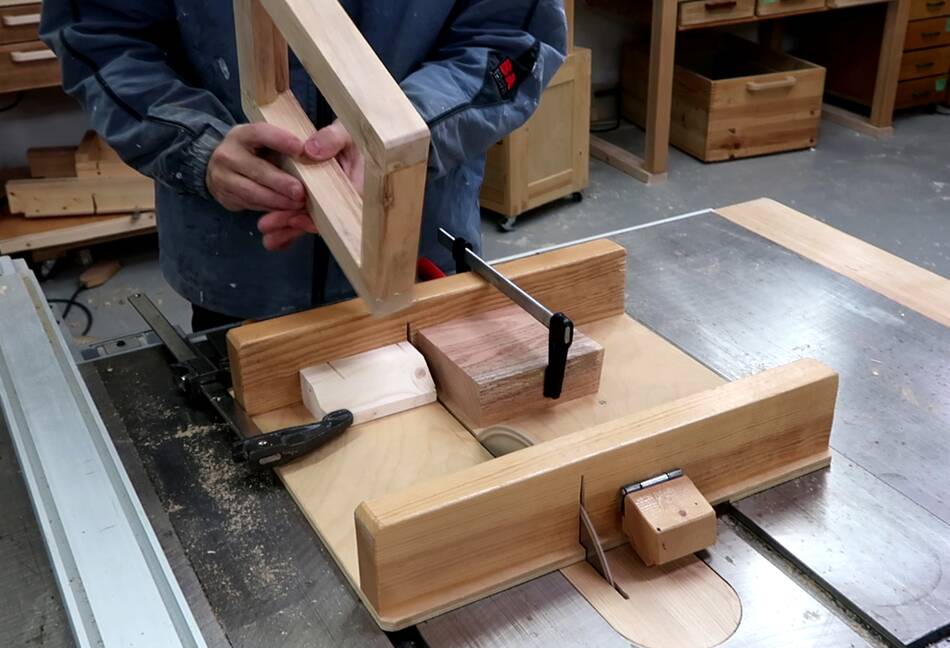
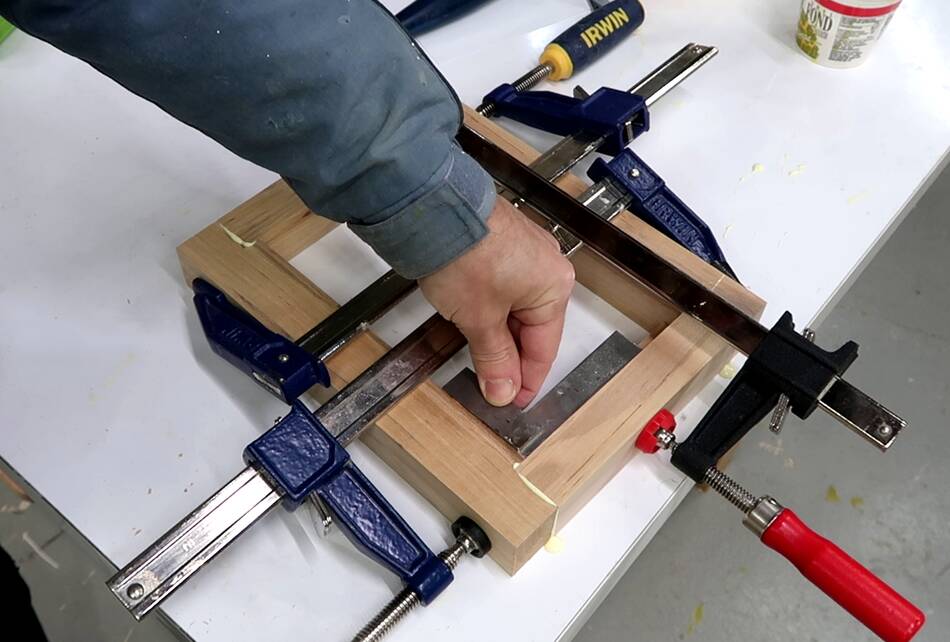 Then gluing the pieces together and checking that it's square.
I'll reinforce these joints later once the glue has dried.
Then gluing the pieces together and checking that it's square.
I'll reinforce these joints later once the glue has dried.
 On previous bandsaws I made the part that holds the top axle as a solid
block of hardwood, but most people don't have big chunks of firewood
handy to cut such a block out of, and drilling the hole for the shaft
straight through the hardwood and aligned properly is difficult.
So this time I made that part as a plywood frame.
On previous bandsaws I made the part that holds the top axle as a solid
block of hardwood, but most people don't have big chunks of firewood
handy to cut such a block out of, and drilling the hole for the shaft
straight through the hardwood and aligned properly is difficult.
So this time I made that part as a plywood frame.

 The sides of this frame are an odd shape, so I printed out a 1:1 template
for it. But having printed just one template, I cut around it and traced
it instead of cutting through it so I could use the same template twice.
The sides of this frame are an odd shape, so I printed out a 1:1 template
for it. But having printed just one template, I cut around it and traced
it instead of cutting through it so I could use the same template twice.
I cut that out with a bandsaw.
The irony of using a bandsaw to build a bandsaw is not lost on me, but if you don't have a bandsaw yet, you should consider building my 16" bandsaw or my 20" bandsaw first, and I do show how to build one of those without already having a bandsaw. Or if you really want to start with a 26" bandsaw, you can figure out how to do the cuts with a table saw and jig saw.
 The front of the bracket has a 1" hole for the axle.
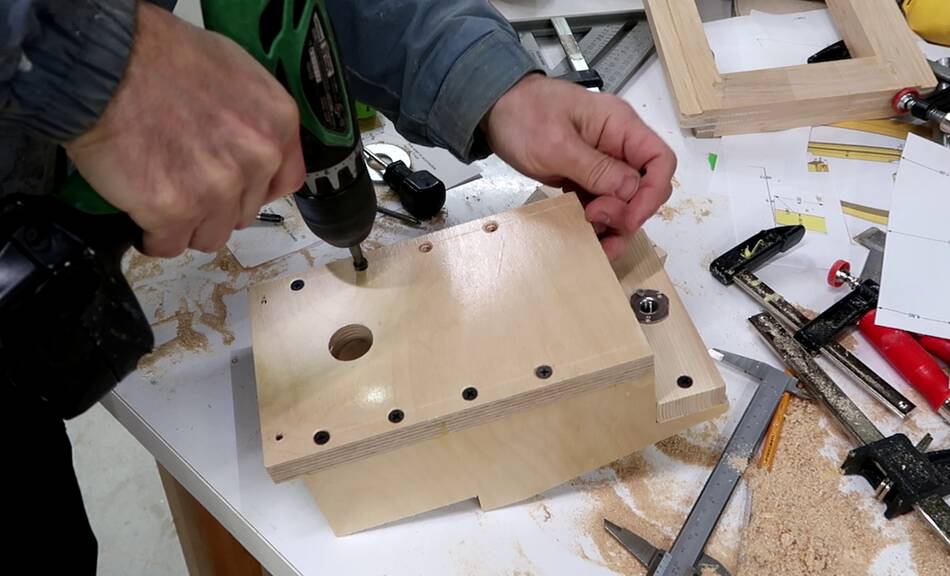
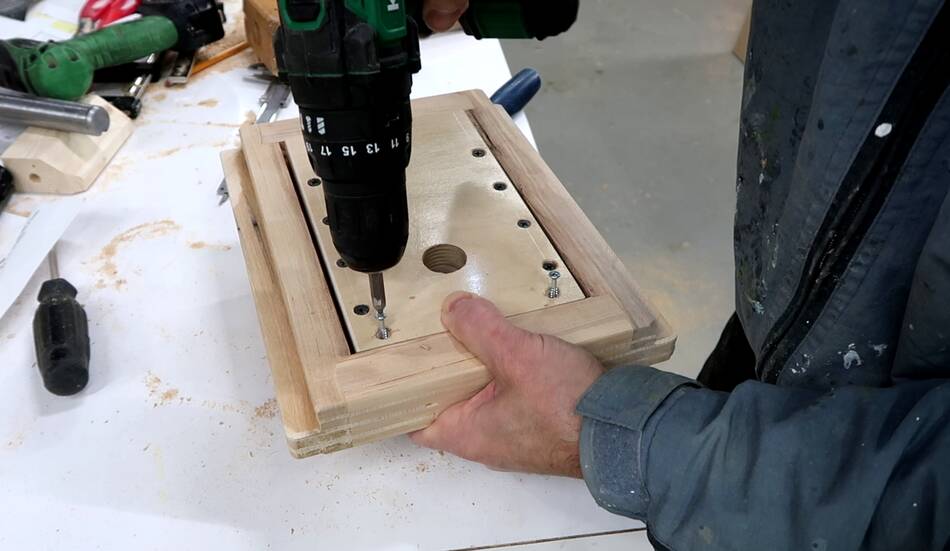
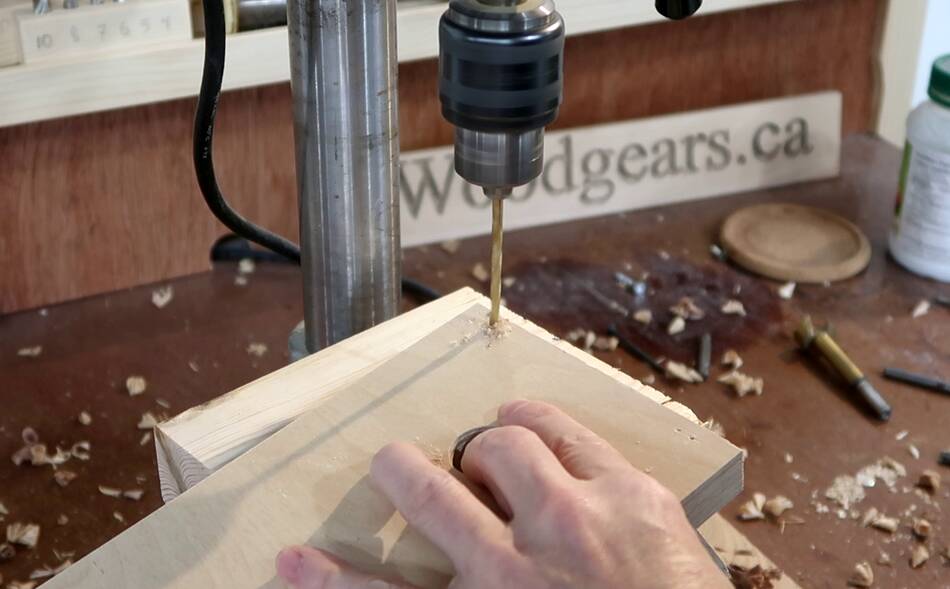 And some holes at an angle near the bottom. These holes are for screws
to hold the piece of plywood in the frame.
And some holes at an angle near the bottom. These holes are for screws
to hold the piece of plywood in the frame.
 I used some recycled baltic birch for this frame, which had varnish on it.
The easiest way to get rid of the varnish where I needed it glued was to cut
very shallow rabbets where it joins.
I used some recycled baltic birch for this frame, which had varnish on it.
The easiest way to get rid of the varnish where I needed it glued was to cut
very shallow rabbets where it joins.
 These shallow rabbets also help to align the pieces as I glue them
together.
These shallow rabbets also help to align the pieces as I glue them
together.
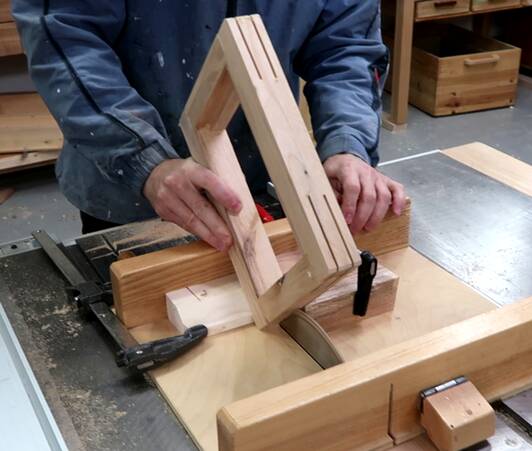 By now the joints in the frame have sufficiently dried that I
can cut slots for splines in the corners.
By now the joints in the frame have sufficiently dried that I
can cut slots for splines in the corners.
Some people make special jigs for cutting splines, but I just use my table saw sled, with a block clamped on the left to help place the workpiece at 45 degrees, and another block on the other side to set the lateral position.
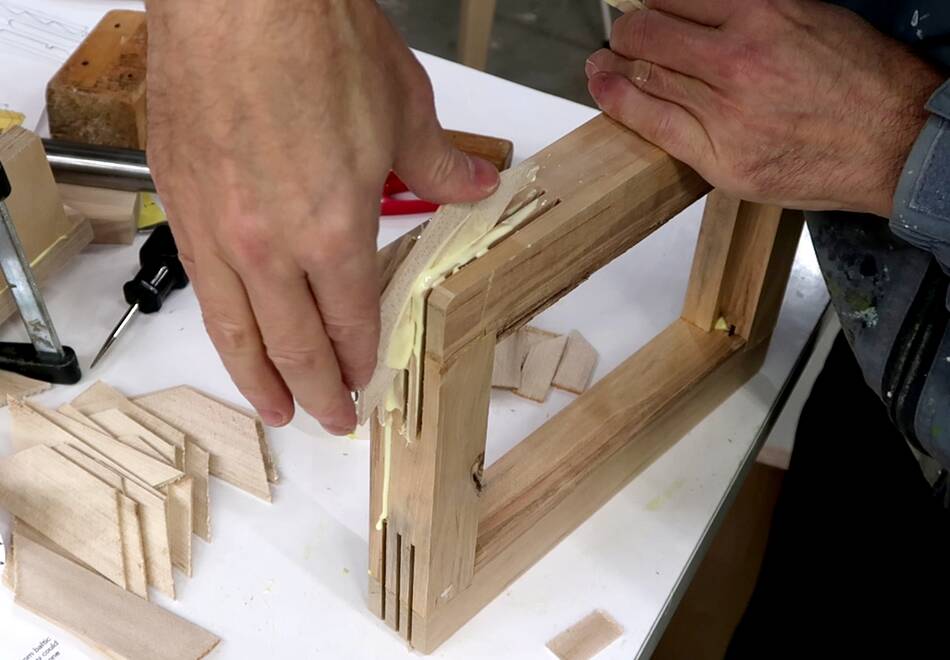 I then cut some strips of wood to go into the slots I just cut and glued
them in.
I then cut some strips of wood to go into the slots I just cut and glued
them in.
I had a thin-kerf blade in the saw, in retrospect I should have switched to a thicker blade for cutting these slots. To compensate, I cut a third slot in the middle.
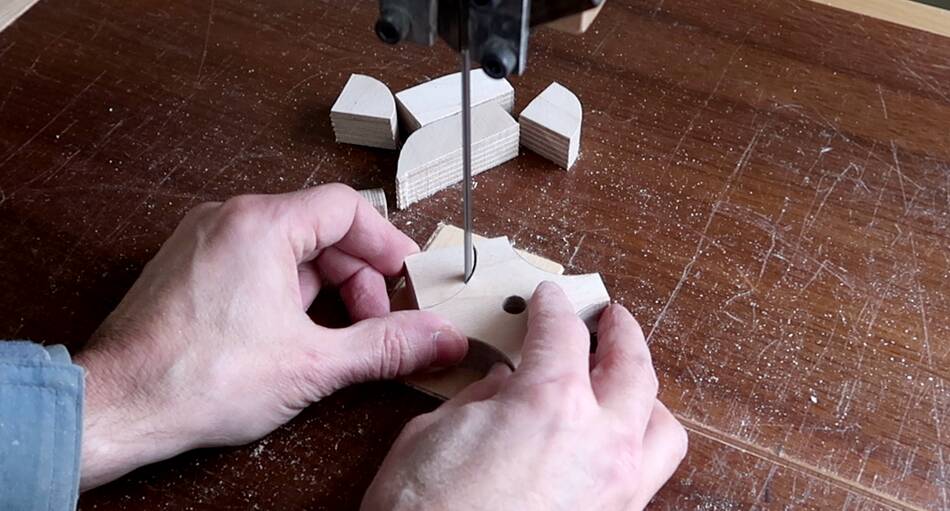
 Then roughly trimming off the excess on the bandsaw
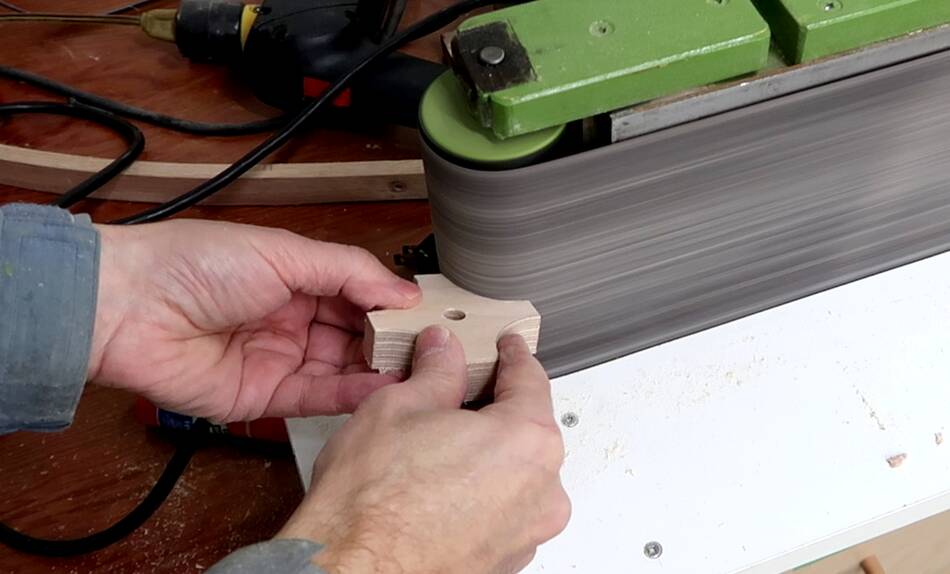
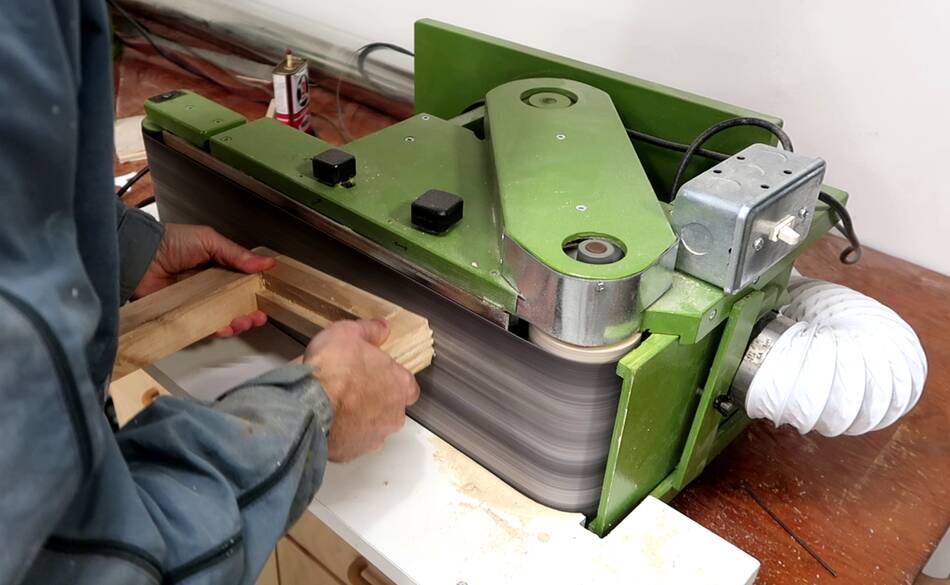 And finishing that on the belt sander. You could also just trim them
with a hammer and chisel. Building a 26" bandsaw is not a beginner
project, so I figure you already know how to do it differently if
you don't have the same equipment.
And finishing that on the belt sander. You could also just trim them
with a hammer and chisel. Building a 26" bandsaw is not a beginner
project, so I figure you already know how to do it differently if
you don't have the same equipment.
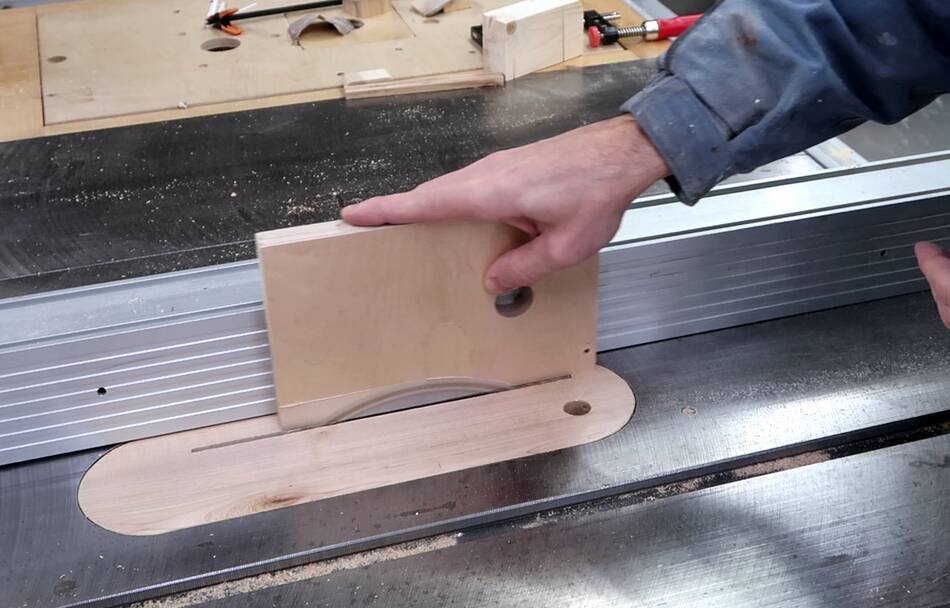
 Then cutting some rabbets along on the edge of the frame. These will allow
the frame to slide up and down in slots on top of the bandsaw.
Then cutting some rabbets along on the edge of the frame. These will allow
the frame to slide up and down in slots on top of the bandsaw.
 I made a four pointed knob for adjusting the tracking. I used to make my
knobs with two, three or five points, but when I used these 4-pointed
plastic knobs I already had when I made
these long reach
clamps I liked the feel of these more than 3-pointed or 5-pointed
ones, so I guess 4-pointed knobs are the way to go.
I made a four pointed knob for adjusting the tracking. I used to make my
knobs with two, three or five points, but when I used these 4-pointed
plastic knobs I already had when I made
these long reach
clamps I liked the feel of these more than 3-pointed or 5-pointed
ones, so I guess 4-pointed knobs are the way to go.
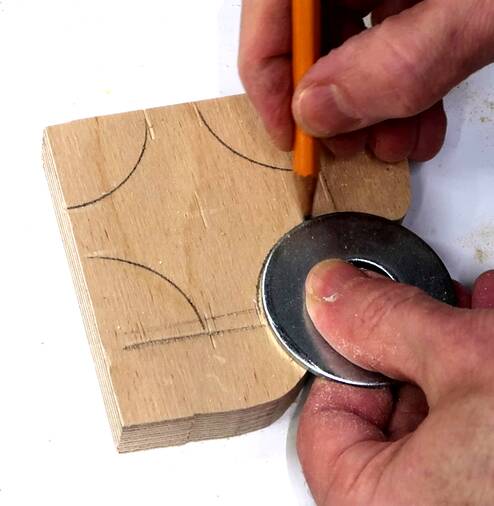
I hadn't yet made templates for these for the plans, so I just drew a square and used a washer to mark the corners.
 It's important to sand all the edges of knobs for them to feel good in
the hands.
It's important to sand all the edges of knobs for them to feel good in
the hands.

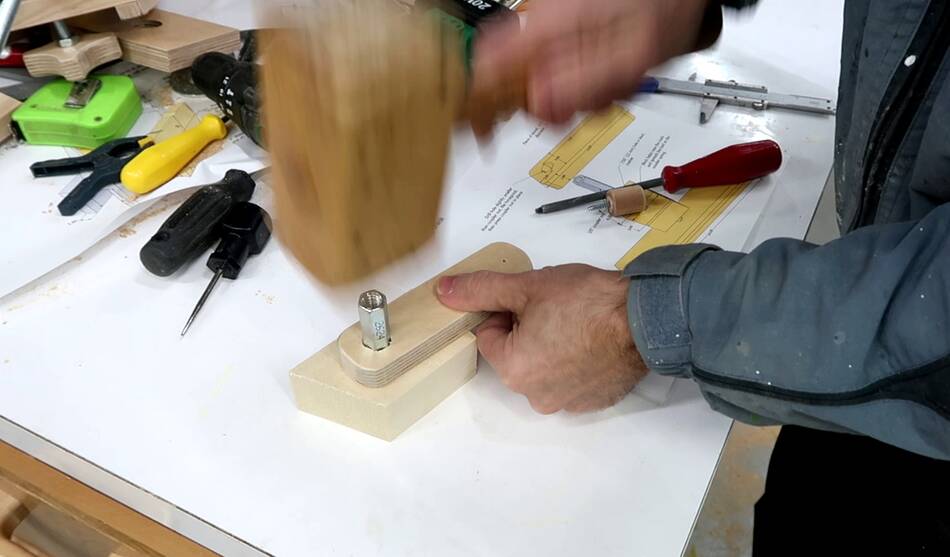
 Then filing the hole square, and hammering a carriage bolt into the
knob. its a 3/8" carriage bolt going into a 23/64" (0.4 mm smaller
than the bolt), so it's an interference fit. I put the knob on top
of a block with a 3/8" hole in it to prevent the plywood from chipping
out on the back from driving the bolt through it.
Then filing the hole square, and hammering a carriage bolt into the
knob. its a 3/8" carriage bolt going into a 23/64" (0.4 mm smaller
than the bolt), so it's an interference fit. I put the knob on top
of a block with a 3/8" hole in it to prevent the plywood from chipping
out on the back from driving the bolt through it.
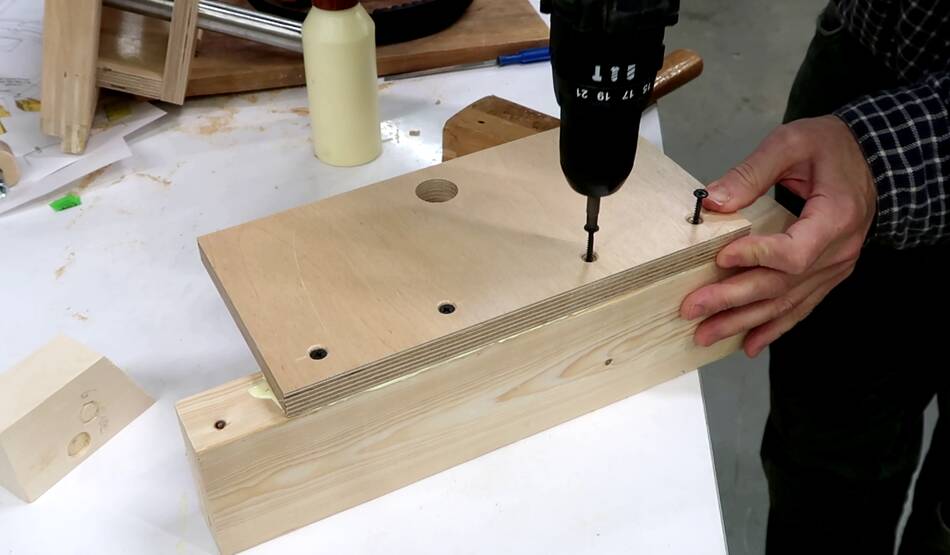
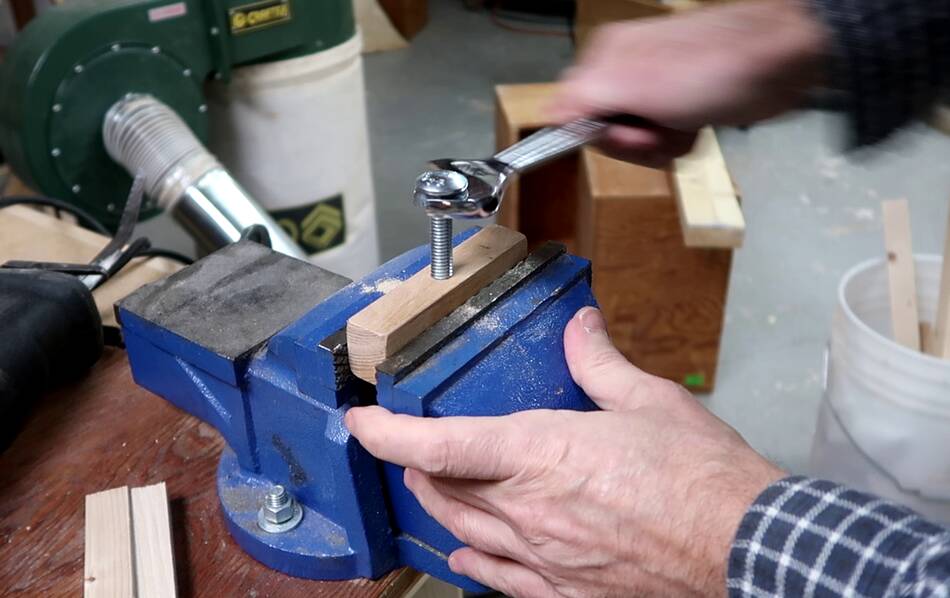
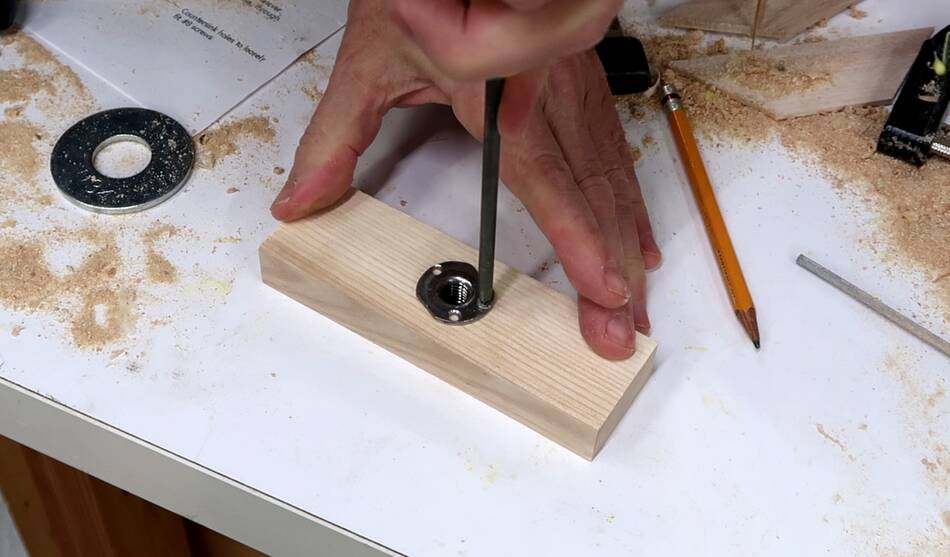 Adding a 3/8" T-nut to a piece of hardwood to go on the top of the bracket.
It's a bit of an odd 3/8" T-nut, but it's the only one that size I had
around. Just tapping a 3/8" thread straight into the hardwood
would have worked fine too.
Adding a 3/8" T-nut to a piece of hardwood to go on the top of the bracket.
It's a bit of an odd 3/8" T-nut, but it's the only one that size I had
around. Just tapping a 3/8" thread straight into the hardwood
would have worked fine too.
 Attaching the piece with the T-nut to the bracket.
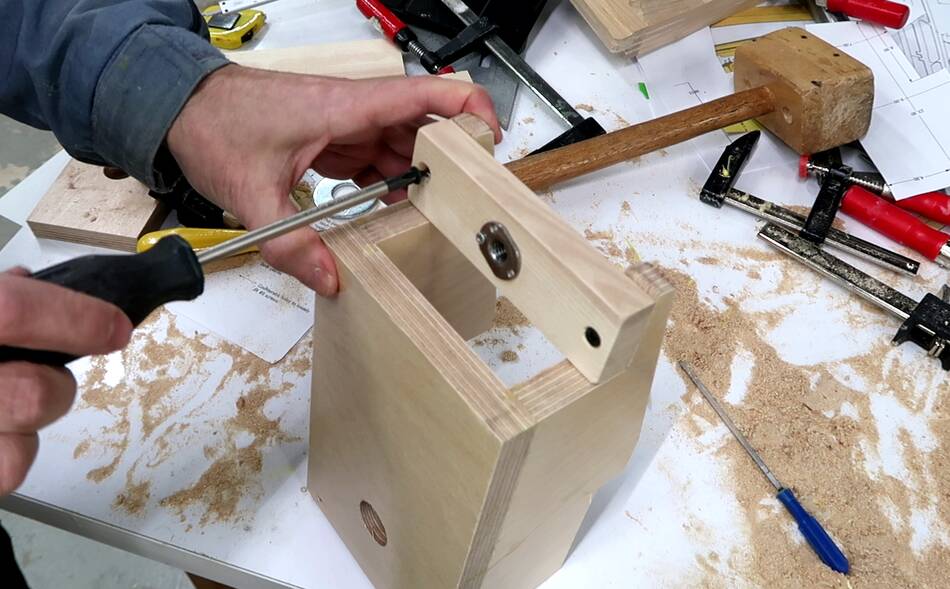
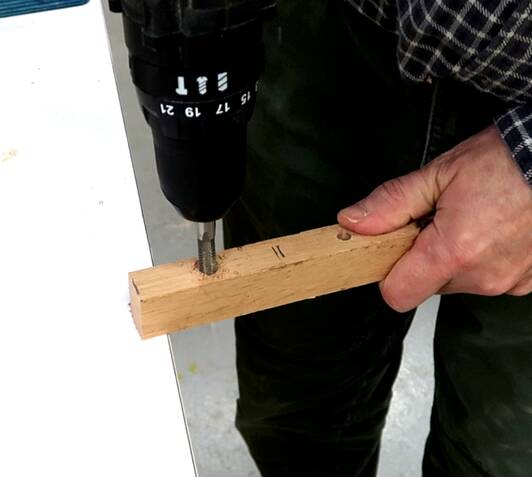
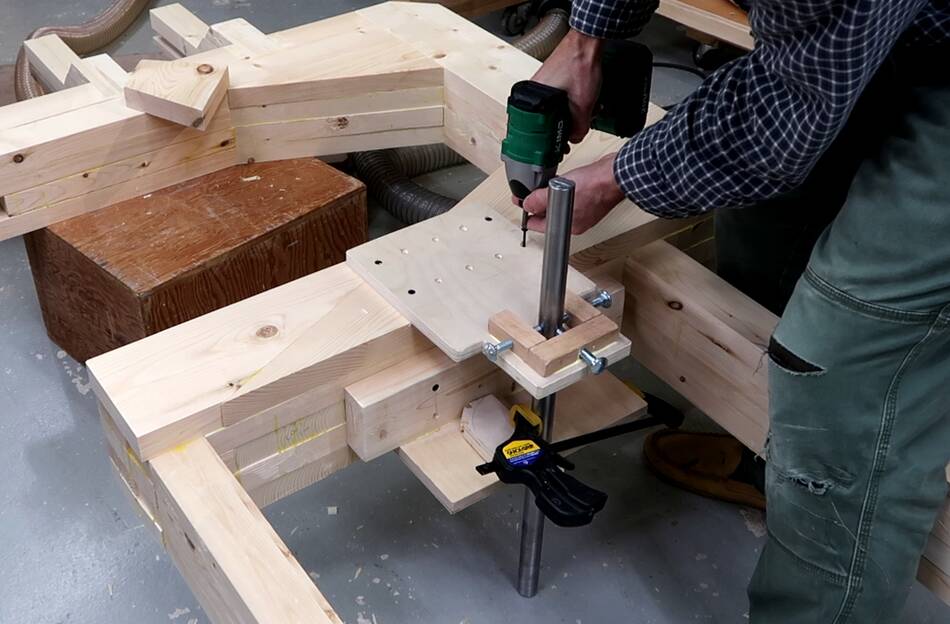
 I also drilled a series of pilot holes to hold the joints of the bracket
together and added screws.
I also drilled a series of pilot holes to hold the joints of the bracket
together and added screws.
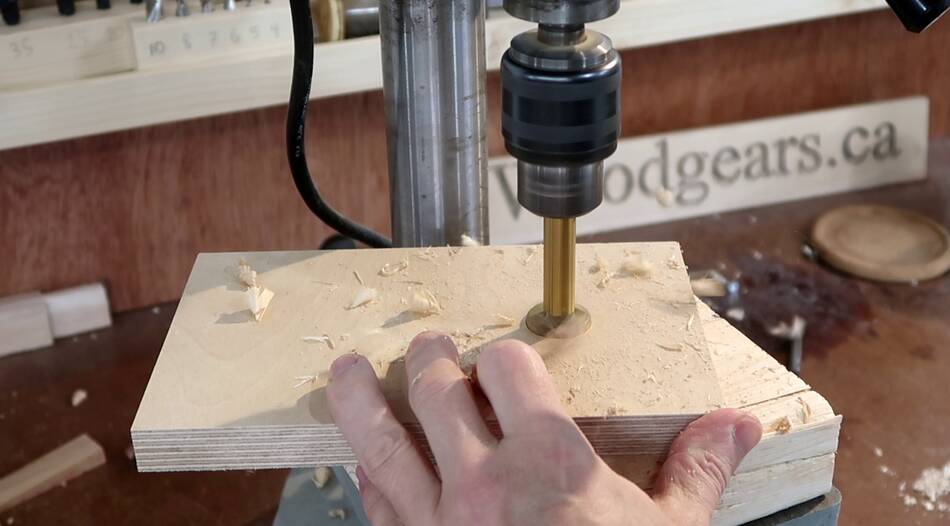
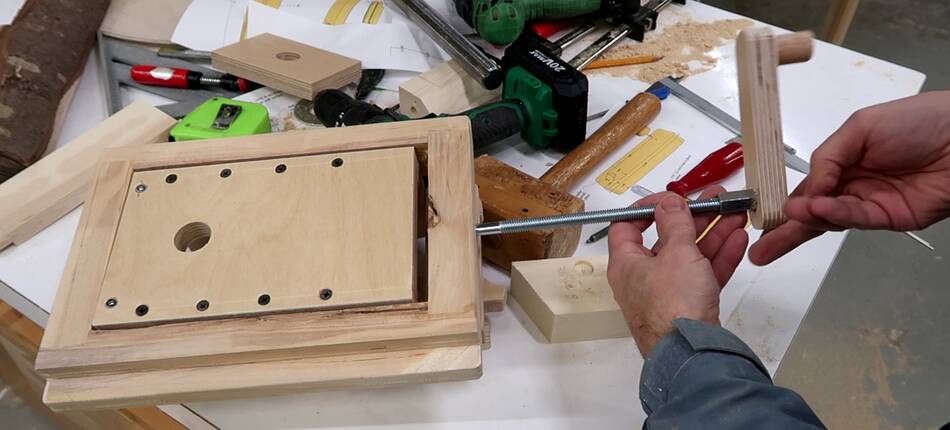
 A hole in the top for the tensioning carriage bolt to go in.
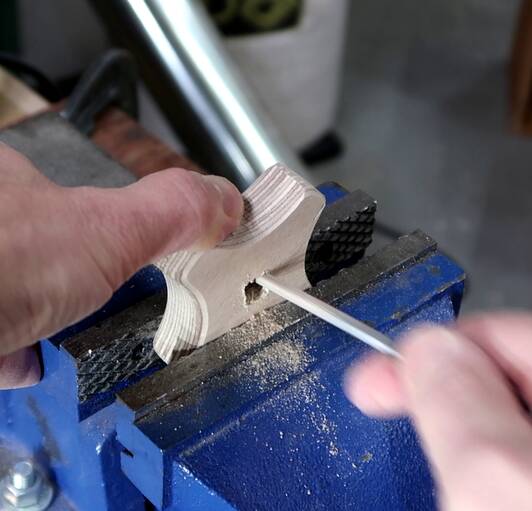
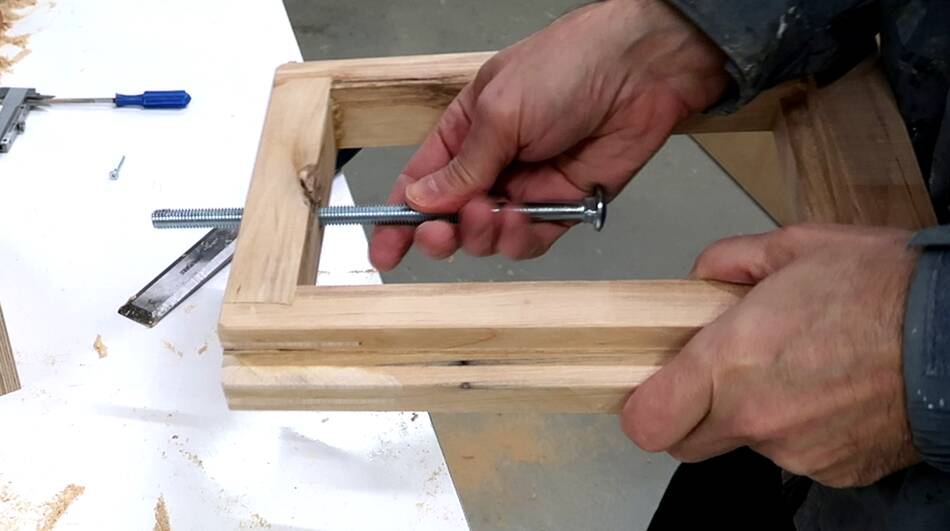 Then a long carriage bolt into the frame. I filed the inside end of this
hole slightly square for the square part of the carriage bolt.
Then a long carriage bolt into the frame. I filed the inside end of this
hole slightly square for the square part of the carriage bolt.
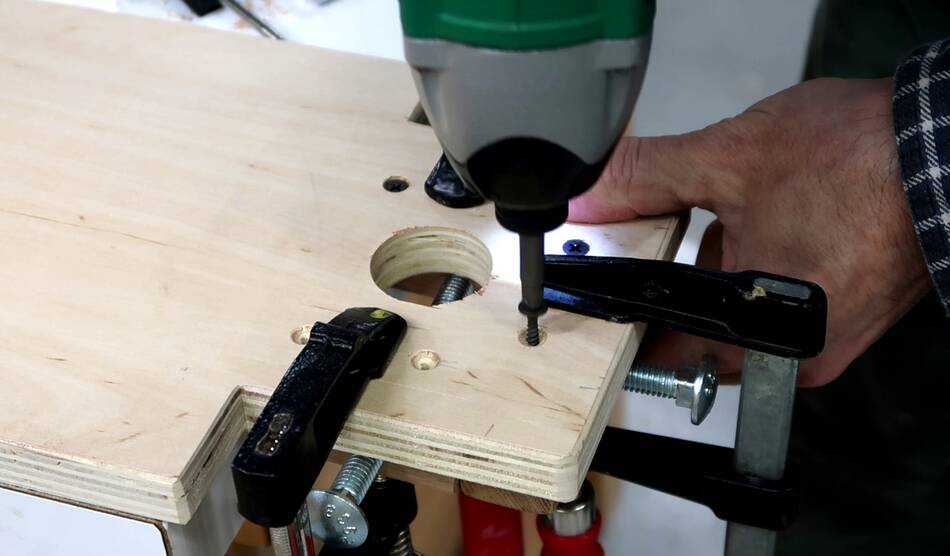
 Then using the two angled holes I drilled in the plywood part much earlier to
attach the plywood into the rabbet ledge of the frame. I drilled pilot holes
first. Also, the holes in the plywood should be large enough to provide
some slack. The screws should not be very tight, so the plywood can tilt
forwards and back by a few degrees.
Then using the two angled holes I drilled in the plywood part much earlier to
attach the plywood into the rabbet ledge of the frame. I drilled pilot holes
first. Also, the holes in the plywood should be large enough to provide
some slack. The screws should not be very tight, so the plywood can tilt
forwards and back by a few degrees.
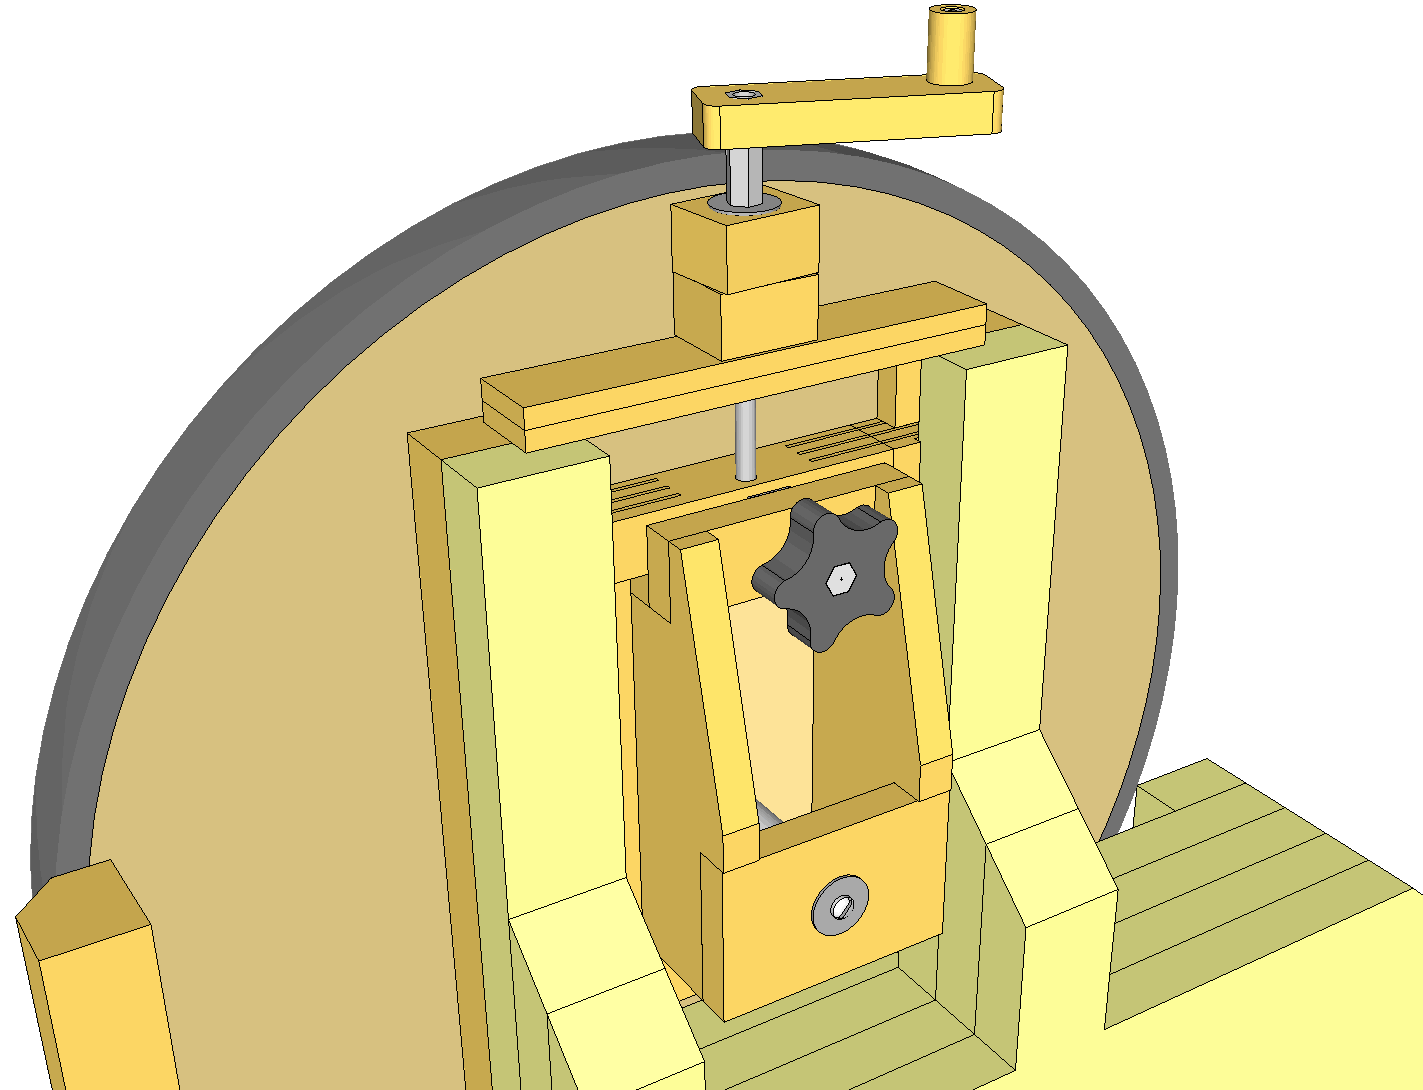
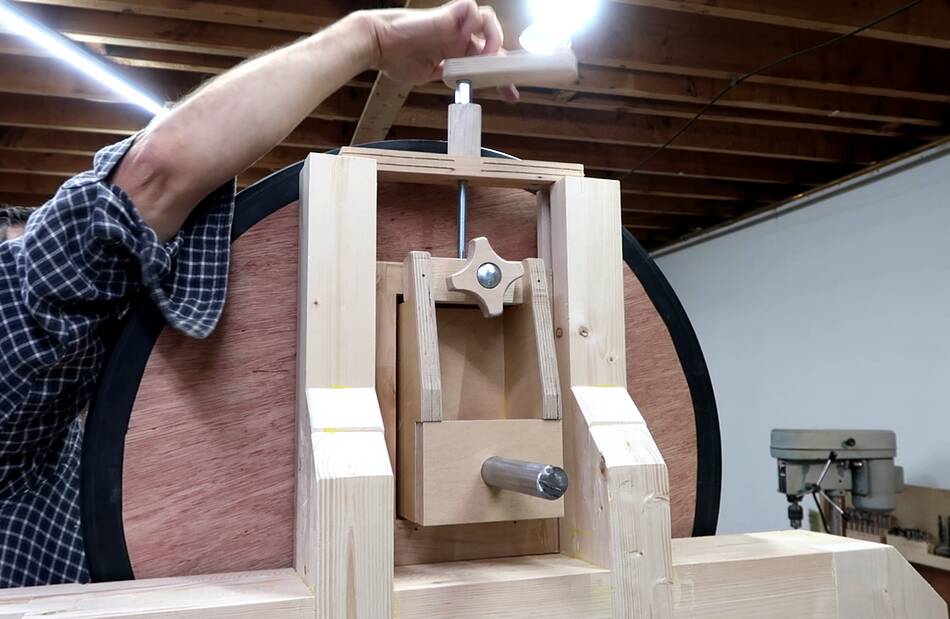
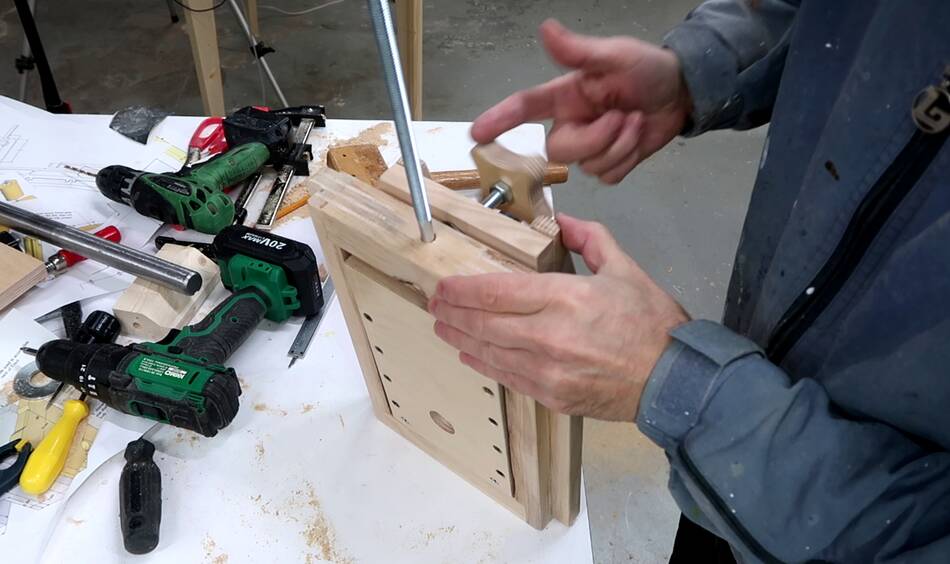 Inserting the threaded knob I made earlier. This pushes the top of the
bracket back, causing it to tilt. Blade tension will pull down on the axle,
pushing the block to tilt forward against the adjustment knob.
Inserting the threaded knob I made earlier. This pushes the top of the
bracket back, causing it to tilt. Blade tension will pull down on the axle,
pushing the block to tilt forward against the adjustment knob.
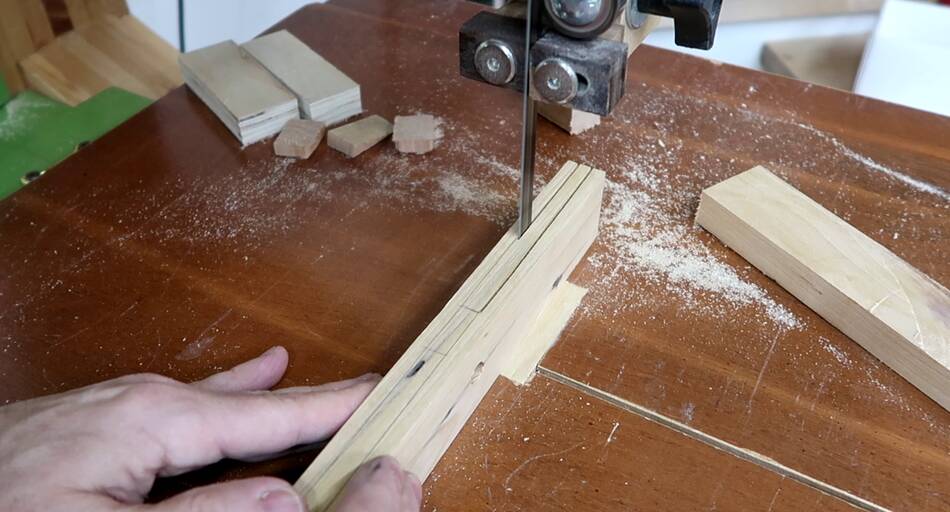
 I glued some thin hardwood strips to the front of the prongs sticking
out the top of the frame. Hardwood is much better at resisting gouging
when the wheel mount frame needs to slide up and down.
I glued some thin hardwood strips to the front of the prongs sticking
out the top of the frame. Hardwood is much better at resisting gouging
when the wheel mount frame needs to slide up and down.
 Making a crank for tensioning the blade. It consists of a long coupler nut
hammered into a slightly undersized hole in a piece of plywood for the
thread, and a short piece of dowel screwed to the other end as a handle.
That handle will be the highest part of the bandsaw, so I don't want to
make it too long to avoid hitting ceiling beams or ducts when I roll it
around the shop.
Making a crank for tensioning the blade. It consists of a long coupler nut
hammered into a slightly undersized hole in a piece of plywood for the
thread, and a short piece of dowel screwed to the other end as a handle.
That handle will be the highest part of the bandsaw, so I don't want to
make it too long to avoid hitting ceiling beams or ducts when I roll it
around the shop.
 Checking the fit of the crank.
 I made two L-profile pieces of hardwood, which I'm screwing to the prongs
on the top of the saw.
I made two L-profile pieces of hardwood, which I'm screwing to the prongs
on the top of the saw.
 And inserting the axle through the bracket. I haven't cut the axle to
its final length yet. Also note that I have the back of the bracket
on the axle, but this part is not attached to the axle. That way, I can
still potentially slide it side-to-side to adjust the wheel to be
coplanar with the frame. Though, as it turned out, it didn't need
to adjust it once it was assembled.
And inserting the axle through the bracket. I haven't cut the axle to
its final length yet. Also note that I have the back of the bracket
on the axle, but this part is not attached to the axle. That way, I can
still potentially slide it side-to-side to adjust the wheel to be
coplanar with the frame. Though, as it turned out, it didn't need
to adjust it once it was assembled.
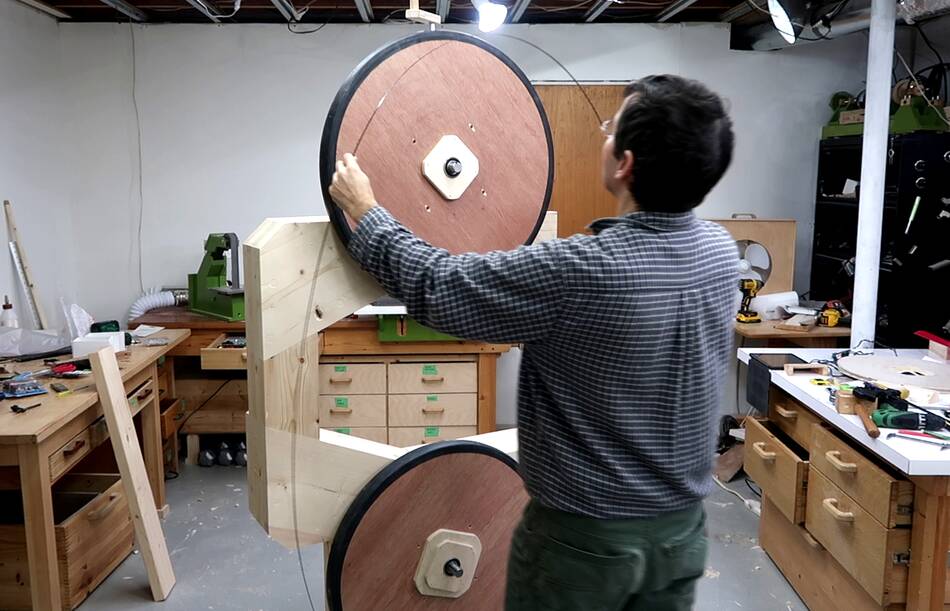
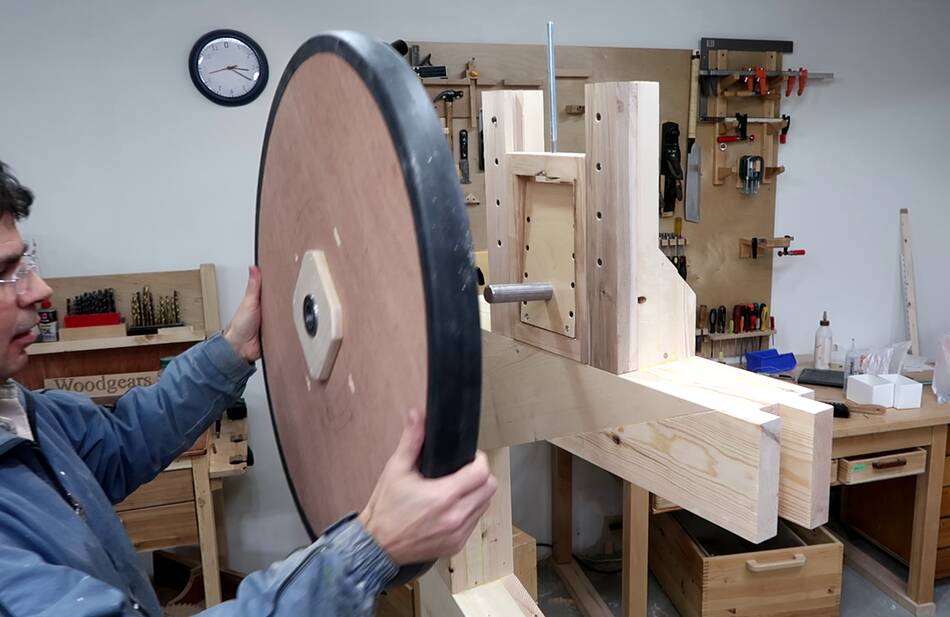 Finally, the top wheel goes on.
 Before making the bottom wheel mount, I still needed to add the last partial
layer to the back of the frame.
Before making the bottom wheel mount, I still needed to add the last partial
layer to the back of the frame.
That layer is not so much for strength or stiffness as it is to give me more bearing surface for the table mount later, and to put the front and back part of the lower axle mounts further apart.
 Because the wheels on this bandsaw are so much bigger than previous ones I
built, the lower axle ends up quite a bit below the horizontal part of the
frame, so I made this bracket out of plywood and a piece of 2x4. I made
this part quite wide because the lower wheel mount also needs to take up
sideways force from the motor's belt later.
Because the wheels on this bandsaw are so much bigger than previous ones I
built, the lower axle ends up quite a bit below the horizontal part of the
frame, so I made this bracket out of plywood and a piece of 2x4. I made
this part quite wide because the lower wheel mount also needs to take up
sideways force from the motor's belt later.
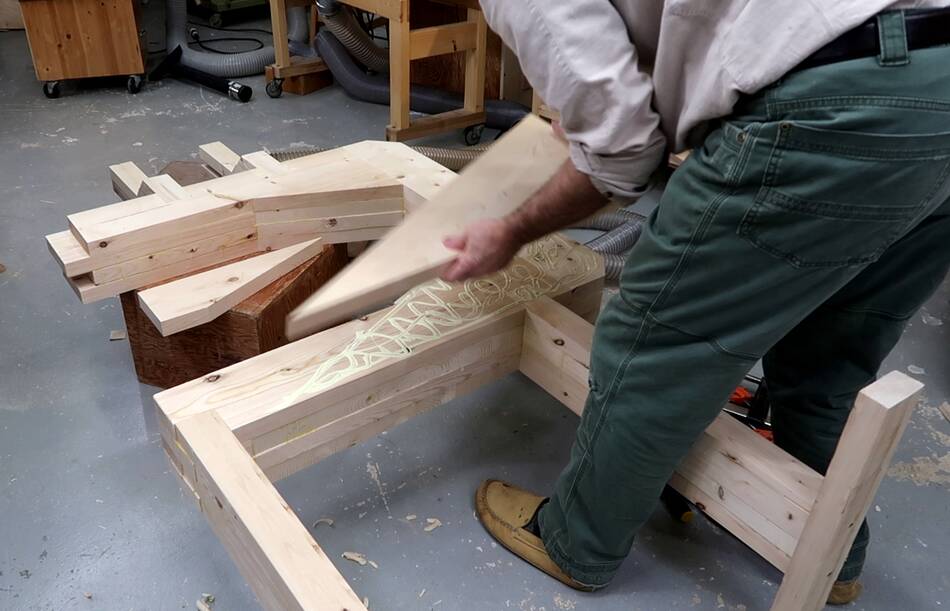
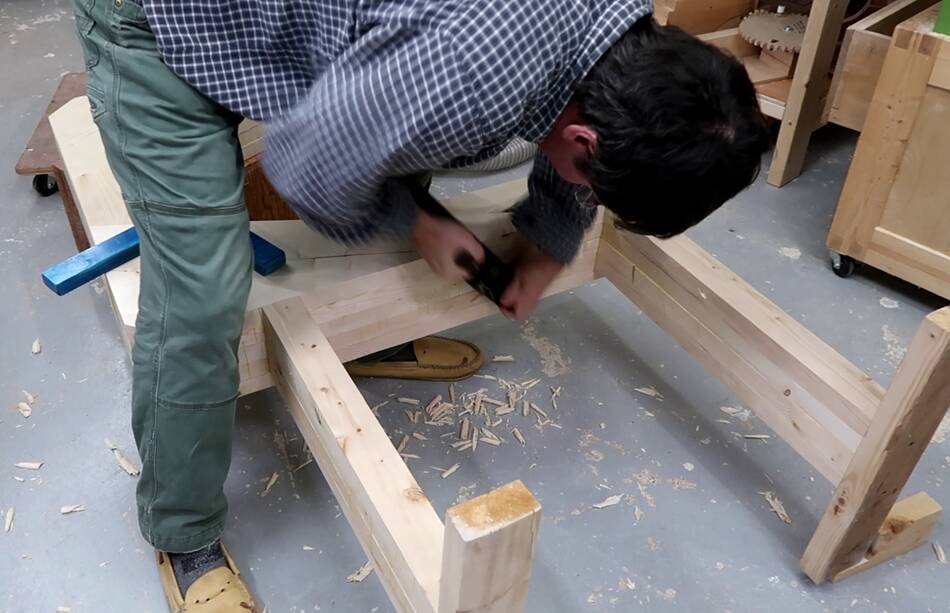 But before I could mount that, I had to flatten the bottom edge of the frame
with a hand plane. I also checked that this surface was square
to the front face of the frame.
But before I could mount that, I had to flatten the bottom edge of the frame
with a hand plane. I also checked that this surface was square
to the front face of the frame.
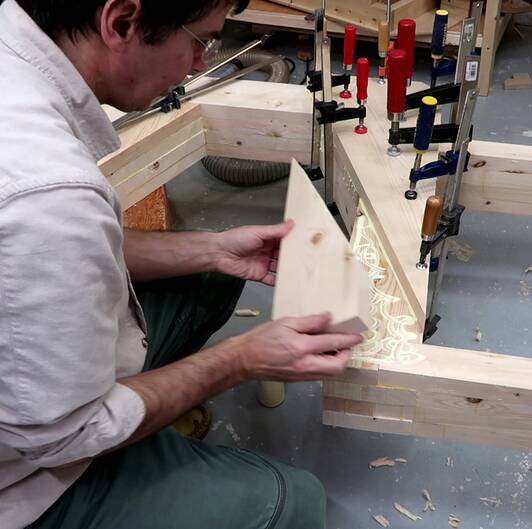
 Then screwing this bracket in place.
 With most bandsaws I have built, after a few years of never de-tensioning
the blade, the alignment of the bottom axle needs to be slightly tweaked from
the wood giving way slightly. This involved taking the lower wheel off,
loosening the lower wheel mount, and adding 0.5 - 1 mm of shim under it.
With most bandsaws I have built, after a few years of never de-tensioning
the blade, the alignment of the bottom axle needs to be slightly tweaked from
the wood giving way slightly. This involved taking the lower wheel off,
loosening the lower wheel mount, and adding 0.5 - 1 mm of shim under it.
On this one, I figured I should just make the back of the wheel mount axle adjustable so when the time comes, I can make this adjustment more easily.
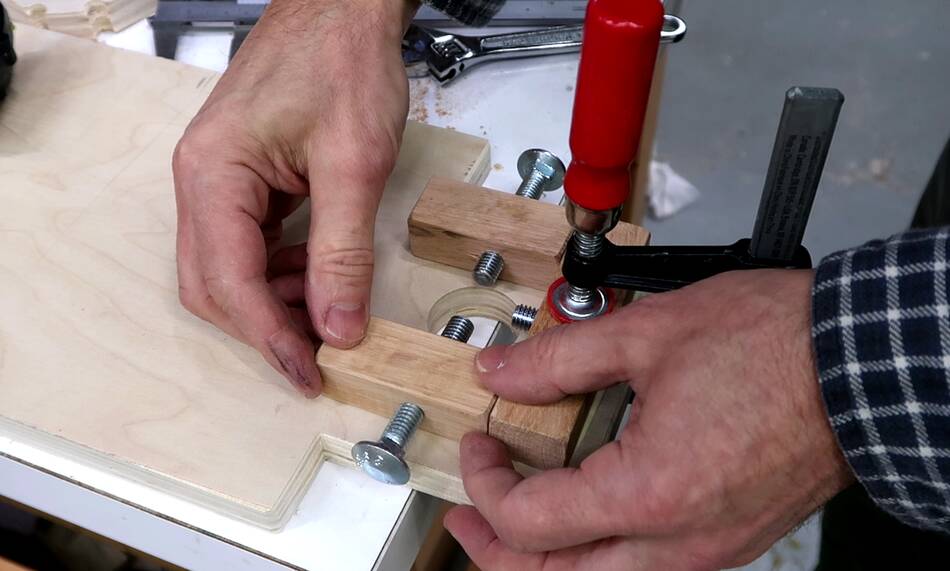
I drilled and tapped some blocks of hardwood to fit carriage bolts. But I didn't tap the thread all the way through, instead drilling the end of the hole just smaller than the bolt, so that the bolt goes in the hole with a lot of friction.
 Then gluing these pieces to the bottom wheel mount, around a hole that is about
5 mm bigger than the axle. The ends of the bolts will be able to push
the back end of the axle exactly where I need it to be for alignment.
Then gluing these pieces to the bottom wheel mount, around a hole that is about
5 mm bigger than the axle. The ends of the bolts will be able to push
the back end of the axle exactly where I need it to be for alignment.
 I also put some screws through the plywood and into the blocks from the other
side, just to make sure they are secured good.
I also put some screws through the plywood and into the blocks from the other
side, just to make sure they are secured good.
The carriage bolts don't have any knobs on them. I figure these will only need adjusting once of twice, ever, so using a wrench is fine. I would have used hex head bolts, but couldn't fine any with long enough threads at the store I went to.
In retrospect, this assembly is overkill. If I did it again I'd just put shims in to set the position, and add to the shims when adjustment is needed years later.
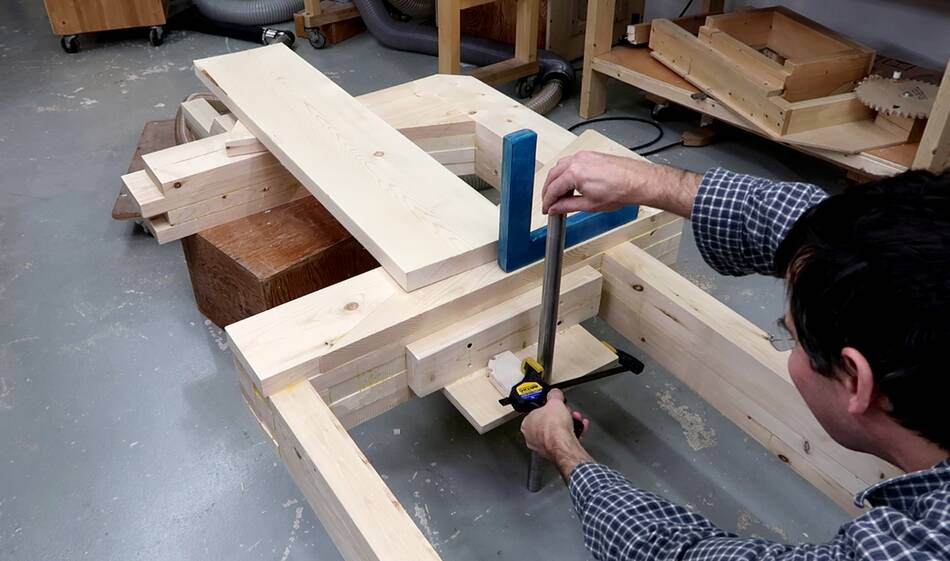 I set the lower axle in place, using a clamp to force it aligned perpendicular
to the face of the frame.
I set the lower axle in place, using a clamp to force it aligned perpendicular
to the face of the frame.
 Then screwing on the back bracket.
I got the initial alignment accurate enough that I didn't need to tweak it at all. So if I had made it non-adjustable, I would have been fine for the time being.
 In the past I made the "wooden spring" for blade tensioning out of several
layers. On a whim, I figured just cutting slots into the ends of a thicker
piece would give it the necessary flexibility. But if you don't already
have a bandsaw, cutting several thin pieces on the table saw and stacking
them would make more sense.
In the past I made the "wooden spring" for blade tensioning out of several
layers. On a whim, I figured just cutting slots into the ends of a thicker
piece would give it the necessary flexibility. But if you don't already
have a bandsaw, cutting several thin pieces on the table saw and stacking
them would make more sense.
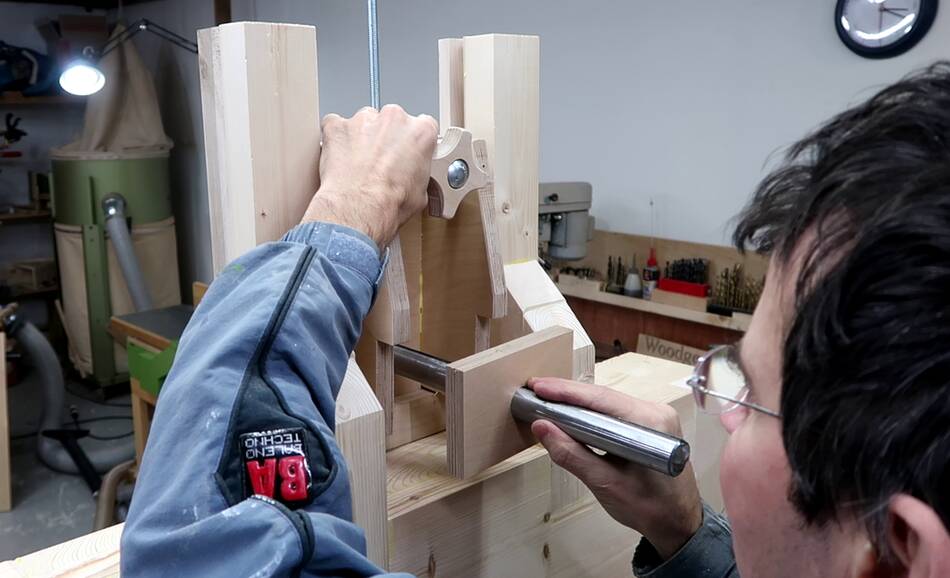
 Then adding this spring to the top of the frame and cranking the upper wheel up
a little.
Then adding this spring to the top of the frame and cranking the upper wheel up
a little.
 With both wheels on their axles, time to put on a blade and check that it
tracks properly. It turns out, I didn't need to tweak the lateral alignment
on the top or the back of the axle on the bottom to get it to track. So
my extra provisions for adjustability weren't needed on mine.
With both wheels on their axles, time to put on a blade and check that it
tracks properly. It turns out, I didn't need to tweak the lateral alignment
on the top or the back of the axle on the bottom to get it to track. So
my extra provisions for adjustability weren't needed on mine.
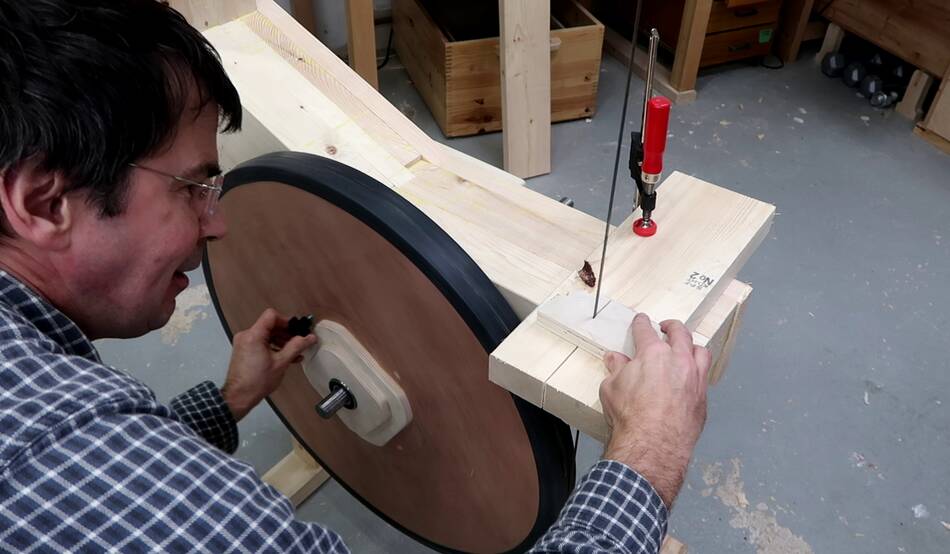 I stuck a knob in the lower wheel and cranked it up, making my first
cut with the is bandsaw! The fact that I could make a cut just by hand
cranking it shows how little power a bandsaw needs for regular cut. I imagine
I could power a bandsaw to be fairly usable with a bread maker motor!
I stuck a knob in the lower wheel and cranked it up, making my first
cut with the is bandsaw! The fact that I could make a cut just by hand
cranking it shows how little power a bandsaw needs for regular cut. I imagine
I could power a bandsaw to be fairly usable with a bread maker motor!
 My 26" (66 cm) saw next to my 16" (40 cm) saw, which in turn is bigger
than the very common 14" bandsaws.
It's a big machine. Not as big as a 36" bandsaw, but as big as I
figured I could make it and have the height of the machine not become
a big problem.
My 26" (66 cm) saw next to my 16" (40 cm) saw, which in turn is bigger
than the very common 14" bandsaws.
It's a big machine. Not as big as a 36" bandsaw, but as big as I
figured I could make it and have the height of the machine not become
a big problem.
Next: Adding the motor
 Making the wheels for this bandsaw
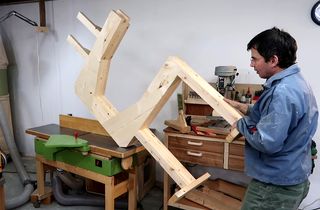 Making the frame
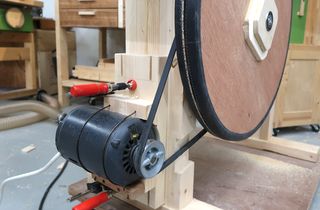 Motorizing it
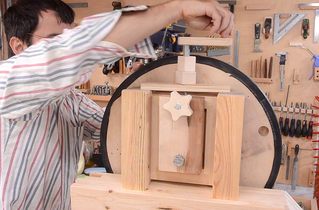 Wheel mounts for