 I saw pictures of
knapp joints
(also known as cove and pin joints) before
but two months ago, "Pask makes" made
this video about
making a knapp joint, and that inspired me to make one on the pantorouter.
I saw pictures of
knapp joints
(also known as cove and pin joints) before
but two months ago, "Pask makes" made
this video about
making a knapp joint, and that inspired me to make one on the pantorouter.
I saw pictures of
knapp joints
(also known as cove and pin joints) before
but two months ago, "Pask makes" made
this video about
making a knapp joint, and that inspired me to make one on the pantorouter.
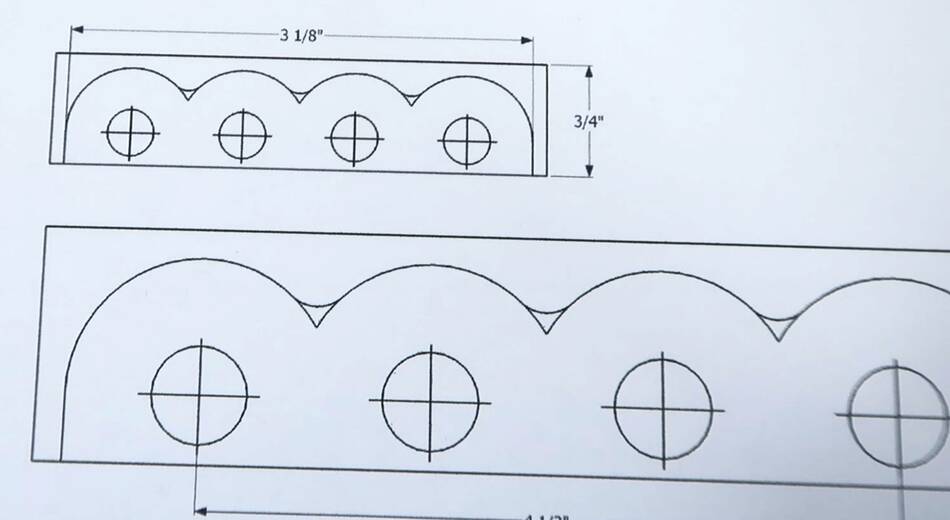
I started by designing the templates in SketchUp, basically by drawing the joint, then scaling it up 2x because the pantorouter reduces by 2x.
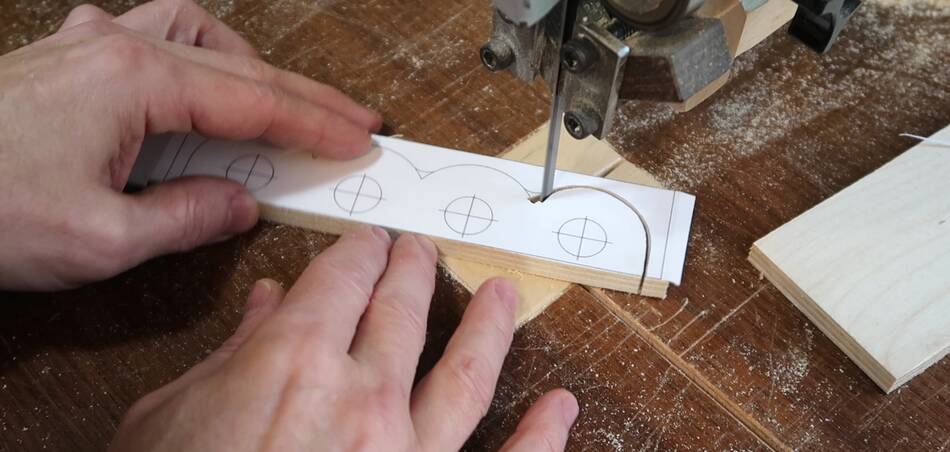 I pasted it on some nice plywood and cut it out on the bandsaw.
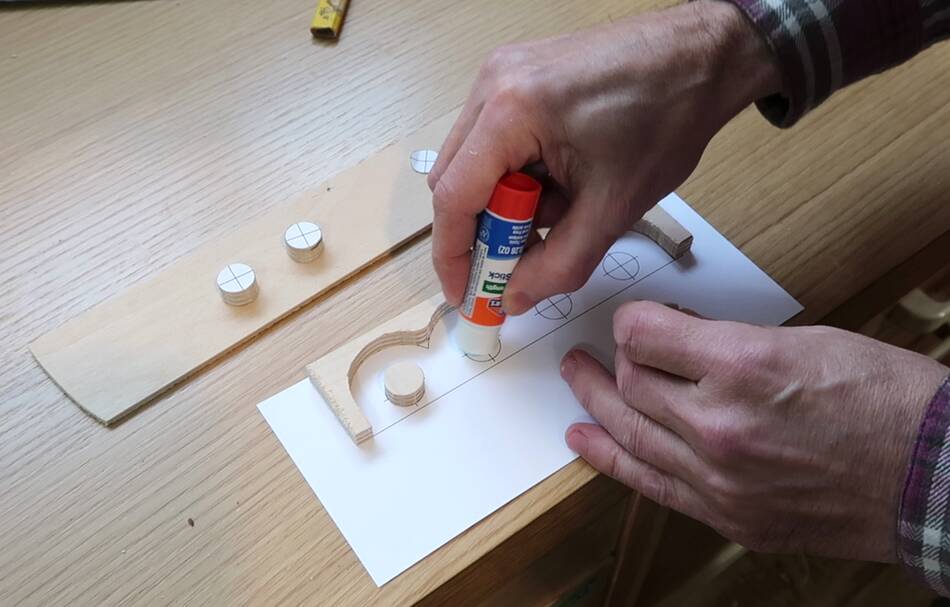 I puzzled a bit over how to accurately position the pins of this template,
but then I had the idea of using glue stick to glue them onto another copy of
the template.
I puzzled a bit over how to accurately position the pins of this template,
but then I had the idea of using glue stick to glue them onto another copy of
the template.
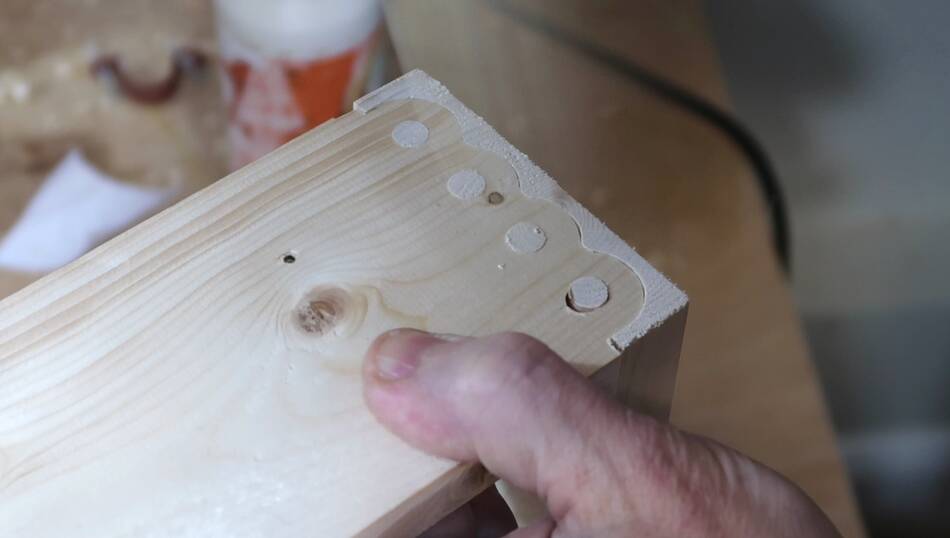
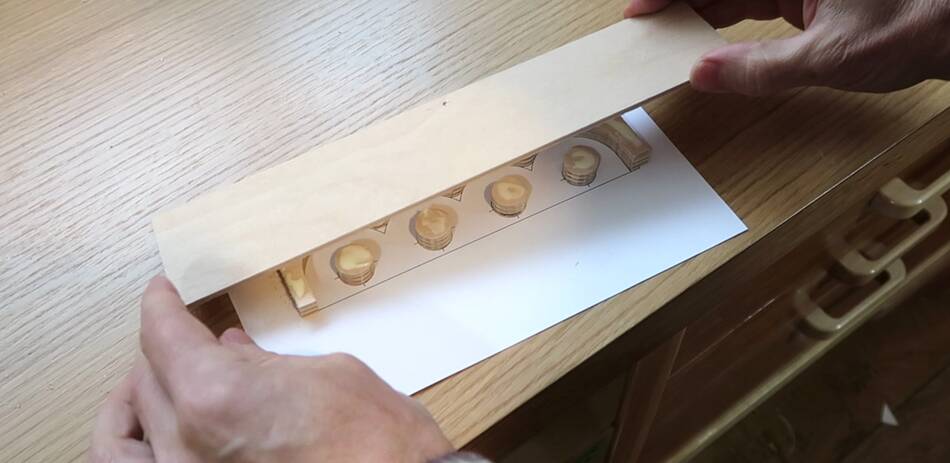 I then put wood glue on top and glued on the "backer" on top and weighed it
down. After the wood glue dried I was able to peel off the paper template
from the other side.
I then put wood glue on top and glued on the "backer" on top and weighed it
down. After the wood glue dried I was able to peel off the paper template
from the other side.
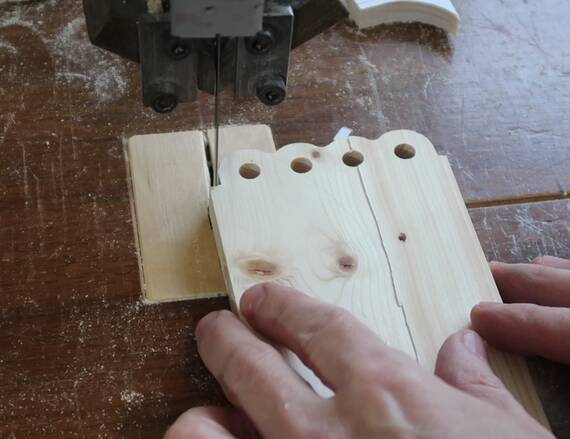
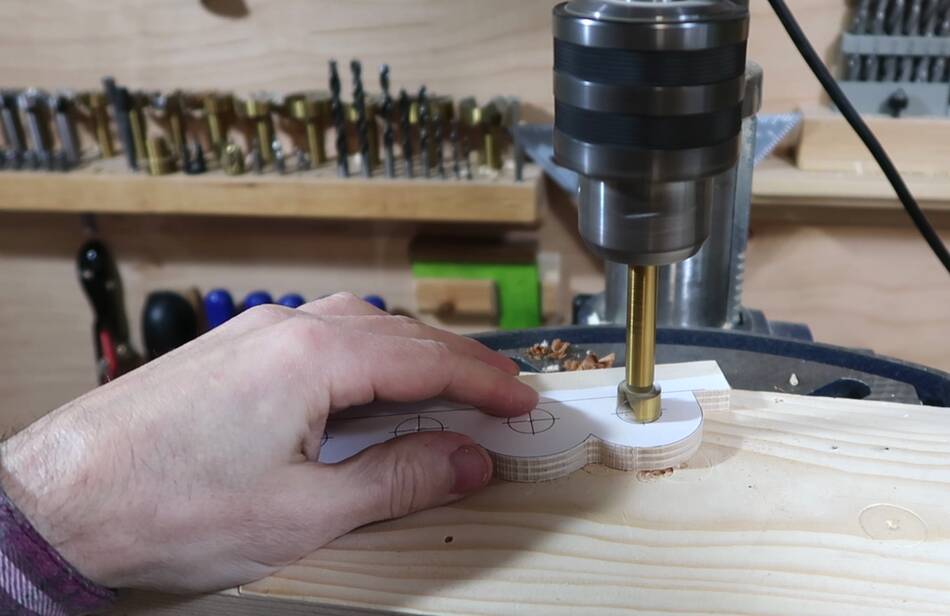 The complimenting template for this was more straightforward. I just cut it
out on the bandsaw and drilled the holes.
The complimenting template for this was more straightforward. I just cut it
out on the bandsaw and drilled the holes.
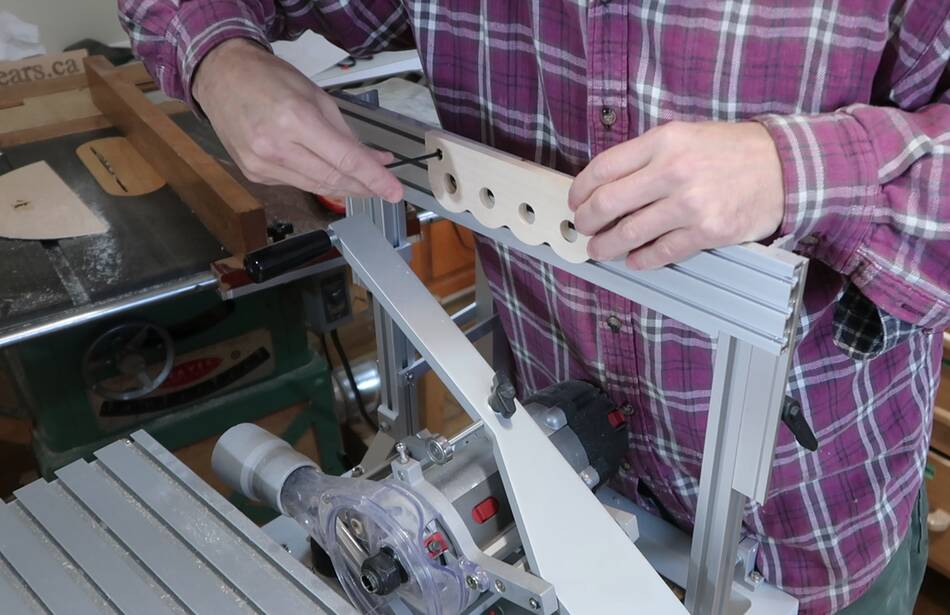 Mounting the template on the metal pantorouter template holder.
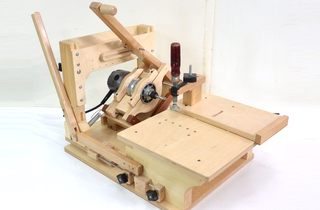
 The metal pantorouter has a tiltable table that can be positioned vertical for
cutting into the side of a piece of wood, but that always makes it
difficult to clamp. Also one time I set the depth of cut too deep and
accidentally milled into the table!
The metal pantorouter has a tiltable table that can be positioned vertical for
cutting into the side of a piece of wood, but that always makes it
difficult to clamp. Also one time I set the depth of cut too deep and
accidentally milled into the table!
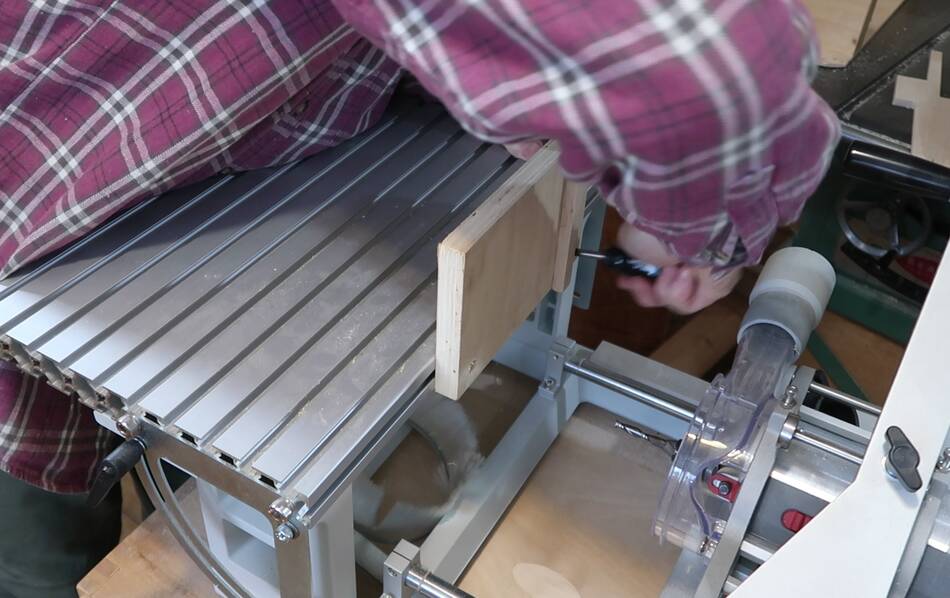
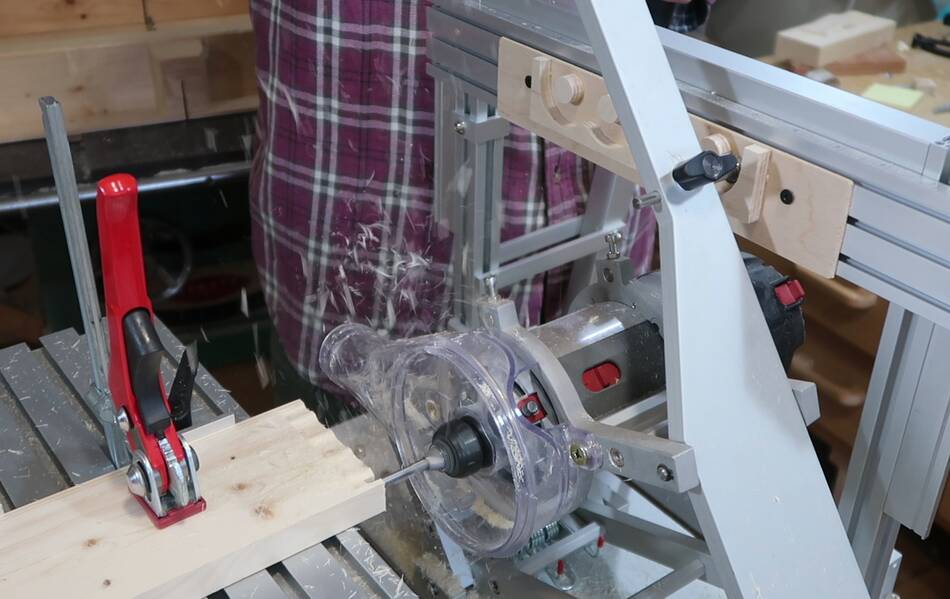
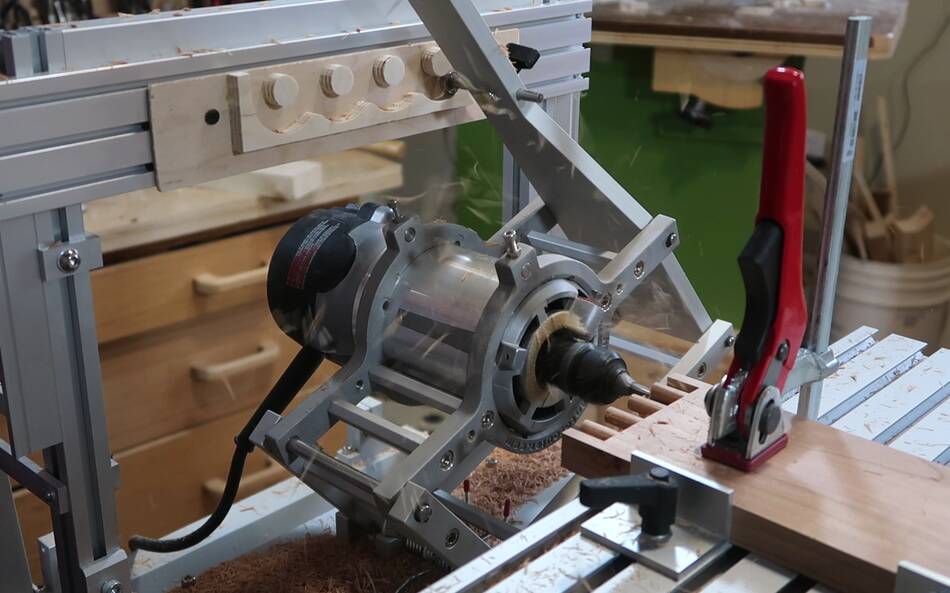
I had the idea of just attaching a sacrificial vertical "table" to the edge of the pantorouter's table.
My vertical table has a side-fence to help me position the stock vertically.
This made it easier to clamp the workpiece on and made for better visibility.
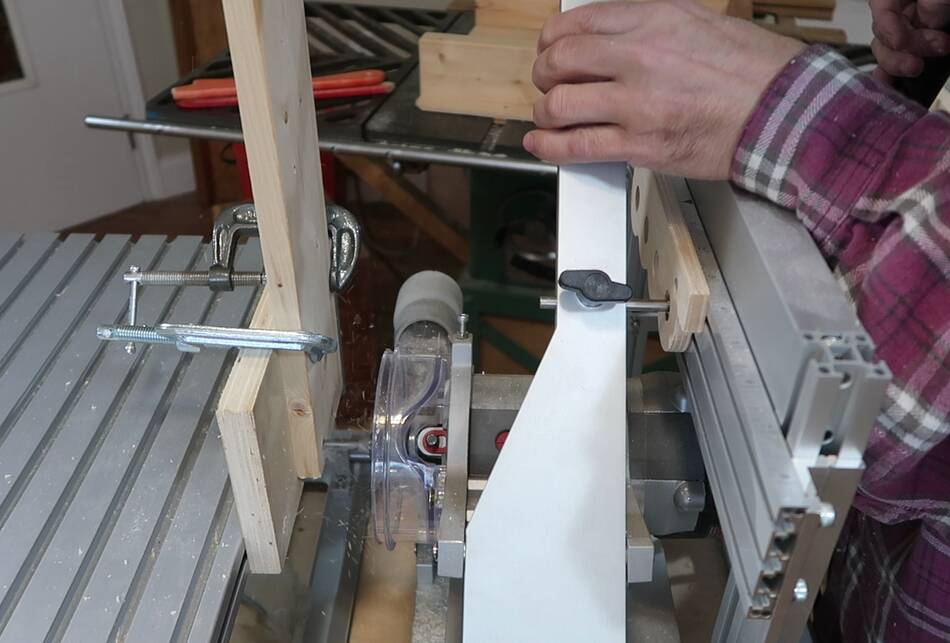
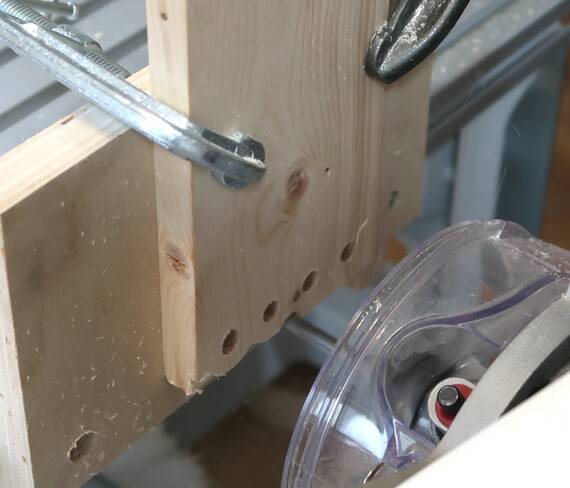 Cutting out the holes. I made the pins 5/16" (7.9 mm) in diameter. I'm cutting
these with a 1/4" router bit, moving the follower inside the hole in the template
in circles as I plunge.
Cutting out the holes. I made the pins 5/16" (7.9 mm) in diameter. I'm cutting
these with a 1/4" router bit, moving the follower inside the hole in the template
in circles as I plunge.
 Then switching to the pins template.
That left an inside corner on each end of the joint that I couldn't get into with the router, so I squared that corner on the bandsaw.
 It was a tight fit, I had to bang it together with a mallet.
The problem was that I designed the template to be used with a 1/2" follower, but I didn't actually have a 1/2" follower, so I used a 13mm follower instead. But using a larger follower means less material is cut away, making for a tighter joint.
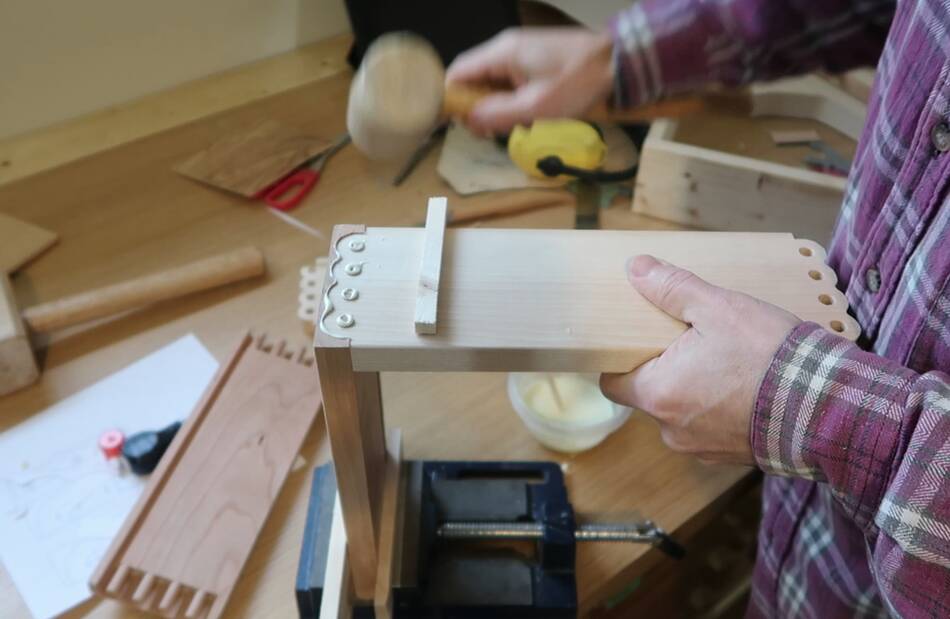
 With the test joint done, I switched to some nice hardwood to make an
actual box. Here cutting the pins in a piece of cherry.
With the test joint done, I switched to some nice hardwood to make an
actual box. Here cutting the pins in a piece of cherry.

 And test fitting it. I made a 1/2" follower out of wood to make for
a slightly looser fit, but hardwood is much less compressible, so it
was still a very tight fit. it took quite a bit of banging to take
this dry fit apart again.
And test fitting it. I made a 1/2" follower out of wood to make for
a slightly looser fit, but hardwood is much less compressible, so it
was still a very tight fit. it took quite a bit of banging to take
this dry fit apart again.
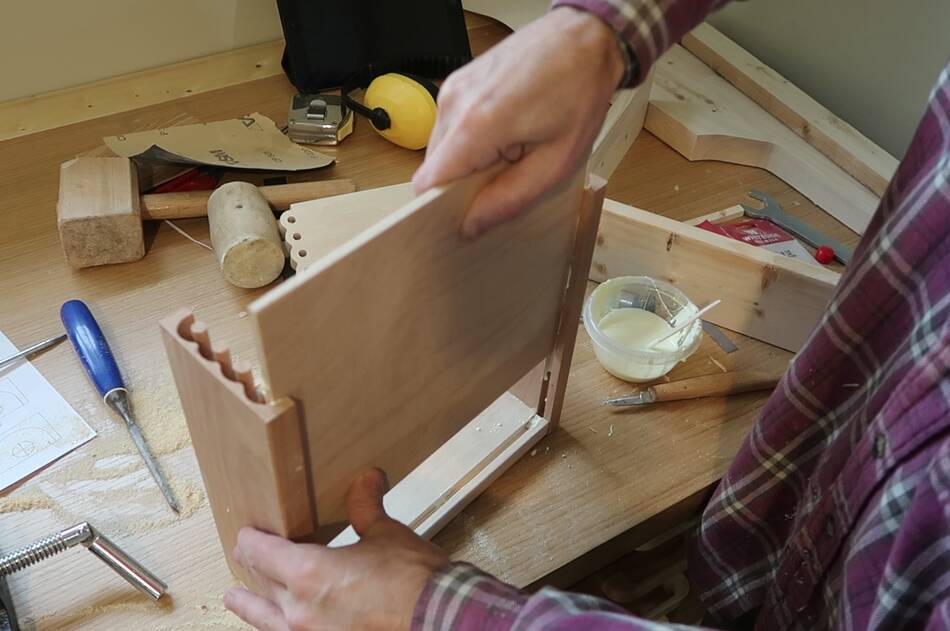
 I still needed a bottom for this box, which is inset into a groove in the box sides.
I cut that groove by making a series of cuts on the table saw.
 Then assembling it with glue. Note the mallet in my hand. I didn't do any
more dry fitting because the joints are just too hard to get apart.
Then assembling it with glue. Note the mallet in my hand. I didn't do any
more dry fitting because the joints are just too hard to get apart.
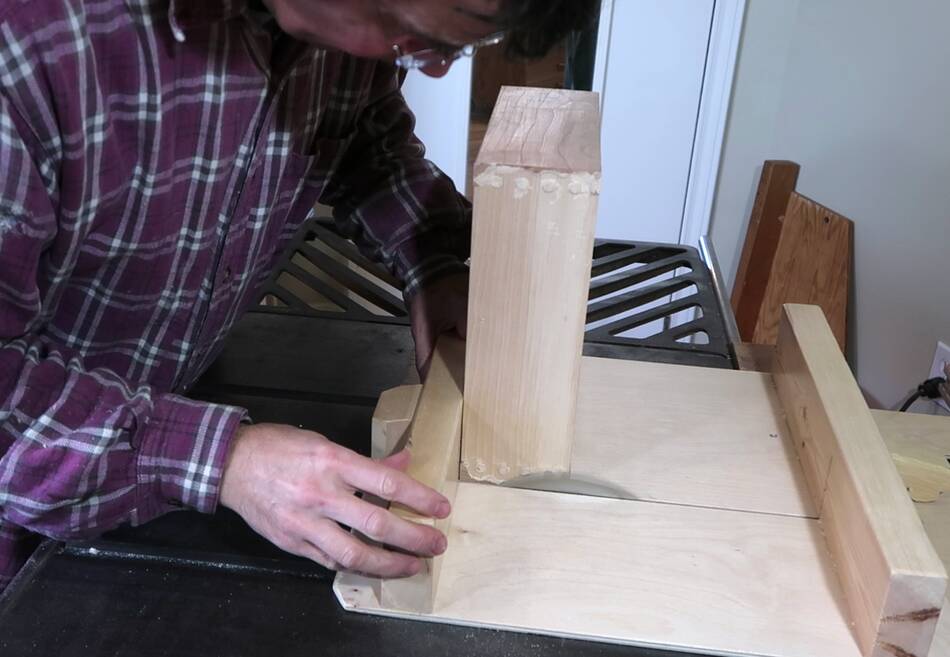
 Then inserting the panel for the bottom. The panel is plywood, so I don't have
to worry about leaving room for shrinkage and expansion. I glued it in place,
which helps to make the box sturdier.
Then inserting the panel for the bottom. The panel is plywood, so I don't have
to worry about leaving room for shrinkage and expansion. I glued it in place,
which helps to make the box sturdier.
I don't think knapp joints are very strong joints, at least not compared to box joints. But they do look neat.
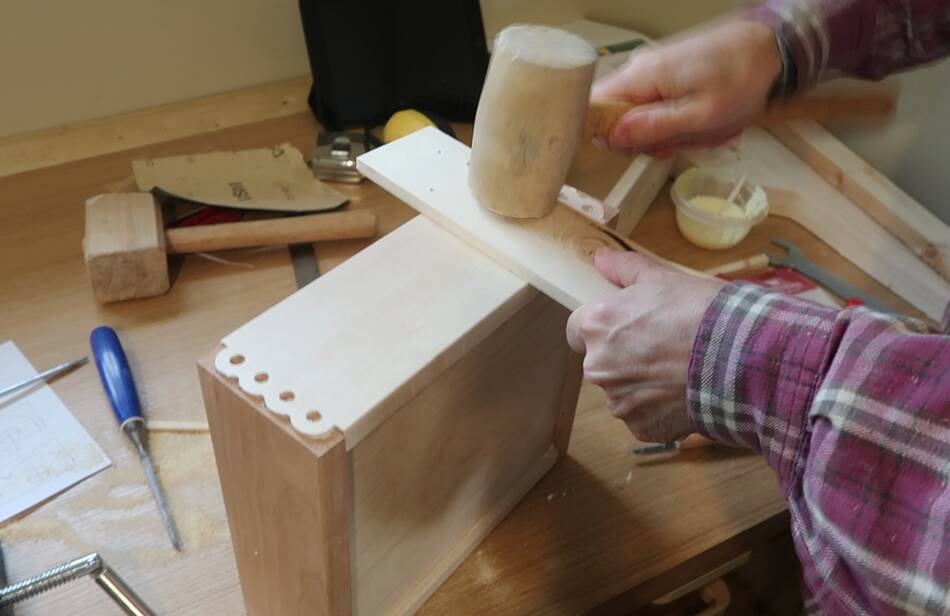 Banging in the last piece.
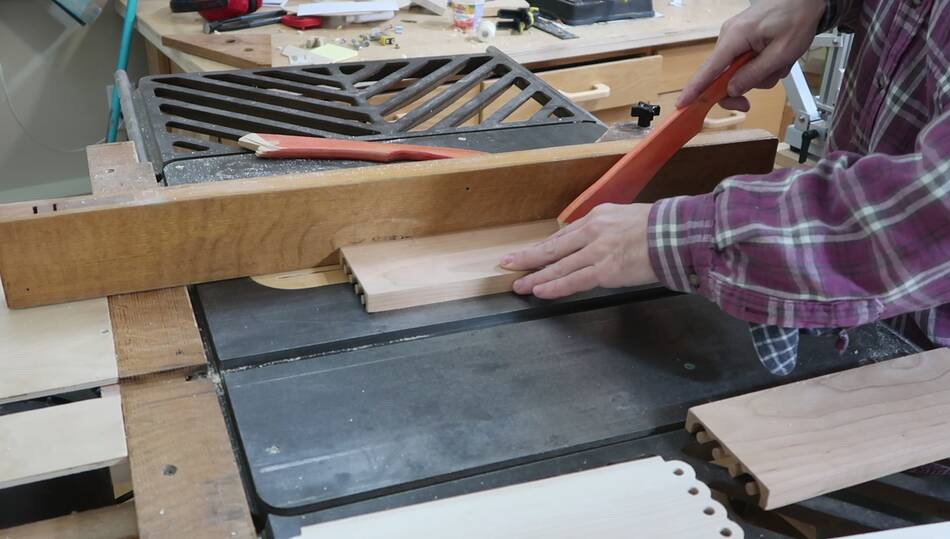
 I deliberately cut the joints a bit too deep, figuring I'd sand them flush
afterwards, but there was too much to just sand away, so I trimmed them
mostly flush on the table saw first.
I deliberately cut the joints a bit too deep, figuring I'd sand them flush
afterwards, but there was too much to just sand away, so I trimmed them
mostly flush on the table saw first.
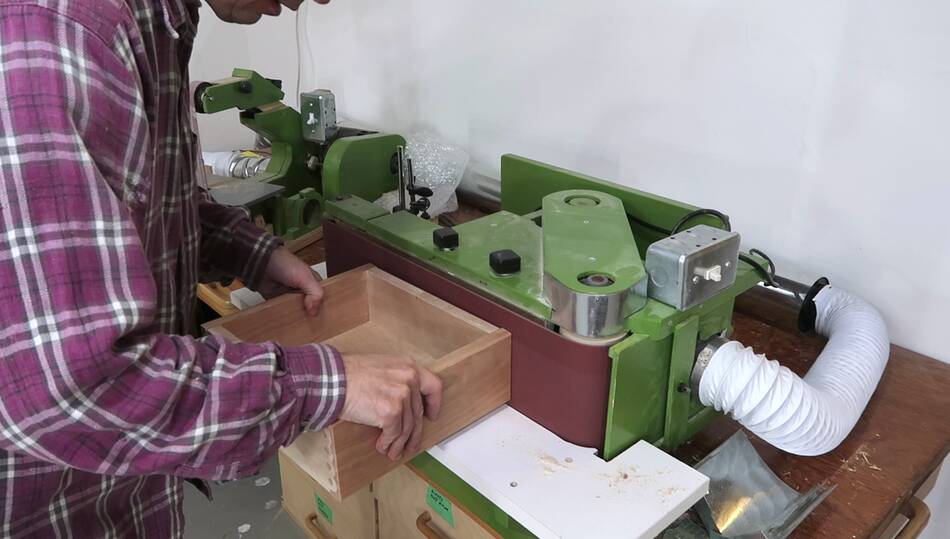 And then I sanded everything flat on the
belt sander.
And then I sanded everything flat on the
belt sander.
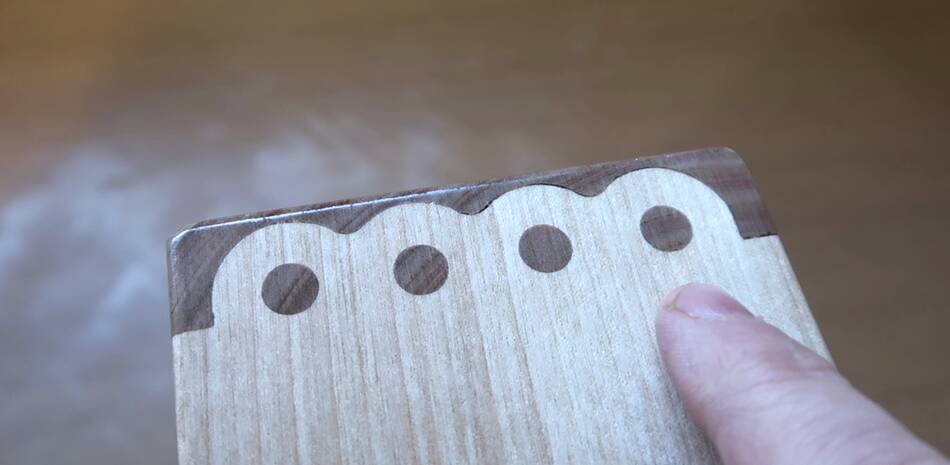 One of the joints of the assembled and varnished box.
 The joints didn't all come out perfect, but good enough that you have to look very closely
to see the imperfections.
The joints didn't all come out perfect, but good enough that you have to look very closely
to see the imperfections.
The arcs on my joints are 7/8" in diameter (22.2 mm) and the pins are 5/16" (7.9 mm). They are spaced 3/4" (19 mm) apart.
Having seen Pask Makes's video about making a knapp joint, I figured, this is another joint the pantorouter could do more easily.
Pask went through quite a few steps making a sort of plug cutter to cut the pins part of the joints, as well as router templates to cut the holes part of the joint. Much more trouble than I went through, but that makes his video a more interesting and longer video than mine.
Pask's method is closer to how these joints were cut originally.
The knapp joint was used in manufactured furniture in the 1870s and 1880s as a sort of "dovetail joint". Back then, machines to manufacture dovetail joints had not been invented yet, whereas the knapp joint was designed to be machine cut (the pins part really can't be hand cut).
It at first seems strange that a machine for cutting dovetail joints had not been invented yet, but I think a big part of the problem was that the necessary technology and materials didn't exist yet.
Cutting a dovetail joint with a router means making a full-depth cut with the dovetail bit into the end grain. That's really hard on the router bit, even a carbide bit. High speed steel is worse, but back in the 1800s, there was no carbide or high speed steel.
Nor were there any "routers". Machinery was powered by steam engines, driven by flat belts, which cast in place Babbitt bearings. Speeds of 10,000 RPM were not practical. But if you were to try to cut with a dovetail bit at just a few thousand RPMs, it would jump and chatter like crazy. So modern approaches of machine cutting dovetail joints weren't practical at that time.
But a big "plug cutter" style cutter could be run slowly to cut the pins part of the joint. As for the holes part, holes could easily be drilled with a drilling machine, and the outline of the holes part could be cut with a haunching machine.
Apparently, the joint fell out of favour when "classic" stuff came more into fashion and people didn't want these modern machine cut joints. Also, by that time, machines for cutting dovetail joints had been invented, so knapp joints were no longer necessary.
But now the irony is, if you come across an old piece of turniture with knapp joints on it, you know its 130-150 years old. A real classic!
I don't think the knapp joint is a terribly strong joint. The pins that hold it all together aren't that much material. But still better than hand cut dovetail joints, because in hand cut joints, people tend to use as few pins and tails as possible because it's so much work to make them.
I also came across this video How to make a Cove and Pin Dovetail With Hand tools, Live | Knapp joint of making knapp joints by hand, but he uses separate dowels instead of cutting around the pins, so not quite a real knapp joint.
Update 2022
Mac Sheldon asked me to design a segmented template for the knapp joints so it can be configured with different
numbers of pins. The template also can handle both halves of the joint in one template.
I made a video about the design and prototyping process for this
 My wooden pantorouter (2010)
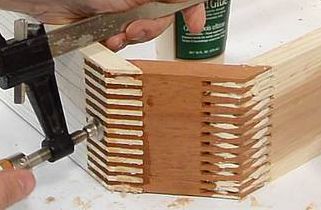 Octagonal box joined box (2016)
 Small box joined boxes (2015)
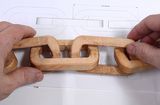 Wooden chain
carved using only power tools (2016)
Wooden chain
carved using only power tools (2016)Back to my a href="../index.html">Woodworking website
 Designing segmented Knapp-joint pantorouter templates
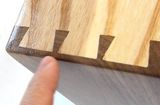 Cheating at hand cut dovetail joints
 Building some overly complicated boxes
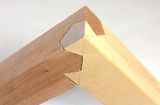 Recreating the clever 3-way joint (Kawai Tsugite)
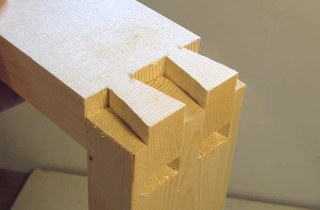 Dovetail joints on the bandsaw
 Impossible looking dovetail joint
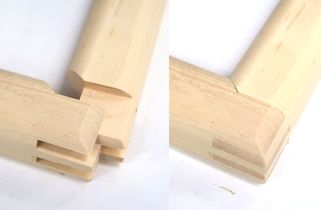 Half box joint, half miter joint