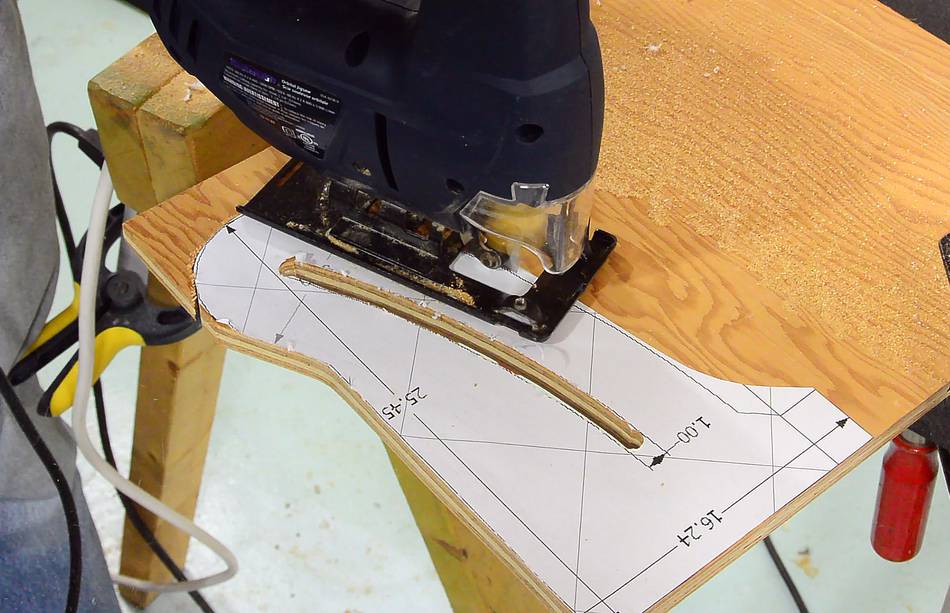
 Having cut the rectangular parts with an improvised
table saw, I proceeded to make the other cuts with a jigsaw.
A bandsaw would be better, but I want to make sure this can be built with
minimal tools.
Having cut the rectangular parts with an improvised
table saw, I proceeded to make the other cuts with a jigsaw.
A bandsaw would be better, but I want to make sure this can be built with
minimal tools.
Having cut the rectangular parts with an improvised
table saw, I proceeded to make the other cuts with a jigsaw.
A bandsaw would be better, but I want to make sure this can be built with
minimal tools.
 This part is mostly curves, so I cut it with the jigsaw.
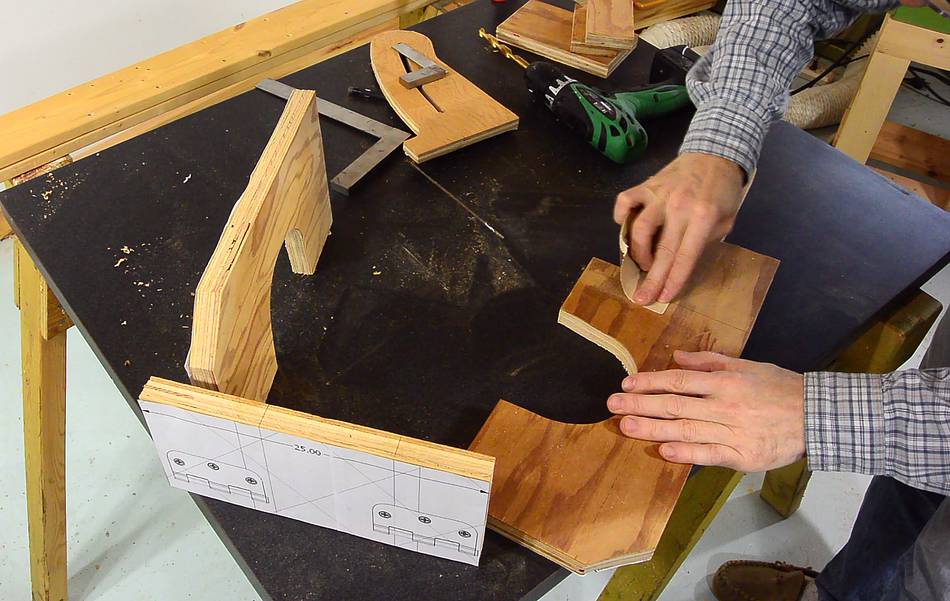 I'm using some old plywood. I have found that old wood glues better
(about 30% stronger joints) if you give the old surfaces a light sanding
where the glue goes. For new plywood, the sanding isn't needed.
I'm using some old plywood. I have found that old wood glues better
(about 30% stronger joints) if you give the old surfaces a light sanding
where the glue goes. For new plywood, the sanding isn't needed.
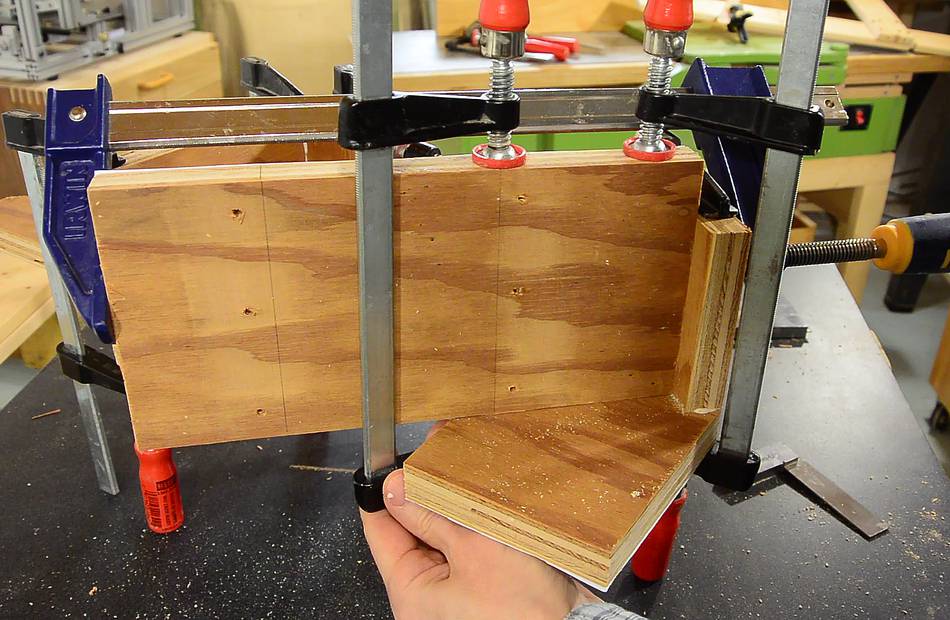
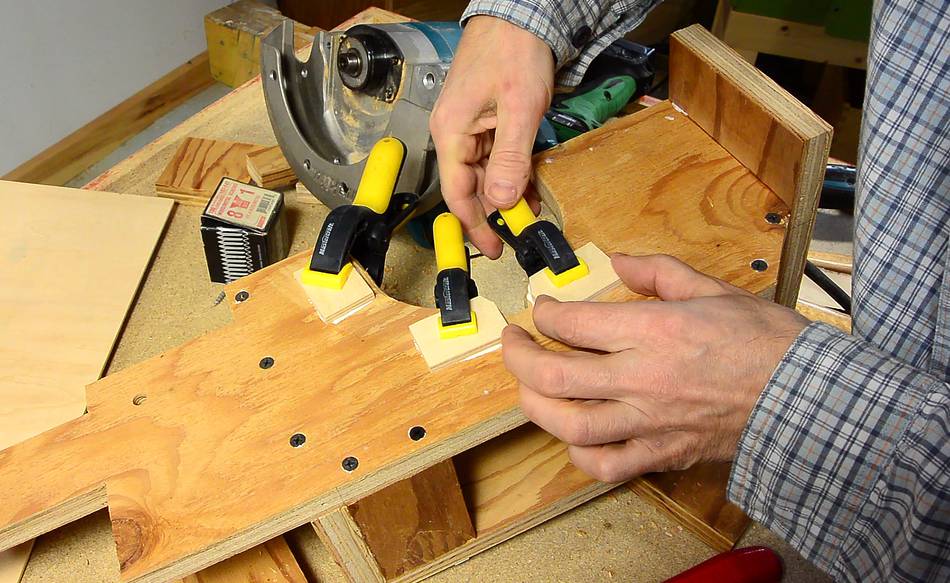
 Test assembled with clamps. This is how it all goes together.
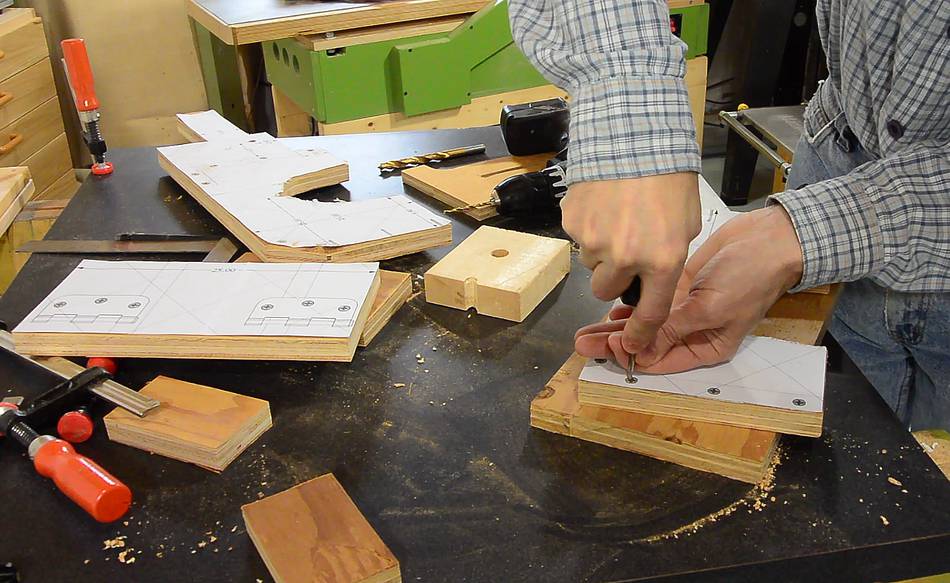 Punching divots with an awl for where the screws go.
 Then drilling holes for the screws. These holes are the size of the screw
thread's outer diameter. After that, I countersunk the holes so that
the screw heads will be flush with the surface
Then drilling holes for the screws. These holes are the size of the screw
thread's outer diameter. After that, I countersunk the holes so that
the screw heads will be flush with the surface
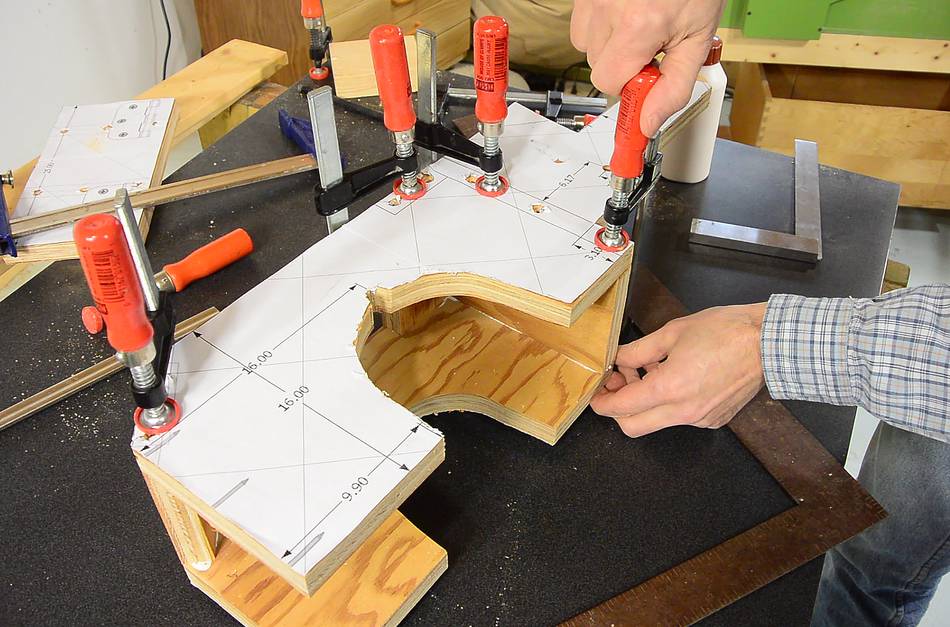
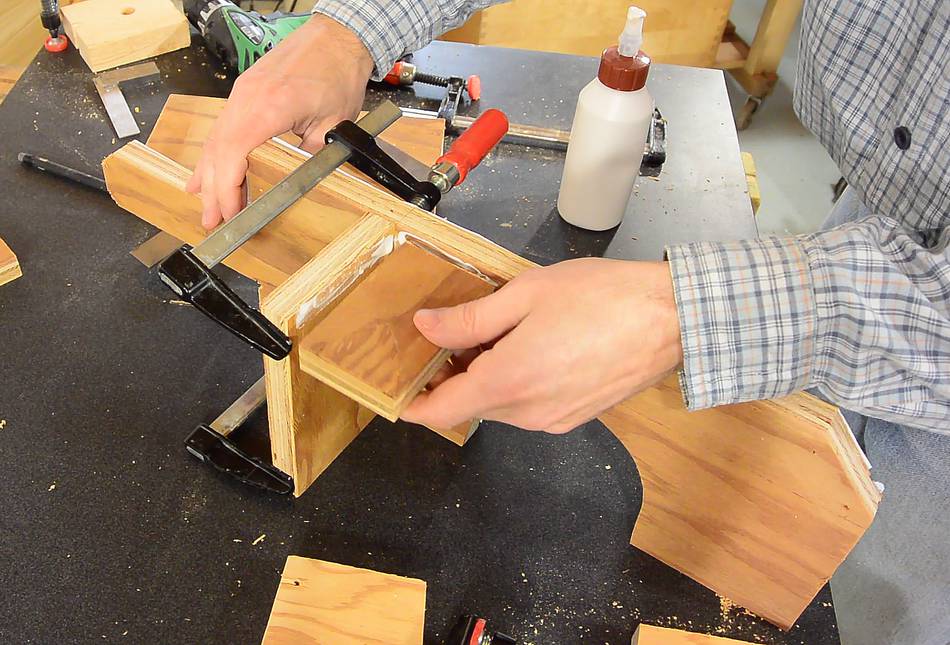 Initial assembly using glue only. I added the screws later.
 This piece turned out to be slightly off-square.
 To force it into square-ness as the glue dried, I clamped another piece
of wood into the corner temporarily.
To force it into square-ness as the glue dried, I clamped another piece
of wood into the corner temporarily.
 Once the glue dried for, I clamped on the "front" part that the
saw will mount to.
Once the glue dried for, I clamped on the "front" part that the
saw will mount to.
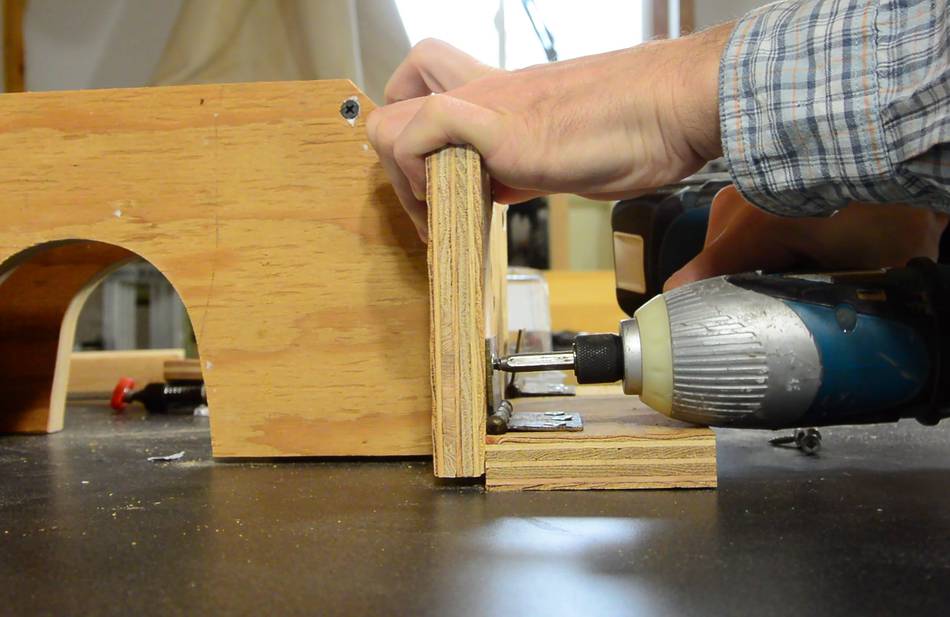
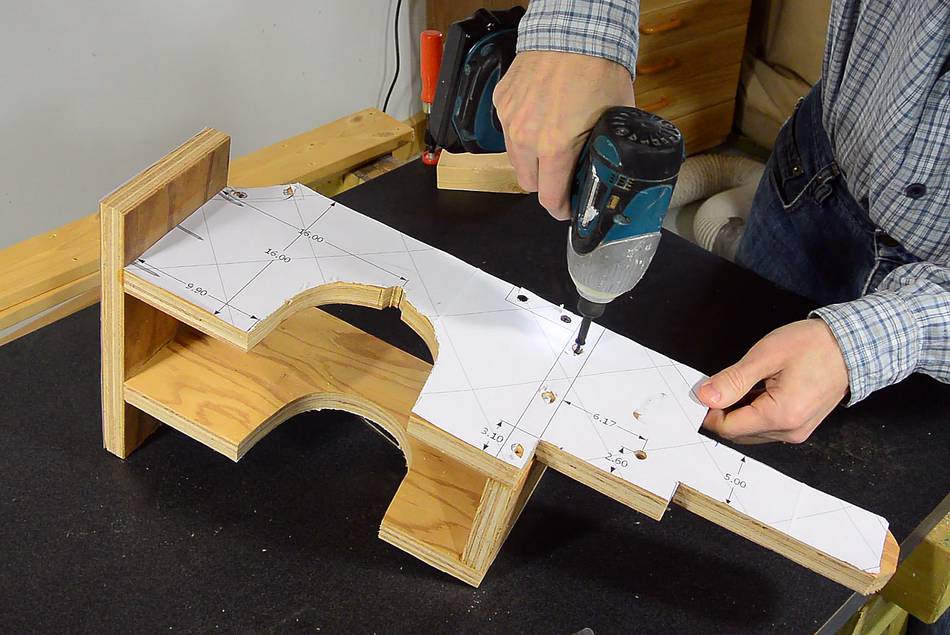 With the glue all dried, I finally drill a pilot hole about the size of
the minor diameter of the screws, then add the screws.
With the glue all dried, I finally drill a pilot hole about the size of
the minor diameter of the screws, then add the screws.
You could of course screw it together while the glue is still wet, but I find it easier to focus on one thing at a time, so I glue first, let it dry, and then screws.
 The hinges for the depth adjustment mount onto a block of wood, which in turn
is glued to the bottom of the table. The plywood holds the screws much better
than the particle board.
The hinges for the depth adjustment mount onto a block of wood, which in turn
is glued to the bottom of the table. The plywood holds the screws much better
than the particle board.
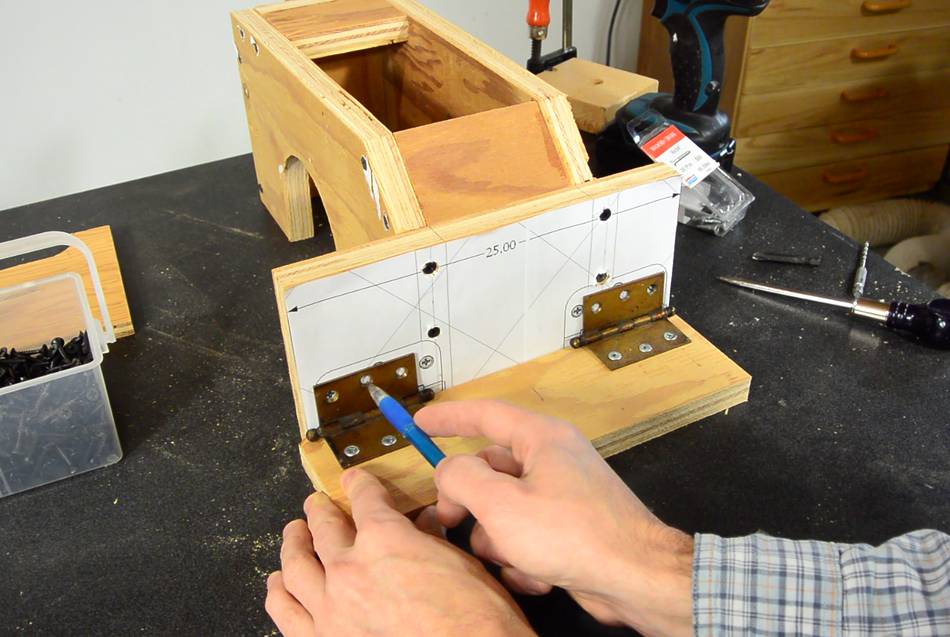
 Here marking where the screw holes need to go, then drilling them.
 After screwing it together, I realized, I should have left a gap between
the pieces of wood. Sawdust will get into this area for sure, and if the gaps
must completely close when the saw is raised all the way, it will really pinch
the sawdust. Leaving a gap of 3-5 mm will prevent too much pressure.
After screwing it together, I realized, I should have left a gap between
the pieces of wood. Sawdust will get into this area for sure, and if the gaps
must completely close when the saw is raised all the way, it will really pinch
the sawdust. Leaving a gap of 3-5 mm will prevent too much pressure.
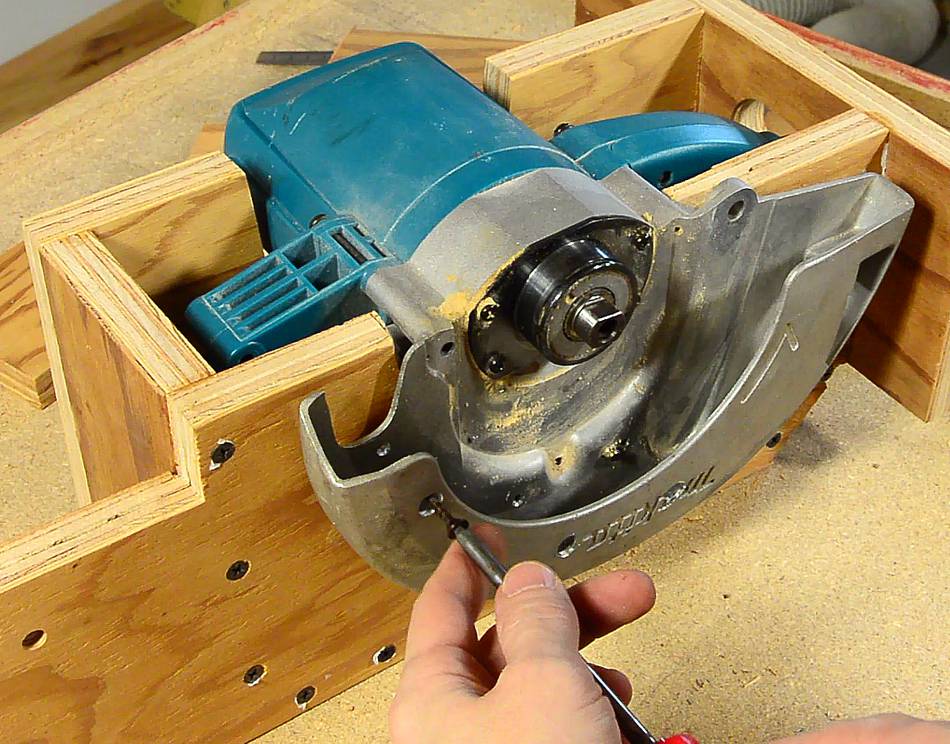
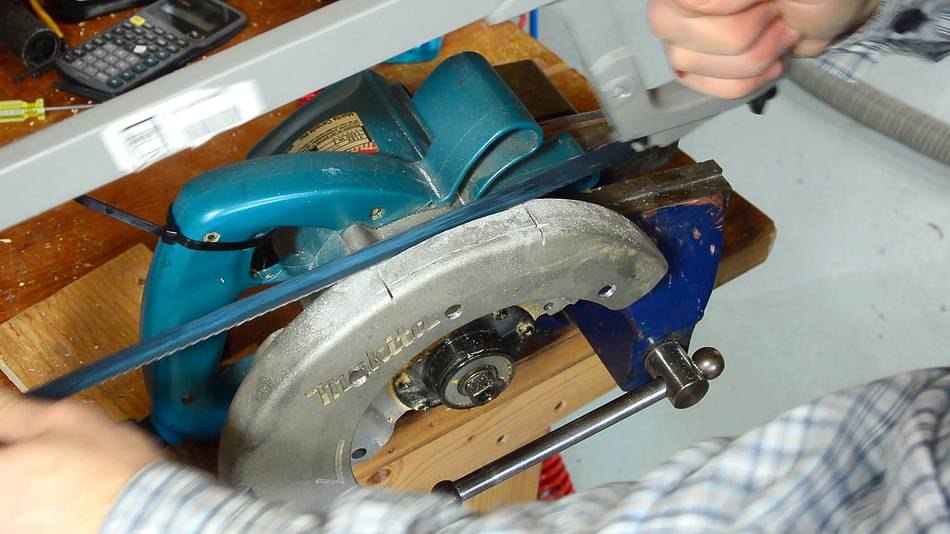
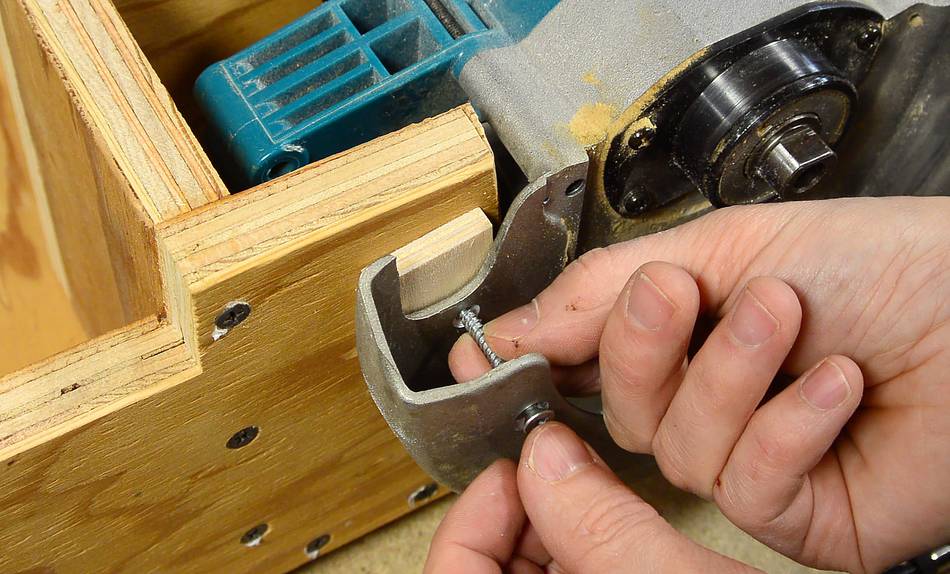
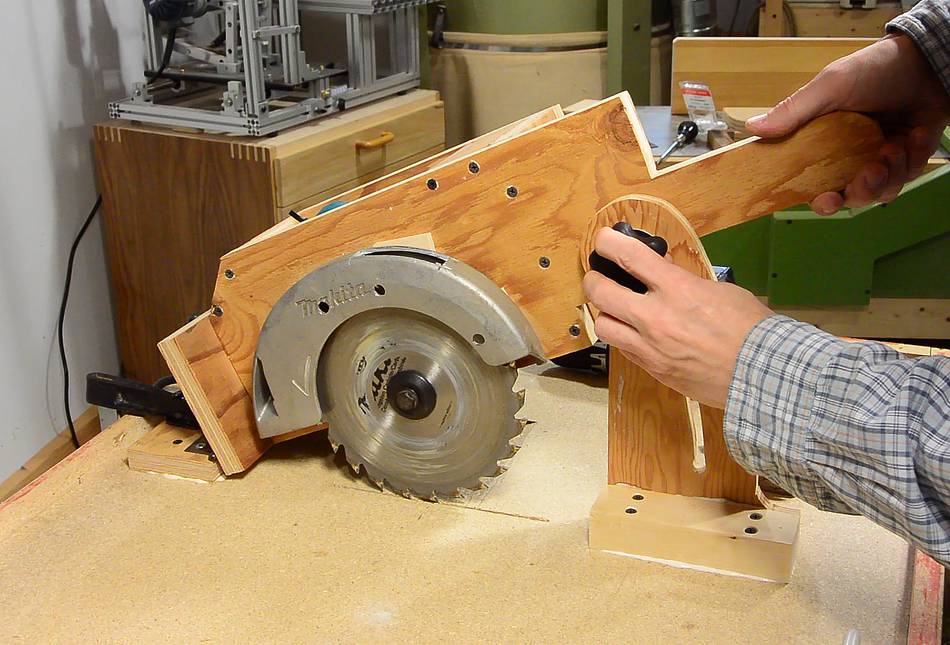
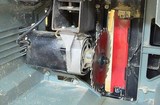
 This is how the bracket will fit around the saw. But to make it fit,
I need to strip the base and guards off the saw.
This is how the bracket will fit around the saw. But to make it fit,
I need to strip the base and guards off the saw.
 It's really difficult to get the ring that holds t he guard off
if you don't have a set of ring pliers. I recommend you cut the ring off with an
angle grinder, because by the time you are done modifying the circular
saw, it won't be suitable for normal use anymore anyway.
It's really difficult to get the ring that holds t he guard off
if you don't have a set of ring pliers. I recommend you cut the ring off with an
angle grinder, because by the time you are done modifying the circular
saw, it won't be suitable for normal use anymore anyway.
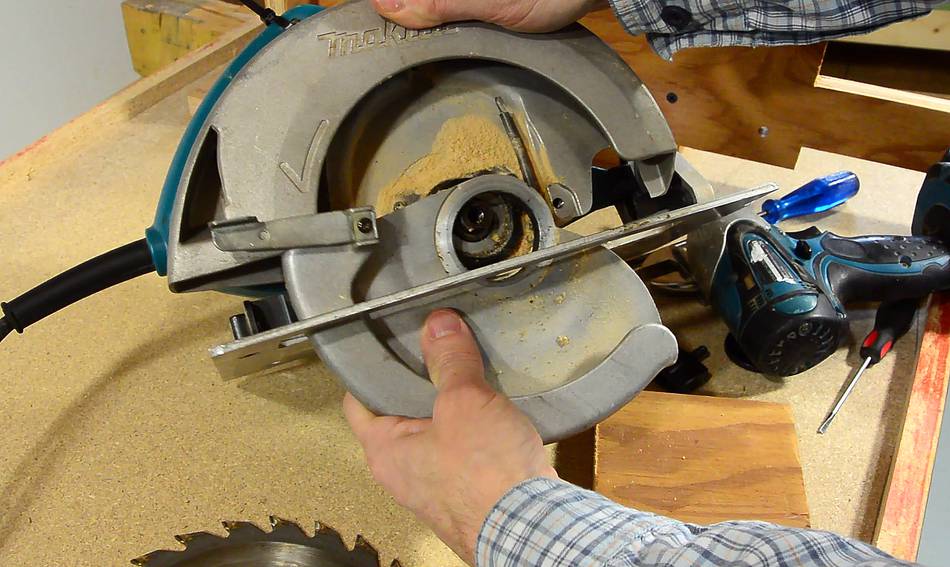 With the ring removed, the guard comes off.
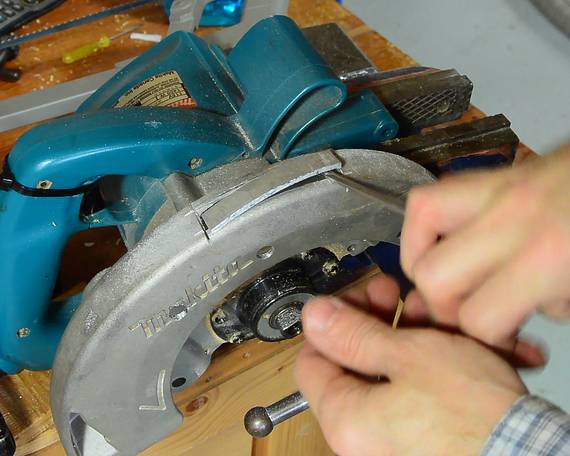
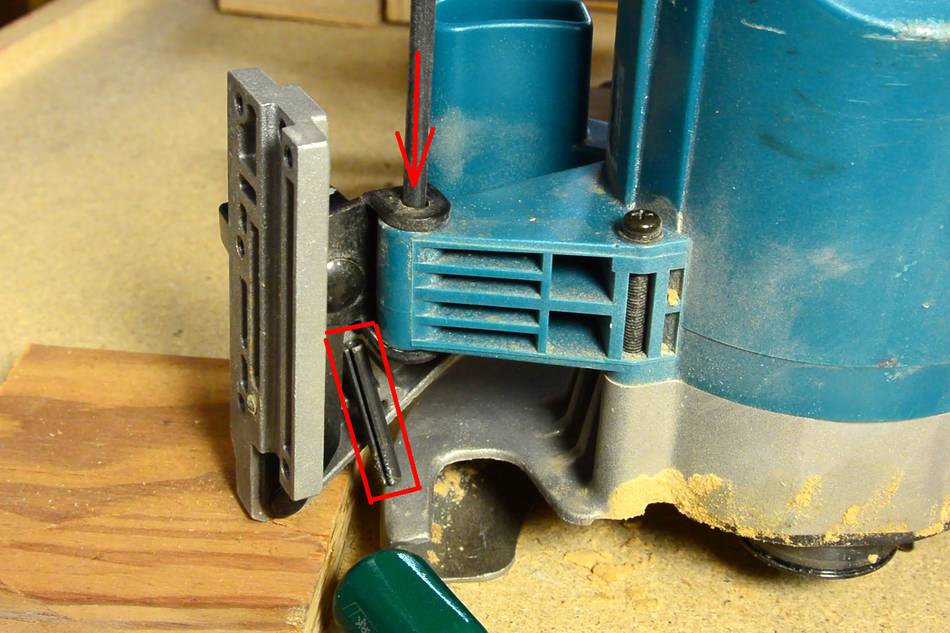 A pin provides the pivoting mount near the front. This pin is really
hard to get out. If it's too hard, just cut the plastic mount for it off
with a hacksaw. You won't need it anymore. The photo was taken just
after the pin came out.
A pin provides the pivoting mount near the front. This pin is really
hard to get out. If it's too hard, just cut the plastic mount for it off
with a hacksaw. You won't need it anymore. The photo was taken just
after the pin came out.
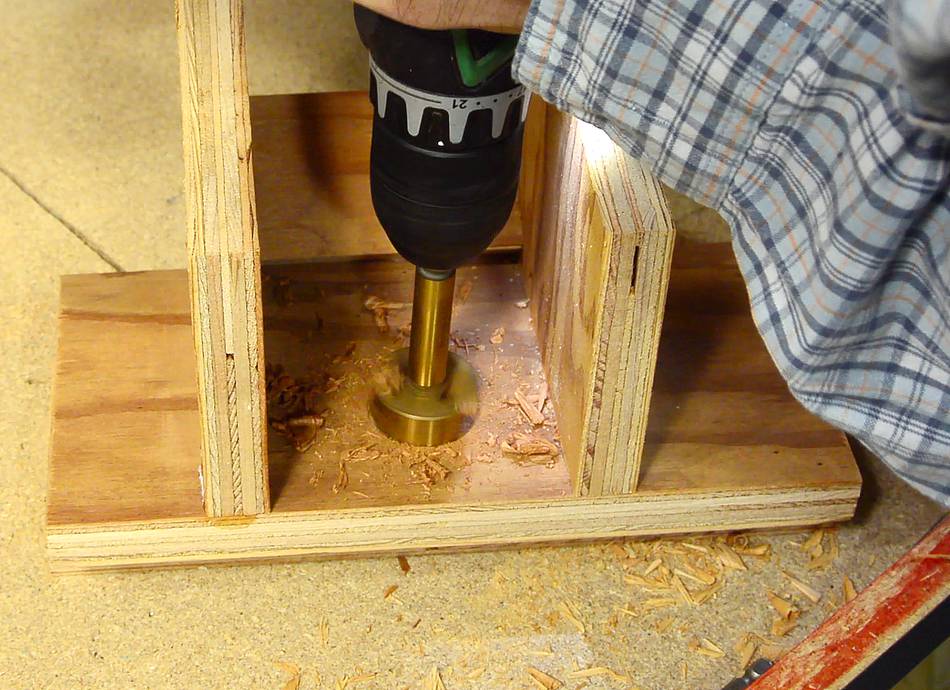 I modeled the shape of the circular saw in CAD when I designed the mount.
Unfortunately, I didn't model the power cord so I neglected
to leave room for it in my design. I updated the plans to include a hole
for the cord, and hopefully, you will remember to drill this hole
before assembling the mount.
I modeled the shape of the circular saw in CAD when I designed the mount.
Unfortunately, I didn't model the power cord so I neglected
to leave room for it in my design. I updated the plans to include a hole
for the cord, and hopefully, you will remember to drill this hole
before assembling the mount.
If you don't have a big forstner bit, drill a 3/8" (10 mm) hole, then cut a bigger hole with a jigsaw.
Ironically, I put the hole in slightly the wrong place, so I had to enlarge it with a jigsaw later.
 Tweaking the saw mount to make sure the saw goes in at the
right alignment.
Tweaking the saw mount to make sure the saw goes in at the
right alignment.
It can be difficult to figure out where the saw hits the mount. If in doubt, draw pencil lines all over the parts that go next to the plywood, and then see where the marks transfer to the wood.
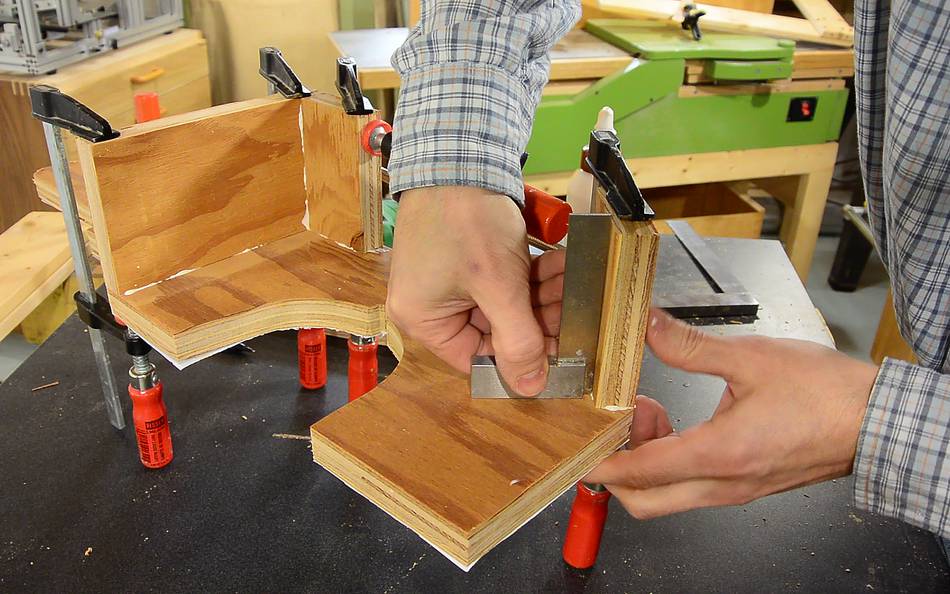
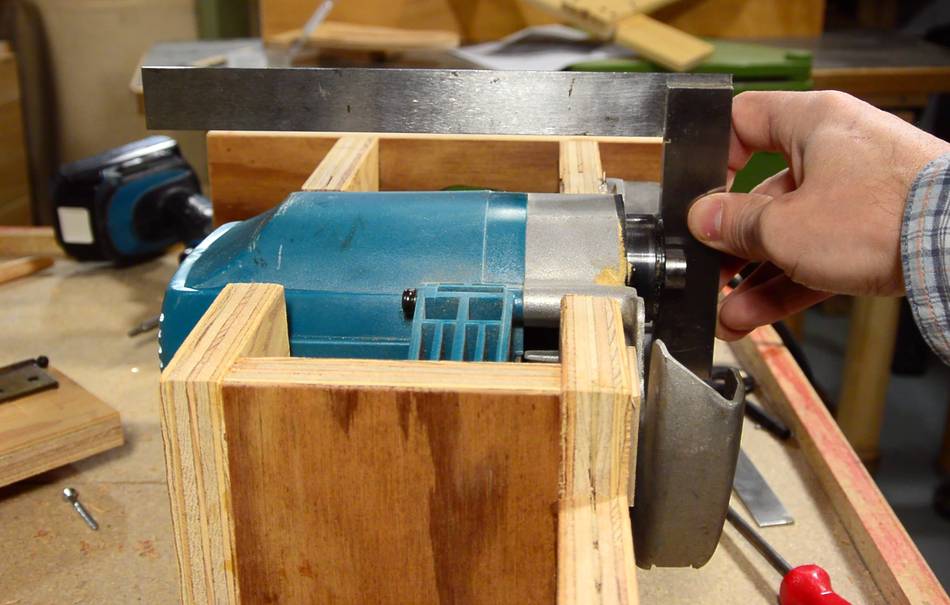
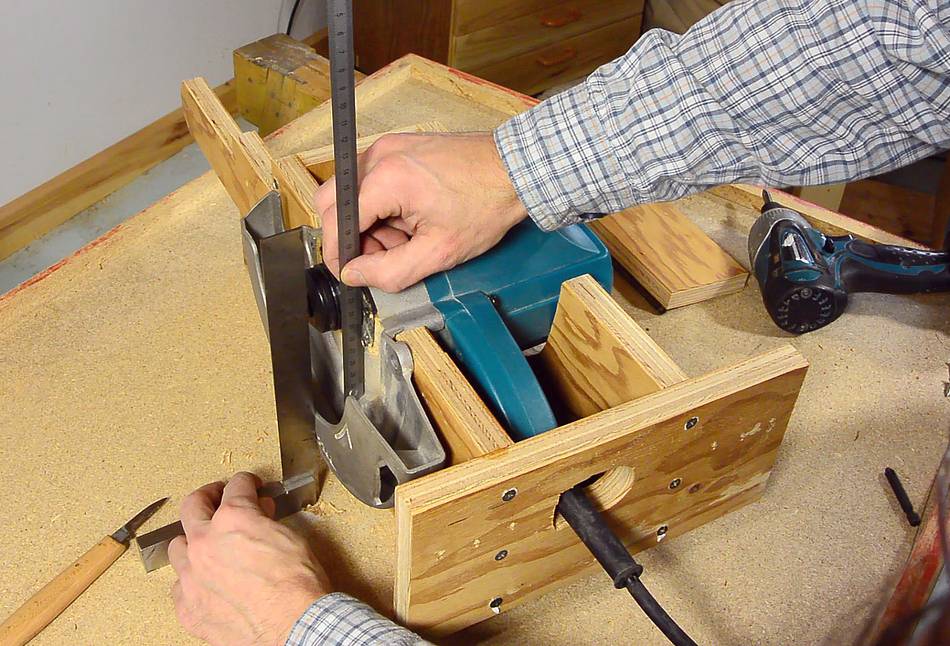 Checking alignment for how the saw will mount. Here I'm checking
that the blade will be vertical in the mount. The ruler is against the
shaft mount of the saw, and I'm eyeballing it to make sure it's parallel
to the square.
Checking alignment for how the saw will mount. Here I'm checking
that the blade will be vertical in the mount. The ruler is against the
shaft mount of the saw, and I'm eyeballing it to make sure it's parallel
to the square.
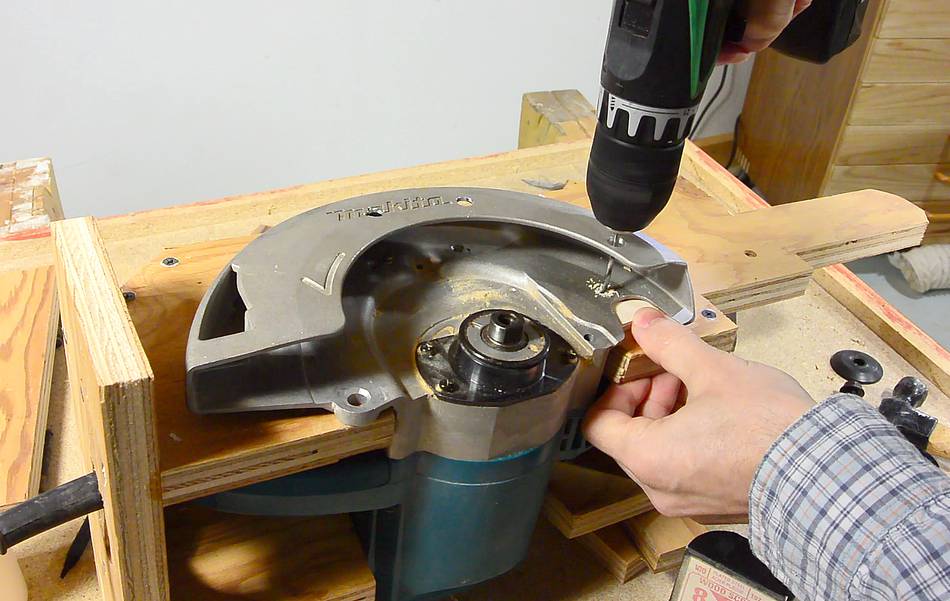
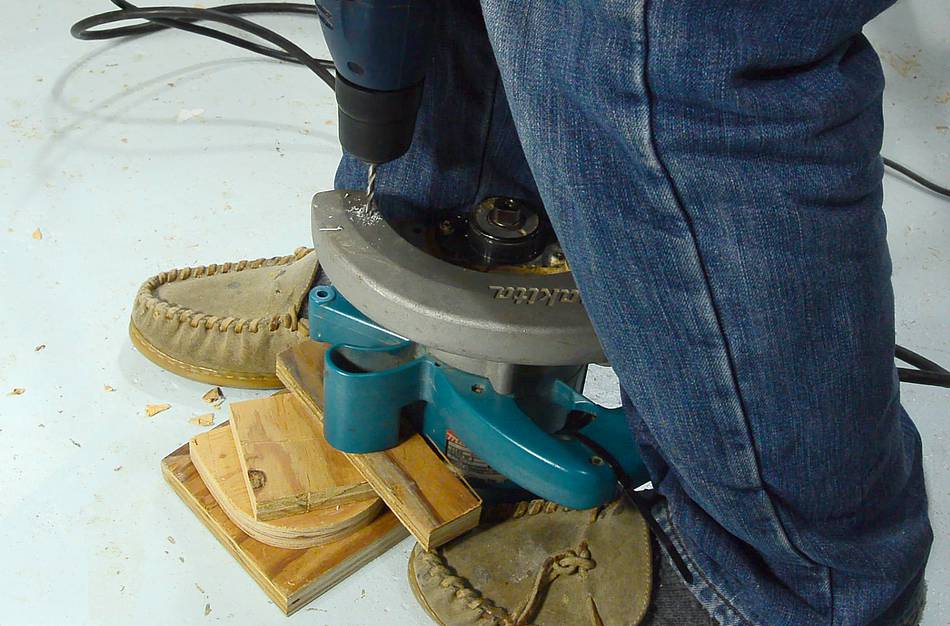 Now drilling new mounting holes in the guard of the saw.
This is best done on a drill press, if you have one. I'm drilling it without one, just to make sure it can be done this way too.
The saw is resting on some pieces of scrap wood to support it at this angle. Drilling in metal takes a lot of force.
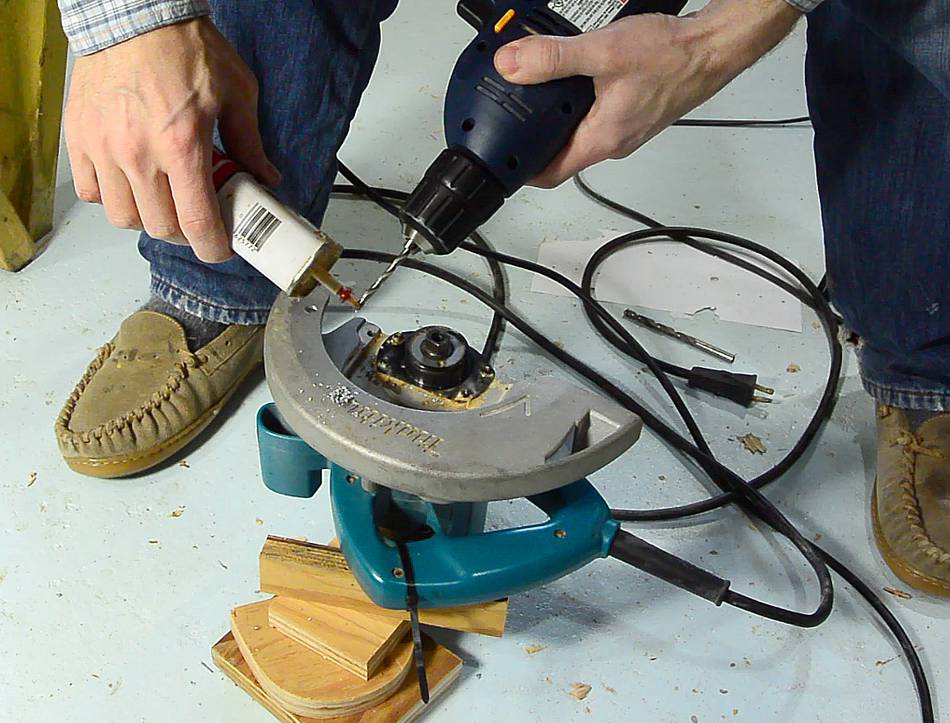 Putting a drop of oil on the drill always helps.
 I drilled the holes on the front of the guard large enough to pass
a screw and screwdriver through.
I drilled the holes on the front of the guard large enough to pass
a screw and screwdriver through.
 On my previous homemade table saw,
I found I had a lot of sawdust getting stuck on the motor's air inlet.
On my previous homemade table saw,
I found I had a lot of sawdust getting stuck on the motor's air inlet.
I think this was made worse because the guard's sawdust ejection slot was plugged up, so the sawdust was deflected all the way around the guard, coming out just below the table on the other side. The sawdust then had to go left or right, and whatever went left went past the motor's air inlet, where some of it got sucked in.
 To make this less likely, I cut a hole in the guard, so that the sawdust could
get ejected straight down, and less of it would end up in the motor.
I cut that slot in the guard with a hacksaw.
To make this less likely, I cut a hole in the guard, so that the sawdust could
get ejected straight down, and less of it would end up in the motor.
I cut that slot in the guard with a hacksaw.
 The way the saw mounts in the bracket, I needed some spacers behind it.
 I glued the spacers right on the bracket. That way, they won't fall out
and they also provide more wood for the screws to screw in to.
I glued the spacers right on the bracket. That way, they won't fall out
and they also provide more wood for the screws to screw in to.
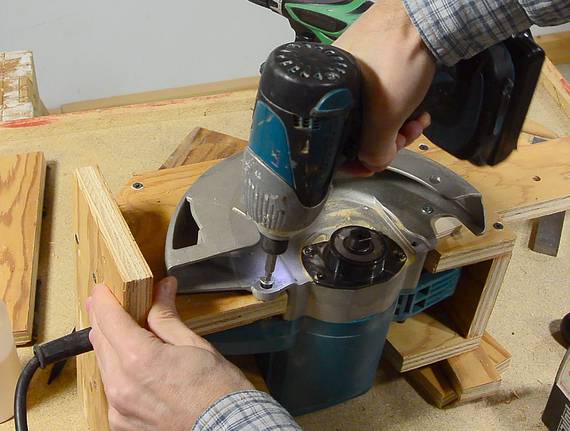
 Drilling the pilot holes for the screws. I'm drilling these through the
holes in the saw. That way, I can make sure the pilot holes are in line
with the holes in the guard. The holes I drilled in the guard were
not all square.
Drilling the pilot holes for the screws. I'm drilling these through the
holes in the saw. That way, I can make sure the pilot holes are in line
with the holes in the guard. The holes I drilled in the guard were
not all square.
 To check what size drill I need to use, I hold the shank of the drill
in front of the screw. If I see a good amount of screw thread sticking
out either side, then I know I will get good thread engagement.
To check what size drill I need to use, I hold the shank of the drill
in front of the screw. If I see a good amount of screw thread sticking
out either side, then I know I will get good thread engagement.
Screwing it on. I used 1.25" #8 screws, and a larger (probably #12) screw for the hole that used to hold the depth adjustment lock.
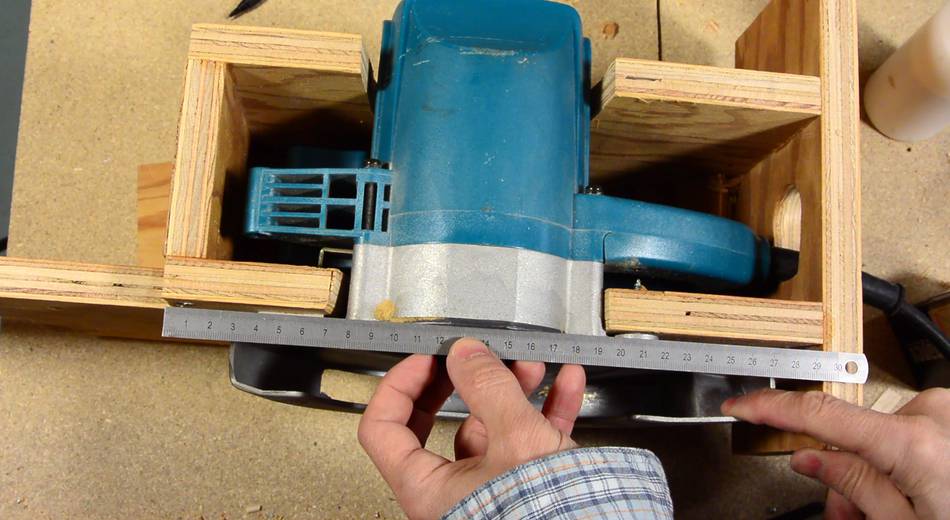
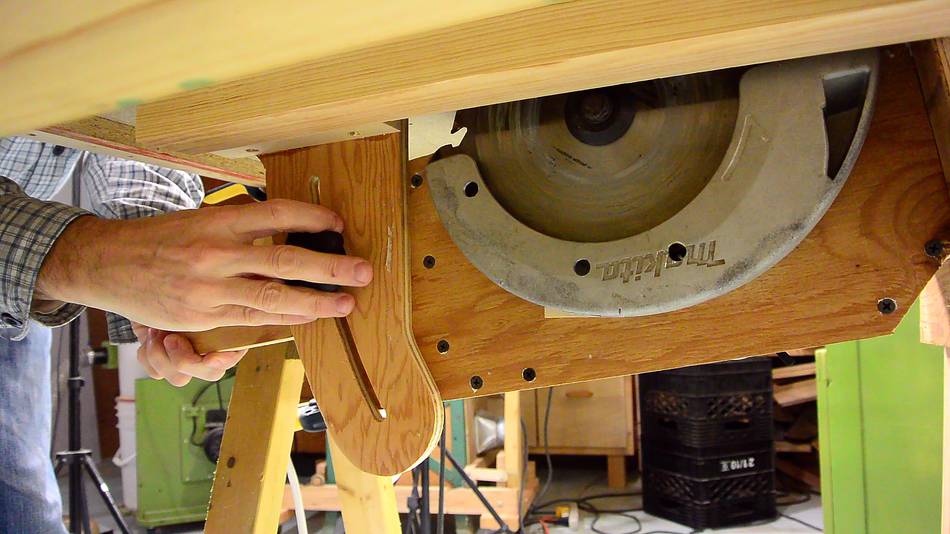
 Checking alignment. Here I'm checking that the saw is parallel with
the wood it's mounted to. Error in this direction would lead to runout.
Checking alignment. Here I'm checking that the saw is parallel with
the wood it's mounted to. Error in this direction would lead to runout.
I glued in two pieces of veneer to act as shims to bring it into alignment.
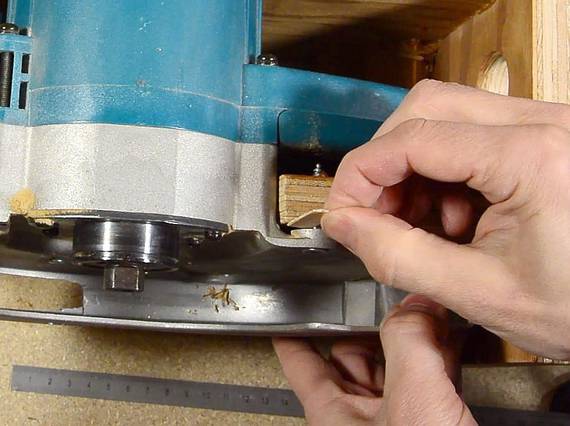
 Also checking that the blade will mount perpendicular to the plate
at the end (behind the square). The edge of this plate will be
parallel with the table.
Also checking that the blade will mount perpendicular to the plate
at the end (behind the square). The edge of this plate will be
parallel with the table.
 Here the hinges are installed. The piece with the hinges on it is just
clamped to the table for the time being to check the fit.
Here the hinges are installed. The piece with the hinges on it is just
clamped to the table for the time being to check the fit.
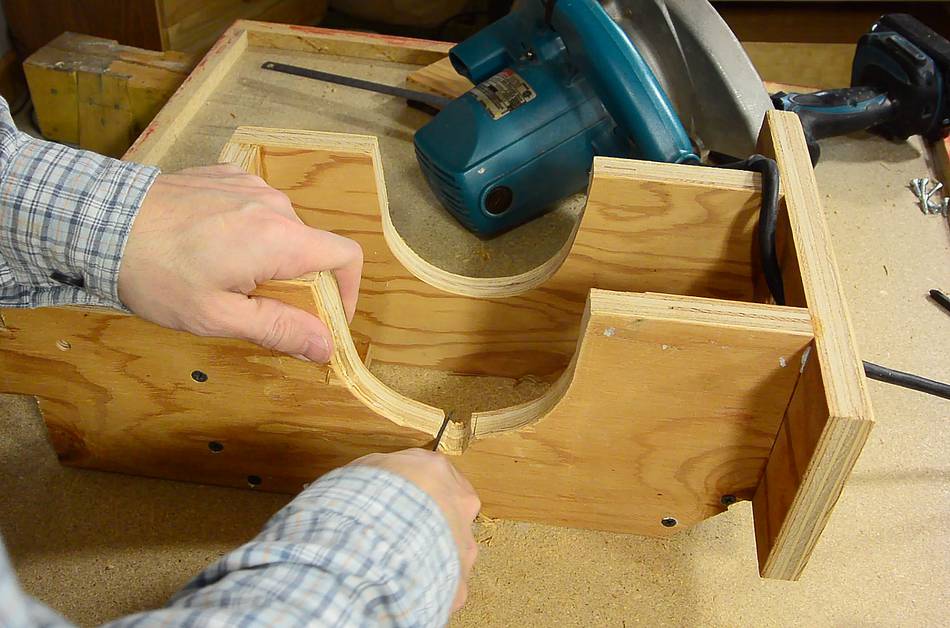
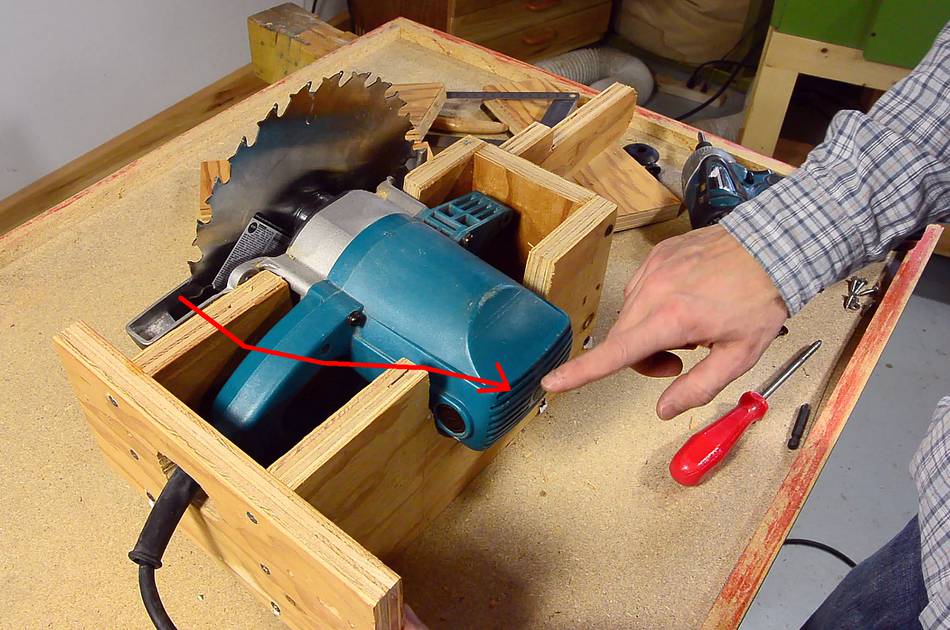
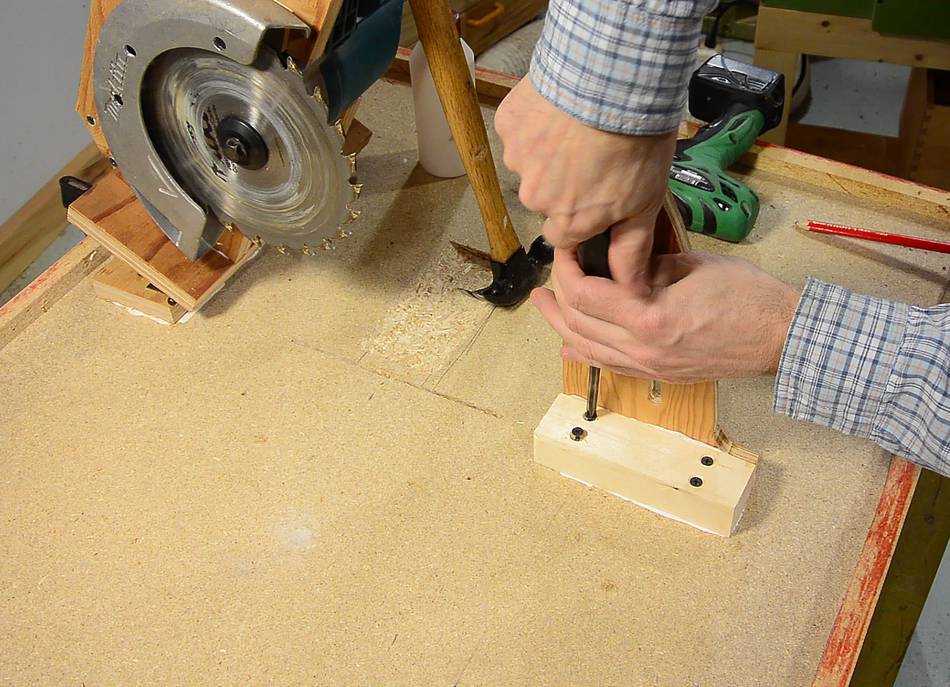
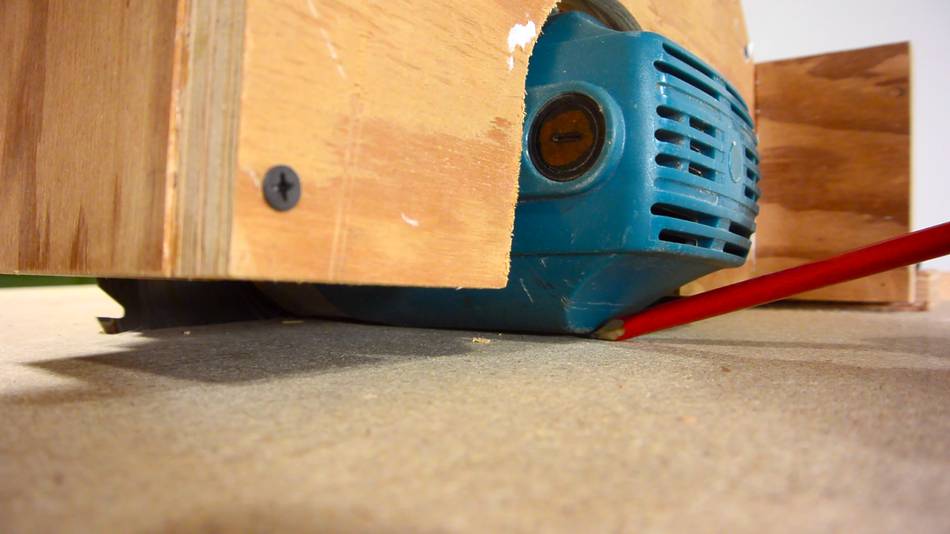 The motor protrudes from the motor mount and hits the bottom of the table
(shown with my red pencil). A cavity needs to be carved out
for the motor. This will add about 8 mm (5/16") extra depth of cut.
The motor protrudes from the motor mount and hits the bottom of the table
(shown with my red pencil). A cavity needs to be carved out
for the motor. This will add about 8 mm (5/16") extra depth of cut.
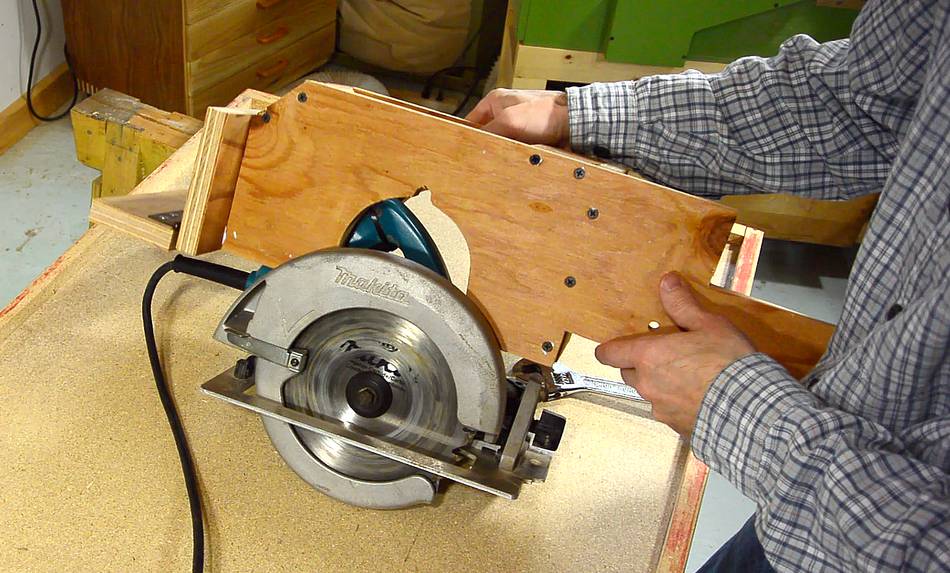
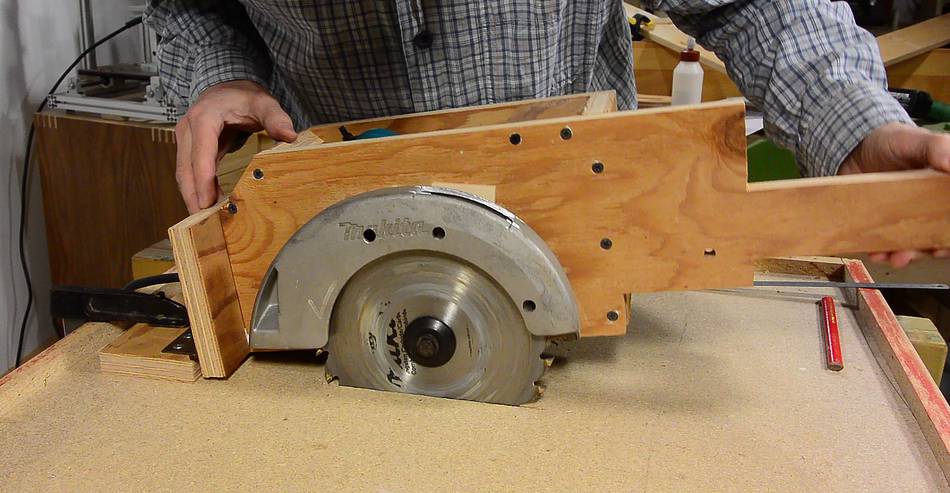
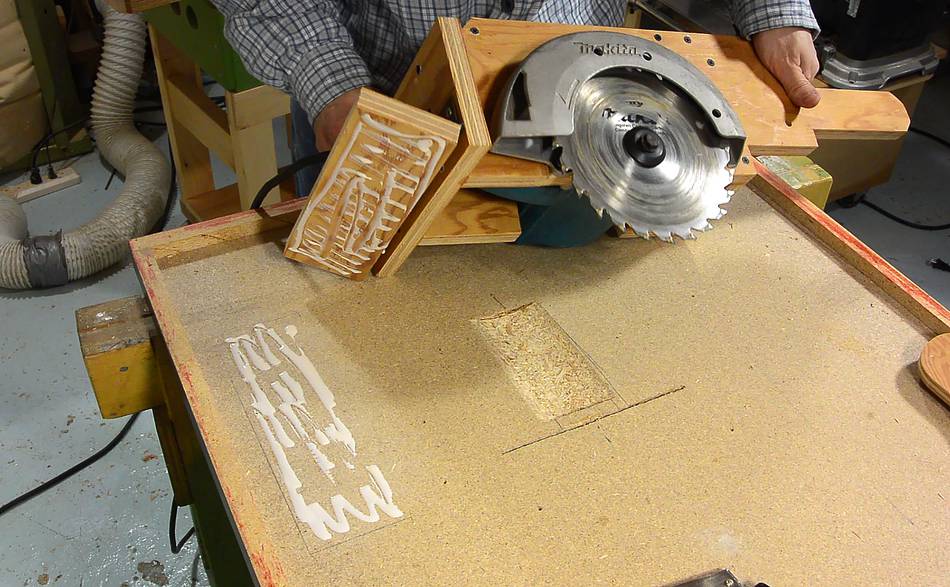
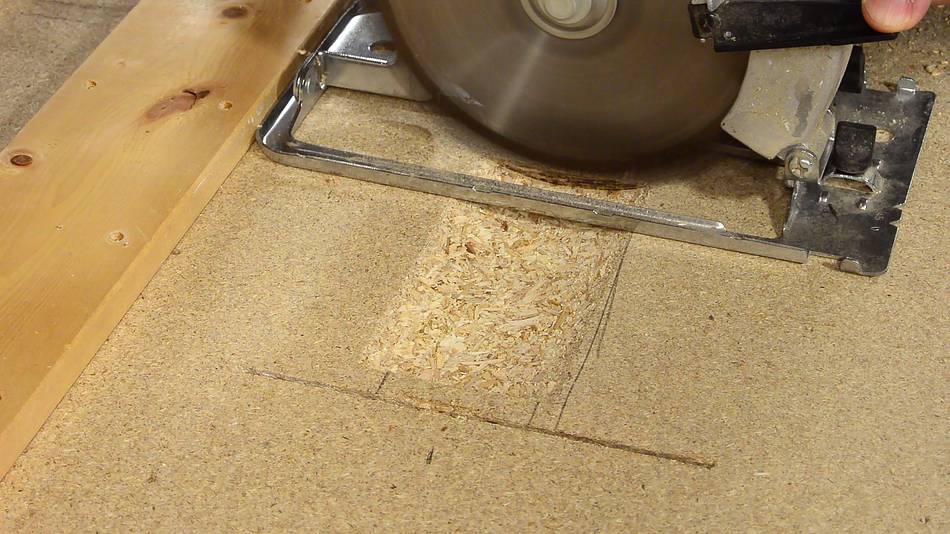 A router would be a good tool to carve out this cavity, but I wanted to
keep the tools needed for this build to a minimum. I tried carving it
out with a circular saw. This worked really well - actually better
than a router would have.
A router would be a good tool to carve out this cavity, but I wanted to
keep the tools needed for this build to a minimum. I tried carving it
out with a circular saw. This worked really well - actually better
than a router would have.
This does require that you have a second circular saw. But considering that the saw you are using for the table saw won't be usable as a handheld circular saw anymore, you really should have a second one.
 Now finally getting ready to glue it on. If you are using recycled wood,
don't forget to sand the surfaces where the glue joint is for maximum adhesion.
Now finally getting ready to glue it on. If you are using recycled wood,
don't forget to sand the surfaces where the glue joint is for maximum adhesion.
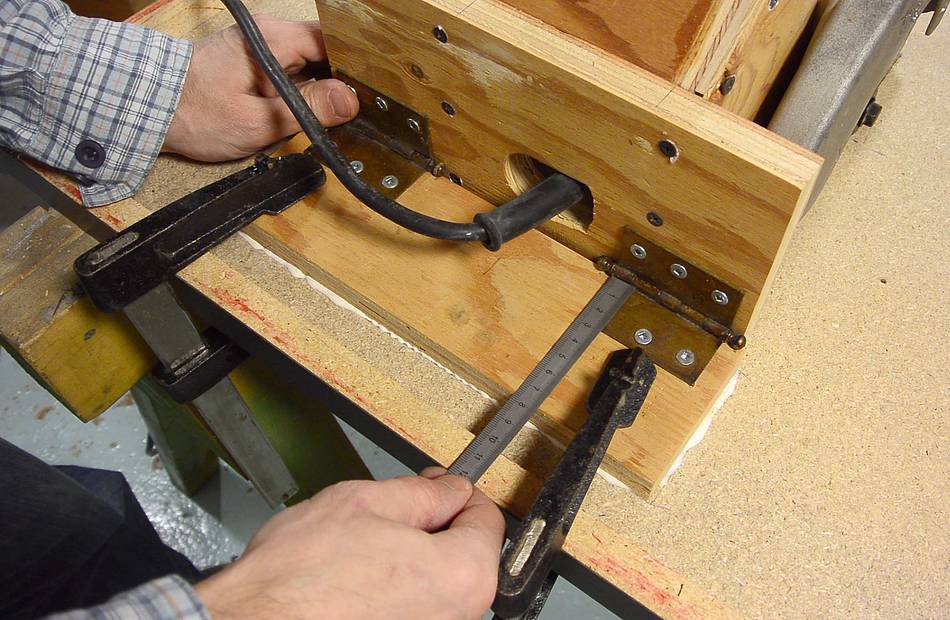 Checking alignment while gluing. Both hinges need to be exactly the same
distance from the back edge of the table (assuming, of course, that the back
edge is parallel to the front edge).
Checking alignment while gluing. Both hinges need to be exactly the same
distance from the back edge of the table (assuming, of course, that the back
edge is parallel to the front edge).
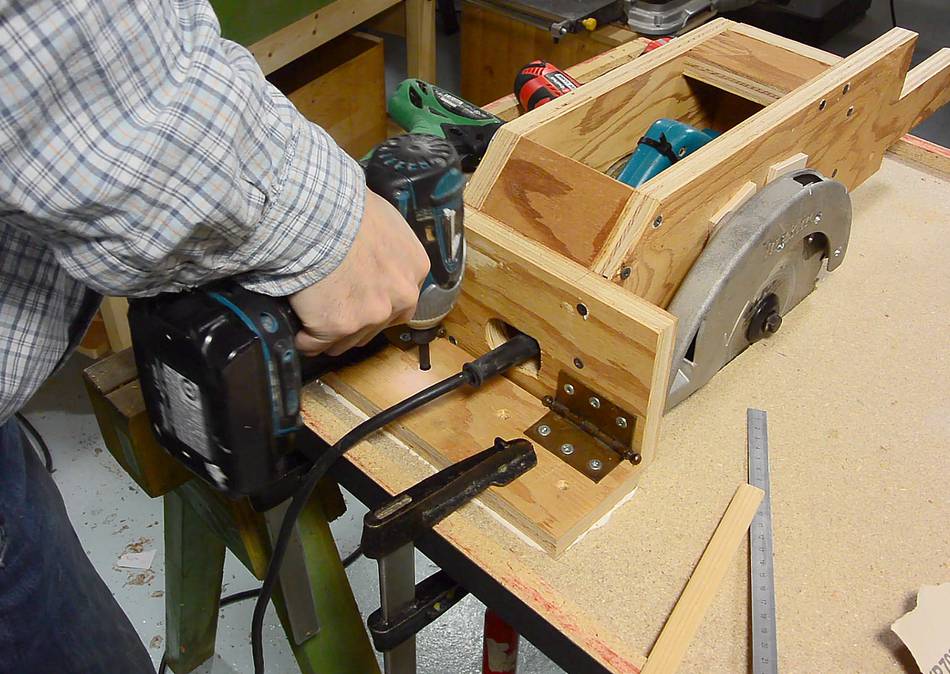 Adding some screws for good measure. I pre-drilled holes for these
to avoid cracking the particle board.
Adding some screws for good measure. I pre-drilled holes for these
to avoid cracking the particle board.
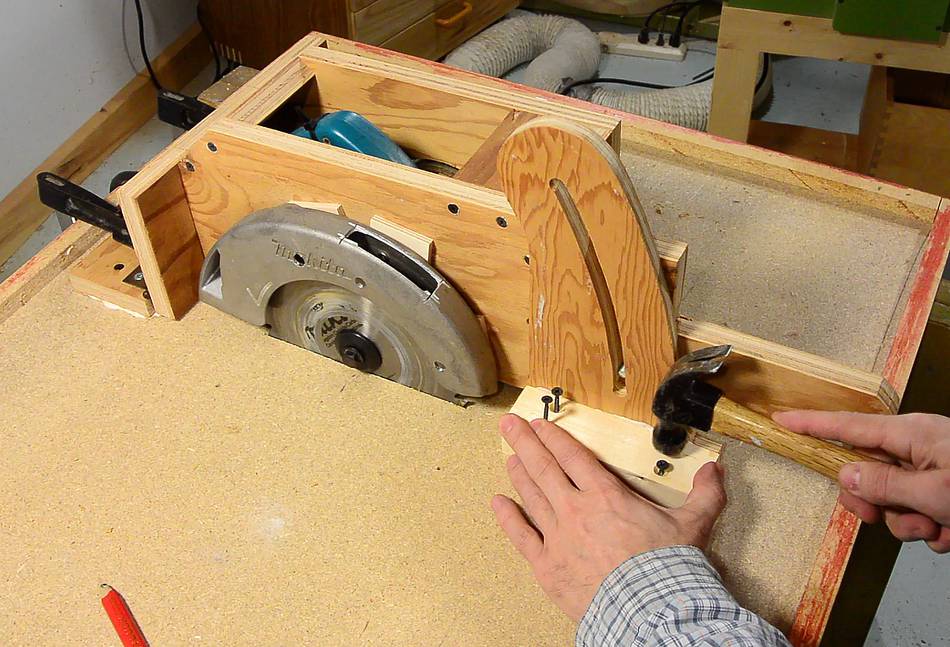
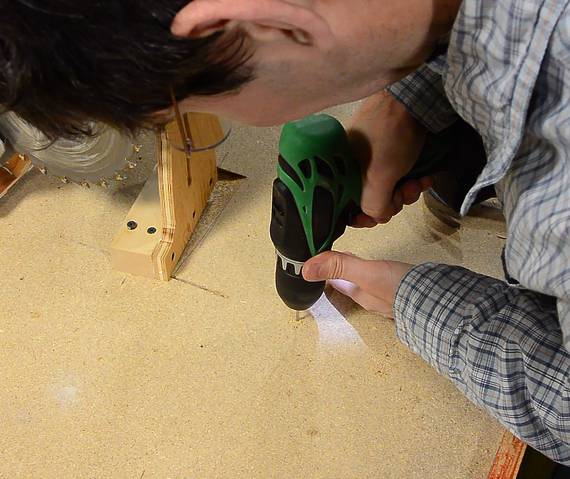 I already glued and screwed a block of wood to the depth adjustment
lock. Here I'm transferring the pilot hole locations by tapping the
screws with a hammer. This makes a divot in the particle board for
where the holes need to go.
I already glued and screwed a block of wood to the depth adjustment
lock. Here I'm transferring the pilot hole locations by tapping the
screws with a hammer. This makes a divot in the particle board for
where the holes need to go.
 Finally, gluing and screwing on the parts.
 Tapping a 5/16" (M8) carriage bolt into the saw bracket....
 then placing a 1.5" (38 mm) fender washer on the other side, followed
by a threaded knob.
then placing a 1.5" (38 mm) fender washer on the other side, followed
by a threaded knob.
 Finally, time to flip the saw over. We now have the main saw mechanism
complete, but still need to make a fence for it.
Finally, time to flip the saw over. We now have the main saw mechanism
complete, but still need to make a fence for it.
Next: Making the fence
 Why I built this saw
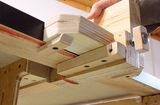 Making the fence
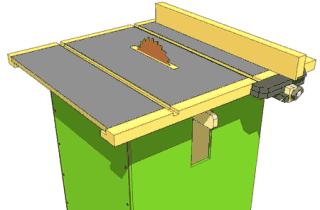 Buy plans for the table saw