Homemade table saw stand
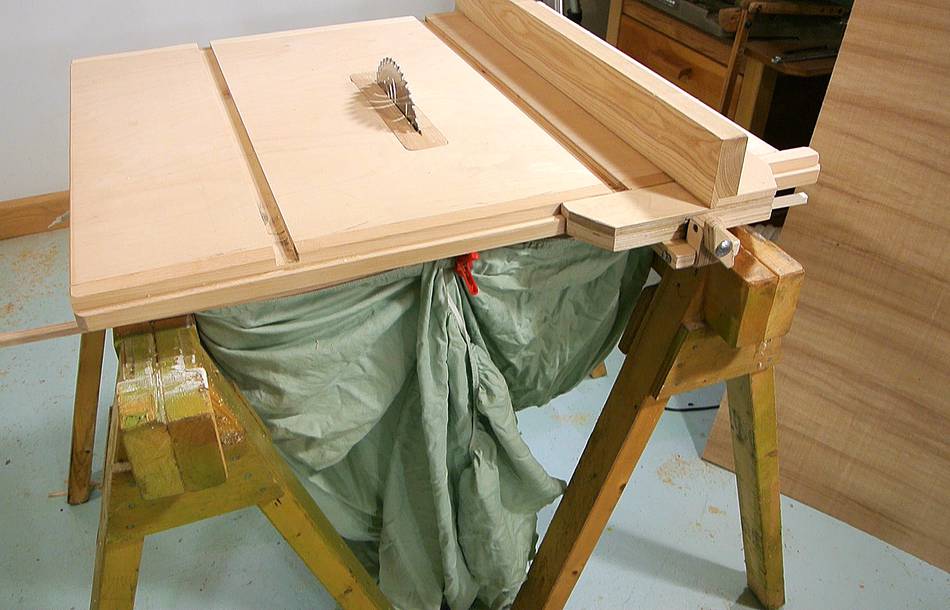 My initial intention for this homemade table saw was that I'd mostly
use it supported on two sawhorses. But using it, I always saw a jet of
sawdust coming out from under there, and the air got very dusty.
My initial intention for this homemade table saw was that I'd mostly
use it supported on two sawhorses. But using it, I always saw a jet of
sawdust coming out from under there, and the air got very dusty.
I remembered, with my first table saw, the dust levels improved dramatically once I enclosed the bottom, so I knew this would help a lot. My first experiment was to put an old bed sheet around the bottom, and that reduced dust levels considerably.
My next idea was to put the saw over a large cardboard box, but I didn't have any around, so I decided to build a nice stand for it.
 I picked up some very thin (3 mm or 1/8") plywood from the garbage.
That plywood on its own is not strong enough, so
I made some frames to go around the edges of the panels.
I picked up some very thin (3 mm or 1/8") plywood from the garbage.
That plywood on its own is not strong enough, so
I made some frames to go around the edges of the panels.
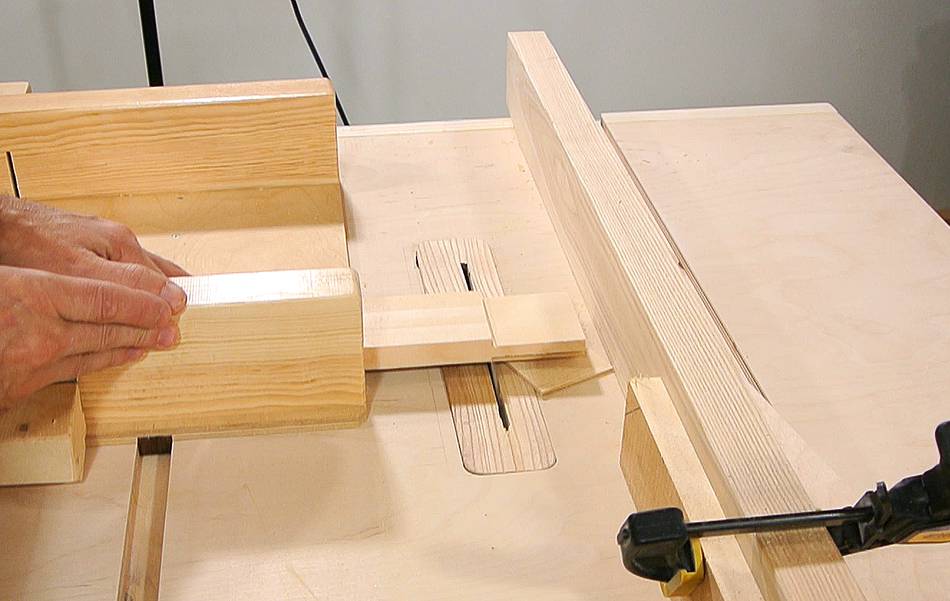
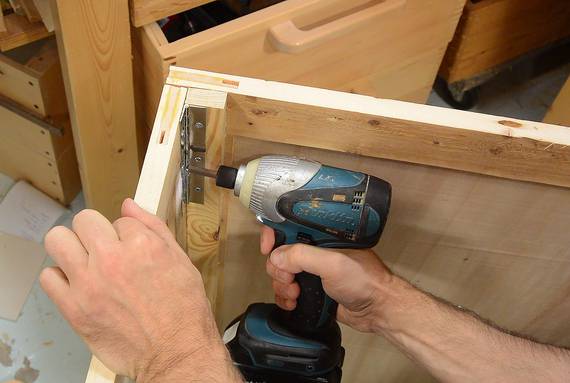
I joined the corners with bridle joints, which I cut with my quick-set tenon jig on the homemade saw. The tenon jig is particularly good for making multiple cuts to hog out the "bridle" part of the joint.
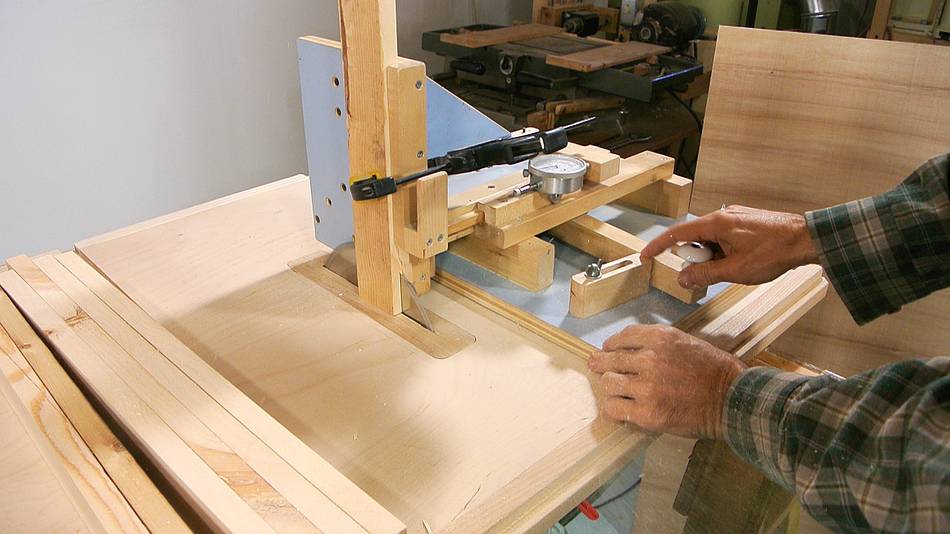
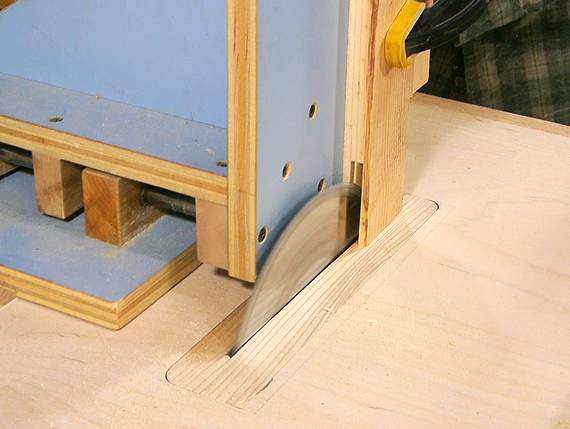
 Cutting the shoulders of the tenons, using my
small table saw sled. The slot on the homemade saw is much further from the blade
(to get out of the way of the saw's motor), so the sled doesn't reach up to the blade.
Cutting the shoulders of the tenons, using my
small table saw sled. The slot on the homemade saw is much further from the blade
(to get out of the way of the saw's motor), so the sled doesn't reach up to the blade.
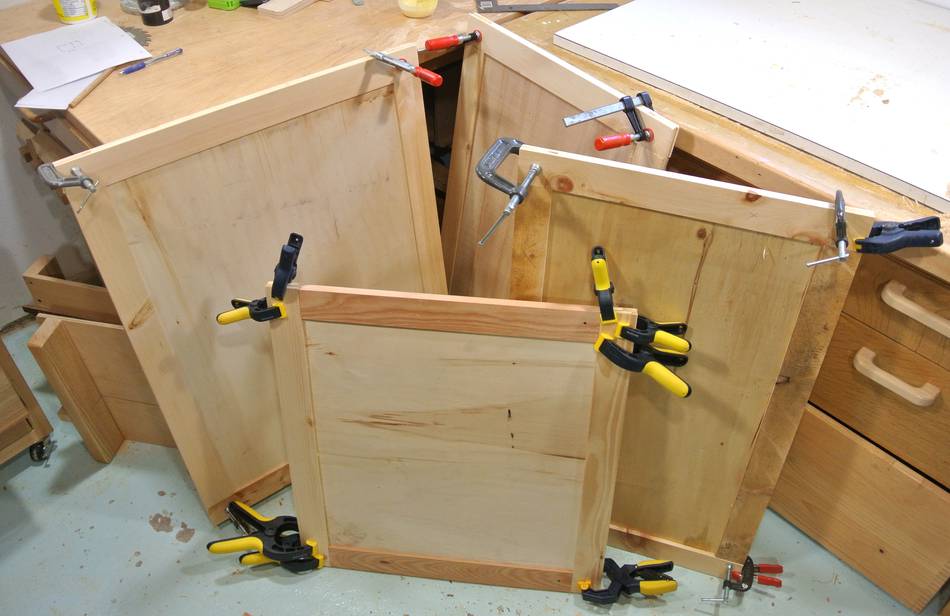
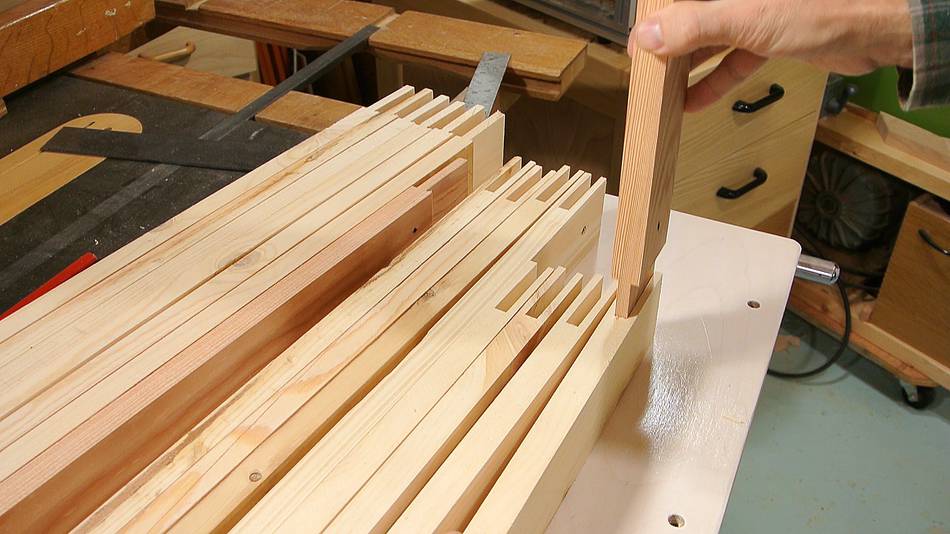 Test fitting the joints
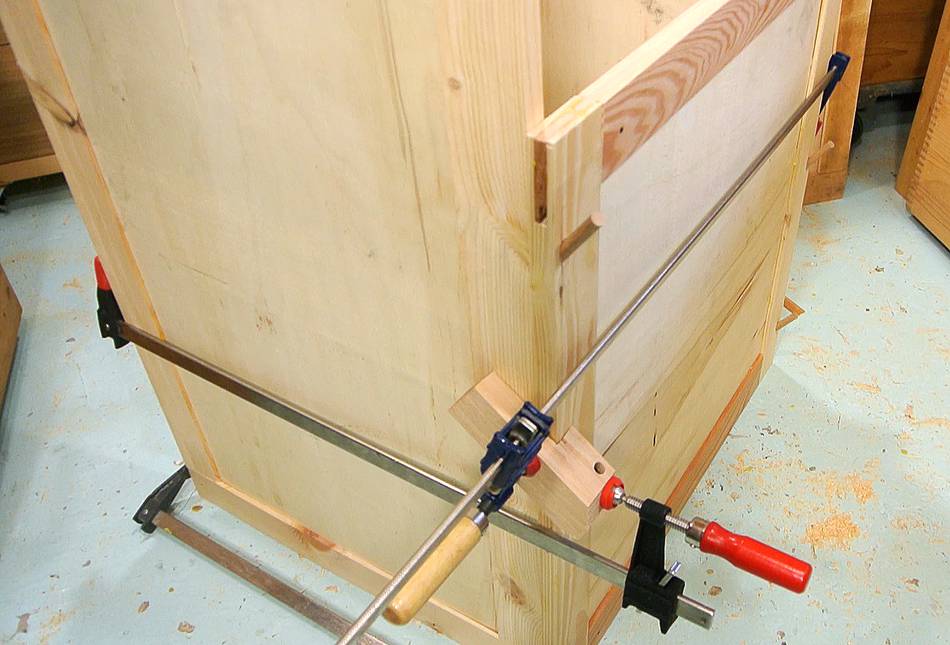
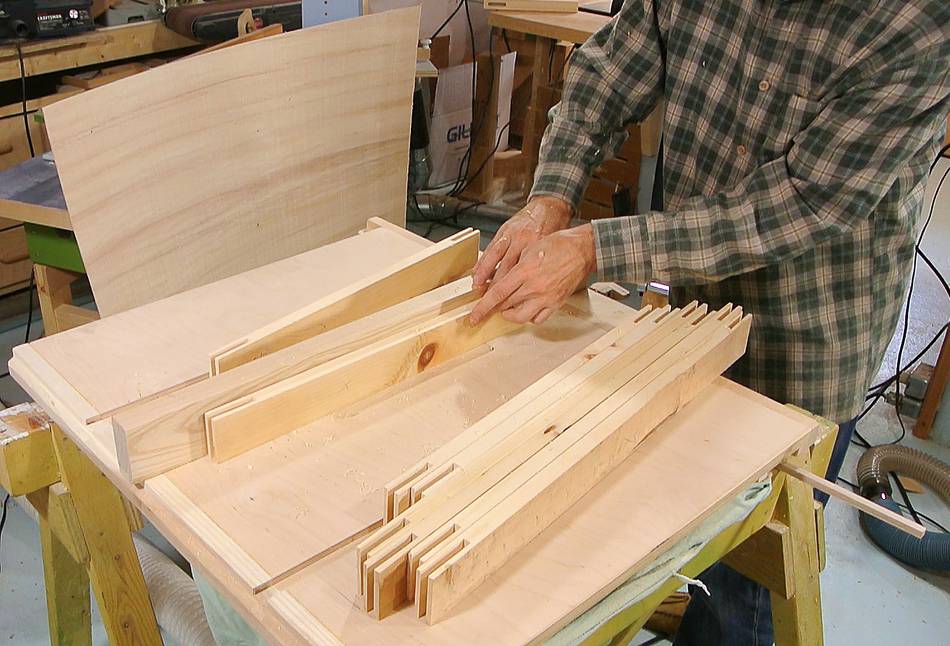 I still needed to cut a slot on the inside edge of the frame pieces for the plywood.
I cut those slots with two passes on the table saw.
I still needed to cut a slot on the inside edge of the frame pieces for the plywood.
I cut those slots with two passes on the table saw.
I found my saw was still slightly out of alignment. Along the length of the blade, it was maybe about 0.3 mm (about 0.010") off, and that really pulled the wood away from the fence. I made sure the alignment on my other table saws is spot on before I ever used them much, so I never realized how much even minor misalignment can throw things off.
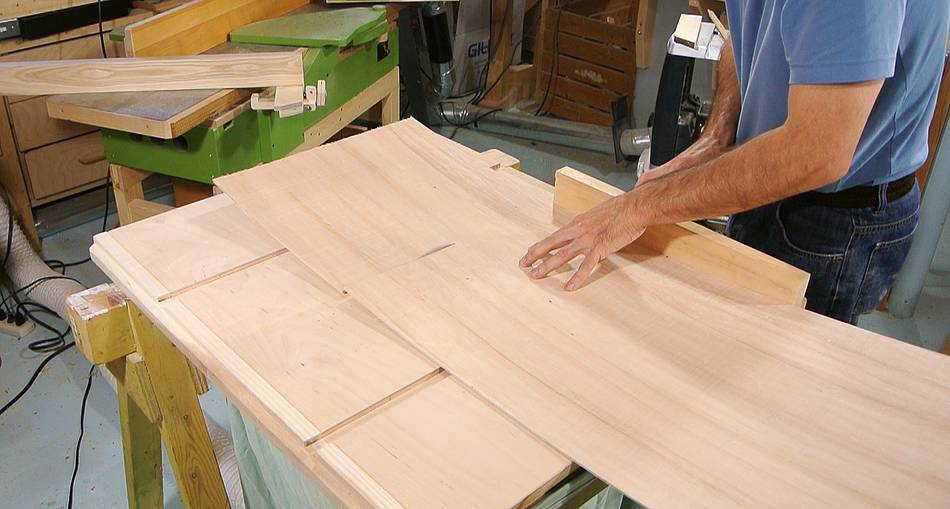 Cutting the plywood panels. I made some of the cuts on my other table saw
because the table on this one is too small. Maybe if I build another one,
I'll make the table larger.
Cutting the plywood panels. I made some of the cuts on my other table saw
because the table on this one is too small. Maybe if I build another one,
I'll make the table larger.
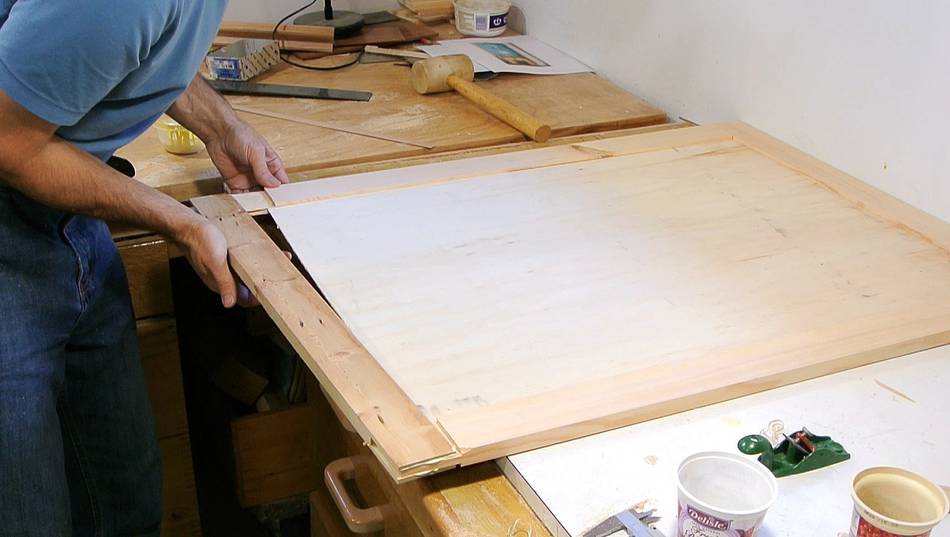
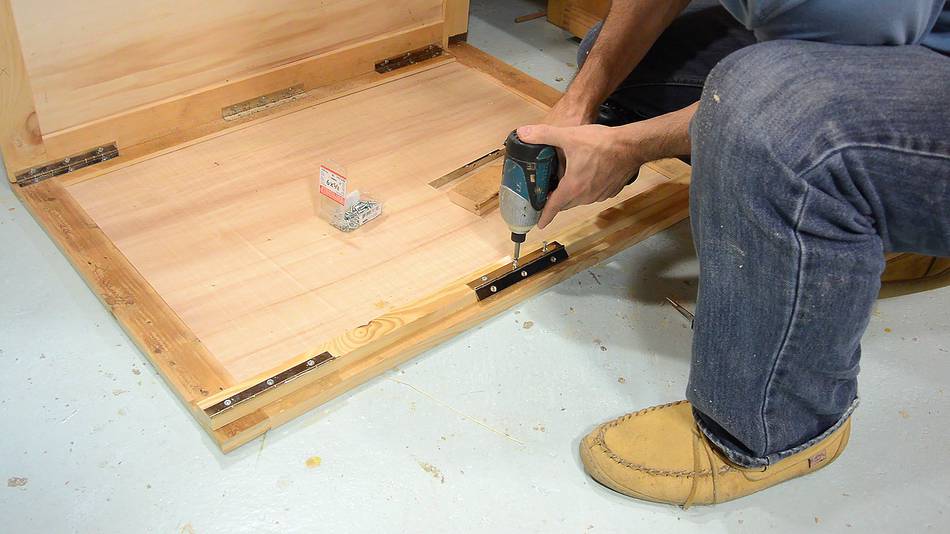
 Assembling the panels. I also glued the panels into the slots. With plywood panels
there's no need to leave room for shrinkage and expansion, so it's best to glue
them in all the way around for strength.
Assembling the panels. I also glued the panels into the slots. With plywood panels
there's no need to leave room for shrinkage and expansion, so it's best to glue
them in all the way around for strength.
 Four panels glued up. The front panel is lower than the other panels to allow
access to the controls.
Four panels glued up. The front panel is lower than the other panels to allow
access to the controls.
 A dumb idea...
So far, everything about this saw is quite light, and to keep it portable, I wanted
to have a way for the stand to assemble and disassemble without tools.
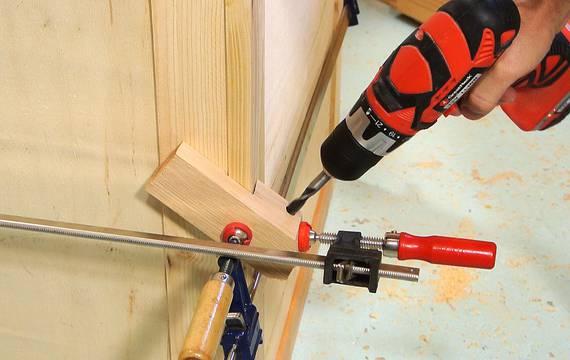
So I had the "clever" idea of having the front and back panels hook onto the side panels via dowels sticking out at an angle. To get the holes aligned, I figured I'd just drill an angled hole through both panels. I made an angled drilling jig out of oak to drill hose holes. But this is where things started to go wrong.
The jig was really hard to clamp in place, especially to overcome the sideways force of the drill as it enters the wood. That, and I drilled the first holes with the front panel in the wrong orientation. And then I had the drill break out the side of one of my panels because it wasn't aligned well enough.
 After drilling a whole lot of wrong and crooked holes, I figured
I might still be able to make this work, but I really shouldn't be setting
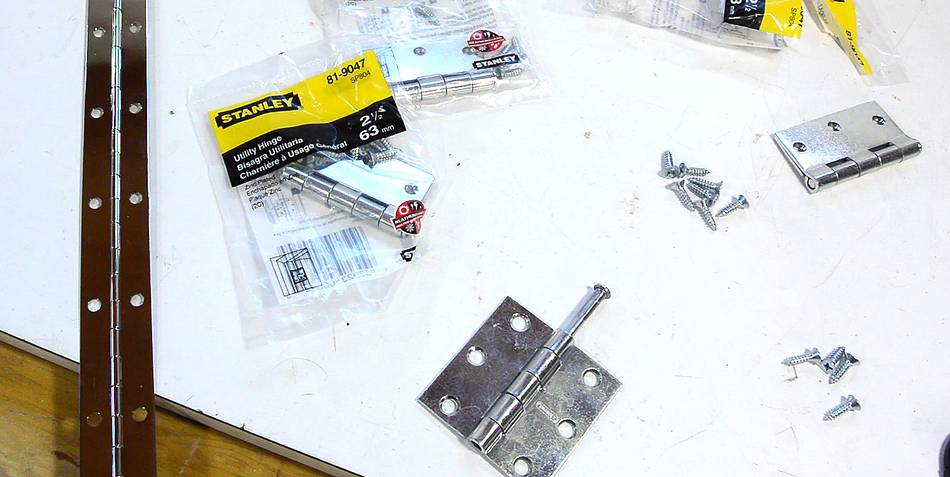
an example of doing this. So I filled in the holes and then bought some hinges
at The Home Depot. They didn't cost that much.
After drilling a whole lot of wrong and crooked holes, I figured
I might still be able to make this work, but I really shouldn't be setting
an example of doing this. So I filled in the holes and then bought some hinges
at The Home Depot. They didn't cost that much.
I needed some loose pin hinges, but fixed pin hinges were half the price. So I bought those, knocked out the pins, and filed down the thicker part of the pin that makes the pins stick.
 I used a piano hinge for the back panel, cut into six sections.
This saved me a few bucks over buying two piano hinges.
I used a piano hinge for the back panel, cut into six sections.
This saved me a few bucks over buying two piano hinges.
 I offset the hinges on one side with a block of wood so
that the right side folds in with an offset. That way, both side
panels can be folded all the way flat.
I offset the hinges on one side with a block of wood so
that the right side folds in with an offset. That way, both side
panels can be folded all the way flat.
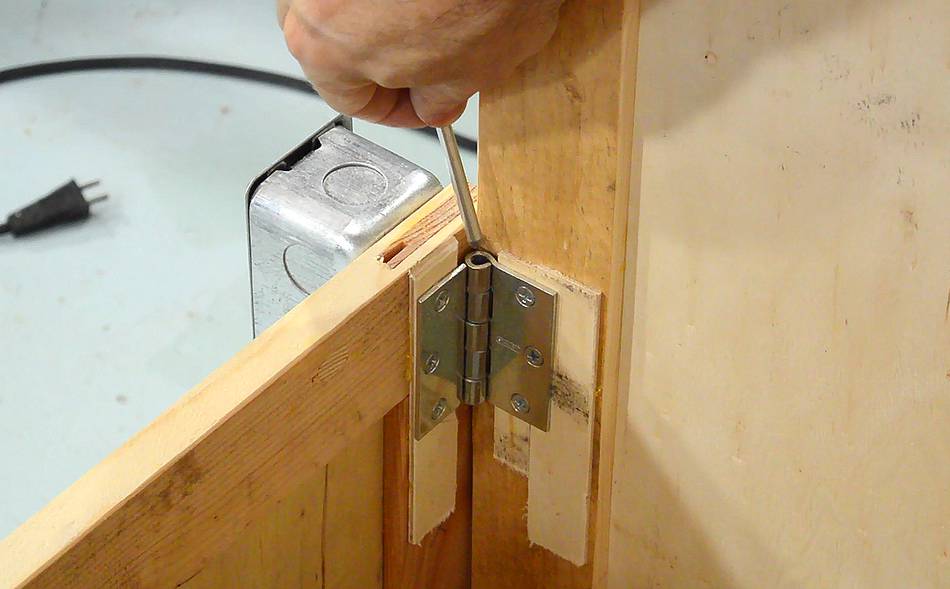 The front panel is held on with four loose pin hinges.
It was tempting to somehow have the front panel fold together with the back and side panels, but with the front panel wider than the side panels, it would not have lined up side-to-side once the stand was folded.
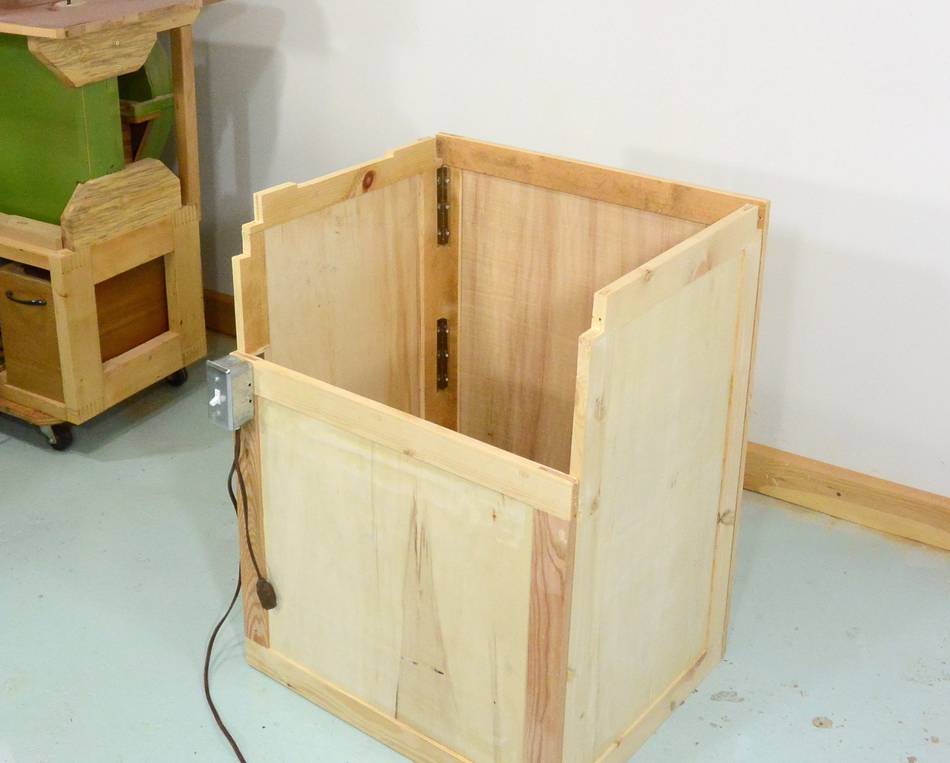
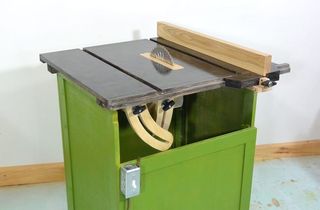
 Assembled stand. I cut notches into the left and right panels
to fit around the bracing I added to the saw's top.
Assembled stand. I cut notches into the left and right panels
to fit around the bracing I added to the saw's top.
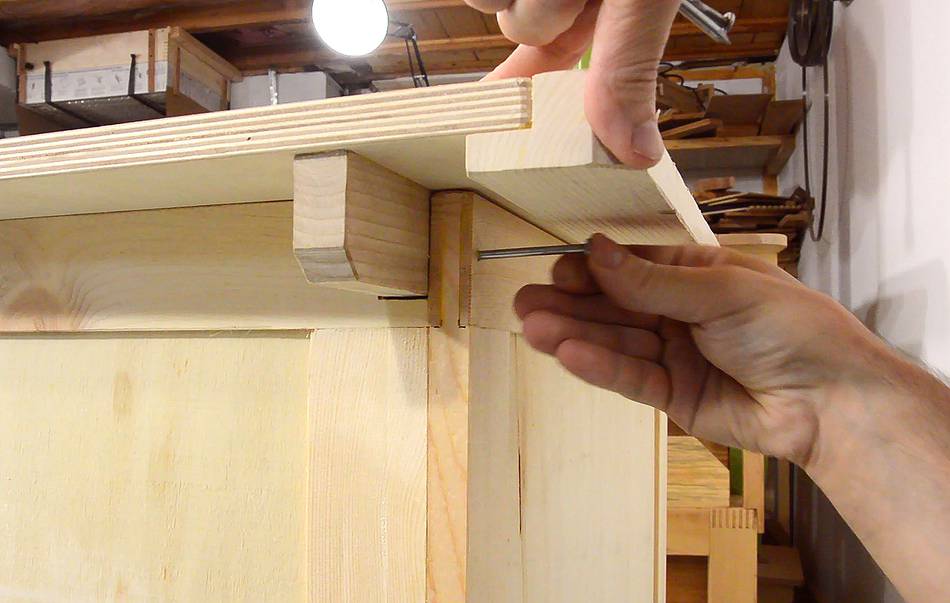 I also drilled some holes through the saw top and frame to insert nails into
to lock the saw to the stand. That way, I could pick up the whole unit by
the top.
I also drilled some holes through the saw top and frame to insert nails into
to lock the saw to the stand. That way, I could pick up the whole unit by
the top.
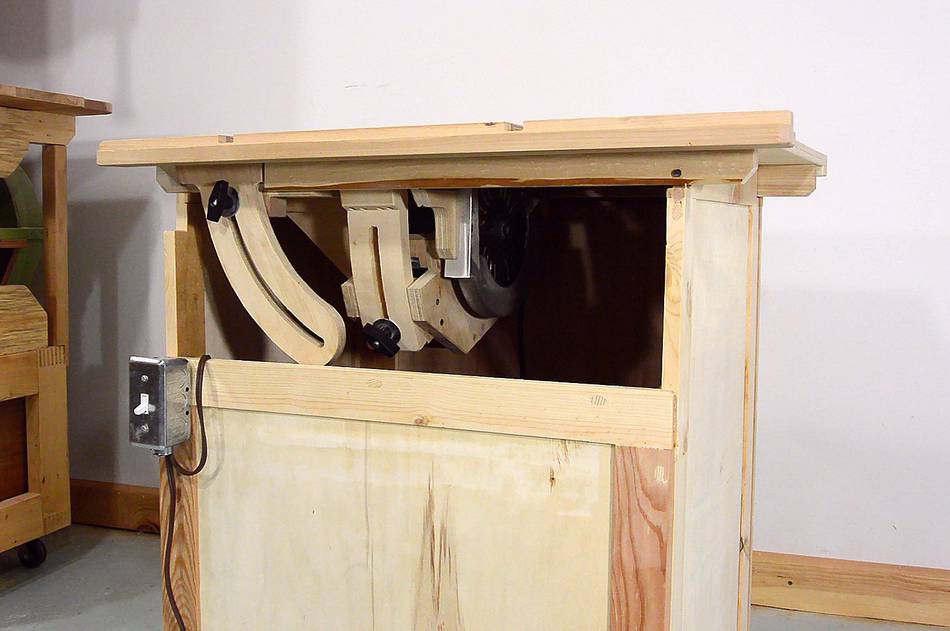
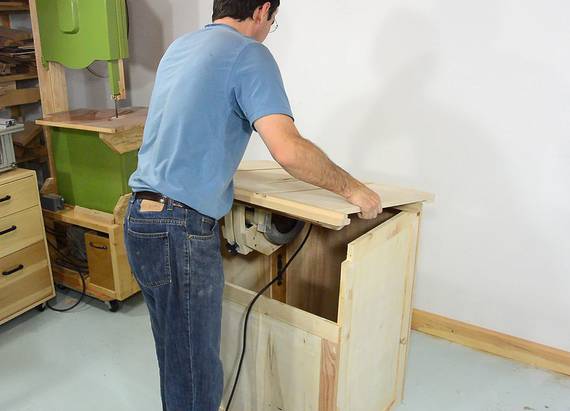
 I thought about adding some sort of door to allow access to the controls
but keep the dust inside, but I also wanted it convenient and simple.
In the end, just attaching a piece of fabric with two spring clamps did the job,
and I can just reach under the fabric to make adjustments.
I thought about adding some sort of door to allow access to the controls
but keep the dust inside, but I also wanted it convenient and simple.
In the end, just attaching a piece of fabric with two spring clamps did the job,
and I can just reach under the fabric to make adjustments.
Testing the saw, I found the dust situation much improved, with very little sawdust outside the cabinet.
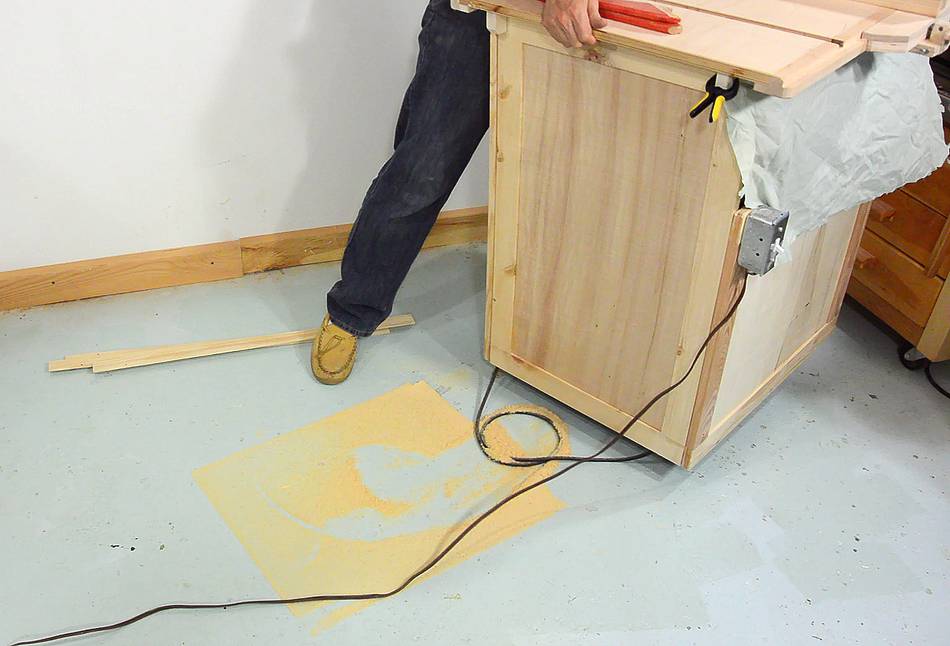
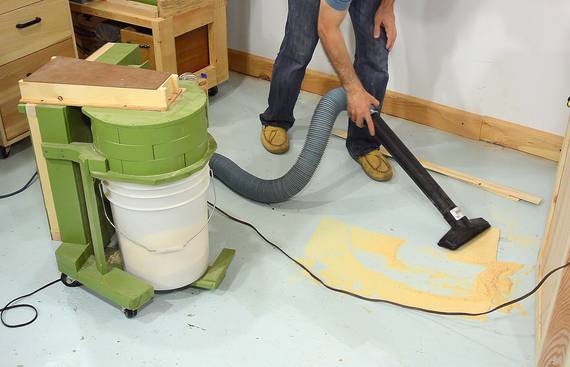 Of course, the sawdust just accumulates inside.
To clean it out, I just pick it up and lift it off the sawdust.
Of course, the sawdust just accumulates inside.
To clean it out, I just pick it up and lift it off the sawdust.
I noticed that air inside the cabinet became noticeably warmer after running the saw for a few minutes, so I'm glad I made the cabinet as large as I did. Hooking up a dust collector would help pull warm air out. But that's not really realistic. I think most people who would build a table saw from a circular saw wouldn't have a dust collector. Maybe a shopvac, maybe just hang the hose in over the front edge, under the cloth.
 I never intended this saw to be a really good table saw, but rather something
cheap and portable. That said, the saw works better than I expected it to.
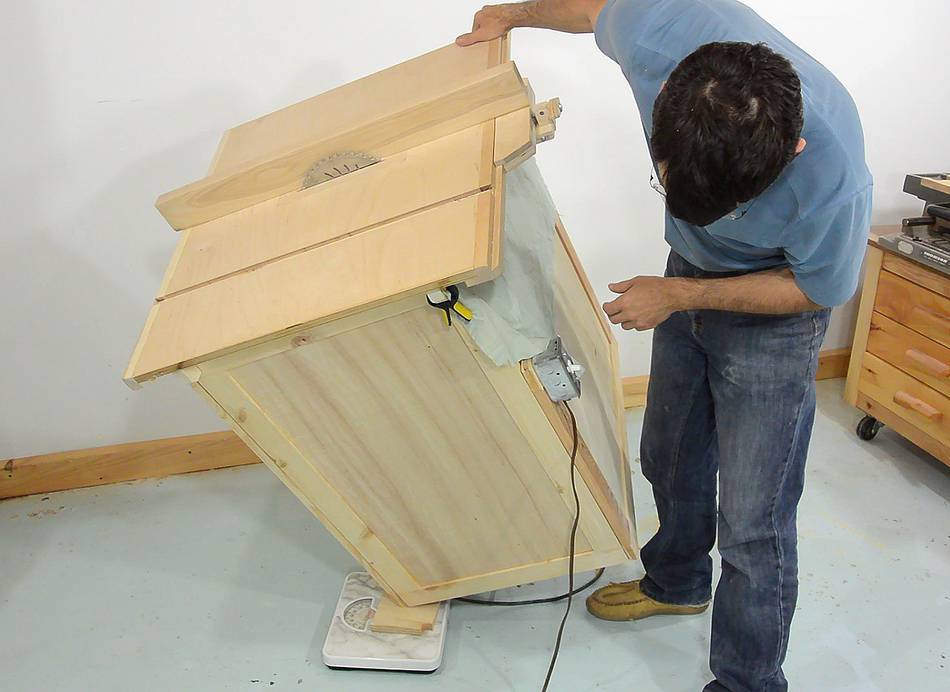
It weighs in at 59 pounds (27 kg).
To put that into perspective, the maximum weight for checked bags on flights
is often around 50 pounds. So, fully assembled, it weighs more than a heavy
suitcase. Thankfully, I don't have to carry it that far!
I never intended this saw to be a really good table saw, but rather something
cheap and portable. That said, the saw works better than I expected it to.
It weighs in at 59 pounds (27 kg).
To put that into perspective, the maximum weight for checked bags on flights
is often around 50 pounds. So, fully assembled, it weighs more than a heavy
suitcase. Thankfully, I don't have to carry it that far!
Next: Painting the saw
See also:
 Homemade tablesaw
 Old table saw
 Building sawhorses
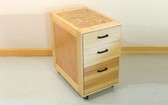 Mobile tool stand
Back to my Woodworking website.