Building the Jenga pistol
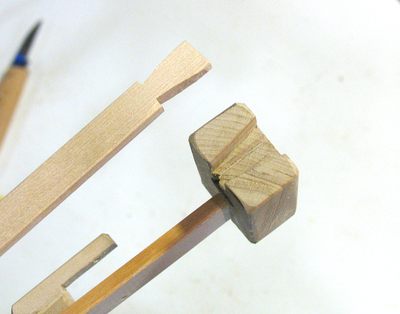
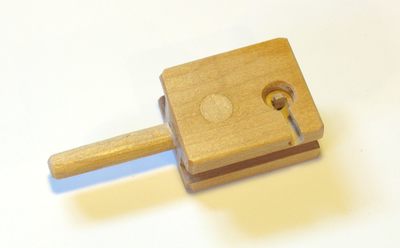 One of the trickier bits of the Jenga pistol is the bolt.
The bolt is made out of one piece of maple, including the pin that sticks
out on the left. You can also see a hole that I plugged in the bolt.
That hole was already in the piece of wood, and I was going to use it for
the keyhole shaped rubber band holder, but then I decided to move that
part further back, so I put a plug in the hole.
One of the trickier bits of the Jenga pistol is the bolt.
The bolt is made out of one piece of maple, including the pin that sticks
out on the left. You can also see a hole that I plugged in the bolt.
That hole was already in the piece of wood, and I was going to use it for
the keyhole shaped rubber band holder, but then I decided to move that
part further back, so I put a plug in the hole.
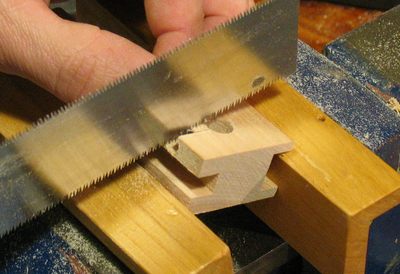
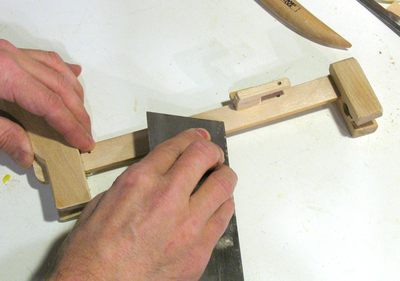
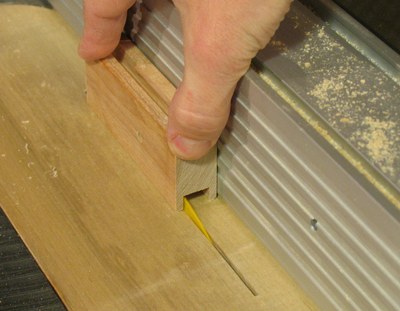 Before cutting the bolt block to its final length, or even cutting out the
pin part, I cut the dados in the top and bottom. The block is really
too small to safely use with a dado blade, so I cut the dado by making a series of
cuts with a normal saw blade and a zero clearance insert.
I have my other fingers reaching on top of the fence, so that if
something snapped or the piece got thrown out of my fingers, my fingers still
would not reach the saw blade.
Before cutting the bolt block to its final length, or even cutting out the
pin part, I cut the dados in the top and bottom. The block is really
too small to safely use with a dado blade, so I cut the dado by making a series of
cuts with a normal saw blade and a zero clearance insert.
I have my other fingers reaching on top of the fence, so that if
something snapped or the piece got thrown out of my fingers, my fingers still
would not reach the saw blade.
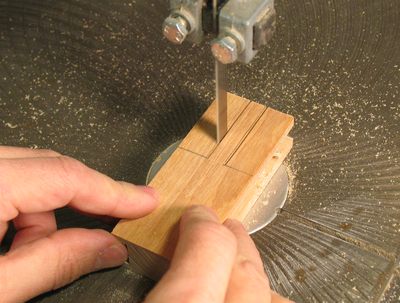 After cutting the dados top and bottom, I cut out the pin. I made four
cuts from the end, and then the cross cuts all with the band saw to leave
a square pin in the middle, 4 cm long.
After cutting the dados top and bottom, I cut out the pin. I made four
cuts from the end, and then the cross cuts all with the band saw to leave
a square pin in the middle, 4 cm long.
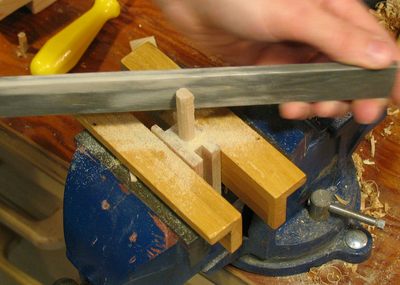 I rounded the pin with a file. a carving knife would work too, but the file
is slightly easier.
I rounded the pin with a file. a carving knife would work too, but the file
is slightly easier.
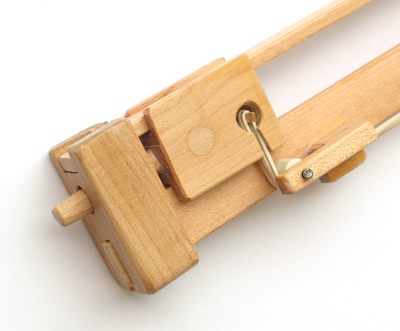 The bolt is pulled forward by a rubber band that hooks into a keyhole
shaped cavity on the bolt. The The rubber band goes around an idler
roller near the front of the gun, and is hooked in the back onto the trigger.
The bolt is pulled forward by a rubber band that hooks into a keyhole
shaped cavity on the bolt. The The rubber band goes around an idler
roller near the front of the gun, and is hooked in the back onto the trigger.
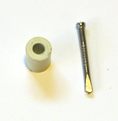 The guide roller consists of a little plastic spacer, which turns on a shaft
that is made of a nail. The nail is cut to the right length, an the front
of it flattened to widen it so that it becomes stuck in the hole I drilled
for it.
The guide roller consists of a little plastic spacer, which turns on a shaft
that is made of a nail. The nail is cut to the right length, an the front
of it flattened to widen it so that it becomes stuck in the hole I drilled
for it.
I have since come up with a simplified jenga pistol design
which eliminates the need for this guide roller.
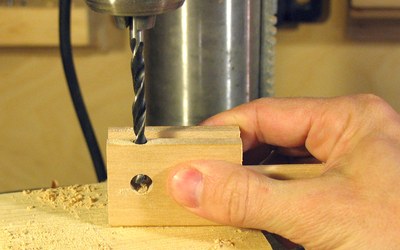 To make the keyhole shaped hole, I drilled a hole in the side
of the block, and then a smaller hole from the bottom of the block. I used
brad point drills for both of these to get fairly clean holes
To make the keyhole shaped hole, I drilled a hole in the side
of the block, and then a smaller hole from the bottom of the block. I used
brad point drills for both of these to get fairly clean holes
 Finally, to get the keyhole shape, I used a fine saw to cut out the side of
the hole that comes from the bottom.
Finally, to get the keyhole shape, I used a fine saw to cut out the side of
the hole that comes from the bottom.
After that, I drilled a smaller hole deep into the main larger hole, and stuck
a small wooden pin in it to hook the rubber bands onto.
 The pistol grip of the gun has a slot cut into it from the top all the way to
where the bottom guide rail for the bolt goes. I glued in a block of wood above
that rail to close the rest of the gap. This piece also provided support for the screw holding
the top rail.
The pistol grip of the gun has a slot cut into it from the top all the way to
where the bottom guide rail for the bolt goes. I glued in a block of wood above
that rail to close the rest of the gap. This piece also provided support for the screw holding
the top rail.
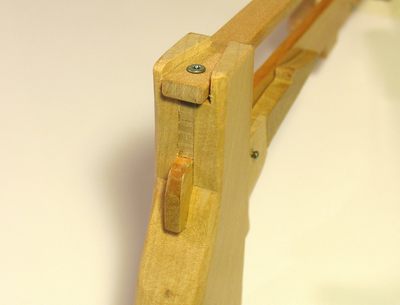
 The top rail has a dovetail on either end, which mates with the block that forms
the muzzle and with the handle block. It's held down by a screw on either end.
The screw at the tip has to be put in at an angle though. If it were put in
straight down, it would protrude into the hole of the muzzle block that the
bolt's pin goes through.
The top rail has a dovetail on either end, which mates with the block that forms
the muzzle and with the handle block. It's held down by a screw on either end.
The screw at the tip has to be put in at an angle though. If it were put in
straight down, it would protrude into the hole of the muzzle block that the
bolt's pin goes through.
 Finally, to make the pistol more comfortable to handle, I put a slight chamfer on
all the outside edges, and then sanded the edges smooth a little bit.
Finally, to make the pistol more comfortable to handle, I put a slight chamfer on
all the outside edges, and then sanded the edges smooth a little bit.
 I also smoothed the guiderails for the bolt with a cabinet scraper, to make the bolt
slide more easily. After varnishing everything, I put a few drops of oil on
them to make the bolt slide more easily.
I also smoothed the guiderails for the bolt with a cabinet scraper, to make the bolt
slide more easily. After varnishing everything, I put a few drops of oil on
them to make the bolt slide more easily.
See also: Building jenga pistol, version 3
Back to the Jenga pistol article
![]()