 This project started when Rachel said "Now I have to cut
the cake into squares or triangles". My immediate thought was
"why not cut it into circles, or hexagons?"
This project started when Rachel said "Now I have to cut
the cake into squares or triangles". My immediate thought was
"why not cut it into circles, or hexagons?"
This project started when Rachel said "Now I have to cut
the cake into squares or triangles". My immediate thought was
"why not cut it into circles, or hexagons?"
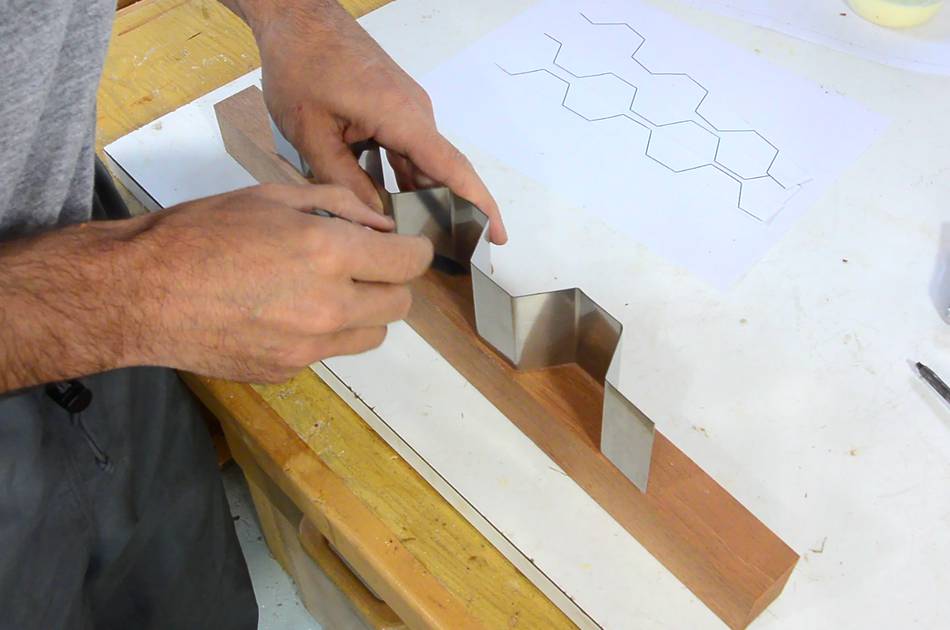
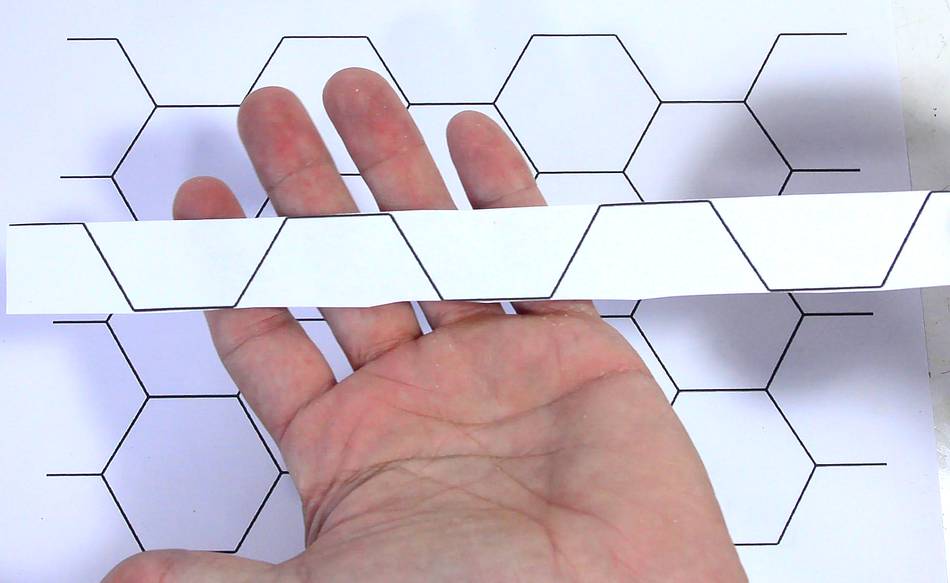 This got me thinking about a good method of cutting a cake into a
hexagon honeycomb pattern. The easiest I figured, was to make a knife that
snakes through the honeycomb pattern as shown on the strip of paper
at left.
This got me thinking about a good method of cutting a cake into a
hexagon honeycomb pattern. The easiest I figured, was to make a knife that
snakes through the honeycomb pattern as shown on the strip of paper
at left.
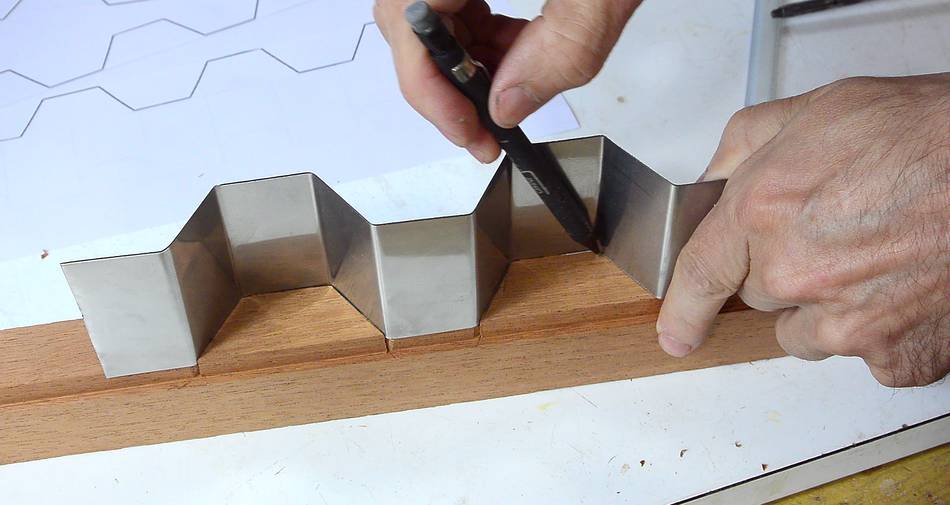
 If you line up a series of cuts like that, you get a honeycomb pattern.
So I had to try this out. I ordered a strip of 26-gauge stainless steel, 2 1/4" (57 mm) wide, from the Metal Supermarket. 26-gauge is 0.019" or 0.48 mm thick.
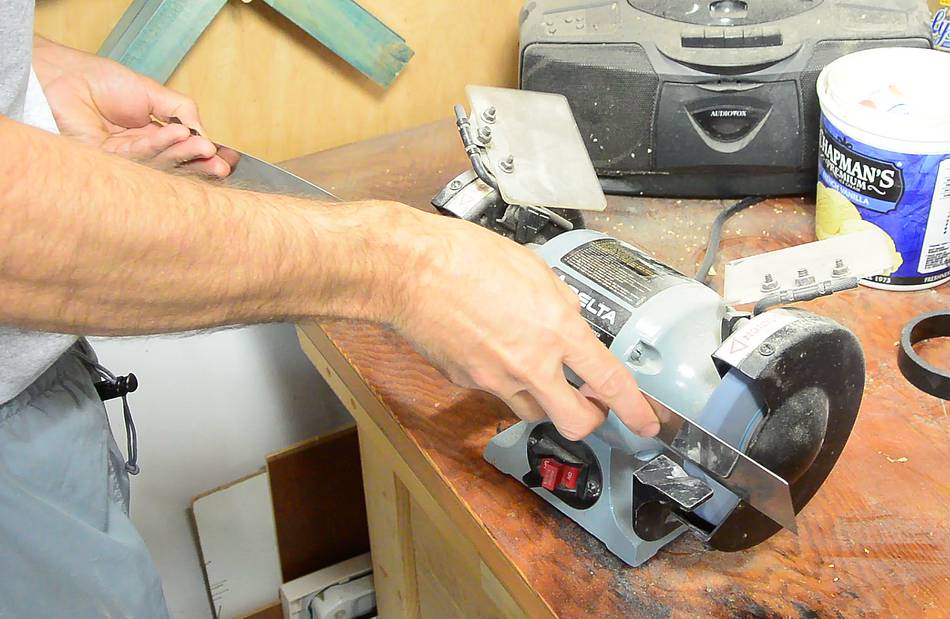
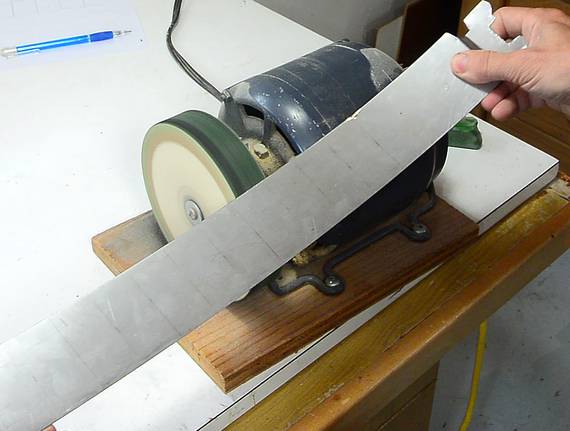 Before bending, I sharpened one edge and smoothed the ground edge
on my buffing wheel.
Before bending, I sharpened one edge and smoothed the ground edge
on my buffing wheel.

 Then I very carefully marked 3 cm increments on both sides,
first measuring then drawing a line across with a square.
Then I very carefully marked 3 cm increments on both sides,
first measuring then drawing a line across with a square.
 A sheet metal brake would be ideal for bending, but I don't have one.
I often bend this sort of thing in a vise, but with a strip this long
and wide, the vise won't work.
A sheet metal brake would be ideal for bending, but I don't have one.
I often bend this sort of thing in a vise, but with a strip this long
and wide, the vise won't work.
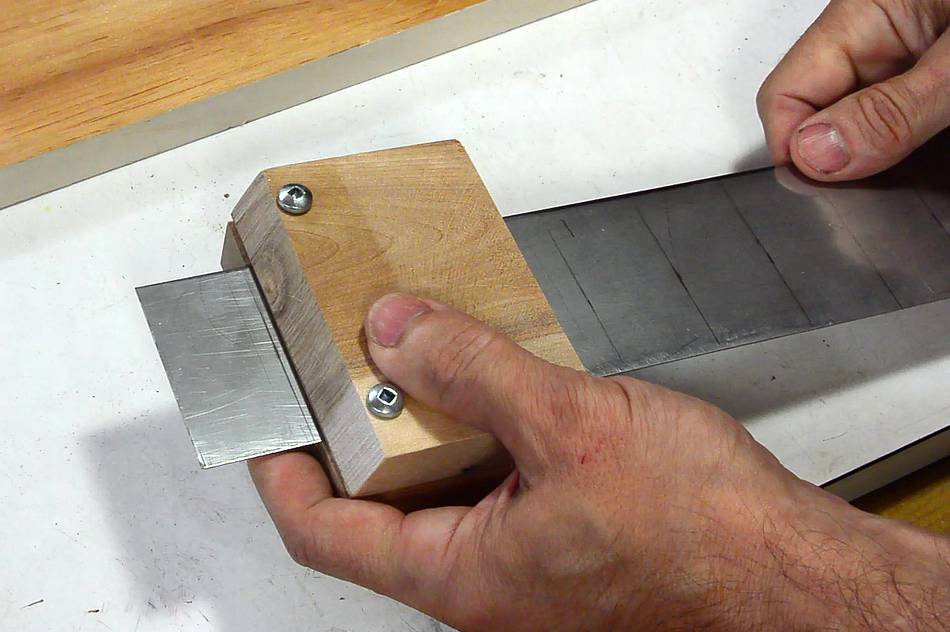
So I made a block of wood to clamp onto the strip.

 I then hand-bend the strip by pushing it against a block of wood in
the vise, checking that I have it at the right angle.
I then hand-bend the strip by pushing it against a block of wood in
the vise, checking that I have it at the right angle.
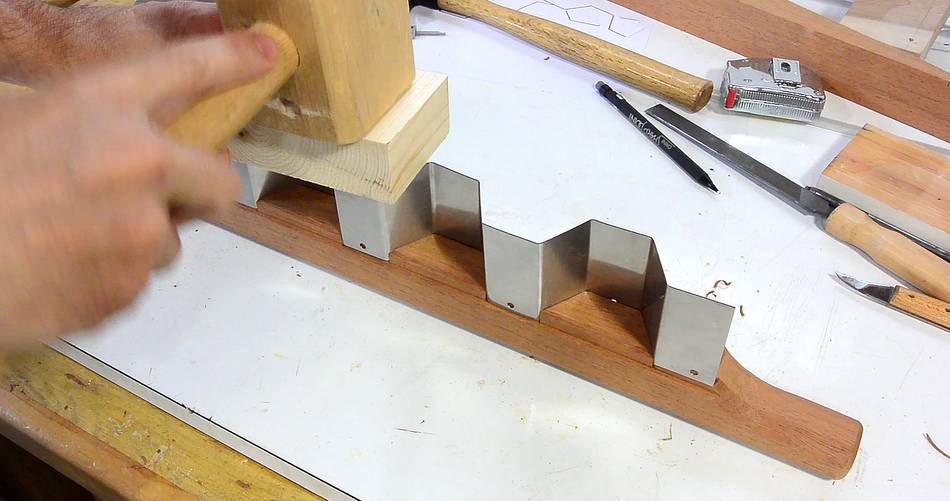
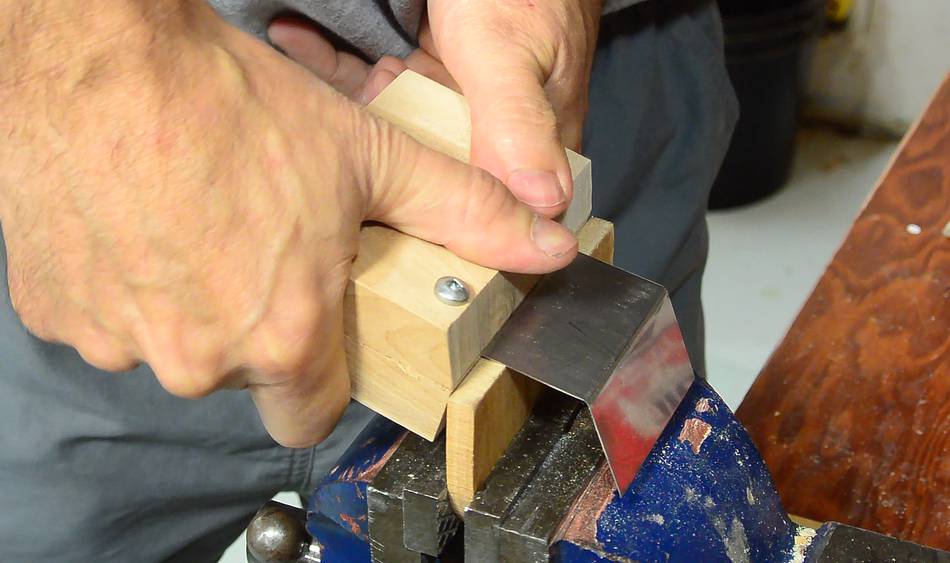 After each bend I move the block of wood to the next line. When I have
to bend it in the opposite direction, I unclamp the block of wood and slid
it on the other way. This way, I'm always bending in the same direction
with respect to my block of wood, hoping to avoid inconsistencies.
After each bend I move the block of wood to the next line. When I have
to bend it in the opposite direction, I unclamp the block of wood and slid
it on the other way. This way, I'm always bending in the same direction
with respect to my block of wood, hoping to avoid inconsistencies.
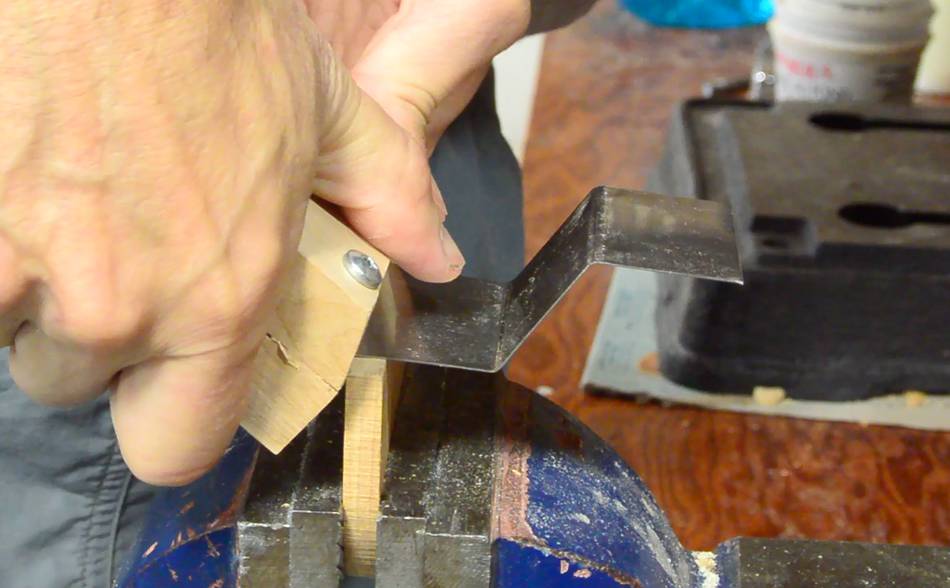
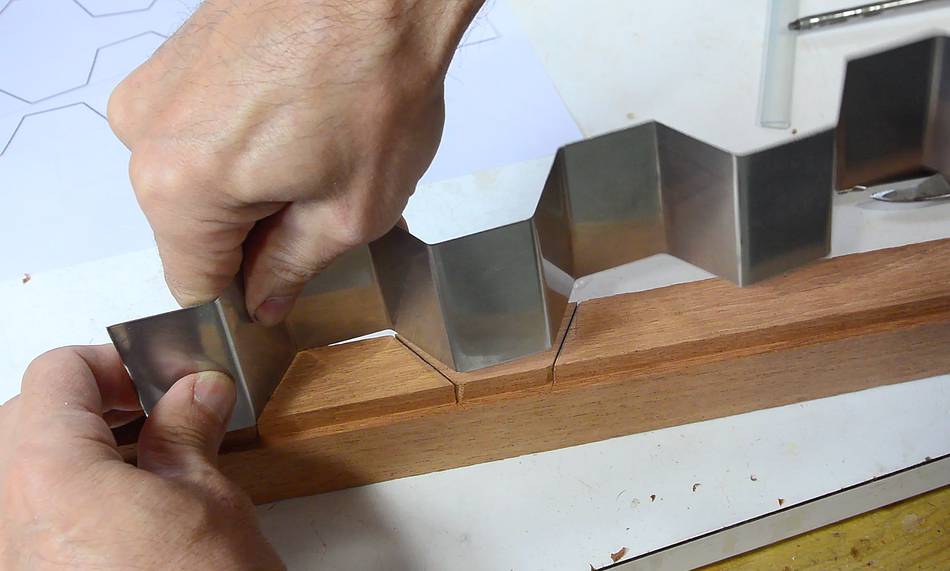
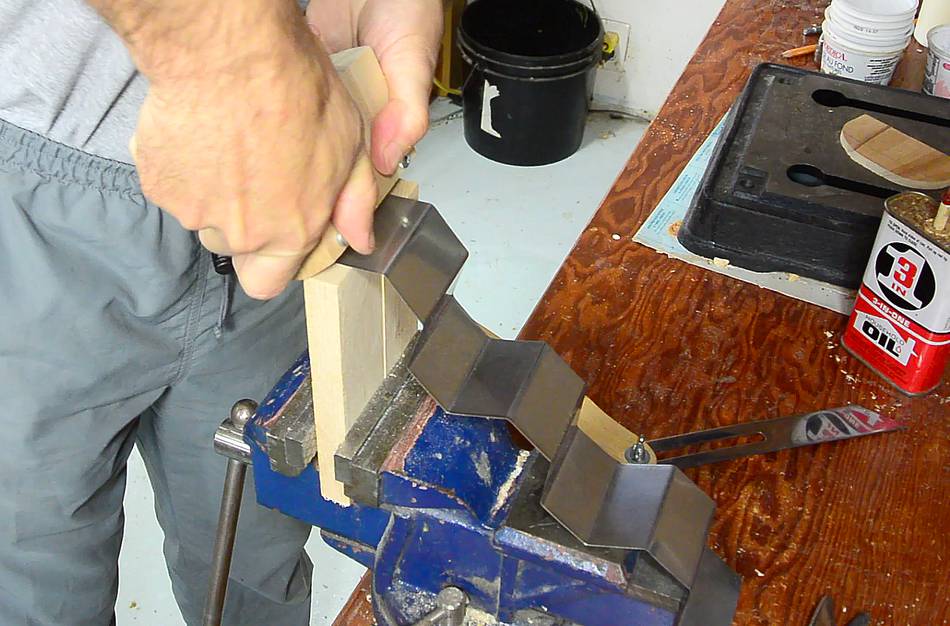 I had to switch to a taller block of wood in the vise once the bent portion
became a bit longer. Here making the last bend.
I had to switch to a taller block of wood in the vise once the bent portion
became a bit longer. Here making the last bend.
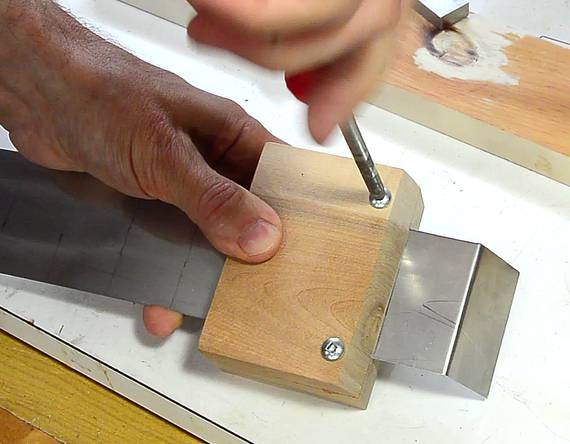
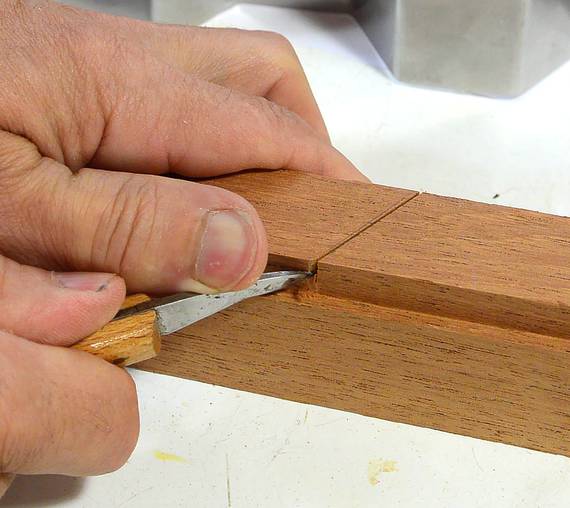
 I marked how wide the knife pattern is on a piece of mahogany.
 I cut a shoulder on either side to help mount the strip.
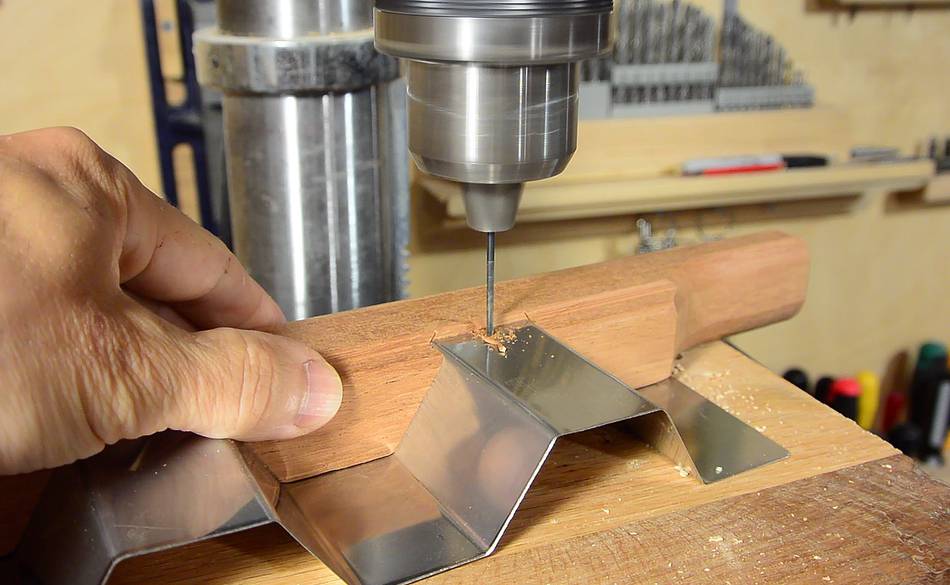
 Marking where the knife blade needs to go through the wood.
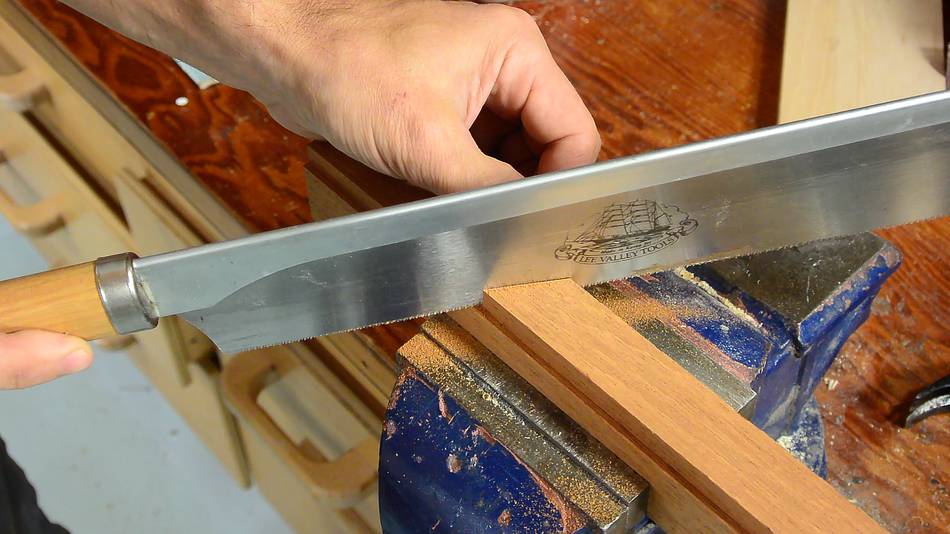
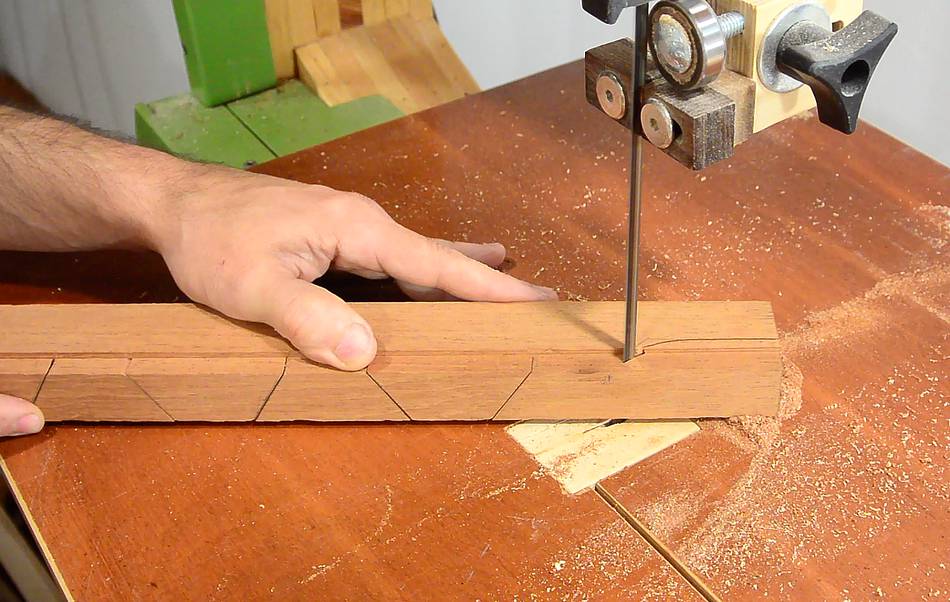
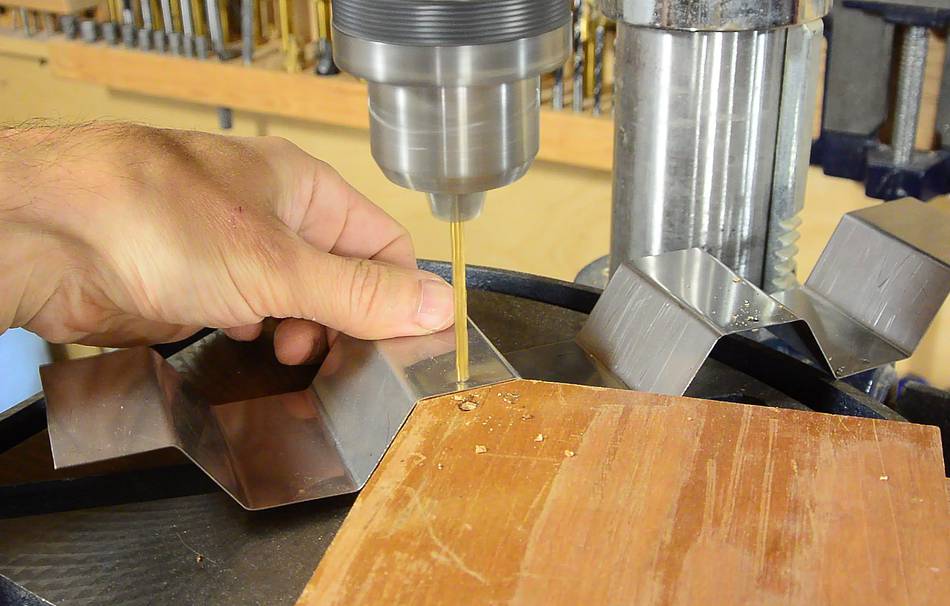
 My dozuki saw makes a kerf that is just wide enough to slip
the knife blade into, though I had to cut away a slight bit
at the corners because my bends were slightly rounded.
My dozuki saw makes a kerf that is just wide enough to slip
the knife blade into, though I had to cut away a slight bit
at the corners because my bends were slightly rounded.
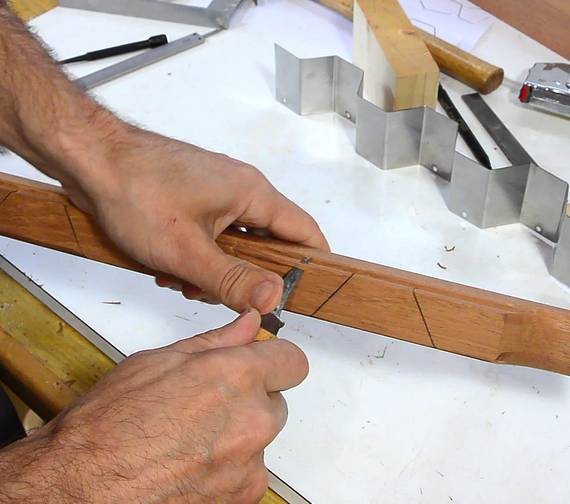
 After making a cut, I partly inserted the blade and marked where the next
cut needs to go, then cut that, fit the blade again, and marked the next
one, and so on for every cut.
After making a cut, I partly inserted the blade and marked where the next
cut needs to go, then cut that, fit the blade again, and marked the next
one, and so on for every cut.
 I cut away parts of the end of the wood to sort of shape handles.
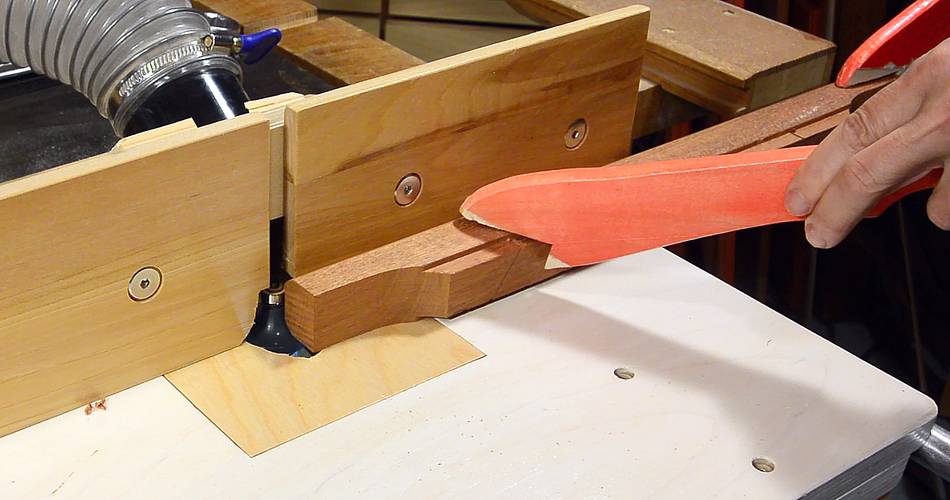 Then rounding the edges with a 1/2" round bit on my router table.
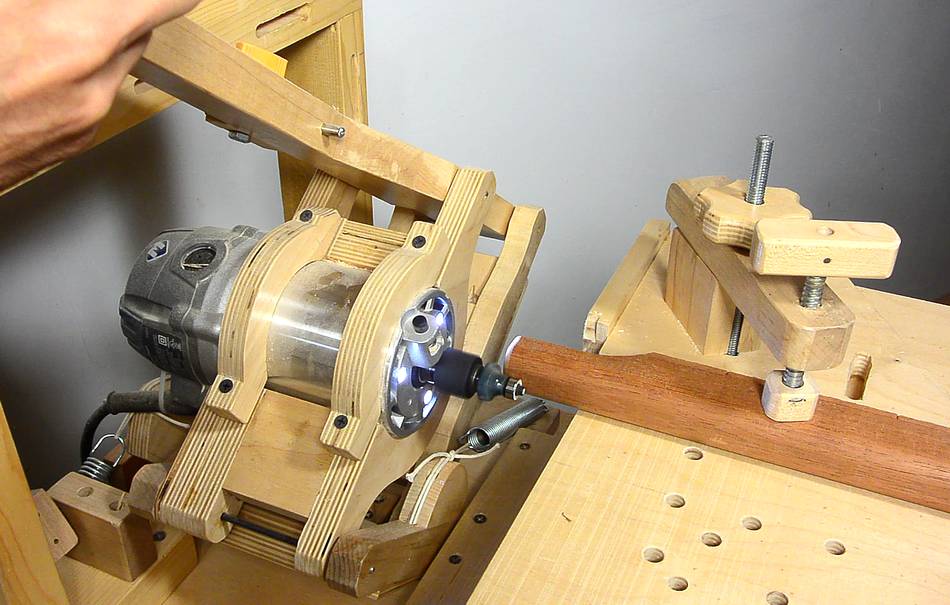
 I used a 1/4" roundover bit to round the corners on the end. The easiest
way to do this was with my
pantorouter, though I'm not using
any templates, just relying on the bit's guide bearing.
I used a 1/4" roundover bit to round the corners on the end. The easiest
way to do this was with my
pantorouter, though I'm not using
any templates, just relying on the bit's guide bearing.
I also rounded over parts of the bottom of the handle that would be exposed after the blade is mounted with a knife.
 I drilled some mounting holes along the edge of the blade.
 Then inserting the blade. This was the first time I pushed it all
the way in. A tight fit, requiring a block of wood and a mallet to get
it all the way in.
Then inserting the blade. This was the first time I pushed it all
the way in. A tight fit, requiring a block of wood and a mallet to get
it all the way in.
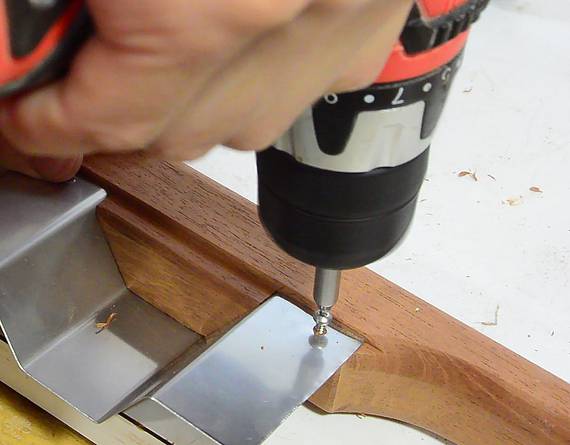 Then pre-drilling holes in the handle and screwing it on with
some stainless steel screws.
Then pre-drilling holes in the handle and screwing it on with
some stainless steel screws.
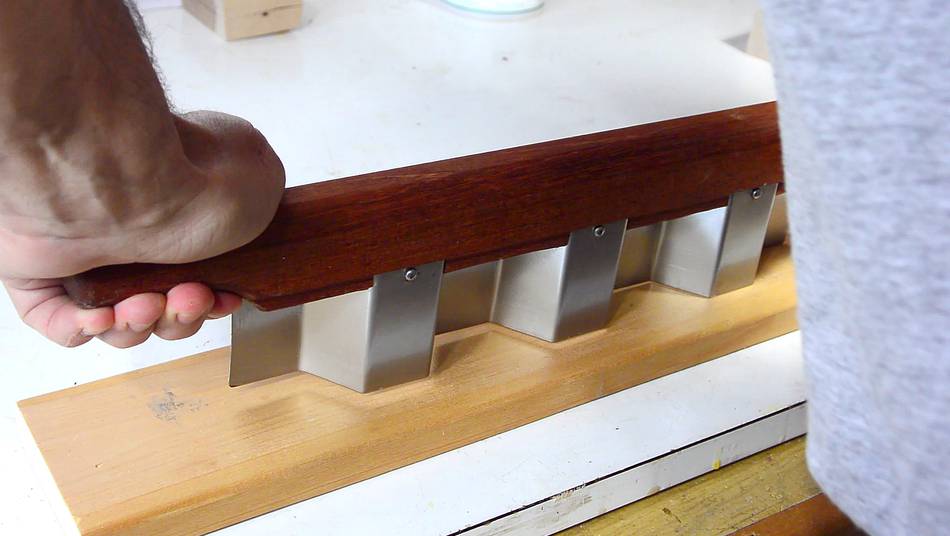 Testing the knife by pressing it down on some pine.
I had actually shaped the handle to have a slight curve on the bottom of it so that the knife can be rocked back and forth a bit for cases where it needs to slice through some tough cake or pizza bottom.
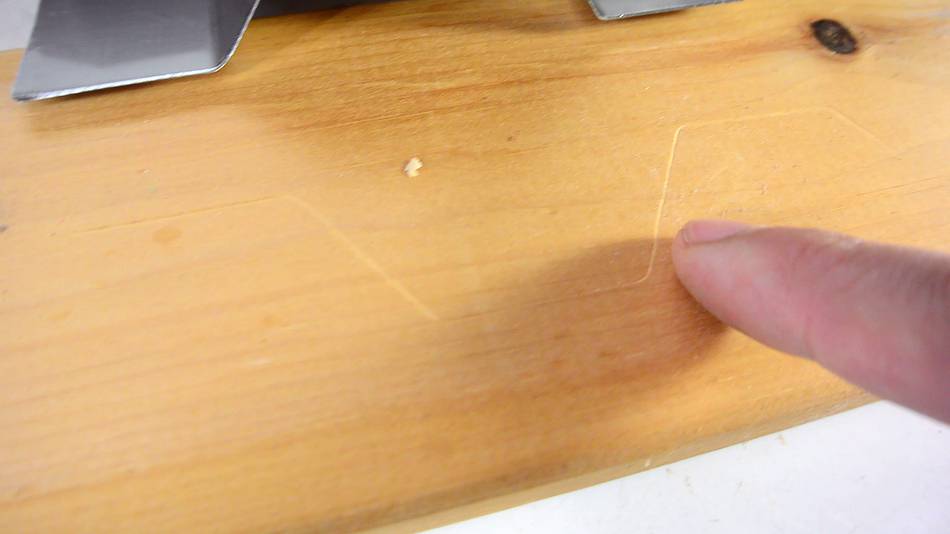 It left a nice indentation in the pine. so I'm confident that it can
slice any cake.
It left a nice indentation in the pine. so I'm confident that it can
slice any cake.
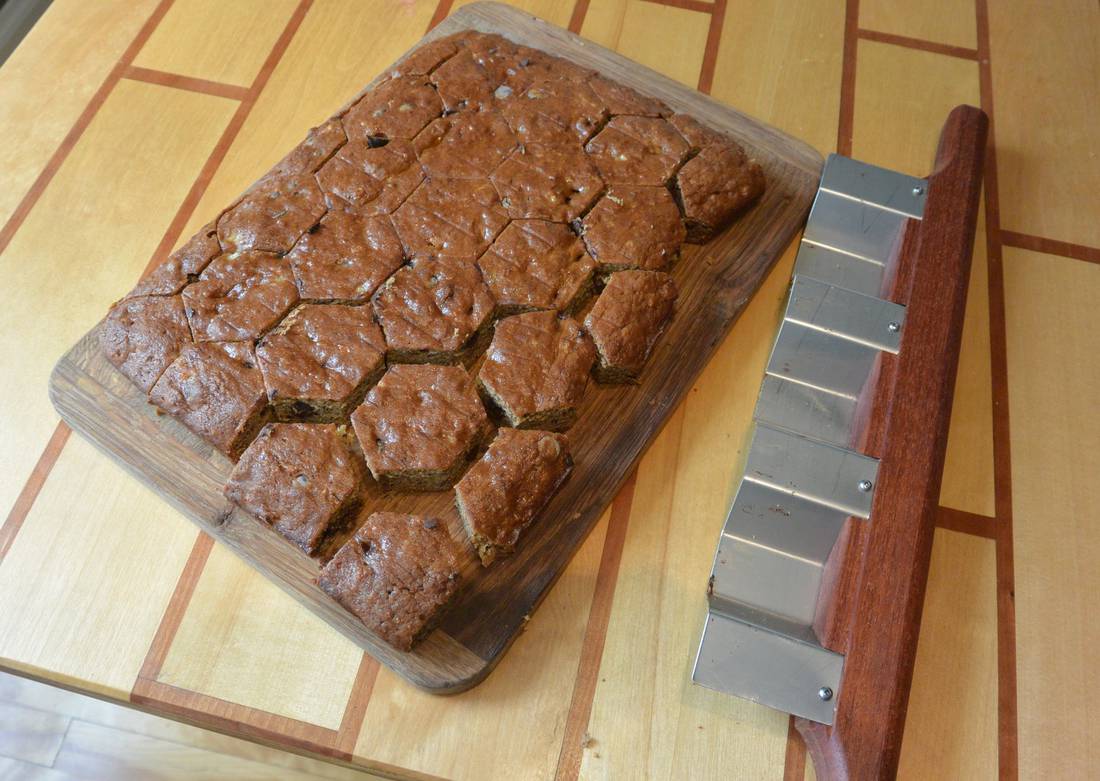
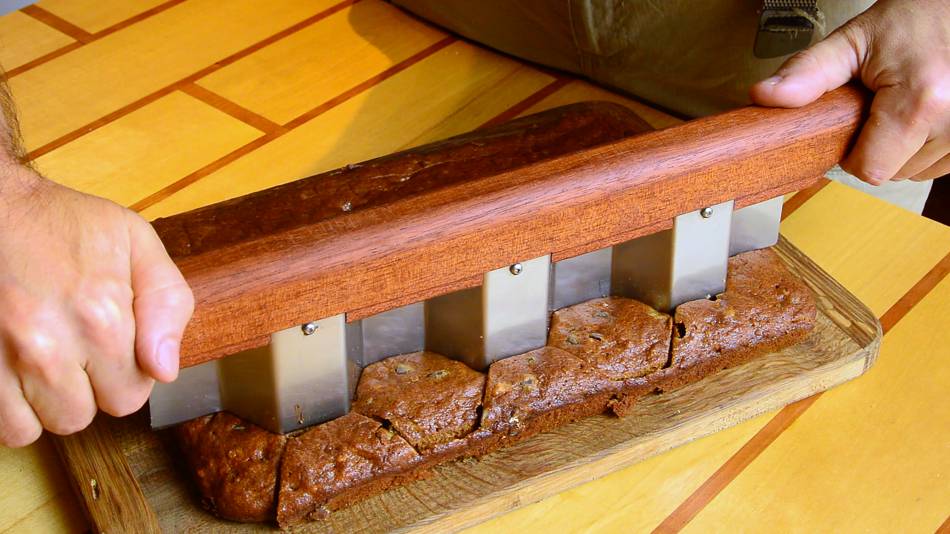 Finally testing it on some cake. Actually, this one is really banana
bread, but Rachel was kind enough to make it in a cake pan so I could
try this knife on it.
Finally testing it on some cake. Actually, this one is really banana
bread, but Rachel was kind enough to make it in a cake pan so I could
try this knife on it.
After each cut, I flip the knife around to get the right orientation for the next cut.
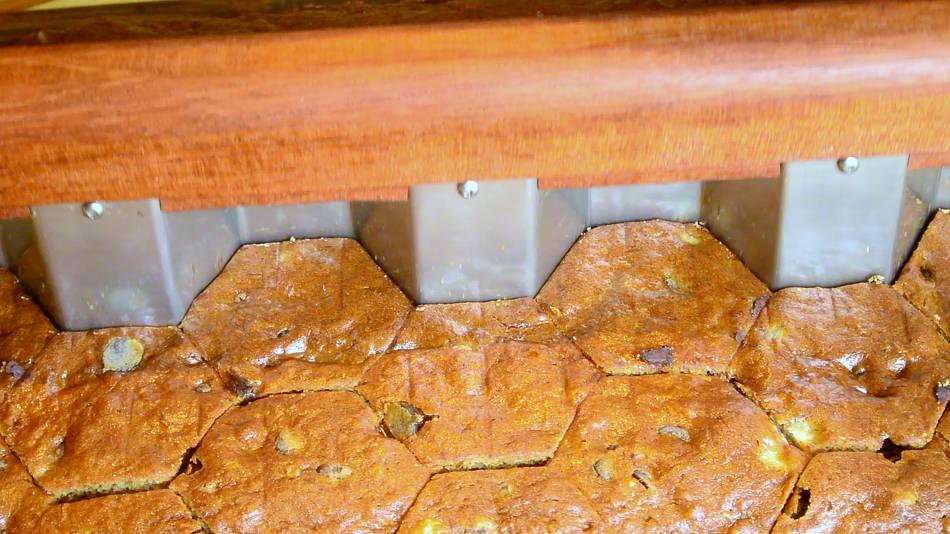 It works quite well on the banana bread. Though any sort of cake with
a pastry filling probably wouldn't do so well.
It works quite well on the banana bread. Though any sort of cake with
a pastry filling probably wouldn't do so well.
I initially thought of this knife as more of a novel but useless invention. But it could be quite useful for a catering business, just to offer brownies or whatever in a more novel shape.
Unfortunately, I don't have the time to make these for sale, though it would be cool if some manufacturer would be interested in making these.
 Warp-free cutting board
 Flip handle
 Kitchen cabinet
 Paper towel roll holder
 Kitchen chairs
 Chip carving knife
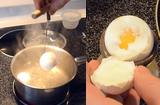 Boiled egg hardness tester
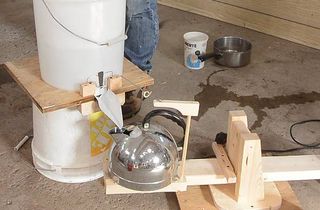 Automatic maple syrup boil-o-matic
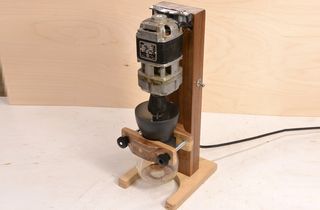 Motorizing a hand-cranked coffee grinder
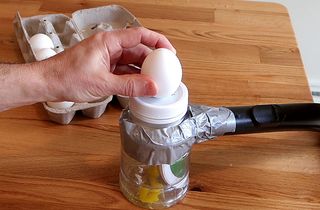 Sucking out eggs with a vacuum cleaner