More on the binary marble adding machine
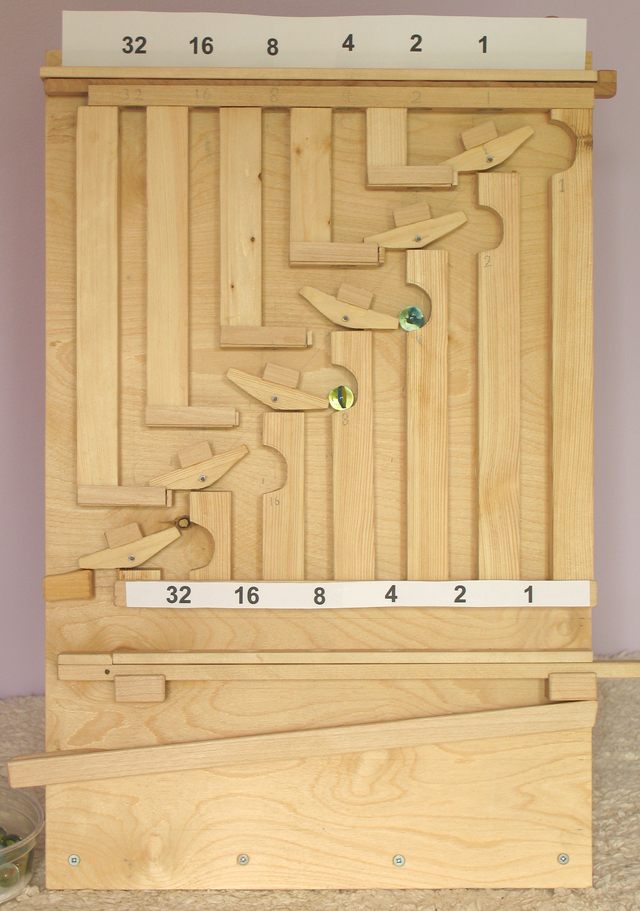
The binary marble adding machine has gotten a lot of interest on the web, so I figured I'd add another page with a bit more detailed pictures and notes to help those who might want to construct their own version of this machine.First some more detailed view (click for larger)

The toggles
The key element of the machine is the toggles. Many shapes of toggle would work. This is the shape I used. And advantage of this particular shape is that it still works if two marbles are dropped on it in a column (at the same time). there's the overall dimension of my toggles:
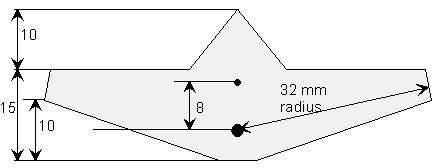
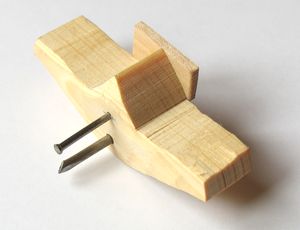 The larger hole at the bottom is about 1/8" in diameter. It allows the toggle to loosely pivot on a
nail. The smaller hole is drilled to 1/64" diameter, and has a smll nail in it. This nail sticks
out the back of the machine, and is used by the reset bar.
The larger hole at the bottom is about 1/8" in diameter. It allows the toggle to loosely pivot on a
nail. The smaller hole is drilled to 1/64" diameter, and has a smll nail in it. This nail sticks
out the back of the machine, and is used by the reset bar.
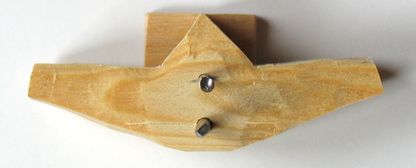
The image bove right shows the toggle from the back. There's a small rectangular piece of wood glued to
the front of the toggle, which prevents the marble from bouncing out of the machine from tme to time.
Its a compromise between visual open-ness, and computational reliability.
Toggles inside the machine
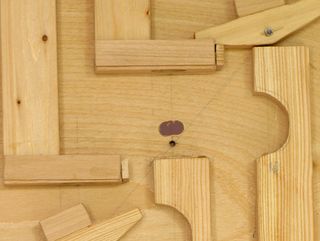

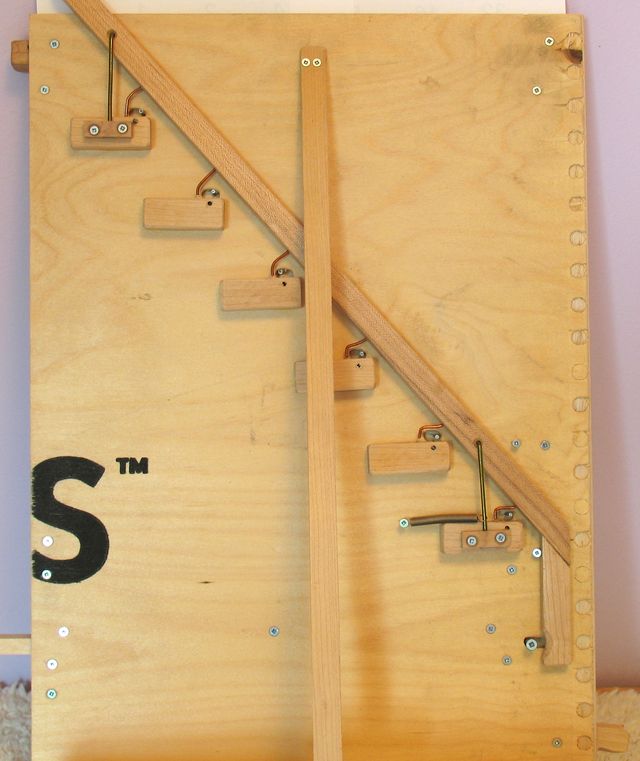
The image above shows part of the machine with one of the toggles removed. The elongated hole above the pivot is where the nail in the toggle sticks thru for the reset bar to activate on the back.
The reset bar has pieces of copper wire stuck through it, which are bent to catch the nails on reset. I used copper wire so I could easily make finee adjustments. Also visible is the coat hanger wire support. The coat hanger is bent at 90 degrees away from the viewer on both ends. At the bottom end, a small block with a cutout is screwed on top of the coathanger, to keep it from sliding out of the hole. The block that the coathanger wire pivots in is 12 mm thick. It also serves as a support for the nail that serves as the pivot for the toggles. the plywood I used is only 6.5 mm tick, so I neede extra support for the nails in the back.
Overall layout
 The image at left shows the overall layout, to scale, with key dimensions. If you save that image
and print it to be 128 millimeters wide on the printer, it will be exactly 1:1 scale, so you could
use that as a guide for your layout.
The image at left shows the overall layout, to scale, with key dimensions. If you save that image
and print it to be 128 millimeters wide on the printer, it will be exactly 1:1 scale, so you could
use that as a guide for your layout.
On my machine, I ended up gluing small pieces of wood to the top of the pices just below the toggles, to keep them from toggling too far. If the toggles flip significantly further than is shown, they may not toggle back if a new marble falls on them.
Also, I tapered the back side of the toggles slightly, so that the extension on either side are a bit narrower (front to back). this way, the ends of the toggles don't rub against the plywood, as that also could cause them to become stuck.
Another key aspect is the size of the marbles. I bought the marbles at 'Michael's arts and crafts store. But any bag of marbles will hav a variety of sizes of marbles in them if you look closely. The ones I use are 14.5 mm to 15.5 mm in size. The variation in a bag tends to be greater than that, so you will probably have to be selective as to which marbles in a bag you use.
Steel ball bearings would be much more precise, but also much more expensive.
Enjoy the video I made about more details on the adding machine:
To the Binary adding machine page
Plans for a slightyly refined version of the machine.
To my Woodworking website
![]()