X-Y drill table based slot mortiser by Hugh Lyman
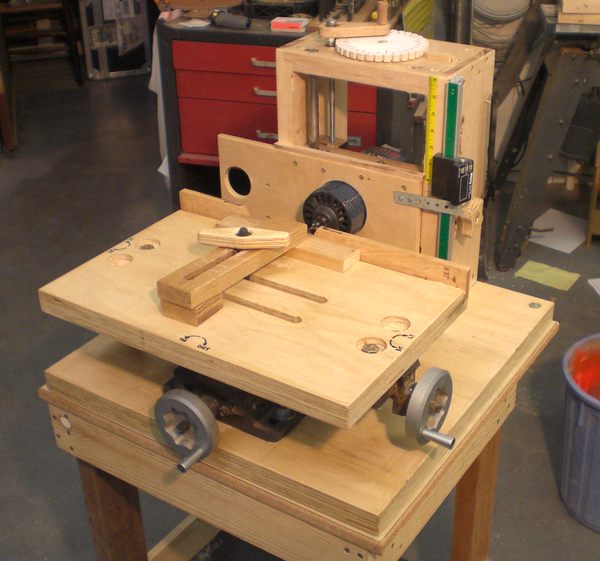
Hugh Lyman built himself a slot mortising machine based on a cross slide normally
used for machining. He writes:
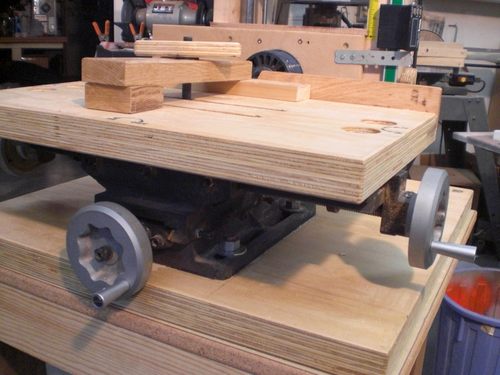
A wooden table attaches to the top of the cross slide, with a wooden hold down attached to that.
There are no limit stops. Each turn of the crank handle is 1/10th of an inch.
(I wish we all were on the metric system)."
Glad to hear I'm not the only one who feels this way about inches :)
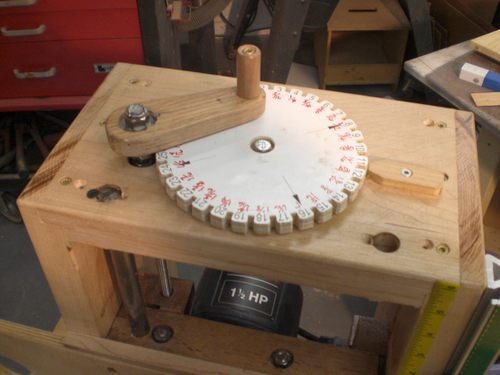 Hugh used the vertical adjustment system based on my slot mortiser plans
but modified it to his needs.
Hugh used the vertical adjustment system based on my slot mortiser plans
but modified it to his needs.
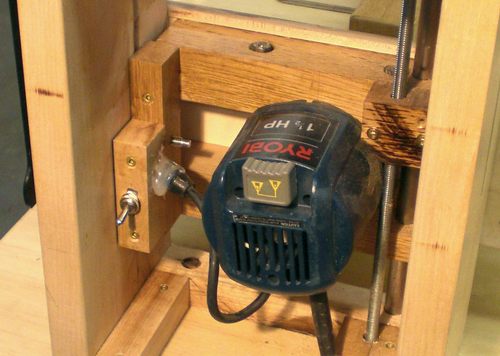
"The vertical adjustment threaded rod has a tee nut in the block that attaches to the router base.
Starting at the top, a nylon lock nut, handle with tee nut, two hex nuts (locked), washer,
(hole in maple top), washer, two hex nuts (locked). No bearing. ( I didn’t have any).
The bottom end of the threaded rod just floats. The maple top plate holds the rod from
any vertical movement. This is a snug fit as any play up or down in the vertical
rod gets transmitted to the router. In other words, when cutting in one direction the rod
is forced down and in the opposite direction the rod is forced up. I would recommend a thrust
bearing in the assembly and will sometime do that."
I noticed that the router mount slid up and down on the steel rod without any bronze bushings.
On my old machine I had run into a bit of binding doing this.
Hugh writes:

"The lock knob has a tee nut in it with 5/16” bolt and a lock nut and is fixed.
I just tapped the oak clamp bar with a 5/16” tap. It works well on my model aircraft
for holding wings to fuselage and it works well here.
The slot on the opposite side was made when I was following your drawings.
My changes happened as I went along. Extra holes and such are just mistakes
I made along the way. Sometimes I forget where I was."
I was curious how the router mount actually works.
Hugh says:
"I cut the oak router bars with a band saw and finished them with a round sanding cylinder on the drill press.
The caulking of the cable switch is hot melt to hold the power cord to the switch block.
It fit inside to start with but pulled out when I took it apart to change the front plywood
face to accommodate the future drill motor. I made the switch block last using the machine."
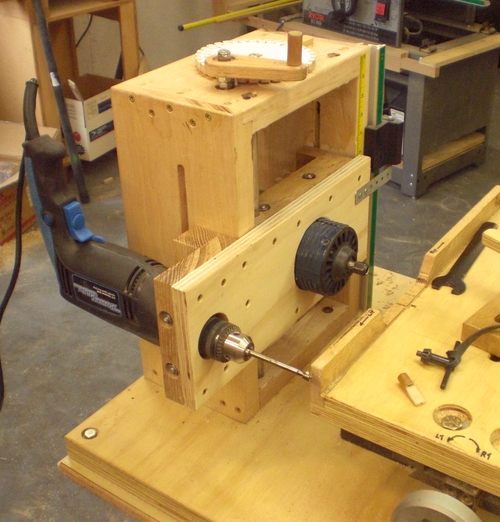
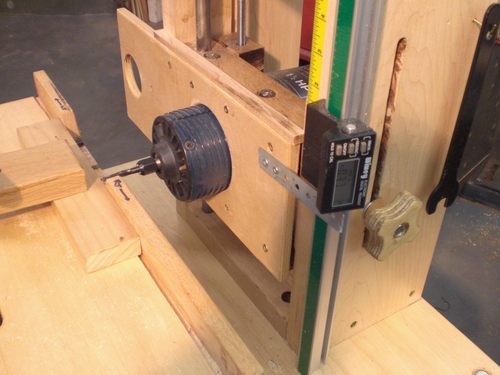
Hugh also added a drill to his machine so he can use it as a horizontal boring machine
"I ordered a cheap ˝” drill motor on eBay and installed it on the Mortise Machine.
I changed the front plywood from 1/2" to 3/4”.
It works pretty good, but the drill motor is inferior.
I wouldn’t recommend buying the Power Glide Drill for $16.00 for serious woodworkers.
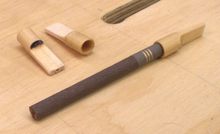 However, I did make some good cigar wood tips using both drill and router, Picture attached.
These were made using 7/16” diameter wood dowels. I soaked them in MINWAX wood hardener
and they are great for my smoking habit. I gave up the pipe smoking two months ago after 45 years."
However, I did make some good cigar wood tips using both drill and router, Picture attached.
These were made using 7/16” diameter wood dowels. I soaked them in MINWAX wood hardener
and they are great for my smoking habit. I gave up the pipe smoking two months ago after 45 years."
The rigidity of hand drills is not that good. I made a similar discovery with my horizontal boring jig with a Makita drill. I just couldn't count on the drill to guide the drill straight - the drill chuck shaft is not mounted that rigidly in the plastic housing. I solved the rigidity problem by building my horizontal boring machine
More slot mortising machines by readers:
Hessam Sane's slot mortiser Shawn Haven's slot mortising machine
More Reader projects