Building a shed from recycled lumber
This article also available in Spanish
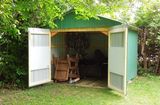
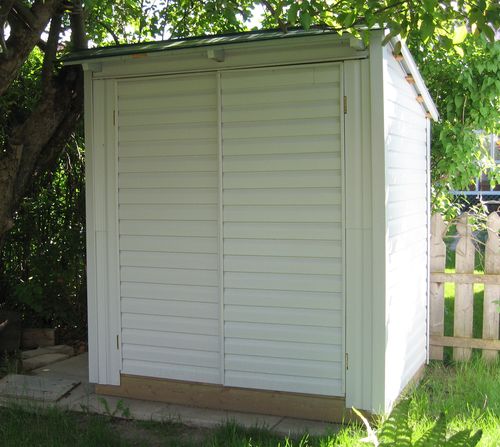 I built this storage shed from recycled and leftover materials to make a little room in my garage.
I was able to free up a lot of space in the garage with this shed, seeing that the
most of the materials for it were recycled and leftover materials previously
stored in the garage.
I built this storage shed from recycled and leftover materials to make a little room in my garage.
I was able to free up a lot of space in the garage with this shed, seeing that the
most of the materials for it were recycled and leftover materials previously
stored in the garage.
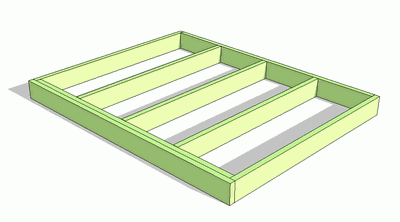 I nailed the base together out of pressure treated 2x6 lumber. Except for the pieces
along the outside edges, this lumber was recycled. Some of the pieces still had rusty
nails in them that I couldn't easily get out. So the base, before I covered it
with painted recycled plywood for the floor, looked quite awful. I didn't take any
photos of it.
I nailed the base together out of pressure treated 2x6 lumber. Except for the pieces
along the outside edges, this lumber was recycled. Some of the pieces still had rusty
nails in them that I couldn't easily get out. So the base, before I covered it
with painted recycled plywood for the floor, looked quite awful. I didn't take any
photos of it.
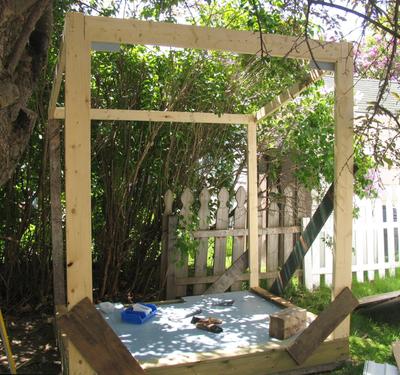 Next was the framing. I started with just the corners and with mostly new
lumber for the corners and rafters, figuring I could use recycled lumber
for less critical parts of the framing.
Next was the framing. I started with just the corners and with mostly new
lumber for the corners and rafters, figuring I could use recycled lumber
for less critical parts of the framing.
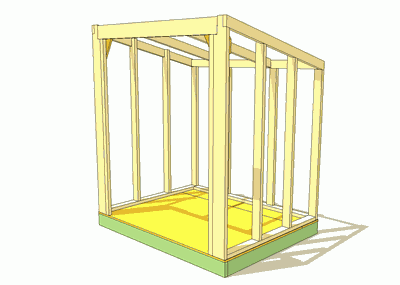
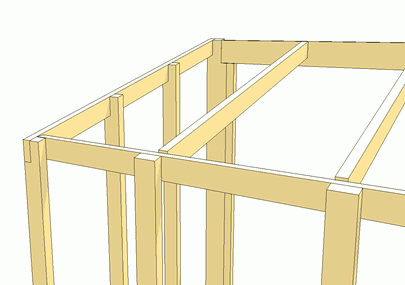
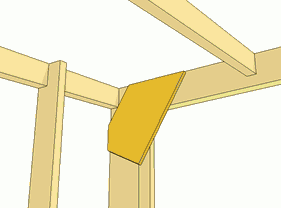
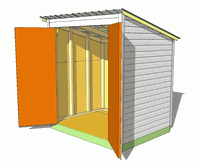
The two drawings below show how the framing joins together, from a
SketchUp model that I drew
after the fact. The SketchUp model differs from the shed that I built in that the model
is drawn as though I was starting with all new materials, as opposed to making use of
whatever bits that I had lying around. I figure it's more sensible that way, rather than
modeling every piece of scrap in SketchUp.
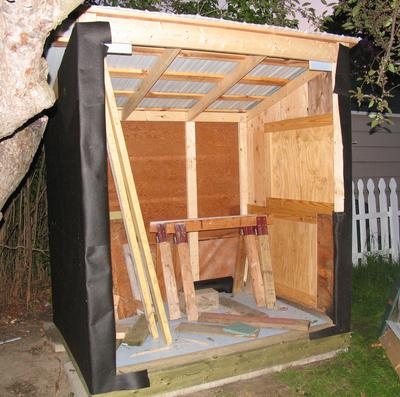
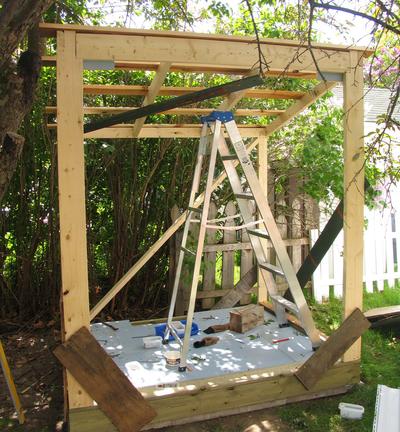 I actually put the whole roof on my shed before I added the rest of the wall framing.
I put the rafters on, and some slats for the roof. It's a "shed roof" with just
one slope. It seems rather natural to build a shed with a "shed" style roof. With this design,
I was able to have relatively high doors on the front, without making the whole shed
unduly tall.
The rafters were also new lumber, but the slats came from a recycled futon frame.
I actually put the whole roof on my shed before I added the rest of the wall framing.
I put the rafters on, and some slats for the roof. It's a "shed roof" with just
one slope. It seems rather natural to build a shed with a "shed" style roof. With this design,
I was able to have relatively high doors on the front, without making the whole shed
unduly tall.
The rafters were also new lumber, but the slats came from a recycled futon frame.
When you order sheet metal roofing, they usually put some extra "cover sheets"
sheets of roofing above and below the material delivered, to protect it.
I had a few of these cover sheets from another project, and used these pieces
for the roof of this shed.
In fact, the size of the shed was dictated by the size of sheet metal
roofing pieces that I had.
Also note the bits of wood nailed on at a diagonal angle in various spots.
It's the sheeting that typically stiffens up a building. But without any sheeting
in place yet, I had to brace the corners to make the structure stable enough for
me to climb up on the roof. I wanted the roof to go on relatively early, just to keep
everything out of the rain.
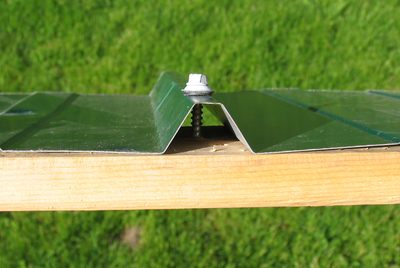 This photo shows how the metal roof is attached. It's screwed
on using sheet metal roofing screws. The screws
are screwed in the ridges of the metal sheeting. Each screw has a dish shaped washer and
rubber gasket to seal the hole it goes into. But with the screws on the ridges of
the sheeting, even if the gasket isn't tight, the water tends to run down into the
troughs, so very little water gets in.
This photo shows how the metal roof is attached. It's screwed
on using sheet metal roofing screws. The screws
are screwed in the ridges of the metal sheeting. Each screw has a dish shaped washer and
rubber gasket to seal the hole it goes into. But with the screws on the ridges of
the sheeting, even if the gasket isn't tight, the water tends to run down into the
troughs, so very little water gets in.
The easiest way to install the screws is to start them like a nail - essentially,
holding them against the metal and hitting it with a hammer to get it to penetrate
the sheet metal and get the tip stuck in the wood. Then use a variable
speed drill with a nut drive in the chuck to tighten it just right. Be sure to
go slow - if you don't stop in time, the whole screw, gasket and all, ends up going through
the sheet metal.
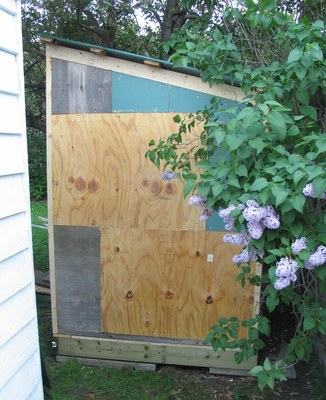 After screwing on the sheet metal for the roof, I nailed various recycled bits of plywood
to the sides of the shed.
The previous owner, and previous previous owner of my house had left various bits
of plywood behind in the garage, and it was good to actually put it to some use.
Some of it was pretty awful looking, though structurally sound. I nailed it on
with the 'good' side facing inwards, seeing that the outside would get covered up.
After screwing on the sheet metal for the roof, I nailed various recycled bits of plywood
to the sides of the shed.
The previous owner, and previous previous owner of my house had left various bits
of plywood behind in the garage, and it was good to actually put it to some use.
Some of it was pretty awful looking, though structurally sound. I nailed it on
with the 'good' side facing inwards, seeing that the outside would get covered up.

On the right side, I used some pieces of a plywood shipping crate that I had
scrounged at some point.
It was made with some 3/4" plywood, with another 3/4" frame nailed on around the edges.
It was solid material, but I never actually found a use for it. The pieces were strong
enough that I decided I didn't need any studs on that wall of the building.
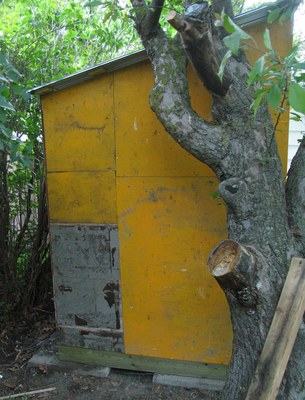
 With the really ramshackle looking plywood sheeting, I decided to cover it with
tar paper, which I had left over from when I had built an addition to my old house.
The tar paper wasn't strictly necessary, but I was going on a trip before
I could finish the shed, and the tar paper would protect it from weather,
and also cover up the ramshackle looking plywood from the neighbours.
With the really ramshackle looking plywood sheeting, I decided to cover it with
tar paper, which I had left over from when I had built an addition to my old house.
The tar paper wasn't strictly necessary, but I was going on a trip before
I could finish the shed, and the tar paper would protect it from weather,
and also cover up the ramshackle looking plywood from the neighbours.
 The sheething makes the walls of the shed quite rigid, except for the front wall,
which is mostly doors.
To help keep this wall square, the easiest place to reinforce it was to nail some plywood
pieces into the door corners. These do cover up a corner of the opening, but it's not like
I'd need the opening that large to put stuff in them. The main reason the shed has two doors
in the front is not to get large items in and out, but so that I can pile it completely full of
stuff like a closet, right up to the front.
The sheething makes the walls of the shed quite rigid, except for the front wall,
which is mostly doors.
To help keep this wall square, the easiest place to reinforce it was to nail some plywood
pieces into the door corners. These do cover up a corner of the opening, but it's not like
I'd need the opening that large to put stuff in them. The main reason the shed has two doors
in the front is not to get large items in and out, but so that I can pile it completely full of
stuff like a closet, right up to the front.
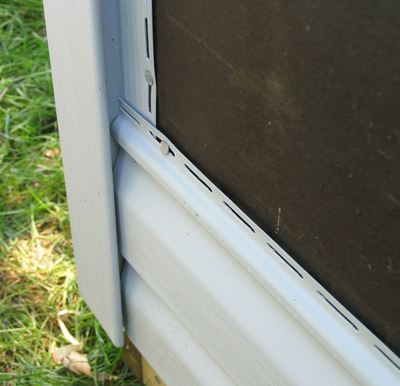 It was several weeks later that I installed siding on the shed. When I had built an addition
to my old house, I had ordered one too many bundles of siding, and by building this,
I was finally able to use it up.
It was several weeks later that I installed siding on the shed. When I had built an addition
to my old house, I had ordered one too many bundles of siding, and by building this,
I was finally able to use it up.
A few notes about how to install vinyl siding:
• It's best cut with tin snips, or deeply score with a utility knife and then bend
it back and forth until it snaps.
• Siding should be 'hung', not 'nailed'. The vinyl expands and contracts quite a bit
with temperature. It's attached with roofing nails, but these nails should not be
driven all the way in, so that the siding can slide back and forth a little bit.
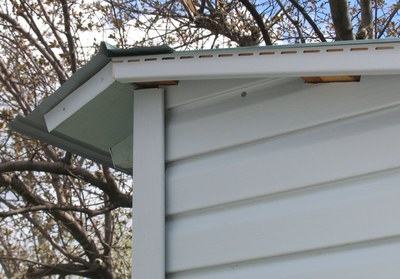 I had originally built my shed with just a few centimeters of roof overhang in the
front, because I wanted to make it as big as possible with the pieces of roofing
that I had at hand. I managed to get another piece of roofing cover sheet
from my parents, which I put sideways across the front as a roof overhang. The ridges
along the front should act as an eavestrough in a minimal sort of way, so that,
hopefully, I won't get dripped on if I need to get in there in the rain.
I had originally built my shed with just a few centimeters of roof overhang in the
front, because I wanted to make it as big as possible with the pieces of roofing
that I had at hand. I managed to get another piece of roofing cover sheet
from my parents, which I put sideways across the front as a roof overhang. The ridges
along the front should act as an eavestrough in a minimal sort of way, so that,
hopefully, I won't get dripped on if I need to get in there in the rain.
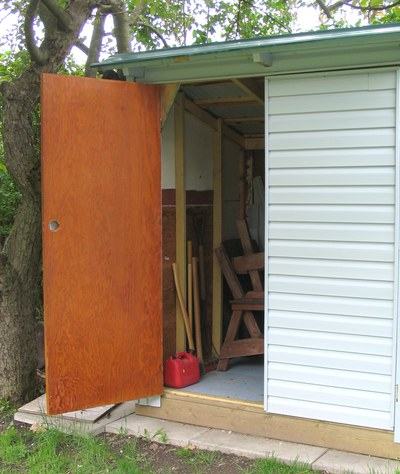 For the doors, I used 1950s style plywood doors. The previous owner of my house
had replaced all the doors, and left the old ones in the garage. This was a good use
for two of them. I put siding on the outside of the doors, to make them look
more consistent with the rest of the shed, and protect them from the weather.
I used more of those doors for other projects - one as a
workbench top, another as a temporary workbench with my
sawhorses.
For the doors, I used 1950s style plywood doors. The previous owner of my house
had replaced all the doors, and left the old ones in the garage. This was a good use
for two of them. I put siding on the outside of the doors, to make them look
more consistent with the rest of the shed, and protect them from the weather.
I used more of those doors for other projects - one as a
workbench top, another as a temporary workbench with my
sawhorses.
Inside the shed, you can see two of my lawn chairs
stacked.
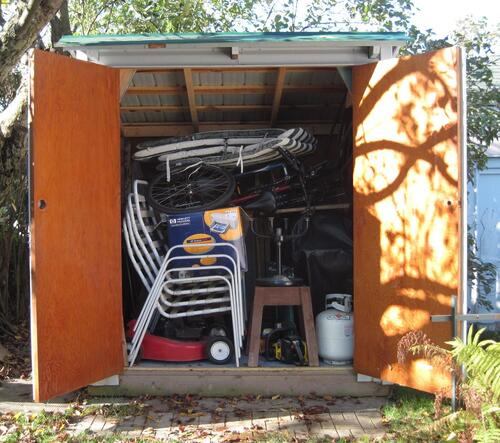 I built this shed in 2008. In 2011, after putting stuf away in the fall, the inside
of the shed was packed like this.
I built this shed in 2008. In 2011, after putting stuf away in the fall, the inside
of the shed was packed like this.
I built a bigger shed the following spring.
If you want to know more about how to build a shed of similar style to this one,
I drew a plan for it in SketchUp.
The sketchup model differs in a few ways from how I built it because I was
optimizing for the recycled lumber that I had when I built it.
 Shed plan in SketchUp

 Larger shed build
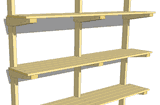 Garage shelves
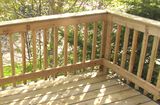 Building a deck