Building a deck
This article also available in Spanish
 When I visited my sister in 2008, she said having a small deck above the entrance
porch would be nice.
So having a look at the situation, there was room for a deck bout 7' by 8',
and I figured I'd be able to build one in about a day. So I took on the challenge
and built the deck...
When I visited my sister in 2008, she said having a small deck above the entrance
porch would be nice.
So having a look at the situation, there was room for a deck bout 7' by 8',
and I figured I'd be able to build one in about a day. So I took on the challenge
and built the deck...
 The roof above the porch consisted of a slightly slanted roof, covered with "roll on roofing".
I didn't want the deck to be at the same slant as the roof. I also didn't want it too
high above the roof. So I used 2x4's, which I tapered towards the higher edge of the
roof against the house.
The roof above the porch consisted of a slightly slanted roof, covered with "roll on roofing".
I didn't want the deck to be at the same slant as the roof. I also didn't want it too
high above the roof. So I used 2x4's, which I tapered towards the higher edge of the
roof against the house.
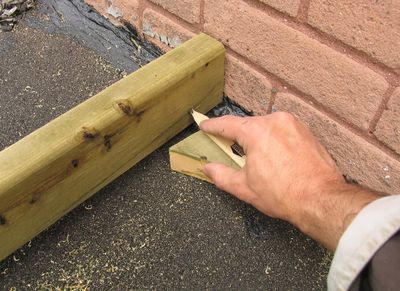
In the picture at left, I put one of the decking planks against the brick to make sure
I'd cut the joists to all come to the same height.
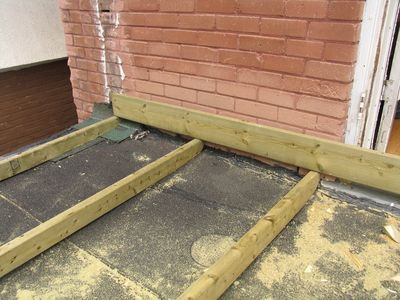
 I fit the joists to the roof by marking a line a fixed distance from the roof with a pencil,
while the 2x4 was propped at the other end to the right height plus the height of the offset I
used with a pencil. The roof was sufficiently level that the lines were straight enough
that I could cut them with a circular saw.
I fit the joists to the roof by marking a line a fixed distance from the roof with a pencil,
while the 2x4 was propped at the other end to the right height plus the height of the offset I
used with a pencil. The roof was sufficiently level that the lines were straight enough
that I could cut them with a circular saw.
 On the low side, there was already some pads on the roof from the previous railing that was
there, though these needed some repairs. The pads are Basically a piece of pressure treated wood
on top of the roof, with roof cement smeared around the edge, and a piece of shingle on
top. This should keep water from flowing to where the load is applied, so hopefully there
should be no leakage brought about by where the deck rests. Although on the end nearest the
house, I just rested the 2x4 joists on top of an extra shingle I put on the roof. With them fitted
to the roof, I figured they should apply pressure evenly and not cause a puncture.
On the low side, there was already some pads on the roof from the previous railing that was
there, though these needed some repairs. The pads are Basically a piece of pressure treated wood
on top of the roof, with roof cement smeared around the edge, and a piece of shingle on
top. This should keep water from flowing to where the load is applied, so hopefully there
should be no leakage brought about by where the deck rests. Although on the end nearest the
house, I just rested the 2x4 joists on top of an extra shingle I put on the roof. With them fitted
to the roof, I figured they should apply pressure evenly and not cause a puncture.
 Next was to put the decking on. I used 5/4" decking, which, with the usual actual dimension
being a fair bit smaller than the specified 'nominal' dimension. The actual dimension
was 1" thick.
Next was to put the decking on. I used 5/4" decking, which, with the usual actual dimension
being a fair bit smaller than the specified 'nominal' dimension. The actual dimension
was 1" thick.
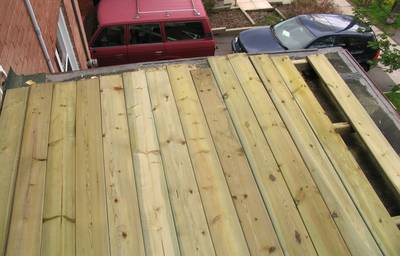
I didn't want to have to rip the last board to make it fit, so I screwed down the first and
last board, and then figured out how much space I had left. The space between the two boards
at right is the total gap that I had to work with, and I spread the boards out evenly
so all the gaps were about the same size. I first split the gaps into two gaps
of equal size on opposite sides, and then screwed down the middle board, so that I only had
to space out half the boards at once by eyeballing it.
I did want gaps between the boards, to allow some airing so that it can dry out after a rain.
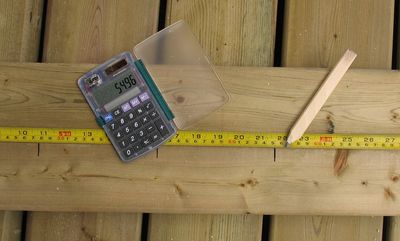 To make the railings, I spaced the spindles evenly across the width of the railing, so that
I didn't end up with an odd interval at the end. Of course, this meant that the actual spindle spacing
worked out to some awkward number. I always use a calculator and a tape measure for this sort of
thing. I use the calculator to work out the position of each spindle, and mark that with
the tape measure. Even when working on a project that is all in inches, it's best to do this in metric,
because at least metric is in decimal.
To make the railings, I spaced the spindles evenly across the width of the railing, so that
I didn't end up with an odd interval at the end. Of course, this meant that the actual spindle spacing
worked out to some awkward number. I always use a calculator and a tape measure for this sort of
thing. I use the calculator to work out the position of each spindle, and mark that with
the tape measure. Even when working on a project that is all in inches, it's best to do this in metric,
because at least metric is in decimal.
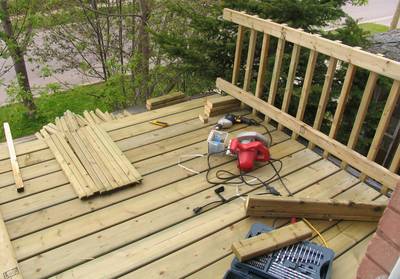
 And screwing the railings together. I did this on the floor. It would have been better to have
a pair of sawhorses to do this on to avoid having to bend over so much. But I didn't have any sawhorses
handy, and there really would not have been room on the small deck anyway.
And screwing the railings together. I did this on the floor. It would have been better to have
a pair of sawhorses to do this on to avoid having to bend over so much. But I didn't have any sawhorses
handy, and there really would not have been room on the small deck anyway.
Each screw has one screw at the top, and two on the bottom. I used two screws on on end so that the whole
ladder arrangement would have more rigidity to it, especially against being shifted side to side.
Without corner posts anchored into something, it's the rails internal rigidity, and the fact that the rails
are attached together at a corner is what keeps the whole thing standing upright and rigid.
 One of the railings mounted. To attach it to the wall, I screwed the last 'spindle' into the brick
with tapcon screws. Except I used a 2x4 instead of a 2x2 for the last spindle to give it extra strength.
One of the railings mounted. To attach it to the wall, I screwed the last 'spindle' into the brick
with tapcon screws. Except I used a 2x4 instead of a 2x2 for the last spindle to give it extra strength.
You can also see a batch of spindles that I just cut to length towards the left. I needed shorter
spindles than they had, plus I wanted the top end to be square, so I had to cut the end off all
the spindles. I did this in batches by putting 10 spindles side by side and cutting them all at once.
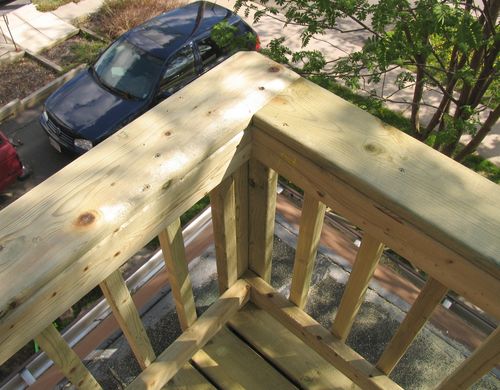
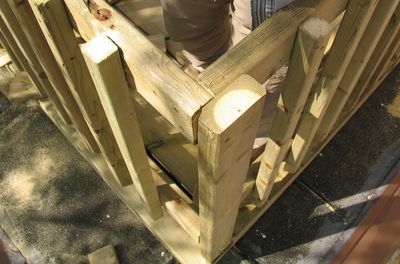 This picture shows how the corner went together.
I really wanted the corner to be sturdy. The corner posts only rest on the surface of the deck,
with a few screws driven in at a diagonal to hold them. This isn't strong enough to withstand
the force of somebody leaning against the railing.
The railing is held up mainly by its own rigidity and how the corners are held together. So if
the corners were to suddenly come apart, the whole railing, plus whoever might be leaning against it
could suddenly come tumbling off the roof.
So the corners have lots of screws holding them together. The photo at left shows the corner assembly
almost done. I neglected to take a photo of the finished corner before I attached
the board on top for the railing.
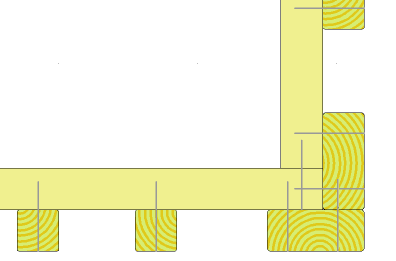 The illustration at left shows how the corner is screwed together. The two upright 2x4's that
make up sort of a corner post also help hold the horizontal 2x4's together.
The illustration at left shows how the corner is screwed together. The two upright 2x4's that
make up sort of a corner post also help hold the horizontal 2x4's together.
 Finally, I put some horizontal boards on top of the railings. this makes the railing a nice
wide surface to put things like coffee cups on. Unfortunately, it also makes the railing a
tempting place to sit, which is not such a good idea, considering how far down it is
to the ground.
Finally, I put some horizontal boards on top of the railings. this makes the railing a nice
wide surface to put things like coffee cups on. Unfortunately, it also makes the railing a
tempting place to sit, which is not such a good idea, considering how far down it is
to the ground.
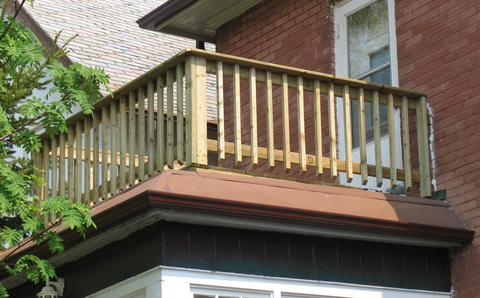
 This shot shows better how the railing is attached to the wall. The upright 2x4 takes
the place of the last spindle, and is screwed into the brick using five 3.5" long tapcon screws.
This shot shows better how the railing is attached to the wall. The upright 2x4 takes
the place of the last spindle, and is screwed into the brick using five 3.5" long tapcon screws.
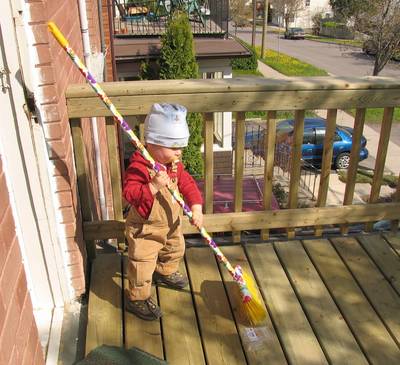
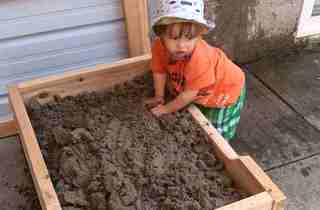
And here's my 18 month old nephew. He's got a thing for brooms, and as soon as he saw
me sweeping up, he wanted the broom. His sweeping technique still needs a bit of work though.
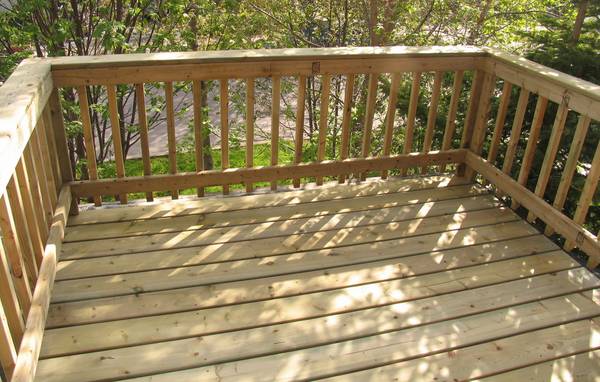
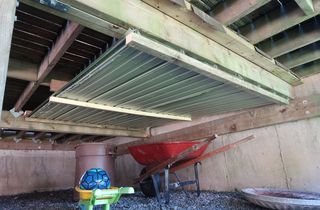
 And finally, the deck, as seen from below. With the trees up against it, it's actually a
very cool and private space to hang out and watch the street from. I wish I had something like
that on my own house!
And finally, the deck, as seen from below. With the trees up against it, it's actually a
very cool and private space to hang out and watch the street from. I wish I had something like
that on my own house!

 Adding a roof under a deck
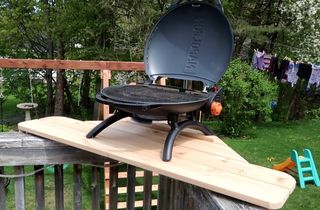 Corner shelf for a barbecue
 Smashed deck repair
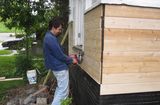 Porch repair
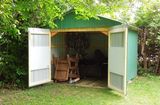 Building a shed
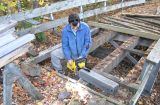 Bodging a bridge
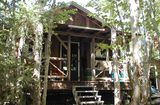
 Building a sandbox
 Making new deck steps